Friday, February 20, 2015

Blueberry Elephant Macarons

Blueberry Elephant Macarons
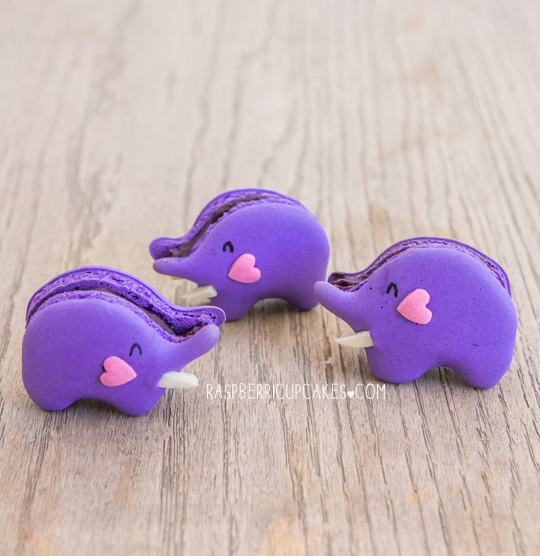
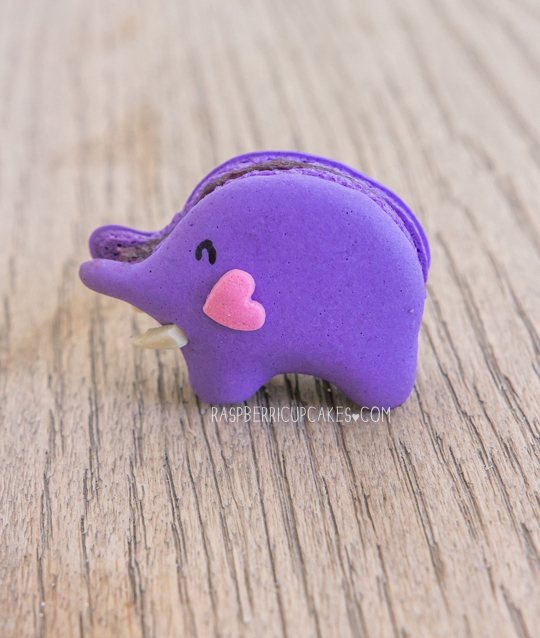
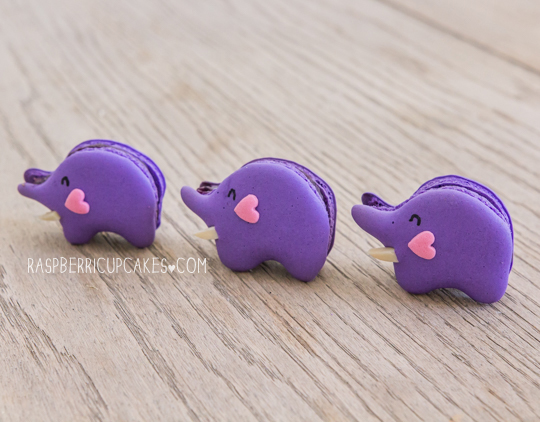
I have no excuses. Not only have I not blogged in almost a month, I haven't baked in almost as long. A few years ago this would have been unheard of! But at the moment it's an unfortunate side-effect of my life. The last baking I did was for a dear friend's wedding in January, they asked me to make some personalised macarons for them and I was super excited to make something special. The requested macarons were purple elephants and black skulls, which was quite an interesting challenge. I just had to share the purple elephants with you guys, they are so darn adorable I can't stand it. I think they might be my favourite of all the animal macarons I've made so far (though the cats are a close second). They were also the hardest to pipe, I had to use a stencil on my baking paper for the first time.
Blueberry Elephant Macarons
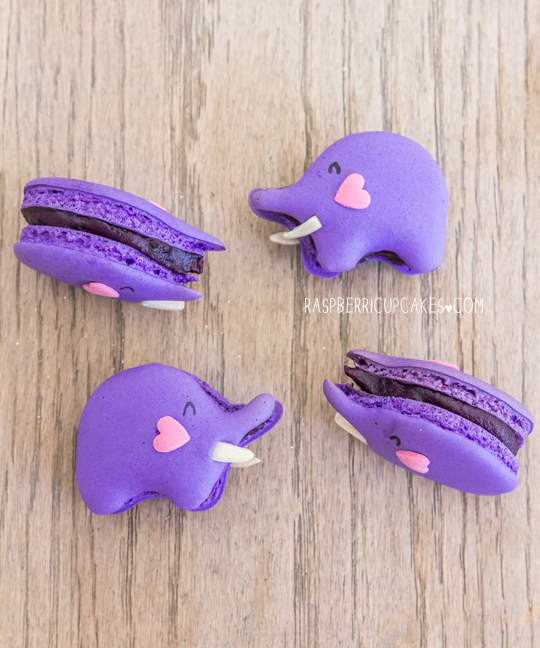
The tusks are made from slivered almonds (I was pretty proud of this, I had a bit of a lightbulb moment in a supermarket aisle while trying to figure out what to use), and the ears are big heart sprinkles. I made about 80 of these stumpy, cute, fat little elephants, which was a rather slow and painful process. But totally worth it in the end. The filling was a blueberry ganache, while the black skulls (I didn't remember to take any photos of them unfortch) were filled with a mango buttercream. I think (hope) the macarons went down well at the wedding. Anyway I finally got off my bum and edited the few shots I managed to grab of these little dudes before I shipped them off to the wedding, so here you go!
Blueberry Elephant Macarons
Blueberry Purple Elephant Macarons
(recipe adapted from Trissalicious)
For the macarons:
Note: this method uses an Italian meringue. If you prefer, you can continue to use the French method I normally use. If you are a beginner with macarons read up and practice plain macarons first. BraveTart has lots of useful advice and info on the subject
Almond Meal Paste:
125g almond meal
125g icing/confectioner's sugar
50g egg whites
Italian Meringue:
125g caster (granulated) sugar
35g water
50g egg whites
Pinch of egg white powder
Purple powdered/gel food colouring, heart sprinkles and slivered almonds + black food colouring to decorate
  1. To achieve the elephant shape, I cut an elephant shaped stencil out of cardboard and traced the shape on to sheets of baking paper for piping. Remember you need to make half the elephants piped to face the left, and the other half to face to the right so that you have mirror images that can be sandwiched together.
  2. In a food processor, blend the almond meal, icing sugar together for a minute, then add egg whites and blitz for a couple seconds to form a paste. Set aside.
  3. To make the Italian meringue, place the caster sugar in a saucepan.  Add the water and make sure that the sugar is dampened.  Heat the mixture and bring this to a boil (do not stir).  Place a candy thermometer in the syrup and take the temperature of 118°C (245°F)
  4. While the sugar is cooking, beat the egg whites and egg white powder using a stand mixer fitted with a whisk attachment and beat at medium speed until the eggs become foamy. Continue beating on high until stiff peaks form.
  5. Stop the syrup from cooking once it reaches 118°C (245°F) and take this off the heat and let the bubbling subside for a few seconds.  Pour the syrup in a thin, steady stream over the beaten egg whites while the continuing to whisk at medium speed.
  6. When all the syrup has been added, (add food colouring here) continue to beat until glossy and meringue has cooled to room temperature (around 10 to 15 minutes).
  7. Using a silicone spatula, fold a third of Italian meringue into the almond mixture to loosen it.  Then, fold in the rest of the Italian meringue.  (You really want to beat all the large bubbles out of the mixture, which is easily done by smearing the mixture on the bottom and side of the bowl with your spatula) Continue folding and stirring until the batter is glossy, and fluid. Take care not to overmix, the mixture should flow like lava and a streak of mixture spread over the surface of the rest of the mixture should disappear after about 30 seconds. 
  8. Place 1/3 of the mixture in a piping bag with a very narrow tip (1-2mm) and the remaining mixture in a piping bag with a slightly wider (about 0.5cm) round piping tip. Use the wider tipped bag to fill in the body of the elephant, then the narrower tip to add on the legs and trunk of the elephant. Tap baking trays carefully and firmly on the benchtop a couple times to remove any large bubbles.
  9. Decorate each shell with a half piece of slivered almond for the tusk and a pink heart for the ear (if you can't get big enough sprinkles, you can also use rolled pink starburst chew lollies or pipe royal icing on the baked shells).
  10. Leave to dry for about 60 mins, until when you press the surface of one gently it does not break/stick to your finger. This will help prevent any cracking and help the feet to form on the macs.
  11. Preheat your oven to 130-150°C (265-300°F), depending on your oven (fan-forced ovens may need to be set as low as 100°C, it really depends) . You can place the tray of piped shells on top of an upside-down roasting tray or another baking tray, for better heat distribution.
  12. Bake for 15-20 minutes. Carefully test if the base of the shell is ready by gently lifting one and if it’s still soft and sticking to the baking paper, then it needs to bake for a few minutes longer. 
  13. Remove from the oven and cool on the tray for a few minutes, then gently remove from the sheet and place on a wire rack to cool completely.
  14. Use a black edible ink pen or a skewer dipped into black food colouring to draw on the eyes.
Blueberry Elephant Macarons
For the Blueberry Filling:
Note: You can replace the blueberry sauce with store-bought blueberry jam to save time
100g (1.7oz) blueberry (fresh or frozen), pitted and diced
 3 tbsp sugar
 2 tsp lemon juice
A few drops of pure vanilla extract
3 tsp cornflour (cornstarch) + 1 tsp cold water
3 tsp powdered gelatine
100g (3.5oz) good quality white chocolate, finely chopped
  1. Prepare the blueberry filling first; place blueberries, sugar, lemon juice and vanilla in a small saucepan and place on medium heat. Stir over heat until sugar dissolves. 
  2. Mix cornflour and water together in a separate small bowl then add to the saucepan with gelatine powder and stir over medium heat until mixture thickens and gelatine dissolves, about 2-3 minutes. Set aside to cool then blitz mixture in a food processor. 
  3. Place blueberry mixture and chopped white chocolate in a heatproof bowl and stir over a pot of simmering water until the chocolate melts and the mixture combines (if chocolate splits, add 1 tsp of water at a time and stir over heat until mixture reincorporates). 
  4. Chill mixture until it thickens (if it is too runny, you can melt more white chocolate into it), and then pipe mixture between macarons shells.
  5. Chill macarons in an airtight container overnight to allow flavour to mature. Serve at room temperature.
Print Friendly and PDF

Monday, January 12, 2015

Jaffa Layer Cake with Macarons

Jaffa Layer Cake with Macarons
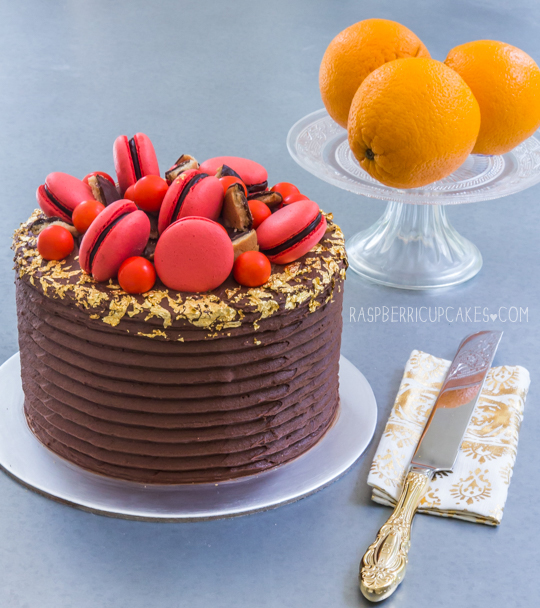
Hi! Happy New Year! Can you believe its 2015? Well it is. I know, I've been very quiet. I've been very busy. Life is craaaaaaaaaaazy. But there is always cake. I thought I should share this recipe with you before I forget how I made it. Because it's a pretty good one. Last month was my brother's 40th birthday. A big occasion like that called for a big cake, or at least a very pretty one.
Jaffa Layer Cake with Macarons
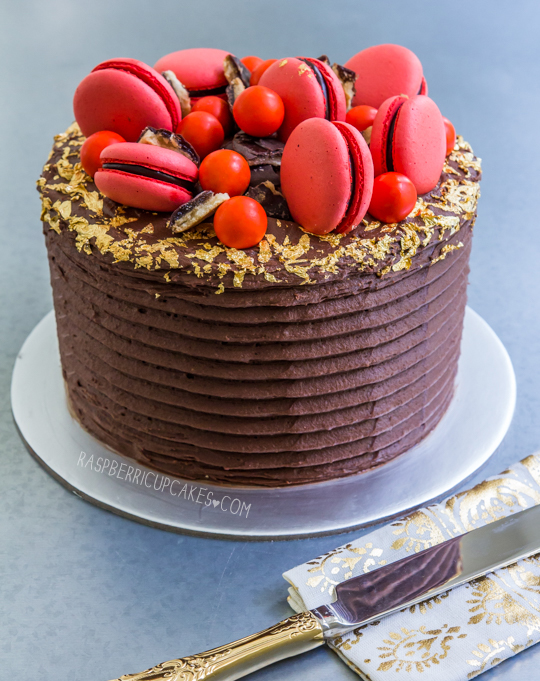
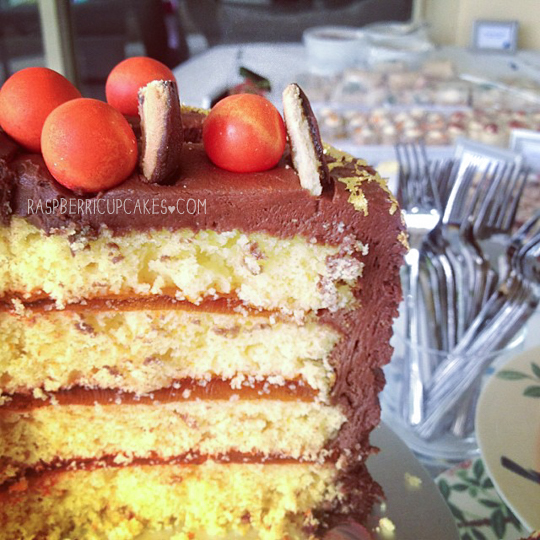
My sister-in-law planned a lovely surprise party for my brother and of course I was tasked with the birthday cake. One of my brother's favourite flavours is chocolate and orange and he LOVES jaffa cakes. So I thought I would make a layer cake based on the flavours and textures of the good old jaffa cake. I made four layers of my favourite orange tea cake from Stephanie Alexander, it's always light and fragrant. I sandwiched the cake layers with orange jelly, which I set with half the usual amount of liquid so it wouldn't fall apart inside the cake (dodgy instagram innards shot at the bottom of the post). The cake was covered in a thick layer of rich but not too sweet dark chocolate and orange icing and lots of gold leaf to add something special.
Jaffa Layer Cake with Macarons
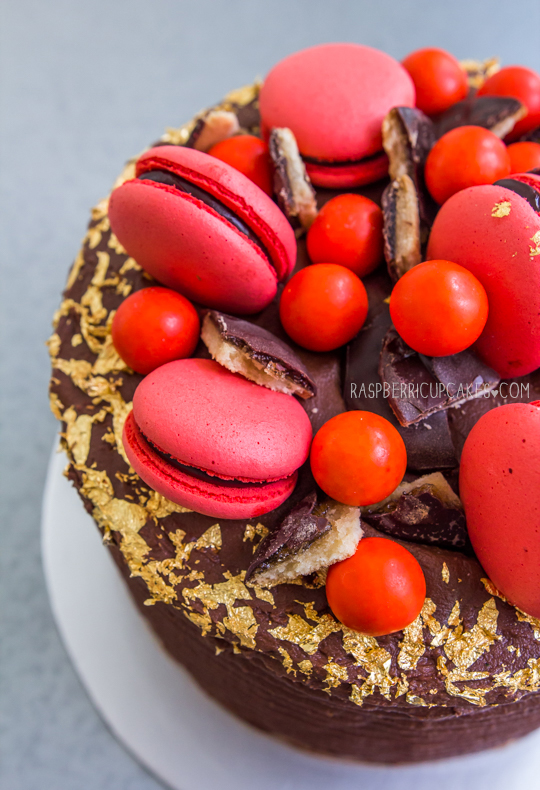
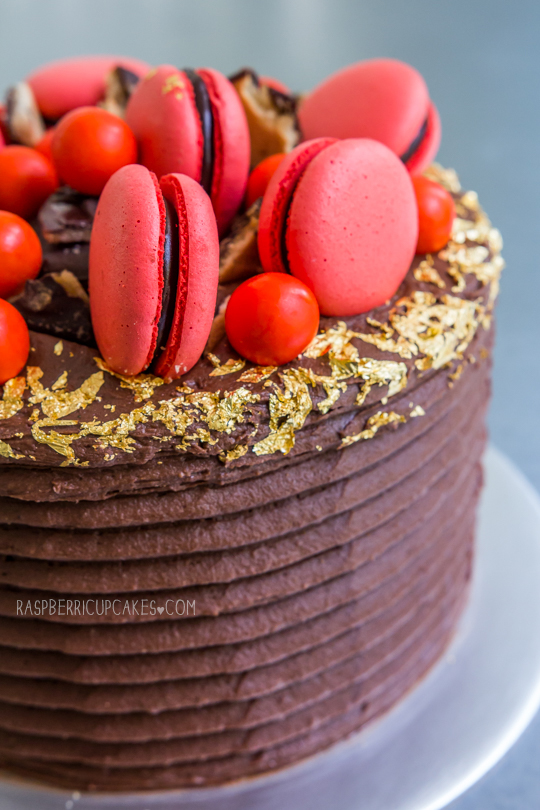
I topped the cake with bits of jaffa cakes, jaffa chocolate balls and jaffa flavoured macarons. As always I agonised over getting the icing neat and smooth enough, and I'm never satisfied with it. I used my fancy icing comb to create the texture on the side, and I kinda love it. Though the gold leaf is actually hiding my very untidy edges because I got too fed up with trying to smooth the corners.
Jaffa Layer Cake with Macarons
The cake went down very well with everyone at the party and looked very pretty sitting next to the delicious canapes from Simmone Logue catering (highly recommended for anyone looking for fancy party catering). My brother was not at all surprised by his surprise party since he noticed it marked on his friend's calender a few weeks earlier, and saw me loading food into our car right before the party. Doh. But it was still fun and I think he loved the cake. The jelly layers worked surprisingly well with the cake, and the slightly bitter chocolate icing was good for balancing out the sweetness of the jelly. This cake is sure to win over anyone who loves the classic combination of chocolate and orange.
Jaffa Layer Cake with Macarons
(makes a 4-layer 15cm (6", this is what I used) or 18cm (7", will result in slightly thinner layers) cake, cake recipe adapted from Stephanie Alexander's The Cook's Companion)
For the orange jelly layers:
Using two orange jelly/jello (2x85g) packets, (I used Aeroplane Jelly), prepare 3 of the same sized baking tins that you are going to use for the cake, greased and line with baking paper. Make up jelly as per instructions, but only use HALF the specified amount of water. This will ensure that the jelly will set firmly. Pour equal amounts of jelly mixture into prepared tins and chill in fridge until set (I prepared mine the night before assembling cake).

For the cake:
2 large oranges
3 large eggs, at room temperature
220g (about 2 sticks) butter, softened
1 cup (200g) caster (granulated) sugar
400g (approx 3 cups) self-raising flour
  1. Preheat oven to 190°C (375°F) (if fan-forced use 180°C (350°F)) and grease and line the base with baking paper of four 15cm (6", this is what I used) or 18cm (7", will result in slightly thinner layers round baking tins (I used two and baked two layers at a time).  
  2. Zest and juice oranges. Combine all cake ingredients in a food processor and blend for 2 minutes. If you have extra time and are worried about over-mixing the flour like me, blend the orange juice and zest, butter, sugar and eggs together first for one minute, then add the flour and blend for another minute. If you don't have a food processor, cream butter and sugar together using an electric beater until light and smooth. Add eggs at a time and beat in well. Add the juice, zest and flour and quickly mix until combined, avoid overbeating the flour. 
  3. Split the batter into four equal portions (I used a scale to measure it exactly), and pour into prepared tin(s) and smooth with a spatula. 
  4. Bake in the oven for 15-20 minutes or until golden and a skewer inserted into the centre comes out clean. Cool in tin for 5 minutes and then carefully remove and cool cake on wire rack completely. (Cakes can be made a day ahead and wrapped in cling film in the fridge overnight before icing)
Jaffa Layer Cake with Macarons
For the macarons:
Follow these instructions to make shells, using red/orange food colouring. (Or you can use my old French method)
Prepare the orange chocolate ganache, using 100g dark chocolate with 1/4 tsp orange essence/extract, finely chopped and placed in a heatproof bowl. Heat 90ml (about 1/3 cup) thickened/heavy cream just  to the boil then pour over chopped chocolate and leave to melt for a few minutes before whisking. Chill ganache until it thickens but is still pipable, then fill macaron shells and leave in the fridge overnight to allow the flavour to mature.

For the chocolate-orange icing:
340g (3 sticks) butter, softened
400g Lindt orange intense chocolate (or about 350g dark chocolate with 1/2 tsp orange essence/extract)
1/4 cup good quality cocoa powder
1/4 cup milk
600-700g (about 5-6 cups) icing sugar, sifted (I blitzed in a food processor to save time)
  1. In a heatproof bowl over a small saucepan of simmering water, melt chocolate (if using Lindt orange intense, strain mixture to remove almonds)
  2. Place butter in a large mixing bowl and beat on high with an electric mixer until light and fluffy.
  3. Add melted chocolate, cocoa powder and milk and beat on low for a minute to start to combine ingredients.
  4. Continue beating while gradually adding icing sugar until mixture is smooth and well combined. Adjust the amount of icing sugar until the desired texture is achieved. You want the mixture to be stiff enough to hold its shape but soft enough to be spreadable. If it is too stiff, add more milk.
To assemble cake:
Jaffa chocolate balls
Jaffa Cake biscuits (I got mine from Aldi)
Optional: gold leaf to decorate
  1. Trim the tops of the cake layers to remove any doming. Place one layer of cake on your cake stand or plate and carefully place a layer of jelly on top. Trim the jelly layer to the same circumference as the cake if there is any overhang. Try not to crack the jelly layer, but it is okay if it does break apart as the icing and cake will hold it together.
  2. Repeat with the remaining cake layers and jelly. 
  3. Crumb coat cake with a layer of icing, then chill cake for about 30 mins-an hour to allow coat to set.
  4. Cover cake with a thick layer of remaining icing using an offset spatula, to achieve the texture I created on the side of the cake, you can use an icing comb like this one.
  5. If you are using gold leaf, use a paintbrush to carefully decorate the edge of the cake with it.
  6. Top with macarons, jaffa balls and jaffa cakes. Chill cake to allow icing to set, and remove the cake from the fridge about 30 mins before serving.
Print Friendly and PDF