Sunday, January 31, 2010

Duck a L'Orange & Duck Fat Roasted Potatoes

ducky
I had to giggle a little bit about the fact that we were eating duck a l'orange for lunch on Australia Day. While others were enjoying barbeques and lamingtons around the country, we were preparing this classic French dish. BUT, it did happen to be from my Margaret Fulton Christmas book, which was given to me as a present from the lovely Karen from Citrus and Candy. And what could be more Aussie than Margaret Fulton?!
xmas
We had originally planned to cook this duck for Christmas. We had a bacon wrapped turkey breast, a ham and prawn cocktails on the menu, it was meant to be a daggy, retro Christmas dinner. But our eyes were bigger than our stomach and we barely managed to finish just the turkey and the prawn cocktails. So we finally got a chance to use our duck on Australia Day.
ducky-4
It was surprisingly simple to put this dish together. I don't cook often (this is the first savoury recipe on here in how long??), so I was happy to help my brother while he did most of it. Most of the energy goes into making the rich sauce, strongly flavoured with orange. And the sauce is the key to this recipe, you can't enjoy the duck without it. I found the meat on it's own wasn't orangey enough for me, but with the sauce it packed a nice citrusy punch.
ducky-23
And OH MY GOD, how good are potatoes cooked in duck fat?! I hadn't had it in so long, and I had a foodgasm when I tasted them again. If you haven't tried duck fat roasted potatoes yet, you haven't lived. These potatoes were cooked to within an inch of their life, and then fluffed up and tossed into a roasting pan full of the fat that had dripped off our duck. All those little fluffy bits of potato on the outside crisped up into crunchy brown pieces of deliciousness.
ducky-6
Duck a l'Orange (and duck fat roasted potatoes)
(from Margaret Fulton Christmas - I have halved the original recipe)
1 x 2.5 kg duck
Rind of one orange, pared
Salt and freshly ground black pepper

1/6 cup sugar
1/8 cup sweet red wine vinegar
3/4 cup chicken stock
3/4 tbsp arrowroot mixed with 1 tbsp port (we substituted the arrowroot for 1 tsp of potato flour)
Rind of one orange, cut into shreds,
1/4 cup port
1 tbsp orange liquer such as Cointreau or Grand Marnier
8g butter
Flesh from 2 oranges chopped into segments

Approx 1 kg potatoes, peeled
ducky-9
Preheat oven to 220 degrees C. Remove all the excess fat from the inside of the duck and insert the pared orange rind into the cavity. Season with salt and pepper and truss the ducks. (We didn't have any string so we just skewered everything together...it sorta fell apart but it didn't seem to matter). Pat dry with paper towel and place the ducks, breast side up, in a roasting pan. Bake for 20 mins until the ducks have browned lightly and released some of their fat. Remove the ducks from the roasting pan but keep the excess fat in the roasting pan. Lower the temperature to 190 degrees C and return the duck to the oven in another roasting pan for an hour.
ducky-11
ducky-12
Boil the peeled potatoes in a large pot of water for approximately 20 minutes, until they are cooked through and just about to fall apart. Drain potatoes and very gently toss them around in the colander so that the exterior fluffs up. (If you have time, place the cooked potatoes into the fridge to remove moisture from them, this will make them extra crispy). Return the duck fat to the oven to heat it slightly, then remove from the oven and gently toss the potatoes in the roasting pan of hot duck fat. Roast potatoes in oven for around 45 minutes, or until they are crisp on the outside. Ensure they do not burn.
ducky-15
Meanwhile, for the sauce, boil the sugar and vinegar over a high heat until it forms a thick syrup. Remove from the heat and gradually stir in the chicken stock. When smooth, put back over the heat and bring to the boil. Gradually add the arrowroot mixture and the orange rind. Simmer the sauce for about 4 minutes or until the sauce is clear and thickened.
ducky-10
When the duck is cooked, remove the trussing and place them on a serving dish and keep warm. As the duck is awkward to dave, it might be best to carve in the kitchen. Cut straight down through the breastbone and back (use scissors or poultry shears to cut through bone). Lay each half of board and make a slanting cut between ribs to separate the wing and leg, making two good portions of each half. With scissors or shears, trim away any carcass bone. The portion should be two wings and two legs with a good portion of breast attached to each wing portion.
ducky-17
Remove all the fat from the baking dish which held the duck, leaving the juices in the bottom. Place over the heat and stir in the port, scraving up the pan juices, allowing it to reduce by half.
ducky-14
Strain into the prepared sauce base and bring to a gentle simmer, then stir in the orange liqueur. Adjust the seasoning and when ready to serive, remove the sauce from the heat and swirl in the butter. Add the orange flesh to the sauce and spoon a little of the sauce over the ducks to give them an attractive glaze.
ducky-20
Serve with the remainder of the sauce and your roasted potatoes. We also served them with peas and buttered carrots.

ducky-21
Print Friendly and PDF

Wednesday, January 27, 2010

Nanaimo Pops - Daring Bakers Jan 2010

nanaimo-3
The January 2010 Daring Bakers’ challenge was hosted by Lauren of Celiac Teen. Lauren chose Gluten-Free Graham Wafers and Nanaimo Bars as the challenge for the month. The sources she based her recipe on are 101 Cookbooks and www.nanaimo.ca.

I seem to be suffering from baker's block at the moment. Perhaps it's a hangover from all the crazy Christmas baking, but I've been feeling too tired to bake. And it's been hot enough in Sydney recently that the absolute last thing that I felt like doing was turning the oven on. So I was slightly relieved to hear what this month's challenge would be, especially after the insanity of last month. I hadn't really heard of Nanaimo bars before this, so I decided to keep it simple and try out the recipe without too much tampering.
nanaimo-9
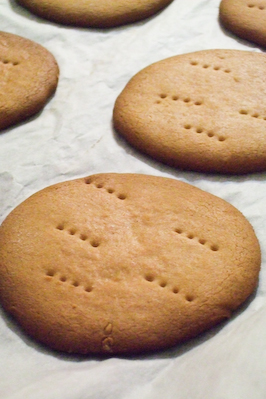
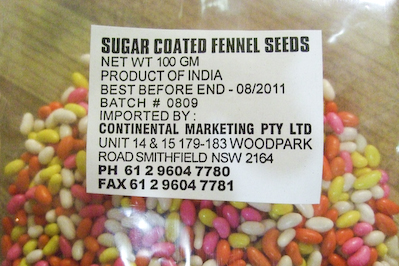
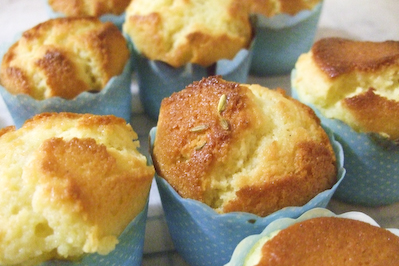
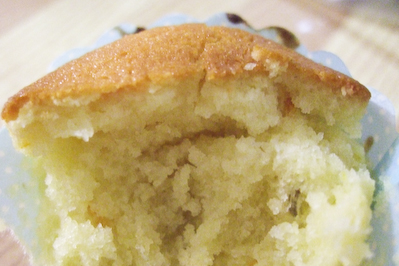
It was quite a straight-forward recipe, unfortunately I left it to the last minute and had to use what was available so I did not make the gluten-free version of the Graham wafers. I was really looking forward to making them since I've seen them in so many of the slices and cheesecake recipes where I've had to replace it with Digestive biscuits. The Graham wafers were delicious, I loved the light flavour the honey gave them, and they tasted nothing like digestives.
nanaimo
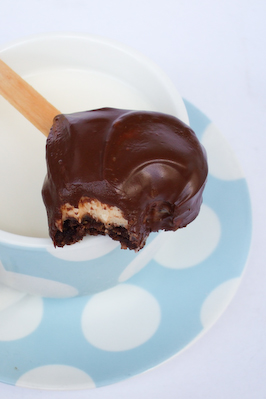
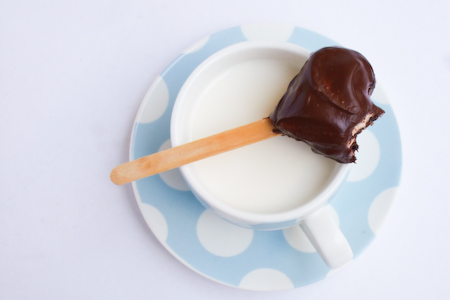
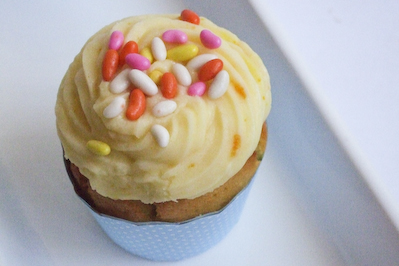
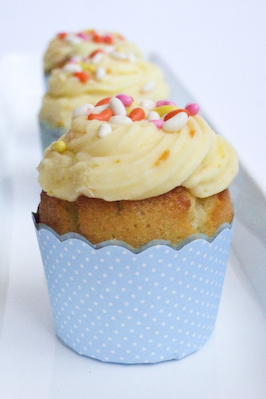
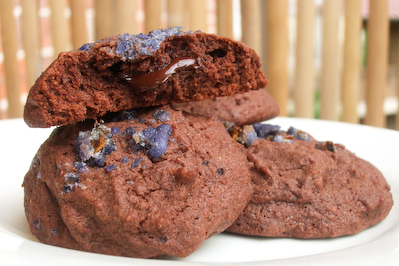
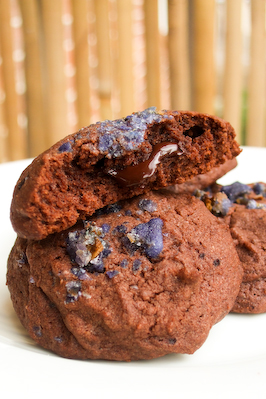
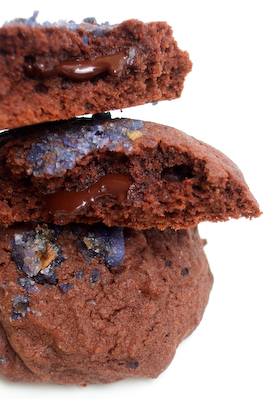
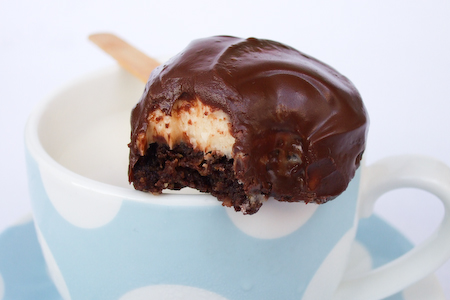
I thought it might be fun to serve the Nanaimo bar on lollipop sticks, like a cake pop. I ended up settling for popsicle sticks, which was probably better since I made them quite large and they needed a thick stick to hold on to. I was a little disappointed with how my Nanaimo pops turned out, but I should have known I was headed for disaster, because anything that is chocolate covered is going to end up a big fat mess if I'm the one doing it. I forgot to chill my pops before taking photos, but they firmed up nicely in the fridge afterwards. I still wish they were a little bit neater, but they were fun to dip into warm milk.
nanaimo-6
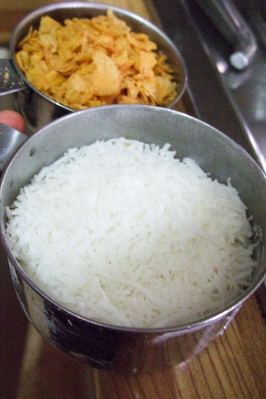
While I adored the Graham wafers, I'm a little unsure if this is one of my favourite slices. The middle layer had a lot of custard powder in it, which has quite a strong flavour. I don't tend to use custard powder for anything other than biscuits, so I wasn't used to the flavour of it. It also seemed such a shame to crush up those lovely tasting biscuits into the base where you couldn't taste it anymore! I also replaced the almonds in the base with cornflakes, due to allergies, which worked quite nicely. It reminded me of afghan cookies, which I have had a major craving for recently.

For Gluten-Free Graham Wafers
Ingredients:
1 cup (138 g) (4.9 ounces) Sweet rice flour (also known as glutinous rice flour)
3/4 cup (100 g) (3.5 ounces) Tapioca Starch/Flour
1/2 cup (65 g) (2.3 ounces) Sorghum Flour (I replaced all three flours with plain flour)
1 cup (200 g) (7.1 ounces) Dark Brown Sugar, Lightly packed
1 teaspoon (5 mL) Baking soda
3/4 teaspoon (4 mL ) Kosher Salt
7 tablespoons (100 g) (3 ½ ounces) Unsalted Butter (Cut into 1-inch cubes and frozen)
1/3 cup (80 mL) Honey, Mild-flavoured such as clover.
5 tablespoons (75 mL) Whole Milk
2 tablespoons (30 mL) Pure Vanilla Extract
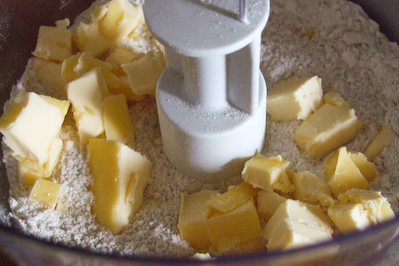
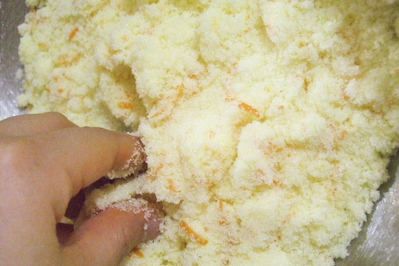
nanaimo-12
Directions:
1. In the bowl of a food processor fitted with a steel blade, combine the flours, brown sugar, baking soda, and salt. Pulse on low to incorporate. Add the butter and pulse on and off, until the mixture is the consistency of a coarse meal. If making by hand, combine aforementioned dry ingredients with a whisk, then cut in butter until you have a coarse meal. No chunks of butter should be visible.
nanaimo-11
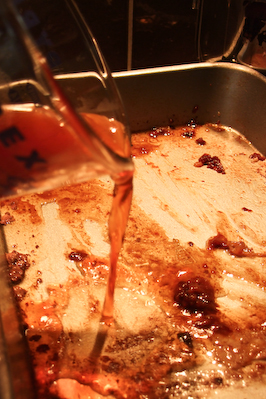
Milk, honey & vanilla (The geek in me was reminded of physiology labs when I saw this)
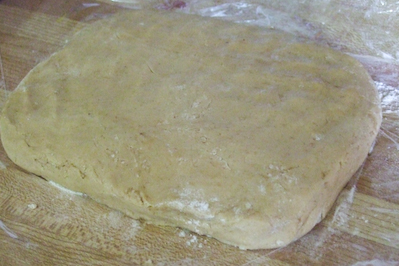
2. In a small bowl or liquid measuring cup, whisk together the honey, milk and vanilla. Add to the flour mixture until the dough barely comes together. It will be very soft and sticky.
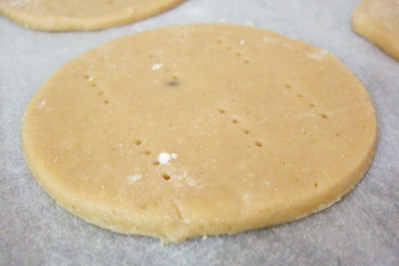
3. Turn the dough onto a surface well-floured with sweet rice flour and pat the dough into a rectangle about 1 inch thick. Wrap in plastic and chill until firm, about 2 hours, or overnight.
nanaimo-13
4. Divide the dough in half and return one half to the refrigerator. Sift an even layer of sweet rice flour onto the work surface and roll the dough into a long rectangle, about 1/8 inch thick. The dough will be quite sticky, so flour as necessary. Cut into 4 by 4 inch squares. Gather the scraps together and set aside. Place wafers on one or two parchment-lined baking sheets. Chill until firm, about 30 to 45 minutes. Repeat with the second batch of dough.
5. Adjust the rack to the upper and lower positions and preheat oven to 350 degrees Fahrenheit (180 degrees Celsius).
6. Gather the scraps together into a ball, chill until firm, and reroll. Dust the surface with more sweet rice flour and roll out the dough to get a couple more wafers.
nanaimo-14
7. Prick the wafers with toothpick or fork, not all the way through, in two or more rows.
8. Bake for 25 minutes, until browned and slightly firm to the touch, rotating sheets halfway through to ensure even baking. Might take less, and the starting location of each sheet may determine its required time. The ones that started on the bottom browned faster.
nanaimo-27
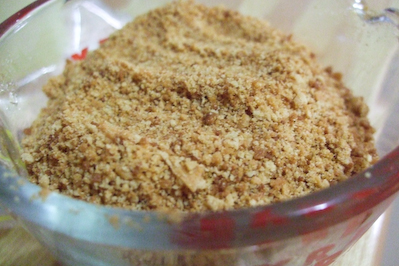
9. When cooled completely, place enough wafers in food processor to make 1 ¼ cups (300 mL) of crumbs. Another way to do this is to place in a large ziplock bag, forceforce all air out and smash with a rolling pin until wafers are crumbs.
nanaimo-18
Nanaimo Bars
Ingredients:
Bottom Layer
1/2 cup (115 g) (4 ounces) Unsalted Butter
1/4 cup (50 g) (1.8 ounces) Granulated Sugar
5 tablespoons (75 mL) Unsweetened Cocoa
1 Large Egg, Beaten
1 1/4 cups (300 mL) (160 g) (5.6 ounces) Gluten Free Graham Wafer Crumbs (See previous recipe)
1/2 cup (55 g) (1.9 ounces) Almonds (Any type, Finely chopped) (I replaced this with an equal amount of slightly crushed cornflakes
1 cup (130 g) (4.5 ounces) Coconut (Shredded, sweetened or unsweetened)
nanaimo-17
Middle Layer
1/2 cup (115 g) (4 ounces) Unsalted Butter
2 tablespoons and 2 teaspoons (40 mL) Heavy Cream
2 tablespoons (30 mL) Vanilla Custard Powder (Such as Bird’s. Vanilla pudding mix may be substituted.)
2 cups (254 g) (8.9 ounces) Icing Sugar

Top Layer
4 ounces (115 g) Semi-sweet chocolate
2 tablespoons (28 g) (1 ounce) Unsalted Butter
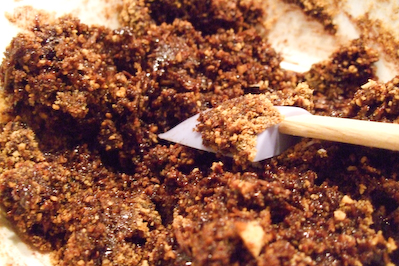
Directions:
1. For bottom Layer: Melt unsalted butter, sugar and cocoa in top of a double boiler. Add egg and stir to cook and thicken. Remove from heat. Stir in crumbs, nuts and coconut. Press firmly into an ungreased 8 by 8 inch pan.
nanaimo-20
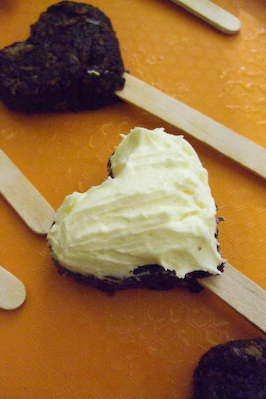
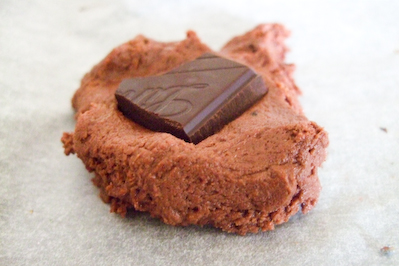
For the pops, I pressed them into heart shapes using a cookie cutter, and then pressed them firmly into the tops of the popsicle sticks.
nanaimo-21
nanaimo-23
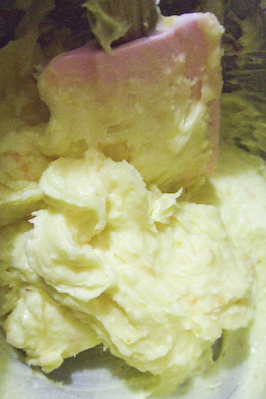
2. For Middle Layer: Cream butter, cream, custard powder, and icing sugar together well. Beat until light in colour. Spread over bottom layer.
nanaimo-24
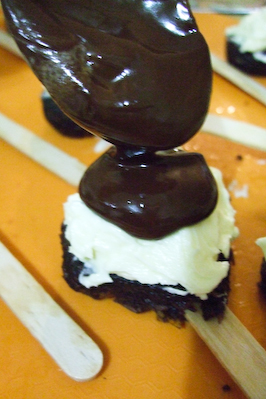
3. For Top Layer: Melt chocolate and unsalted butter over low heat. Cool. Once cool, pour over middle layer and chill.
nanaimo-25
I placed my pops over a wire racks so any excess chocolate could drip off. After chilled, serve with hot tea or warm milk...or whatever you feel like! Thanks to Lauren for this month's challenge, I'm going to go munch on some Graham wafers now!
nanaimo-2
Print Friendly and PDF

Thursday, January 21, 2010

Fennel Seed & Orange Cakes

orangefennelcakes
It's funny to remember what a fussy child I was. I hardly ate anything, believing that I didn't like most things without even really trying them, and my Mum gave up pretty early on trying to push me to try new things. But then I moved to Sydney to live with my brother, and very quickly learnt that if I didn't want to starve, I would have to eat whatever he made for me.
orangefennelcakes-4
Thanks to my brother, I rejoice in the discovery of a unique, exciting flavour on my tastebuds, strong ones that would have made me wrinkle my nose when I was younger. It probably has something to do with getting older and getting less sensitive tastebuds I suppose. One of those flavours that I'm slowly learning to love is the anise/liquorice flavour. Star anise is one of my absolute favourite ingredients to add to any meat dishes, and I'm starting to be obsessed with fennel and aniseed. On our food tour of Surry Hills a while back, I randomly picked up some colourful sugar-coated fennel seeds at the Indian grocery store. These are usually used like breath mints after a meal (and apparently fennel seeds help to aid digestion) and I love them. And being me, I couldn't look at the beautiful colours of the coated fennel seeds without thinking, 'Cupcake decorations!".
orangefennelcakes-10
So here's something a little different. I used a moist french yoghurt cake recipe that I tested out a long time ago on this blog, but paired it with an orange buttercream rather than a marmalade glaze. The addition of fennel seeds in the batter infuses it with a very light, fragrant aroma of anise, not the least bit overpowering. Even if you don't like liquorice, you will like these. I've had this recipe waiting in the sidelines for a while, I made it for my brother's birthday but then all the hectic Christmas baking came straight after it. I mucked up the buttercream slightly when I made it for him, but have since improved it. But it seems appropriate to try something new on my brother, since he's the one who taught me to get over my silly fears.

Fennel Seed & Orange Cupcakes
(adapted from this Dorie Greenspan recipe)
1 cup plain flour
1/2 cup almond meal (can replace with another 1/2 cup plain flour)
2 teaspoons baking powder
Pinch of salt
1 cup sugar
Grated zest of 1 orange
1/2 cup plain yogurt
3 large eggs
1/4 teaspoon pure vanilla extract
1/2 cup flavorless oil, such canola or safflower (I used about 2 tbsp less of this)
1 tsp fennel seeds
orangefennelcakes-6
For the buttercream:
125g unsalted butter, softened slightly
2 1/2 cups icing sugar
1 tbsp orange juice
1 tsp orange zest
1 tbsp sugar-coated (or regular) fennel seeds to sprinkle on top (available at Indian grocery stores)

Preheat the oven to 180 degrees C. Whisk together the flour, baking powder and salt.
Put the sugar and zest in a medium bowl and rub the zest into the sugar with your fingertips until the sugar is moist and aromatic.
orangefennelcakes-7
Add the yogurt, eggs and vanilla and whisking vigorously until the mixture is very well blended. Still whisking, add the dry ingredients, then switch to a large rubber spatula and fold in the oil. You'll have a thick, smooth batter with a slight sheen. Spoon batter into a lined cupcake tray, filling it about 3/4 full.
orangefennelcakes-9
Bake for 20-25 minutes or until cooked through and golden brown. Transfer to a rack and cool completely.
orangefennelcakes-12
orangefennelcakes-11
Beat butter at high speed with an electric mixer until light and fluffy. Sift icing sugar into bowl, then beat in orange juice.
orangefennelcakes-13
Pipe or spoon on to top of cakes and then sprinkle a pinch of candied fennel seeds on top. Can be stored for several days in an airtight container.
orangefennelcakes-2
Print Friendly and PDF

Friday, January 15, 2010

Molten Chocolate Centred Cookies with Candied Violets

moltenchoc
You know when you get a wicked chocolate craving and the only thing you can think about itsbiting into something that is full of warm melted chocolated that oozes out like lava? I had one of those cravings the other day. And it was overwhelming. I was dreaming of sweet fluffy muffins, still steaming in the middle, that I could break open to reveal their gooey chocolate centres. But then I thought, wouldn't it be even better in a cookie? With the contrasting textures of the crumbly cookie versus the smooth liquid centre, I needed to make it (and eat it) right away!
choclava
These biscuits, like most biscuits, are ridiculously easy to make. But the reward is a decadent, rich but not too rich soft biscuit, with a little bit of crunch on the outside. The slight bitterness of the cocoa is offset by the light floral sweetness of the candied violets. Best enjoyed warm, so that the centres ooooooooooze when you bite into them, I served them straight out of the oven or warmed them up in the microwave before I served them. Though I usually refrain from overindulging in the sweet treats that I make for this blog, I think I must have ended up eating nearly half of these biscuits because they were dangerously moreish, like brownies in a cookie form. And they more than satisfied that crazy chocolate craving I was having.
moltenchoc-2
Molten Chocolate Centred Cookies with Candied Violets
(Makes 30-40 biscuits)
225g unsalted butter, softened
2 cups caster sugar
1/2 cup Dutch process cocoa powder (3/4 if using regular baking cocoa powder)
2 large eggs
1 tsp pure vanilla extract
2 cups plain flour
1 tsp baking powder
100g dark chocolate (I used Lindt 70% but you can use a less bitter chocolate)
2 tbsp candied (crystallised) violets
moltenchoc-4
Preheat oven to 180 degrees C. Cream butter and sugar with an electric mixer in a large mixing bowl. Add eggs, vanilla and cocoa powder and beat until combined. Sift flour and baking powder in a separate bowl and then fold gradually into the mixing bowl. The dough should be smooth, very fluffy and sticky.
moltenchoc-5
Using your hands or a tablespoon, shape balls of dough about 3-4cm in diameter. Flatten slightly on a lined baking tray and then press a small piece of dark chocolate into the centre. Gently use your fingers to press the dough around the piece of chocolate. The dough is very sticky, so it might be easier to lightly flour your hands before touching the dough.
moltenchoc-6
Crush candied violets into small pieces (I used my mortar & pestle) and then sprinkle over the top of each ball of dough. Leave about 5 cm between each biscuit to allow room for spreading.
moltenchoc-7
Bake for approximately 10 minutes. The biscuits should be just starting to firm up around the edges but will still be soft and fudgy in the middle. Serve straight away while the centres are still liquid.
moltenchoc-8
Can be stored in an airtight container for a week. When ready to serve, warm up in a microwave for 15-30 secs, or until the biscuits are very warm to the touch, so that the chocolate in the centre is melted.
moltenchoc-9
*EDIT*: Tina brought up a very good point in the comments below - These cookies taste really good cold anyway, I was far too lazy near the end of the batch to warm them up before scoffing them. Tis the magic of chocolate!
Print Friendly and PDF