Wednesday, June 30, 2010

Mandarin & Rhubarb Macarons

mandarinmacs-3
Ahhh macarons. These little sweet treats are everywhere. Love them or hate them, it's hard to escape them. My opinion on macarons is a little confused. First of all, I shouldn't be eating them - I'm supposed to be allergic to almonds. But I eat them anyway because they haven't made me sick yet. Sometimes I find them insanely sweet, and can get a little nauseated if I have too many...like the time I ate 48 in one day at Adriano Zumbo. But as a learning home baker, these little babies are the perfect challenge. There are SO many things that can go wrong. You could have made them 10 times in a row and have them turn out perfectly, only to have your next batch turn out awful. But ohhhh how glorious it feels to succeed! To press your nose up to the oven door and see those little feet pop up! For those who have yet to understand the macaron craze, at least try to make them yourself because they taste so much better once you are victorious in your quest for macaron feet (particularly after 3 failed batches have been thrown in the bin).
mandarinmacs-4
So why am I rambling on about the joys of baking macarons? Last night, I made a last minute decision to bake these mandarin flavoured shells to go with my leftover homemade rhubarb jam that I made previously. And everything went exactly to plan. Baking is so much more fun when you're more confident and not experimenting with crazy new recipes. It was relaxing, almost therapeutic, and I can look at these in a much happier light compared to those bloody madeleines that gave me so much grief. But there is always room for improvement!
mandarinmacs-5
I've used the combination of mandarin and rhubarb previously, for these upside-down cakes, so I knew it would be a winner. I was a little anxious at first, because the mandarin flavour in the shells was very mild right after baking and I thought the rhubarb jam would overpower it. But after filling the macarons and leaving them to sit in the fridge overnight, the mandarin flavour developed nicely and was very fragrant by the next day. These may have been the best textured macarons I've ever made, but I think that was more due to the fact that I am making less mistakes, than to do with anything I changed in the recipe. (I personally believe it is only the foolish bakers who immediately blame a recipe rather than themselves when things do not turn out as well as expected in the kitchen)
mandarinmacs-6
The mandarin flavour turned out surprisingly well, considering I only used the zest from a Hickson mandarin. You could certainly replace the mandarin zest with lemon or orange zest, in fact I would strongly encourage you to try lemon zest as a substitute because I am still completely obsessed with the lemon & rhubarb combination. But I do like the rhubarb and mandarin combination, it has a very Winter fruit-y theme about it. Anyway, it's such a relief to be finding comfort in baking at the moment, it takes away all the stress from earlier in the day. I've always had trouble adapting to change. I like routines. And right now there are changes occurring in my life that I am struggling to process and adapt to, so it's good to come home and fall into the comfortable routines of baking. Yep, I'm totally gonna go hug my oven now.
mandarinmacs-7
Mandarin & Rhubarb Macarons
(adapted from Tartelette's basic macaron recipe, makes 25-30 macarons depending on size)
100g aged egg whites (you can use fresh eggs too, just make sure they are room temperature. I always use fresh these days, and zap it in the microwave on defrost for 10 seconds)
110g almond meal, dried in a cool (100 degrees C) oven for 5 minutes and sifted
200g icing sugar
50g sugar
Zest of one large (or two small) mandarin (Can also be substituted with orange zest or lemon zest), about 1-2 tsp
150ml Rhubarb Jam (recipe here)
Optional: 1 tsp egg white powder, orange powdered food colouring

Line two baking sheets with baking paper. Place icing sugar in food processor and pulse for a minute to remove any lumps. Stir in almond meal and pulse a few times to combine. Place in a large mixing bowl with mandarin zest.

Beat egg whites and egg white powder in a medium mixing bowl until the egg white powder dissolves and it reaches soft peaks. With the mixer on high speed, gradually add sugar (and food colouring) and beat until it reaches stiff peaks.
mandarinmacs-9
Add meringue to your dry mixture and mix, quickly at first to break down the bubbles in the egg white, then fold carefully as the dry mixture becomes incorporated and it starts to become shiny again. Take care not to overmix, the mixture should flow like lava and a streak of mixture spread over the surface of the rest of the mixture should disappear after 30 seconds to a minute. Place in a piping bag and pipe rounds of about 3cm diameter on lined baking sheets or silicon baking mats. Gently rap your baking sheets on your bench top to remove any extra bubbles from your piped shells.
mandarinmacs-10
Preheat your oven to 140-150 degrees C (temperature varies depending on your oven). Leave shells on bench to dry for about an hour, so that when you press the surface of one gently it does not break. Place on top of an overturned roasting tray or another baking sheet if they are not professional grade. Bake for 13-15 minutes, depending on the size of your shells. Remove from the oven and cool on the tray for a few minutes, then gently remove from the sheet and place on a wire rack to cool completely.
mandarinmacs-11
Sandwich macaron shells with about 1 tsp rhubarb jam and refrigerate overnight to allow the flavour to mature. Serve at room temperature. Can be stored for several days after baking in an airtight container in the fridge.
mandarinmacs-8
EDIT: I don't care what Masterchef says, it's not pronounced macaROON. It's macaRON!
Print Friendly and PDF

Sunday, June 27, 2010

Black Forest Self-Saucing Puddings

blackforestpudding
Self-saucing pudding. How amazing is self-saucing pudding?! It's no regular, run-of-the-mill pudding. It goes into the oven a big, sloppy mess and comes out as a fluffy, steaming delicious thing that is already sitting in its own sauce! I mean, does it really get much better than that? Stephanie Alexander's self-saucing chocolate pudding has always been one of my favourite winter desserts. But here is a fun, slightly boozy spin on the chocolate version.
blackforestpudding-3
I have always been a black forest cake kind of girl. I know it's sometimes known as a bit of a daggy cake, one that some people might dread to receive as their birthday present. But I've always loved it. Cherries and chocolate make me happy, what can I say? Adapting those flavours into a pudding like this isn't too much of a stretch, the flavour from the cherries and Kirsch adds a lovely fruity depth to the pudding. Especially with that gooey, rich chocolate sauce (using Dutch process cocoa powder is a must, regular cocoa will not do!).
blackforestpudding-5
Usually I make self-saucing puddings in one big cake tin, which is great fun to scoop out big spoonfuls of pudding and sauce out of, but this time I thought I would try splitting them up into separate servings. It works just as well, and is a lot less ugly, as long as you make sure you split up your pudding and topping mixture evenly between each of the servings. I even managed to get my hands on some fresh cherries (for a ridiculously high price) to serve with the fresh cream. I have to say, digging my spoon right into the bottom of these puddings, to get a taste of the cake, sauce, cream and cherries all in one mouthful is total bliss. And if you're not into boozy puddings, you can always replace the Kirsch with water.
blackforestpudding-4
Black Forest Self-Saucing Puddings
(makes about 4-6 servings, adapted from Stephanie Alexander, The Cooks Companion)
125g plain flour
60g caster sugar
a pinch of salt
2 tsp baking powder
2 tbsp Dutch processed cocoa powder
1 egg
1/2 cup morello cherries (from jar, drained)
1/3 cup milk
40g butter, melted
a few drops of pure vanilla

180g brown sugar
2 tbsp Dutch cocoa
190ml boiling water
60ml Kirsch
Optional: fresh cherries and whipped cream to serve
blackforestpudding-9
Preheat oven to 180 degrees C. Grease four large ramekins with butter (or a 20cm square cake tin, or 6 medium ramekins). Sift flour, cocoa powder , sugar and salt together in a bowl. In a separate bowl, mix together milk, butter, vanilla and egg. Add wet ingredients to dry ingredients and mix to combine. Fold in cherries. Pour into greased ramekins, evenly divided.
blackforestpudding-10
Mix brown sugar and cocoa powder and sprinkle over the top of the pudding mixture, also evenly divided between each ramekins. Mix water and Kirsch together and pour even amounts over each pudding. Bake for about 30 mins, or until the puddings are firm to the touch and the sauce should be bubbling around the edges. (Will take about 40-45 minutes if baking in single cake tin). Remove from the oven and cool for a few minutes, then serve warm with whipped cream or ice cream and fresh cherries.
blackforestpudding-7
If you're sitting there wondering what's going on with all the leaves; I couldn't help grabbing a few of them from the tree outside my house. I've always loved seeing all the trees as the leaves are changing cover on my old street where I used to live. The trees were all perfectly spaced to lean over and create a gorgeous leafy tunnel all the way down the street. And though I don't live by that street anymore, whenever I see the leaves on the trees changing colour I always think about how pretty and magical that street looks at this time of the year :) Roll your eyes at me if you want, I'm a sucker for it!
blackforestpudding-8
Print Friendly and PDF

Tuesday, June 22, 2010

Duck & Cherry Pastries

duckcherrypasties-7
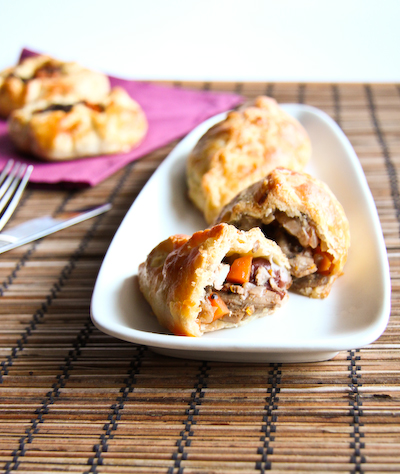
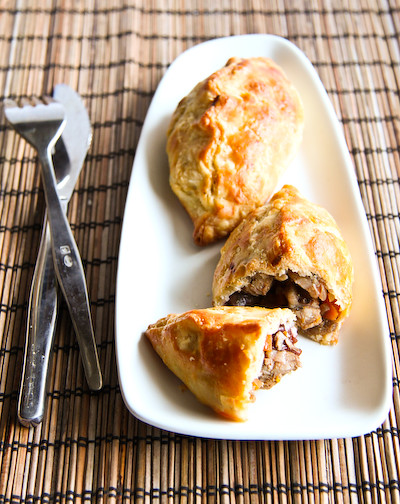
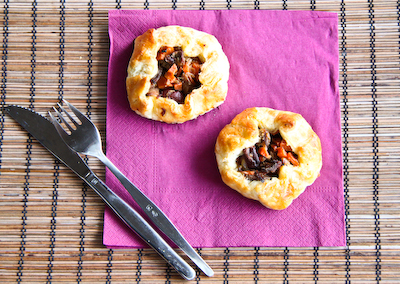
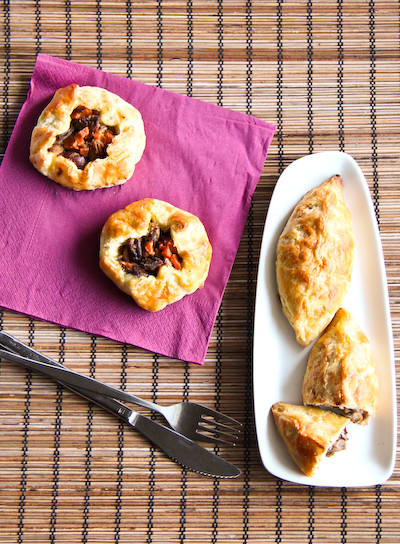
Here's my savoury recipe for the season, you know that I don't get the urge to bake anything without sugar very often. But I have had these duck & morello cherry pastries on my mind for a long time. I got swept up by this idea of making duck pies, and I couldn't let it go. Finally, I decided to get off my lazy behind and make these. They might not be the prettiest pastries you've ever seen, but they are mouth-wateringly delicious.
duckcherrypasties-2
I decided to try using Bourke St Bakery's savoury shortcrust pastry, since I had so much success with their 
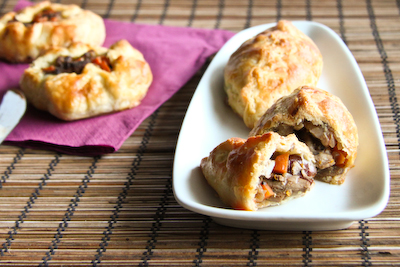
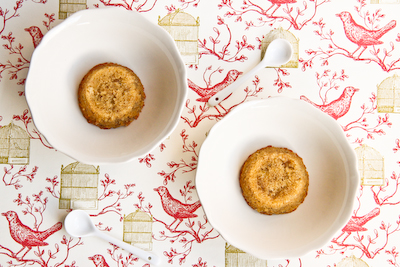
sweet shortcrust in the past. And though it definitely did not disappoint in flavour, it didn't hold it's shape as much as I had hoped, probably because it is quite a flaky pastry with big streaks of butter through it. But it tasted so rich and divine that I didn't really care how it looked. I tried to do some parcels with nicely pleated edges (we call them pasties here), but gave up halfway and made other half as little gallettes, and in the end the pasties didn't even hold their shape so the gallettes looked much better. The main thing that stopped me from doing this recipe sooner was the fact that I needed an extra day's preparation, and it's very hard to find the free time to do that when you work fulltime. But it turned out to be quite stress-free and it was easily completed on two weeknights. You could even complete it all in one day if you have the motivation, the only thing that makes this recipe long is the time you need to leave for the pastry to chill.
duckcherrypasties
These definitely aren't going to make the healthiest dinner of the week, but when it's miserably cold you crave a bit of indulgence. The combination of the strong flavour from the duck meat and the crisp, buttery pastry is gorgeous, and then there is the added sweetness from the cherries. I cheated a little bit and bought half a roast duck from the local Chinese BBQ store, rather than cooking the duck meat myself, but I think that it saves a lot of time while still tasting great. I always use store bought roast ducks when I make red duck curry, it is a bit of a pain to peel the meat off the bones but no where near as much effort as cooking it yourself. Plus then the meat is already infused with so much flavour from the sauce and spices. Try to chose a red wine that is not too sweet when cooking the filling, as there is already a lot of sweetness from the cherries, orange zest and carrots. And don't be scared off by the prep time needed, you can make the pastry dough and the filling the night before and then roll, fill and bake them for dinner the next day. They are so worth it!
duckcherrypasties-5
Duck & Cherry Pastries
(You will need to start this recipe a day ahead, shortcrust Pastry from the Bourke Street Bakery cookbook, makes 14 medium pastries)
For the pastry:
300g cold unsalted butter, cut into 1.5cm cubes
600g plain flour, chilled
1 tsp (5g) salt
3 tsp (15ml) white vinegar, chilled
170ml (2/3 cup) water, chilled
Eggwash, to brush

For the filling:
1/2 cooked duck, meat removed from bones and shredded (I bought a 1/2 roast duck from a Chinese bbq store)
1 brown onion, finely diced
1 carrot, finely diced
1/2 cup red wine
1 cup jarred morello cherries or fresh pitted cherries
Zest of 1/2 an orange
1 sprig of fresh thyme, chopped
Salt and pepper to season
duckcherrypasties
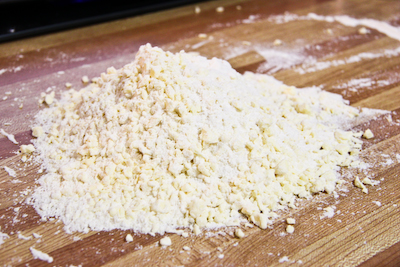
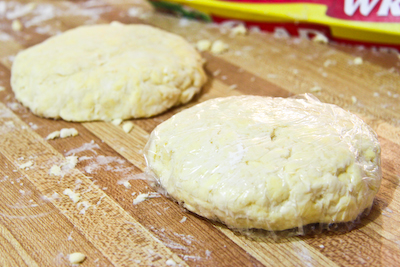
Prepare the pastry dough; Remove the butter from the fridge 10 mins before starting, so that it has softened a little but is still very cold. Place butter, flour and salt in the food processor and pulse 3-4 times in 1 sec bursts to partly combine. (If no food processor available, use your fingertips to rub dry ingredients partly into butter) Empty out on to a clean surface and gather together. Combine water and vinegar and carefully sprinkle over the flour mixture. Using the palm of your hand, smear the mixture away from you on the bench. Gather dough together and repeat smearing process a few more times to bring it together. You should still be able to see streaks of butter through the dough. Divide into two flat disks, wrap in clingfilm and chill for at least 2 hours or overnight.
duckcherrypasties-2
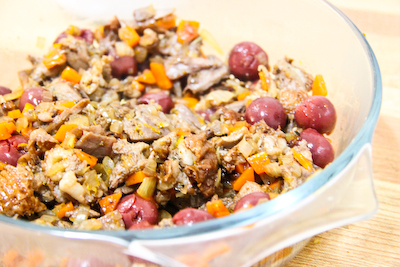
To make the filling, sweat onions and carrot on medium heat with a bit of olive oil. When carrots and onions are tender, add wine and simmer until the liquid has reduced. Add duck, thyme and orange zest and simmer for another 10 minutes, stirring occasionally. Generously season with salt and pepper to taste. Gently fold in cherries, trying to keep them intact. Remove from the heat and allow to cool completely. Can be stored overnight in the fridge.
duckcherrypasties-4
When ready to assemble pastries, remove dough from fridge 20 mins before starting. Also take duck out of fridge if it has been chilling. Sprinkle a light dusting of flour on a clean workbench and flour your rolling pin. Roll out the dough until it is 3mm thick, then using a 14-15cm diameter bowl/plate/cutter as a guide, cut out circles of dough. Alternatively, separate the two disks into 14 equal balls of dough and roll them out into circles individually. Place on lined baking sheets and chill for at least an hour to allow the gluten in the dough to relax.
duckcherrypasties-5
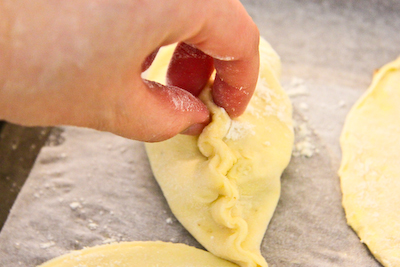
Preheat oven to 200 degrees C. Split duck mixture into 14 even portions, about 1/4 cup of filling for each pastry. Place filling in the middle of the pastry, then brush egg wash around the edge of the dough. To make the parcels, bring edges together at the top of the pastry and pinch together firmly to form a crinkled edge. To make galettes, simply fold all the edges in over the filling.
duckcherrypasties-6
Place on lined baking tray and bake for around 20 mins, or until pastry is golden brown. Remove from oven and cool on wire racks, serve warm. Can be stored in the fridge for several nights and reheated in the oven.
duckcherrypasties-8
Print Friendly and PDF

Thursday, June 17, 2010

Lemon Madeleines & Rhubarb Jam

lemonrhubarbsponge-2
Remember how I mentioned in my last post about how my house smelt like lemons and failure? It was because of these silly lemon madeleines. I had made a delicious batch of rhubarb jam, which was ridiculously easy to make, and I wanted something lemon flavoured to have with it. I am a little obsessed with the lemon & rhubarb combination, ever since I tried some amazing lemon & rhubarb macarons at the Gourmet Rabbit launch at Tastevin Bistro. It is just a fantastic balance of sweet and sour. So I had to make these lemon madeleines. I thought it would be easy, I've used my trusty madeleine recipe countless times without any problems, always achieving that lovely hump on the tops of these delightful little sponge cakes. I figured I would just follow that recipe, using lemon zest as the flavouring.
lemonrhubarbsponge-5
But instead, I ended up attempting and failing that recipe 3 times, as well as trying a different recipe which I wasn't happy with. I couldn't understand how a recipe which I had never had issues with in the past was suddenly failing so consistently. I wasted so many eggs, so much flour and SO MUCH BUTTER. After two days and so many flat, soggy madeleines which were flung into the bin in disgust, I was ready to give up. To acknowledge defeat. But then I remembered seeing this love Ginger Powder Puff recipe on Gourmet Traveller, and it looked like it might work well as a madeleine batter. Gourmet Traveller has never failed me before, and I really wanted something to have with my awesome rhubarb jam. And HUZZAH, it worked perfectly! Not exactly the texture I like in my madeleines (I prefer mine a little crisper on the outside and a little less dry), and they didn't develop the signature humps, but that could be more my fault than the recipe.
lemonrhubarbsponge-7
Because of this, I was a little hesistant to call these madeleines, since they seem more like regular mini sponge cakes to me, but I figured that it would be confusing not to since I used my madeleine tin to make them. And it is nearly a génoise cake, so I think it will do to call them madeleines. But I also filled some mini muffin trays with the batter and they baked just as nicely, so there is no need to invest in a madeleine tray if you don't have one. Trust me, I've yet to get my money's worth from my madeleine tray. As for what went wrong with my usually foolproof recipe? I'm not 100% sure. I think I had forgotten how long I needed to whip my eggs and sugar for, so maybe the sugar hadn't dissolved properly which made the mixture unstable. Or perhaps the chemistry of the recipe could not handle the addition of lemon zest. If any one is game enough to reattempt the old recipe with lemon zest I would definitely encourage you, because I love the texture of those madeleines. Just to make sure you beat your eggs for at least 8 minutes!
lemonrhubarbsponge
Let me quickly talk about the amazing rhubarb jam. I was pleasantly surprised by how easy it was to make this jam, and how tasty it was! If you like rhubarb, you will love this jam. It is such a great way to use up your rhubarb, and will go well with so many things. I added a little bit of vanilla essence because rhubarb and vanilla alway pair up so nicely and it gives the jam some extra depth. The equal quantities of fruit and sugar means that the jam is on the sweet side, so it went really well with these little zesty sponge cakes. I imagine the cakes and jam would go really well with some vanilla or ginger flavoured custard as well. Even if you can't be bothered to make the madeleines, try the jam!
lemonrhubarbsponge-4
Lemon Madeleines & Rhubarb Jam
(makes approximately 24 madeleines and 3 small jars of jam, adapted from this recipe and this recipe)
For the jam:
3 sticks of rhubarb, washed & dried, stringy bits removed and then weighed (approx 380-400g)
Equal amount of sugar i.e. 380-400g
Rind of 1 lemon
1 tsp pure vanilla essence or 1 vanilla bean

For the madeleines:
110g (3/4 cup) self-raising flour
30g (1/4 cup) cornflour
Zest of 1 large or two small lemons
2 eggs, at room temperature
110g (1/2 cup) raw caster sugar
20g butter, melted and cooled
For dusting: pure icing sugar

To make the jam, chop rhubarb up into 1 inch pieces and place it in a medium heavy based saucepan with the sugar. Gently heat, stirring continously until the sugar has dissolved. Turn up the heat and add the lemon rind and vanilla, boiling the jam for 10 minutes, then remove the pot from the heat. Sterilise jam jars in boiling water for 10 minutes then spoon warm jam into each jar. Seal with lids and leave to cool. Store in the fridge.

Preheat oven to 180 degrees C. Triple-sieve flours into a bowl and set aside. Whisk eggs and sugar in an electric mixer until mixture is tripled in volume and holds a trail (4-6 minutes). Sift in flour mixture, in batches, folding in with a large metal spoon between additions to combine, then fold in butter and lemon zest. Spoon into two 12-hole buttered and floured madeleine or gem scone/mini muffin tins, bake until light golden (6-10 minutes), cool in tins for 5 minutes, then carefully remove and cool on a wire rack. Dust with icing sugar and serve warm or at room temperature with rhubarb jam.
lemonrhubarbsponge-6
This post is for Lisa, my lovely friend and fellow lover of all things rhubarb! Happy Birthday dear!
lemonrhubarbsponge-3
Print Friendly and PDF

Monday, June 14, 2010

Banana Puddings with Ginger Butterscotch Sauce

nanapudding-5
At the moment, my blog is my happy place. Work is not. Work is the thing that sucks the life and joy out of me, but it's okay because I can come home and bake and blog. So it becomes incredibly frustrating when I am in a total baking funk. Lately I've been lacking ideas and inspiration. I've attempted a few baking experiments which have ended in disaster. It kind of makes me want to tear my hair out. So when a banana pudding was requested for dessert, I was more than happy to do it because it was something simple and safe. There was only so much that could go wrong, right? And nothing beats a warm, sticky pudding in the middle of winter.
nanapudding-4
I was too lazy to go to the supermarket. There are some days when I would love to bake, but I just cannot be bothered to leave the house. Even though I would have loved to try Linda's beautifully light looking steamed banana pudding, I didn't have all the ingredients I needed. So I just sort of made one up to match the ingredients I had at home (hence the weird mixture of cup and weight measurements, sorry!). I thanked my lucky stars that I had a container of mashed bananas in my freezer (I do this everytime I have some super black bananas that are about to get thrown out). So I went about with the usual beating and stirring, I was a little nervous because the batter was looking a bit like scrambled eggs. Uncomfortable feelings of doom were starting to build in the back of my mind, but to my surprise they baked really nicely, turning golden brown and fragrant, slightly softer and denser than a banana cake. They were reeeeallly buttery, so I've adjusted the amount of butter in the recipe below.
nanapudding-6
The real winner in this dessert is the ginger butterscotch sauce. It's thick and smooth, with just the lightest tinge of ginger. It might not be the very first flavour that you might imagine matching well with banana, but it really does the trick. I could imagine this sauce tasting just and lovely with a sticky date or chocolate pudding. The sauce it quite rich and sweet, so it was perfect with a big scoop of vanilla ice cream on top. It's the type of dessert that you just want to snuggle up on the couch with. Too bad it wasn't enough to pull me out of my baking bad place, let's just say I've wasted a lot of eggs, butter, sugar and lemons this weekend. My house smells like lemons and failure :( Apologies in advance if it's bit quiet around here for the next few weeks while I try to get my baking mojo back!
nanapudding-3
Banana Pudding Cakes with Ginger Butterscotch Sauce
(makes 12 servings)
For the banana pudding:
1 cup mashed over-ripe bananas (about 2 large bananas)
3/4 cup caster sugar
160g unsalted butter, softened
3 eggs
3/4 cup self-raising flour
3/4 tsp baking powder
1 tsp ground cinnamon

For the Ginger Butterscotch Sauce:
3 tbsp golden syrup (preferably Lyle's brand)
1/2 cup pouring cream
1/2 cup tightly packed brown sugar
30g unsalted butter
1/4 tsp salt
1 tsp ground ginger

Preheat oven to 180 degrees C and grease a 12-hole cupcake or muffin tin well. Sift flour, baking powder and cinnamon in a separate bowl and set aside. Cream butter and sugar in a large mixing bowl with electric beaters until light and fluffy. Add eggs one at a time, beating well to combine after each addition. Beat in bananas, then gently fold in sifted dry ingredients.
nanapudding-8
Spoon mixture evenly into the greased cupcake tin, so they are about 3/4 full. Bake until golden brown on top and a skewer inserted into the centre of the puddings comes out clean, around 20-25 minutes depending on how big they are. Leave to cool in their tray for about 15 minutes, then using a flat bladed knife, carefully remove puddings from the tray.
nanapudding-9
To make the butterscotch sauce, place golden syrup, cream, sugar, butter, salt and ginger in a small saucepan and gently bring to the boil. Reduce heat slightly and simmer for 10 minutes, stirring regularly until sauce is thick and smooth. Remove from heat and serve puddings with a scoop of vanilla ice cream and a generous serve of sauce on top.
nanapudding-10
Print Friendly and PDF

Sunday, June 6, 2010

Neopolitan Melting Moments

meltingmoments
The other day, my usually unromantic boyfriend of many, many years came home from work with a bunch of my favourite flowers. My first question to him was, "Did you do something bad?". Which is quite sad now that I think about it. But it's been a while since I've gotten flowers. He's not one for romantic gestures, he hates Valentine's days and is only sort of enthusiastic about anniversaries. But he hadn't done anything wrong, just saw the flowers on his way to the bank on his lunch break. And I was happy to have something to put in my favourite new vases, these laboratory flower vases that I got along with my awesome teacupcake moulds from Urban Outfitters ♥
meltingmoments-5
What can I say, the geek in me couldn't resist them. Anyway, the surprise of getting flowers (something that I hadn't had in a while), made me feel like baking something I haven't had in a while. Before I started this blog, my baking was limited to a very short list of basic recipes. For each of them, I would make them over and over with lots of different recipes until I found one that I was happy with. Vanilla cupcakes, chocolate chip cookies, sticky date pudding, vanilla bean pannacotta and melting moments. I was OBSESSED with melting moments. They are so evil but so good. A thick sploge of icing sandwiched between two melt in your mouth, buttery shortbread biscuits. Here in Australia I think they're also known as yoyo biscuits, but I've always known them as melting moments. What do you call them? They charge a ridiculous amount for them at cafes but they are so satisying with a cup of tea or coffee. And even better when they are homemade.
meltingmoments-4
So here's a fun version that's even tastier than the plain vanilla version. I am a sucker for neopolitan ice cream. If you've ever bought neopolitan ice cream, you probably end up favouring one of the three flavours more than the others, whether it's the strawberry, chocolate or vanilla bit. For me it was always the strawberry. But in the end you always end up eating all of it because ice cream is ice cream. So this time I decided to try making neopolitan melting moments, rather than going and buying myself a giant tub of ice cream. I basically split one portion of the shortbread dough into three and made one vanilla flavoured, another chocolate flavoured and the third strawberry flavoured. And did the same thing with the icing, then sandwiched them together so that each biscuit had chocolate, strawberry and vanilla flavouring, in three different variations. Look!
meltingmoments-7
Fun, right? And very very tasty. The combination of all three of the flavours in each biscuit is great, and interestingly each variation tasted a little different. It was quite interesting and the biscuits were pretty darn addictive. And so colourful! They are pretty rich, so I wouldn't recommend having more than three of these in one sitting. It always used to surprised me how difficult it was for me to find a recipe for melting moments that I was happy with. So many recipes out there give you dry, raw tasting, crumbling biscuits that make you feel like you've just filled your mouth with sawdust. But this one is really good. The biscuits aren't dry or too floury, just as long as you don't overwork the dough or cook the biscuits long enough. Oh and use good quality butter, it really makes your biscuits that much better.
meltingmoments-8
Neopolitan Melting Moments
(adapted from this Gourmet Traveller recipe, makes 24 biscuits)
For the biscuits:
250g soft unsalted butter
80g icing sugar, sifted
1 tsp vanilla extract
1 tsp strawberry extract + pink food colouring
1 tbsp cocoa powder, sifted
75g cornflour, sifted
225g plain flour, sifted

For the icing:
275g icing sugar, sifted
100g cold unsalted butter, finely chopped
2 tbsp melted dark chocolate
2 tbsp strawberry puree or strawberry jam
1/4 tsp vanilla extract

Preheat oven to 180 degrees C and line 3 baking trays with baking paper. Using an electric mixer, beat butter and sugar until light and fluffy. Split flours into three equal portions, one for each flavour of biscuit (75g flour, 25g cornflour) add a pinch of salt of each. Split creamed butter mixture into three equal portions as well.
meltingmoments-11
For the chocolate biscuits, replace 1 tbsp of flours with 1 tbsp cocoa powder. Beat 1/2 tsp vanilla essence into one of the butter portions. Fold in the flour and cocoa mixture with a wooden spoon until the mixture just comes together to form a soft dough. For the strawberry biscuits, beat strawberry essence into creamed butter. Fold flour mixture in with a wooden spoon until the mixture just comes together to form a soft dough. For the vanilla biscuits, beat 1/2 tsp vanilla essence into creamed butter. Fold flour mixture in with a wooden spoon until the mixture just comes together to form a soft dough.
meltingmoments-12
Trying to handle the dough as little as possible, form level 1/2 tablespoons of mixture into balls, then place 5cm apart on baking paper-lined oven trays, flatten slightly to 3.5cm rounds, then, using a floured fork, press tines gently into dough rounds, to create grooves. Bake for 12 minutes or until lightly coloured. Stand biscuits on trays for 5 minutes, before transferring to wire racks to cool completely.
meltingmoments-13
For the three different icings, beat sugar and butter until light and fluffy, and split into three equal portions. Beat melted chocolate into one portion, vanilla extract into another portion and strawberry puree/jam into the third.
meltingmoments-14
Sandwich biscuits together with 2 tsp of icing, so that each biscuit has chocolate, strawberry and vanilla flavours; 1 chocolate + 1 strawberry biscuit with vanilla icing, strawberry and vanilla biscuits with chocolate icing and chocolate and vanilla biscuits with strawberry icing.
meltingmoments-6
Print Friendly and PDF