Christmas is here! It's just hours away from us in Sydney, and I can't believe how quickly it has crept up on me. I'm very pleased with the amount of Christmas baking I've managed to squeeze in this year, with the
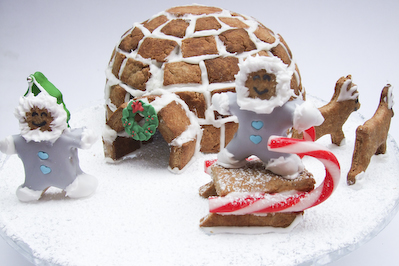
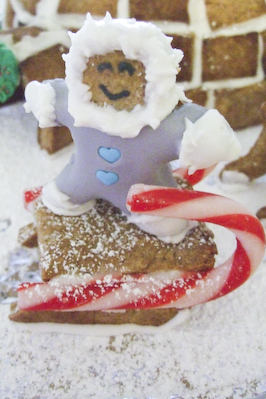
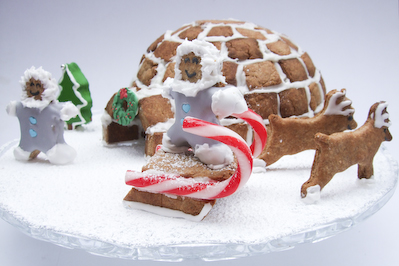
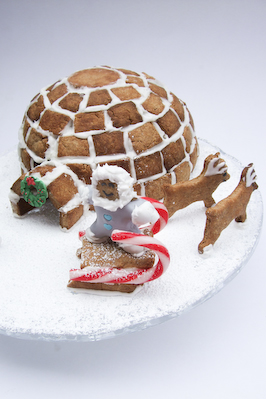
mini gingerbread houses,
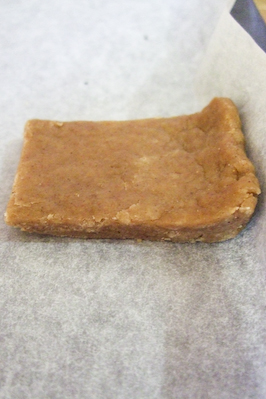
fruit mince slice,
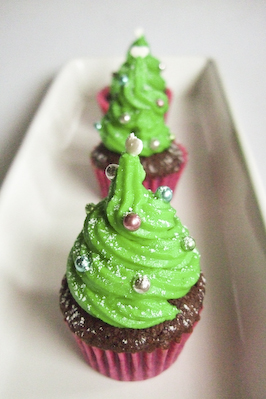
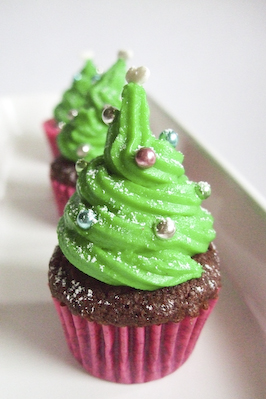
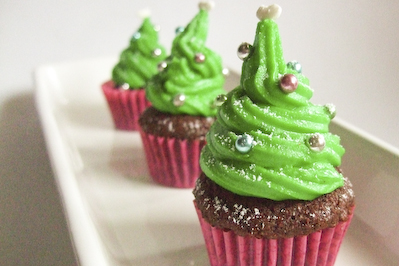
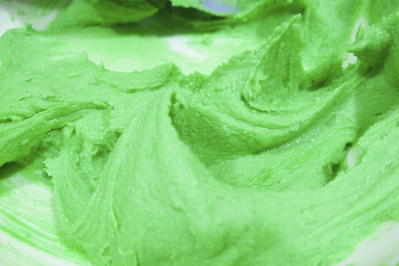
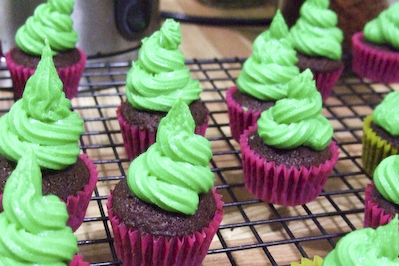
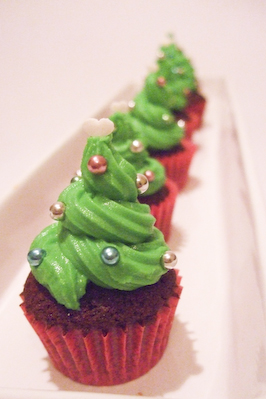
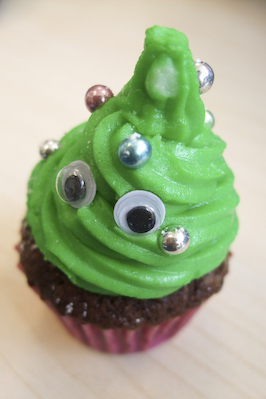
Christmas tree cupcakes and my
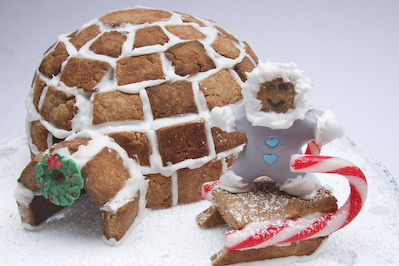
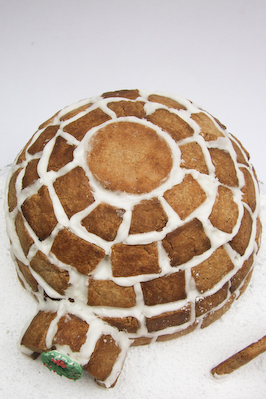
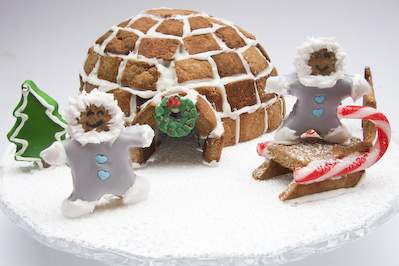
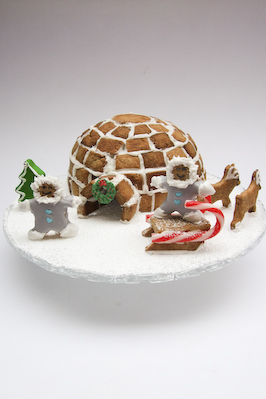
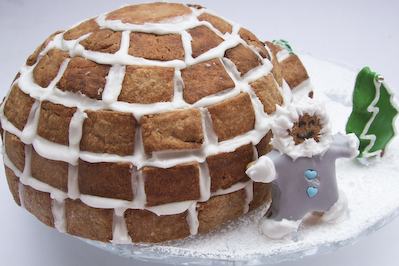
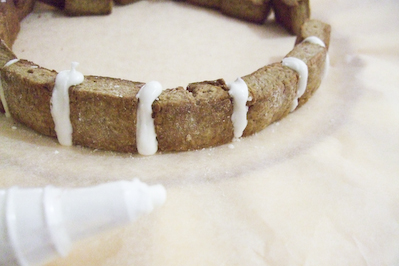
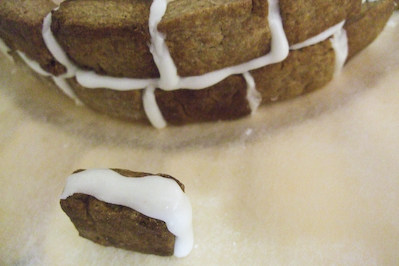
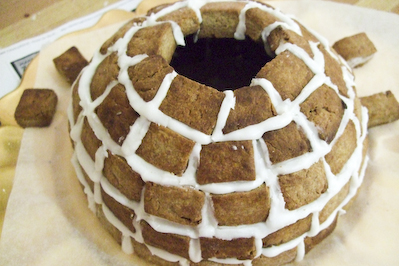
gingerbread igloo. It feels weird to be finally at the end of my Christmas-themed baking, and it will be hard to snap out of decorating everything in red, white and green!
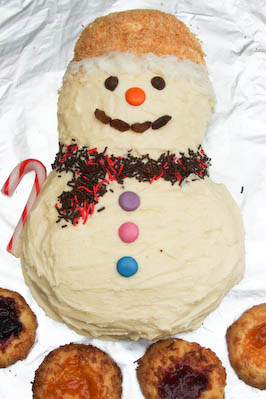
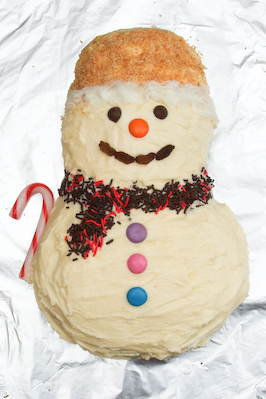
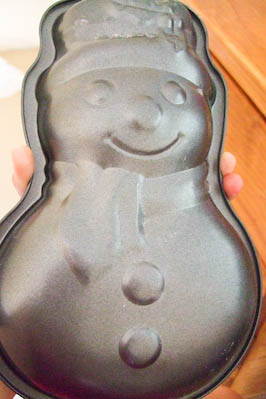
So, for my final Christmas baking post of the year, I'm sharing the two recipes that I baked up just in time for Christmas. I don't like doing things at the last minute, so of course the obvious choice for a dessert would be cakes and cookies. Citrus and coconut cakes, shaped like snow men thanks to a cute little cake tin I picked up with my Mum. The cake is super easy and is coated in the most luxurious salted buttercream, a genius idea for a buttercream that the most awesome Karen from
Citrus and Candy was kind enough to share with me. She made this salted buttercream with a rich butter cake for the
Sydney bloggers' Xmas party, and as soon as I tasted that sexy, sexy buttercream, I knew I had to try it for myself.
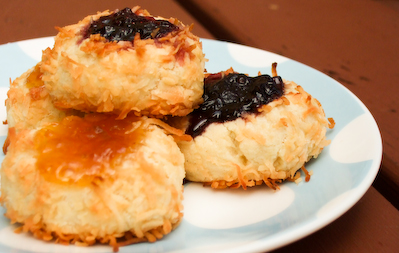
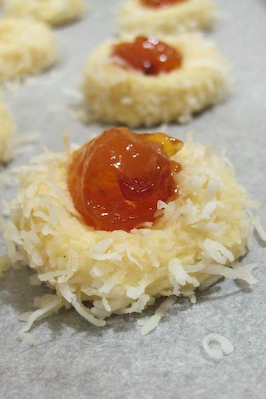
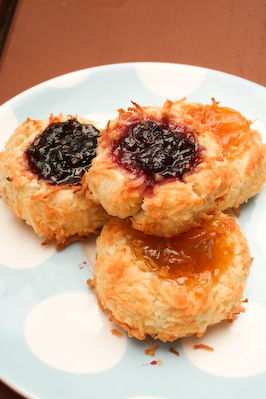
And for the cookies, a recipe from the Barefoot Contessa for coconut thumbprint cookies. I hadn't really watched her show much, but my Mum LOVES her and when I saw these cookies on her show I thought they were just perfect for Christmas day. They look like cute little jam centred snow balls, with a melt-in-your-mouth shortbread dough and lovely smelling toasted coconut. My mum practically crowed with delight when she heard I was making these cookies.
Citrus Coconut Butter Cake
(adapted from Lemon Coconut Cake from the Essential Baking Cookbook)1 1/2 cups (185g) self raising flour
1/2 cup (45g) desiccated coconut
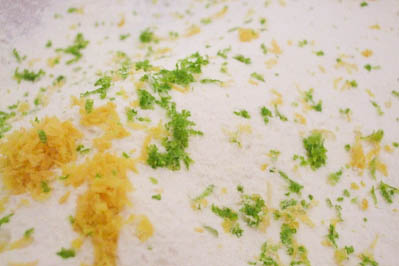
Zest of 2 lemons
Zest of 1 lime
1 cup caster sugar
125g butter, melted
2 large eggs
1 cup (250ml) milk
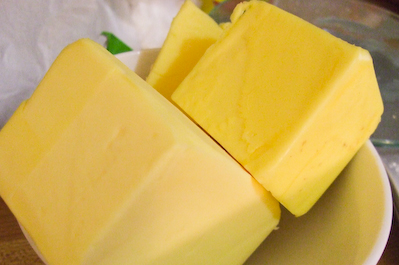
Citrus & Candy's Salted Buttercream250g salted butter (I used Girgar)
400-500g icing sugar, sifted
table salt to taste
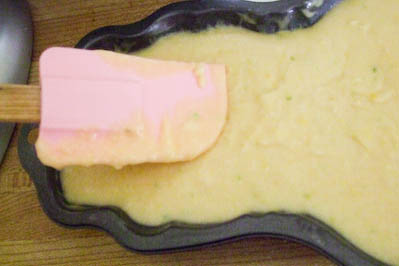
Preheat oven to 180 degrees C. Lightly grease a deep 20 cm round cake tin and line with baking paper(I split the batter in two and filled two greased and dusted with flour snow man shaped cake tins).
Sift the flour into a large bowl and add the coconut, zest, sugar, butter, eggs and milk. Mix well with a wooden spoon until smooth. Pour into the tin(s) and smooth the surface.
Bake for 40 minutes, or until a skewer comes out clean when inserted in the centre of the cake. Leave the cake in the tin for 5 minutes before turning onto a wire rack to cool completely
Beat butter until light and fluffy with an electric beater. Gradually add icing sugar, beating to combine until the icing reaches your desired texture (stiff enough not to run but smooth enough to spread easily). Add extra salt if needed and beat to combine, I added about 1/4 tsp extra.
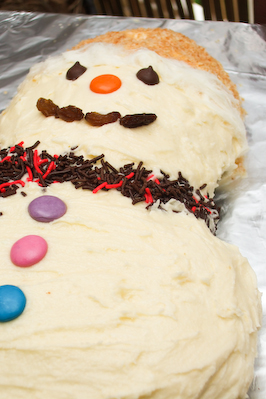
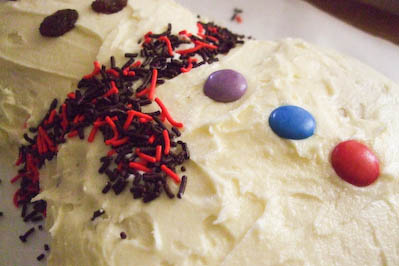
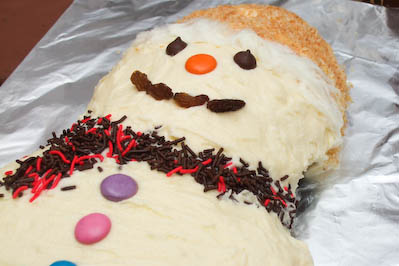
To make the snow man cakes: spread icing over the cake evenly, smoothing with a spatula. Decorate with toasted coconut, sprinkles and candy.
For the decorations I used chocolate and strawberry sprinkles for the scarf, smarties for the buttons and an orange smartie for his nose :)
Sultanas for his mouth, choc chips for his eyes and I toasted some desiccated coconut under the grill for 5 minutes for his beanie, I then finished it off with a fluffy hem using vanilla pashmak (persian fairy floss). I loved how completely straightforward the baking and decorating for this cake was, it meant that I could do it with as little stress as possible, which was such a relief on a stinking hot and rushed day. The cake came out of the oven golden brown with a fluffy interior, with the rich aroma of coconut and citrus zest. I actually made two snowmen, and one of them cracked in half because I picked it up before it had cooled! Nothing that couldn't be fixed with a bit of buttercream though. The buttercream was to die for, thank you so much Karen!
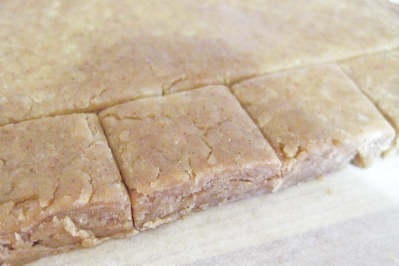
Right, on to the thumbprint cookies. Though I think in Australia they'd probably be known more as jam drop cookies. With the coconut it made them seem like a hybrid of
jam drop biscuits and
coconut macaroons. The thing that makes these biscuits SO good is the
obscene amount of butter in them. I'm not going to beat around the bush, there is nearly half a kilo of butter in one batch of these biscuits. But remember the recipes makes quite a lot of biscuits, and then do what I do and lock this information into the carefully guarded space in your brain which I like to call the butter vault, where I happily forget the amount of butter that I put into all the desserts I make.
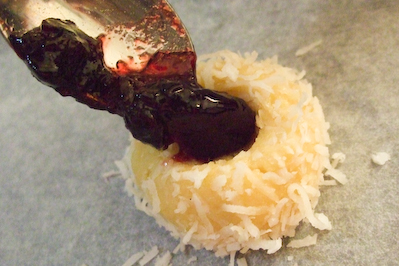
But all that butter really does make a difference. These biscuits are amazing, they literally melt in your mouth. The combination of the fluffy, buttery shortbread with toasted coconut and jam is just the perfect thing to go with a warm Christmassy drink. I jazzed them up a little with some fancy jams, cherry and blueberry, as well as the usual apricot. I love my jam.
Jam & Coconut Thumbprint Cookies(recipe by Ina Garten, Barefoot Contessa Family Style)455g unsalted butter, softened
1 cup sugar
1 tsp pure vanilla extract
3 1/2 cups plain flour
1/4 tsp salt
1 large egg, beated with 1 tbsp of water for egg wash
200g shredded coconut
Jam of your choice, I used cherry, blueberry and apricot
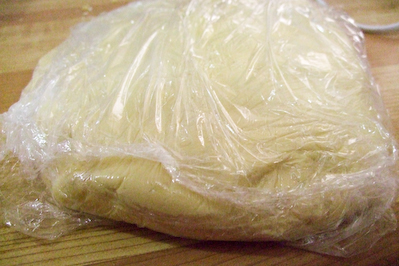
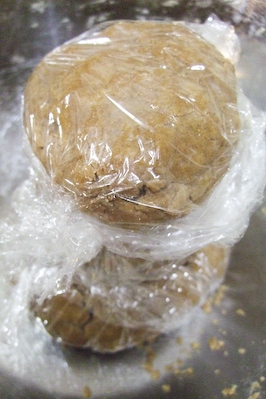
Preheat oven to 180 degrees C. Cream butter and sugar together with an electric mixer until are just combined and then add the vanilla and beat to combine. Sift flour and salt in a separate bowl and then gradually add to the butter and sugar, with the mixer on low speed. Mix until the dough starts to come together. Dump mixture on a floured surface and roll together into a flat disk. Wrap in clingfilm and refrigerate for 30 mins.
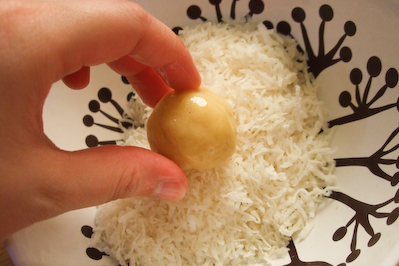
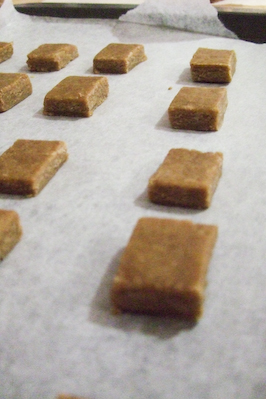
Roll the dough into 1 1/4 inch balls (I made mine a tiny bit smaller, maybe around an inch), dip each ball into egg wash and then roll in coconut.
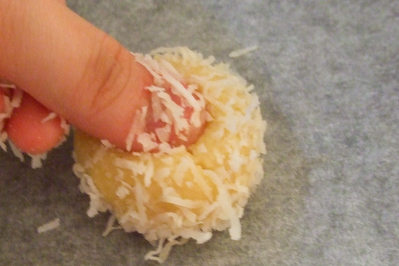
Place on a lined baking tray and press a light indentation into the top of each with your finger. Drop a quarter teaspoon of jam into each indentation.
Bake for 20-25 minutes, until the coconut turns golden brown. Cool and serve.
The two recipes on these post definitely highlight the reason why I love cakes and cookies so much, they are so devilishly rewarding for minimal effort. These biscuits are the perfect post-Christmas lunch nibble, and I hope that
A's family will love them with their cups of tea. I just won't mention how much butter is in them...
This might not be my last post for the year, but just in case, I want to wish everyone a very Merry Christmas and a Happy New Year! Starting my blog this year has been a truly amazing, rewarding experience, and to every single person who even bothered to spend a second on this little blog, thank you so so much, you're the best. Bring on 2010!
xx Steph :)

 I have had a lot of bad luck when it comes to New Year's Eve. The one I remember the most is getting food poisoning from some dodgy chicken rice while up at Genting Highlands (a casino/theme park in Malaysia) when I was a little tween, and ended up spending the entire night and some of the morning throwing up. And then there's all the other years where epic plans have been made, only to fall apart at the last second. So in recent years I've kept it quiet, planned very little and kept my expectations low. I also don't do New Year's resolutions, they never work out well for me.
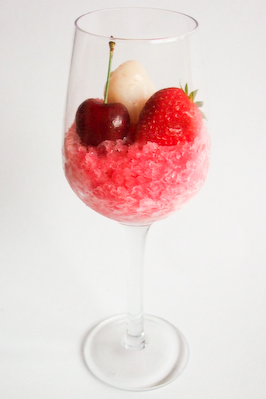
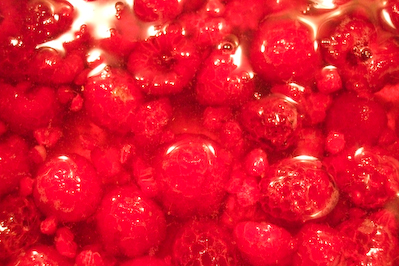
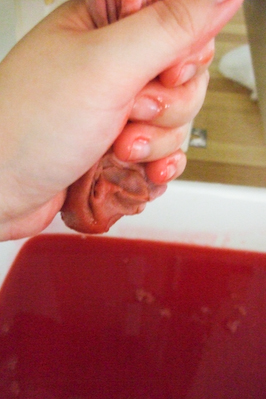
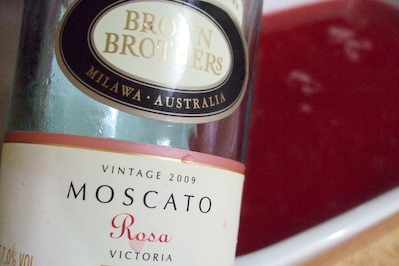
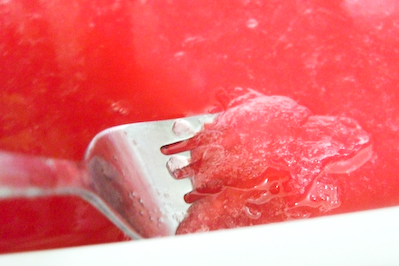
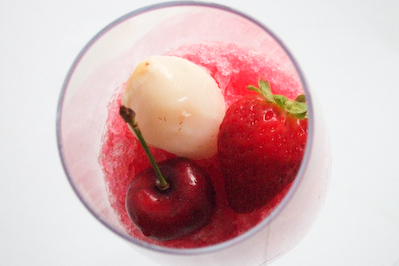
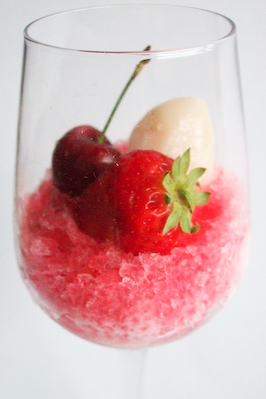
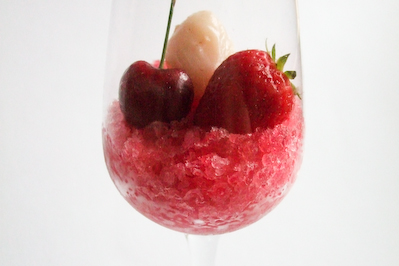
 While I was trying to think of a nice dessert to make for A & I, I realised I didn't want anything fancy, or complicated, or anything that needed assembling or heating at the last minute. This is the perfect thing for a New Year's Eve party, it's so easy and only has three ingredients, but has a fabulous colour and flavour, and a little bit of booze. It's a nice refreshing way to wash down any greasy party food you might feel like eating first. Serve it in some cocktail glasses, or shot glasses if you just want to use it as a palate cleanser, or in big plastic cups with fat plastic straws if you want to serve it as a slushie! Yep, granita is just a fancy word for a slushie ;) (Unfortunately I only had my cheapo wine glasses in my apartment for the photos!)