Tuesday, March 25, 2014

Raspberry Swirl Cupcakes for raspberri cupcakes' 5th Birthday!

Raspberry Swirl Cupcakes
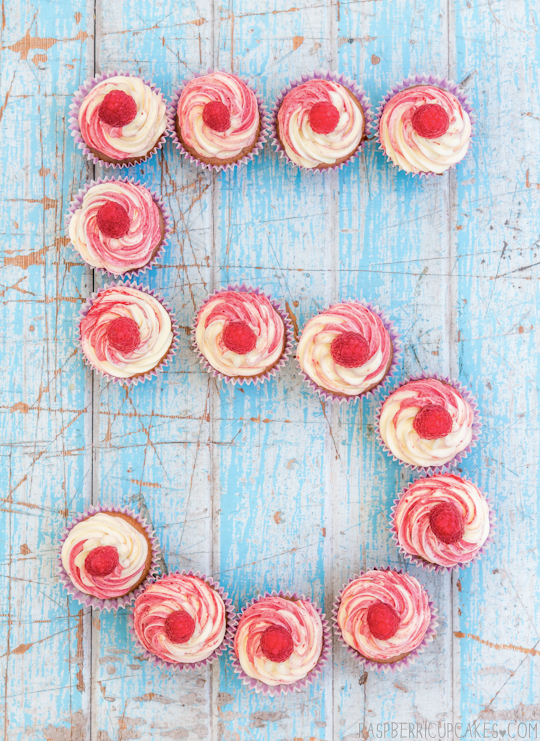
Today raspberri cupcakes is 5 years old! Can you believe it? I can't. I'm pretty sure in blogging years that is a decently long time. I couldn't let an occasion like this go by without any acknowledgement, even though things are crazy in my part of the world at the moment. So of course, I made raspberry cupcakes for raspberri cupcakes. Swirly ones.
Raspberry Swirl Cupcakes
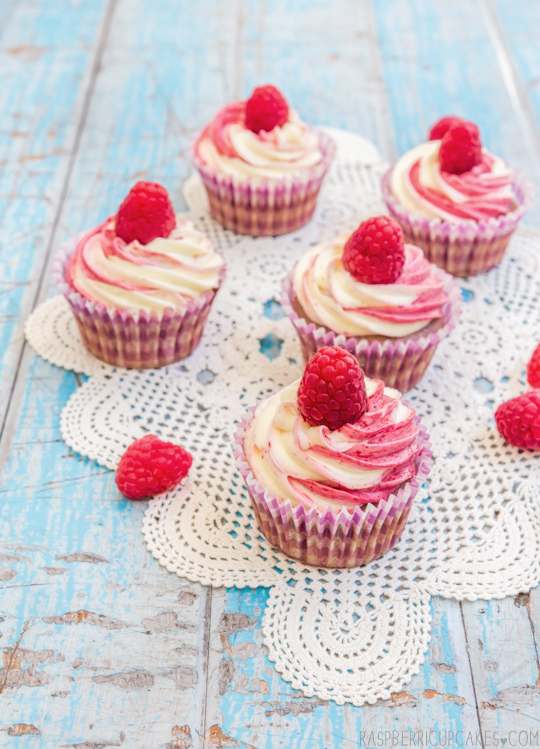
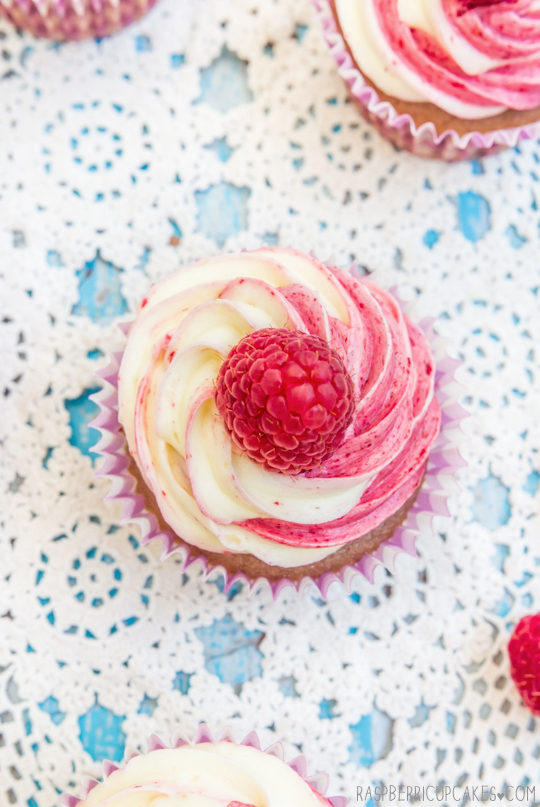
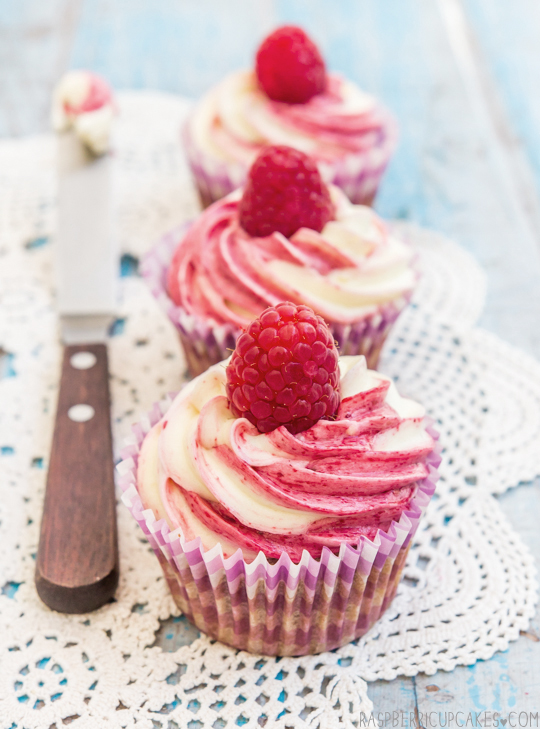
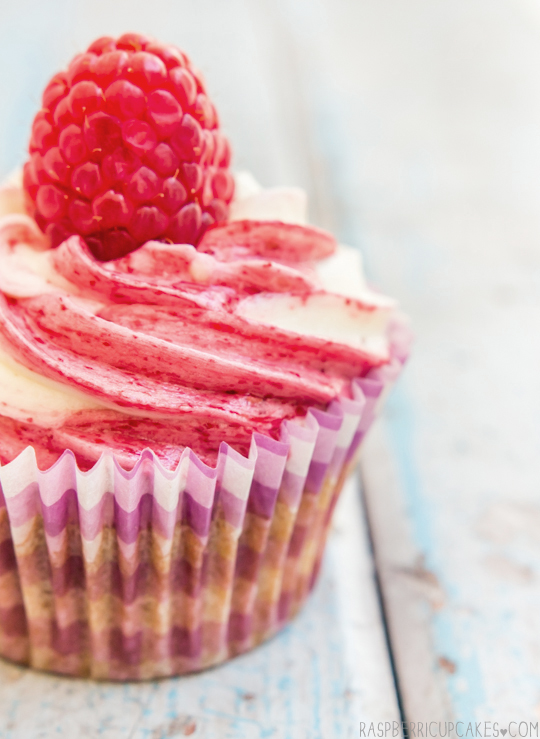
Aren't they pretty? I mixed some raspberry compote into the white chocolate icing, and also some raspberry puree into the white cupcake batter. Strangely enough the batter turned a sort of purple shade, which matched the paper liners. I thought it was appropriate since purple is my favourite.
Raspberry Swirl Cupcakes
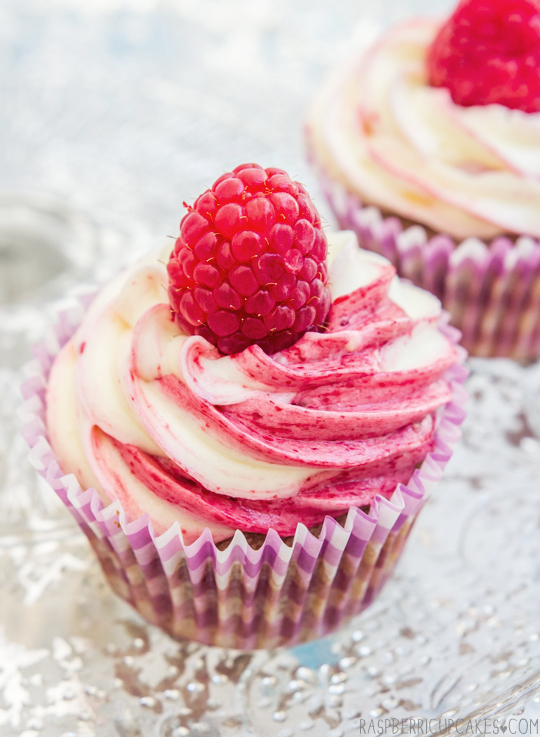
The cakes on their own didn't taste as strong as I had hoped, so you might want to try mixing in whole raspberries if you want a bigger raspberry flavour in the cake. The icing was also a little salty for my liking, so I've switched it in the recipe below to use unsalted butter. But I loooove how the swirlyness turned out. So purdy. It helps that I invested in some nice big new piping bags so it was easy to fill it half with white and half with pink icing to achieve the perfect swirl.
Raspberry Swirl Cupcakes
It's so weird to think about how far this blog has come from its humble beginnings. I never would have imagined how many amazing experiences and wonderful friends I would get from starting this little website and I feel super lucky because of that. This blog has become part of my life and hopefully will continue to be part of my future. To those of you who read my blog, try my recipes, comment here or on facebook or instagram or write me messages or emails, thank you so much. You can't imagine how much it means to me. There have been so many times where I've had fleeting thoughts about whether it was worth the effort to keep going with the blog, and then I've gotten a sweet email or comment from a reader and it just reaffirms that it is always worth it.
Raspberry Swirl Cupcakes
So cupcakes for everyone! I wish I could send one out to each and every one of you but I can't, raspberries are 7 bucks a punnet and I would go broke. But I wish I could! Anyway I hope that I can keep doing what I'm doing, because it's been a blast. Happy 5th Birthday to my little blog!
Raspberry Swirl Cupcakes
Aaaaaannd GIF!
Raspberry Swirl Cupcakes
(makes about 20 cupcakes, cake adapted from i am baker's Perfect White Cake, icing from Cookies and Cups)
For the icing:
150g (about 1 punnet/5.5oz) raspberries (frozen or fresh), pureed and strained (about 1/2 cup strained puree)
Finely grated rind of 1/2 lemon
1/4 cup sugar (50g)
340g (1.5 cups) butter (preferably unsalted, I used salted and found it too salty in this case)
255g (9oz/1.5 cups of chips) good quality white chocolate (min 30% cocoa solids, do NOT use baking chocolate), finely chopped
Optional: Fresh raspberries for decoration
  1. Prepare the icing ahead of time as it will need to be chilled before whipping.  Place butter and white chocolate in a large saucepan and melt over low heat, stirring regularly until smooth (the solids may separate but this is okay). 
  2. Remove from heat and cool for 10 minutes, then chill in the fridge until solid, about 3 hours. If you are impatient like me you can stick it in the freezer for about half an hour.
  3. Place raspberry puree, lemon rind and sugar in a small saucepan on medium/low heat and simmer until mixture has thickened and darkened slightly, about 10-15 minutes. 
  4. Remove from heat and cool for 10 minutes, then chill in the fridge for at least half an hour. (You can skip this step and replace this with 1/3 cup raspberry jam to save time) 
  5. Before you are ready to decorate your cupcakes, remove white chocolate mixture from fridge at least 30 mins ahead of time to allow it to soften slightly.
  6. Place white chocolate mixture in a large mixing bowl and beat on high with an electric mixer until very light and fluffy.
  7. Place 1/3 of the mixture in a separate bowl and fold in raspberry mixture or jam until combined.
  8. Prepare a large piping bag with a star tip, fill one side along the length of the bag with the raspberry icing and the other side with plain white icing and pipe over cupcakes in a spiral motion. (About 1 part pink to 2 parts white icing will work best)
  9. Optional: Top cupcake with fresh raspberry for decoration.
Raspberry Swirl Cupcakes
For the cupcakes:
150g (about 1 punnet/5.5oz) raspberries (frozen or fresh), pureed and strained (about 1/2 cup strained puree) 
295g (about 2 cups + 1 tbsp) plain flour
4 tbsp cornflour (cornstarch)
2/3 cup milk at room temperature
6 large egg whites at room temperature
2 tsp pure vanilla extract
350g (1 3/4 cups) granulated sugar (I used caster)
4 tsp baking powder
1 tsp salt
170g (1 1/2 sticks butter), softened but still cool (I used salted, add 1 tsp salt if using unsalted)
Optional: 50g raspberries, chopped
  1. Preheat the oven to 180°C (350°F). Line two cupcake trays with cupcake papers.
  2. Triple sift flour and cornflour together in a medium bowl.
  3. Make sure milk and eggs are room temperature.
  4. Pour raspberry puree, milk, egg whites, and vanilla into a medium bowl and mix with a fork until blended.
  5. Mix flour mixture, sugar, baking powder, and salt in bowl of electric mixer at slow speed. Add butter, cut into cubes and continue beating on low for about 1-2 minutes.
  6. Add all but 1/2 cup of milk mixture to flour mixture and beat at medium speed for 1 & 1/2 minutes. Add remaining 1/2 cup of milk mixture and beat for about 1 minute. Optional: fold in extra chopped raspberries at this point.
  7. Fill cupcake papers 3/4 full with batter (an ice cream scoop helps with this).
  8. Bake until toothpick/skewer inserted in the center comes out clean, about 20 minutes. Cool in tin for 5 minutes, then carefully remove from tin and cool completely on a wire rack.
  9. Pipe icing mixture above, store iced cupcakes in fridge, removing 15 minutes before serving to allow icing to soften slightly. Icing will melt if left at room temperature for too long.
Raspberry Swirl Cupcakes

Print Friendly and PDF

Monday, March 17, 2014

Irish Cream Cheesecake

Irish Cream Cheesecake
Happy St. Patrick's Day! I made a dessert at the last minute for today, so apologies that this recipe is probably going up a little too late for anyone else to actually make this year. Unless you're a big fan of Baileys and you just want to make it any time of the year. I'm not actually too keen on the stuff, but I thought it would be nice to make this for my workmates who are celebrating today. A cheesecake for Irish Cream lovers, it has a strong kick to it that might not be to everyone's tastes.
Irish Cream Cheesecake
Sorry for the radio silence over the last couple of weeks, it's been a hard slog. Unfortunately things are going to be pretty nuts for the next few months, so weekly posts are becoming harder and harder. It's starting to drive me a little batty, I love baking up a storm and making a big mess in the kitchen and I start to get antsy if I haven't baked in a while.
Irish Cream Cheesecake
So this weekend I made this cheesecake! It's the chilled kind, so it was really quick to make. Well it would have been really quick to make if I had made it correctly the first time. I swear everything I've made in the last month I've had to redo at least once because of a dumb mistake I've made. It's not a good precedent, especially when I'm making my first wedding cake at the end of this month. Eek! I also got a little tipsy from tasting the mixture a lot, it definitely has a kick to it. I reduced the amount of Bailey's on my second attempt, and you could reduce it even more if you want a milder flavour.
Irish Cream Cheesecake
I went the an Oreo crust this time. I do love an Oreo crust. Any old biscuit crust would work great with this cheesecake, but I think the dark crumbs look nice with the fluffy, pale cheesecake mixture in.
Irish Cream Cheesecake
A word of warning; do NOT put green M&Ms on this cheesecake and then put it in the fridge overnight. It will turn into a lumpy green puddle of mess. It's not pretty. If you do want to decorate it as its seen in the photos, pop the M&Ms on at the last minute. Trust me.
Irish Cream Cheesecake
Baileys (Irish Cream) Cheesecake
(adapted from my Milo Cheesecake recipe)
For the crust:
1 packet (200g) Oreos (or other biscuit of your choice), including centres
50g (3.5 tbsp) butter, melted
  1. Grease and line the base of an 18cm (7inch) or 20cm (8 inch) springform cake tin with baking paper (I used 18, you may want to use an extra half packet of Oreos if using 20cm to ensure a good crust thickness). 
  2. Place biscuits in a food processor and blend until crushed to small crumbs, then add melted butter and blend until just combined.
  3. Press mixture in an even layer on the base of the prepared tin.

For the filling:
300ml (about 1 1/4 cups) thickened (heavy) cream
340g (12oz) cream cheese, softened
1/2 cup (100g) sugar (I used caster/superfine)
150ml Baileys or any other Irish Cream
3 & 1/2 tsp powdered gelatine
Optional: Green M&Ms to decorate right before serving (I needed two large bags to get enough green ones)
  1. Whip cream in a mixing bowl until it reaches soft peaks (take care not to overmix). Chill until ready to use.
  2. Place cream cheese in a separate large mixing bowl and beat with an electric mixer on high until smooth. Add sugar and beat until combined. 
  3. Place gelatine in a small separate bowl with 3 tbsp cold water to soften it.
  4. Place Baileys in a small saucepan on medium heat, add softened gelatin and whisk to combine. Continue whisking over heat until dissolved. Ensure there are no lumps.
  5. Add warm gelatine mixture to cream cheese and beat until smooth. 
  6. Fold in whipped cream until smooth and then pour mixture over crumb layer. 
  7. Chill for at least 3 hours or overnight. 
  8. To serve, run a thin-bladed knife under hot water and then carefully run around the edge of the pan to loosen it. Carefully remove from pan and serve, or store in an airtight container in the fridge until ready to serve. 
  9. Optional: When ready to serve, decorate with green M&Ms (don't do this too early as M&Ms colour will bleed into cheesecake after a while)
Irish Cream Cheesecake
Print Friendly and PDF

Monday, March 3, 2014

Malted Milk Chocolate Brownies with Maltesers

Malted Milk Chocolate Brownies with Maltesers
It was the perfect weekend for baking this weekend (but not so much for photography). It was grey and dreary, it was wet and miserable. No better time to make your whole house smell like delicious, freshly baked brownies. And not just any regular brownie either, a chewy, malted milk chocolate brownie full of Maltesers (malted milk balls) to give it crunch.
Malted Milk Chocolate Brownies with Maltesers
Don't let their dimpled, scraggly appearance put you off. These brownies are the bees knees. The cat's pajamas. I went one step further and did a light sprinkling of Milo (chocolate malt) powder over the top before putting it in the oven, which created an extra chewy, chocolatey crust over the top. It's up to you if you want to do that, or sprinkle crushed Maltesers over the top. It seemed like opinions were divided when I floated the idea with those of you on Facebook and Instagram, so I'll leave it up to you!
Malted Milk Chocolate Brownies with Maltesers
Now you might think these seem over the top and super sugary, but keep in mind that I seriously reduced the amount of sugar from the original brownie recipe so it's really not too sweet at all. The original recipe is David Lebovitz's and is so amazing, it's now my go-to brownie recipe. (Link is below if you want it.)
Malted Milk Chocolate Brownies with Maltesers
I couldn't resist trying it with a scoop of vanilla ice cream. It was pretty awesome.
Malted Milk Chocolate Brownies with Maltesers
As with any brownie, the important thing is to ensure you don't overbake them. I usually take mine out of the oven quite early because I know that they'll keep cooking a little longer as they cool inside the pan. The hardest part is always the wait as they cool. They smell SO good and all you want to do is have a taste but you must resist! They will slice much better once they are cooled. Now go make them!
sbs
Edited to add: I'm very lucky to be featured in SBS Feast Magazine this month! They were lovely enough to include five of my recipes! Make sure to grab a copy of the April issue (pictured above), which is on stands today.
Malted Milk Chocolate Brownies with Maltesers
Malted Milk Brownies with Maltesers
85g (3oz / 6 tbsp) butter, cut into pieces (I used salted, add a pinch of salt if using unsalted)
225g (8oz) good quality milk chocolate, chopped
1/4 cup (50g) sugar
1/2 cup malted milk powder (or Horlicks/Milo/Ovaltine powder)
2 large eggs, at room temperature
1/4 cup (35 g) all-purpose flour 
1 cup Maltesers/malted milk balls (about 100g)
Optional: extra Milo powder or malted milk powder to sprinkle on top, or crushed Maltesers
  1. Preheat the oven to 180°C (350°F), I'd recommend lowering it to 170°C if using fan-forced. 
  2. Grease well and line the bottom and two long sides of a 20x30cm slice/brownie tin  or a 20cm square cake tin. Let the baking paper hang over the edges of two sides, it will make it easier to lift brownie out later. Grease the paper lightly as well.
  3. In a medium saucepan, melt the butter, then add the chocolate and stir over low heat until the chocolate is melted and smooth. Stir in the sugar and malted milk powder until combined (it may go grainy at this point, but this is okay). 
  4. Remove from the heat and stir in the eggs one at a time until smooth. 
  5. Add the flour and stir energetically for just a minute, until the batter loses its graininess, becomes smooth and glossy, and pulls away a bit from the sides of the saucepan. 
  6. Fold in Maltesers and scrape the mixture into the prepared pan and sprinkle a small amount of Milo powder over the top.
  7. Bake until the center feels almost set, about 27-30 minutes. Don’t overbake. 
  8. Let cool completely in the pan before lifting out the brownies using the baking paper overhang. Slice into 12 or 16 equal pieces. 
  9. Store in in airtight container, can be stored for 4 days or frozen for up to a month. 
Malted Milk Chocolate Brownies with Maltesers
Print Friendly and PDF