Saturday, February 27, 2010

Apple Pie Tiramisu, Daring Bakers Feb 2010

appletira
The February 2010 Daring Bakers’ challenge was hosted by Aparna of My Diverse Kitchen and Deeba of Passionate About Baking. They chose Tiramisu as the challenge for the month. Their challenge recipe is based on recipes from The Washington Post, Cordon Bleu at Home and Baking Obsession.
appletira-2
I know some of you might be completely mortified by how much I've strayed from the traditional tiramisu here. As soon as I saw what the challenge was going to be this month I thought about making a lovely traditional tiramisu (a dessert which I love), but I could make a regular old tiramisu any day of the year, and this was for Daring Bakers! I had to go a little crazy.
appletira-5
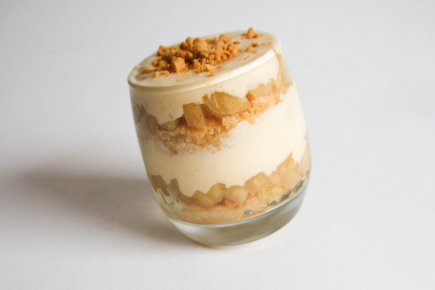
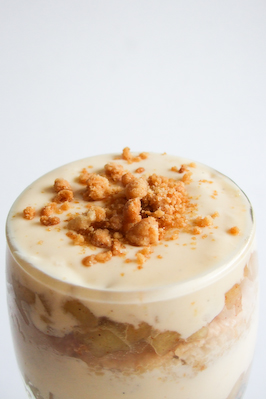
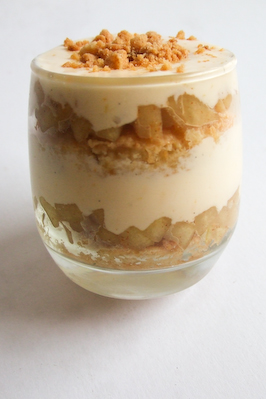
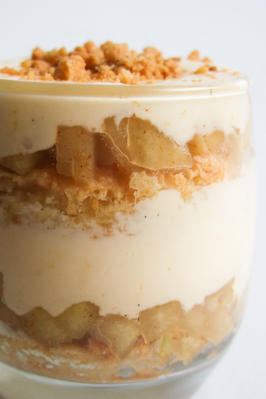
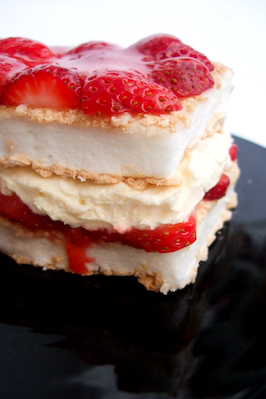
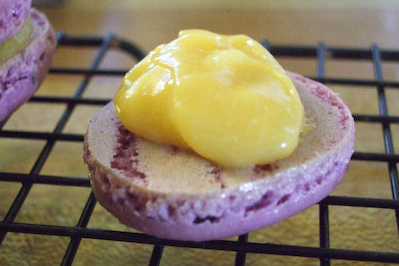
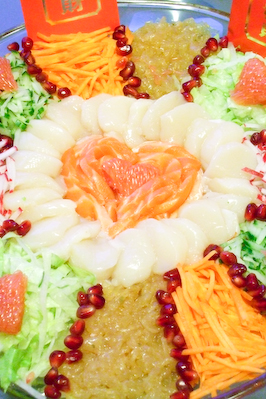
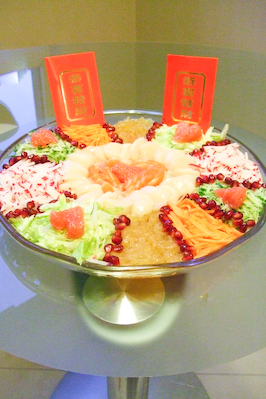
I tossed up several ideas, but time and money constraints reined me in. I thought about doing a dark chocolate and raspberry tiramisu with butterscotch schnapps, or a strawberry margarita tiramisu with lime juice and tequila soaked ladyfingers and strawberry mascarpone served in a cocktail glass with a sugar/salt crusted rim. But I was determined to get this dessert prepared for our annual family Chinese New Year's Ever dinner...and this recipe really does require a whole lot of prep. So I kept it simple. But tasty. Apple pie and tiramisu, two favourites, two classics....together in one dessert, by using apples cooked until tender with butter, sugar & cinnamon, and a sprinkling of apple pie crust on top. And all of us were really surprised by how tasty it was in the end.
appletira-27
I usually hate recipes that require this many separate elements and so much prep and chilling time. I like things you can bung in the oven once and be done with. It seemed like a huge shame to make this beautiful zabaglione and then mix it up with all these other creamy things so it was lost amongst it all. But then I made it, and it was soooooo good. For those of you who are tiramisu purists, I don't blame you. But try not to think of this adaptation as ruining a classic, and more that it is taking inspiration and creating something fun and new.
appletira-12
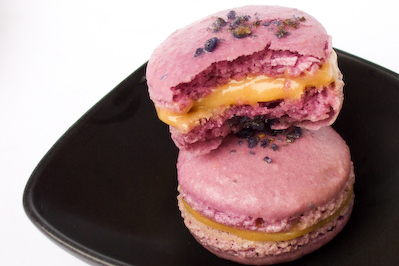
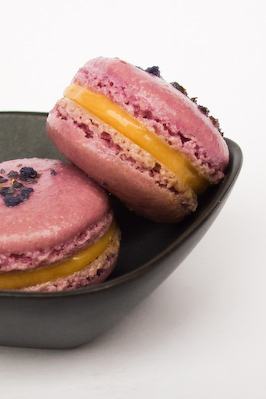
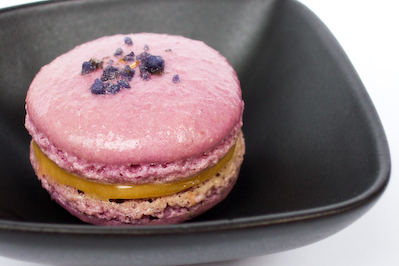
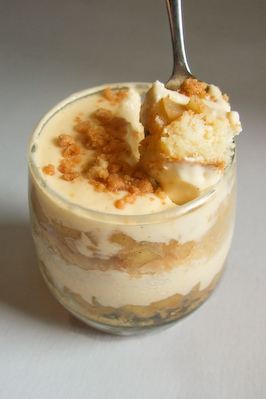
I really enjoyed the flavours and textures, with the soft, sweet ladyfingers that had the lovely scent of brandy, the beautifully smooth and creamy mixture, cinnamon flavoured apple pie mixture and the crunch of the crumble. I might make this again, but hugely cut down the prep time by only using bought mascarpone and cream for the mixture and buying lady finger biscuits.
appletira-19
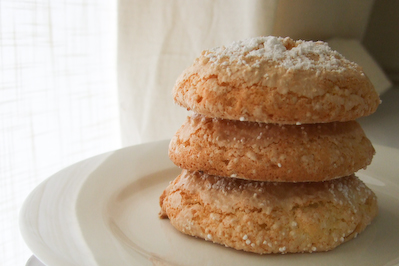
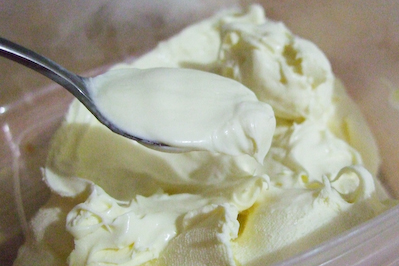
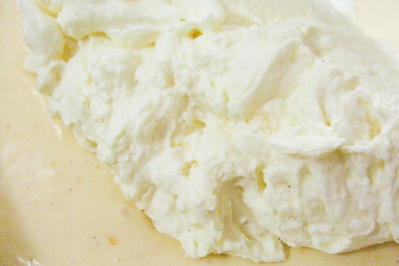
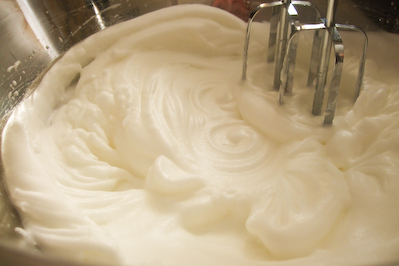
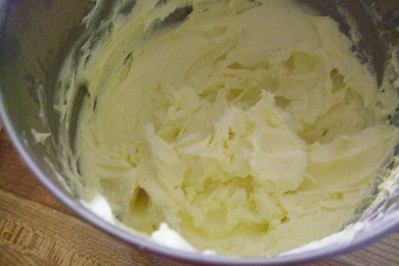
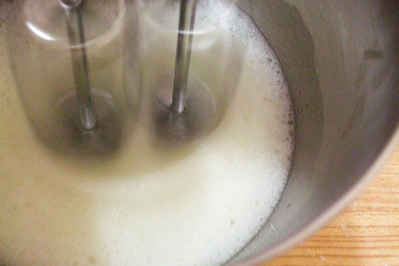
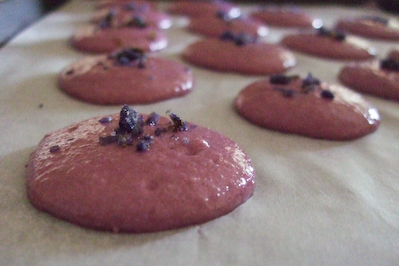
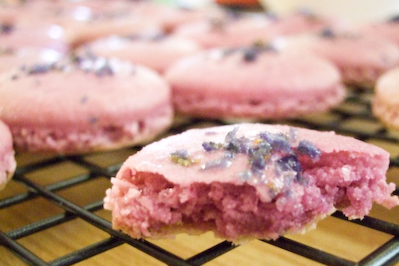
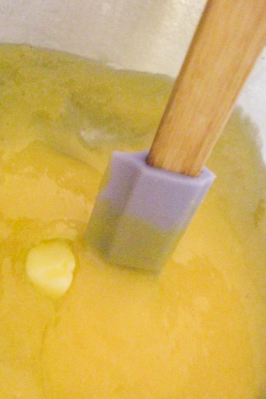
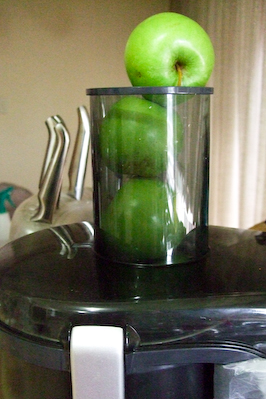
The mascarpone was easy to make, I've made ricotta before but the mascarpone was a little different. It only thickens when it curdles, so it's not completely obvious that anything has happened after you add the lemon juice. But after chilling it overnight it was lovely, creamy and smooth. The sponge fingers turned out exactly like I imagined, soft and fluffy with a crisp outer layer. The apple pie filling and cinnamon crumble are dead easy to make, and I also used this as an opportunity to finally use our fancy fruit juicer that can take whole apples!
appletira-21
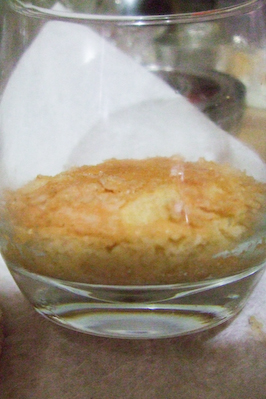
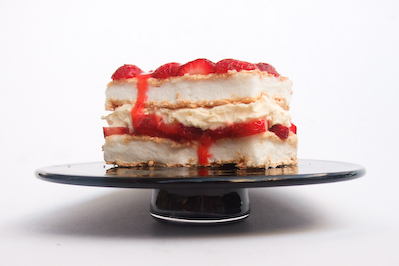
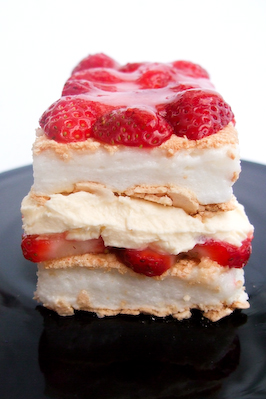
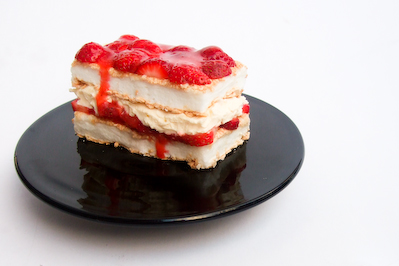
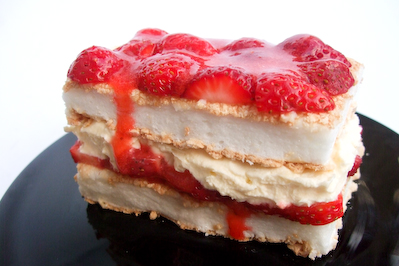
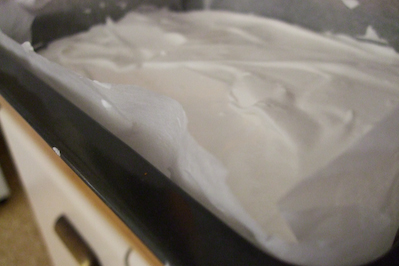
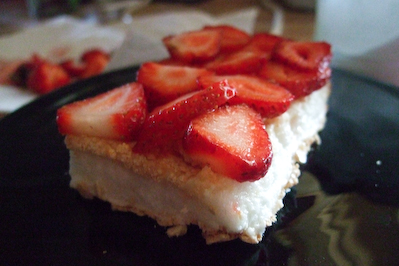
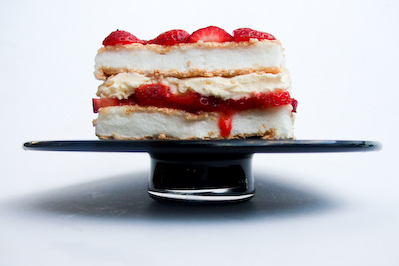
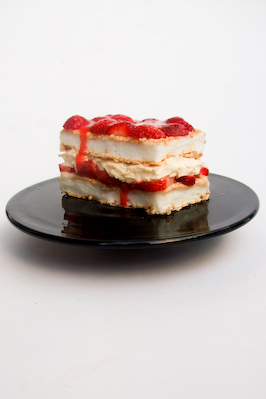
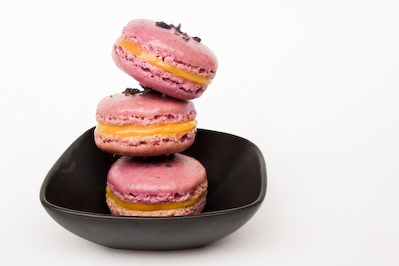
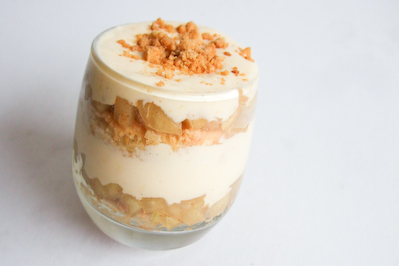
I made two versions of this dessert, as individual sized portions in these amazing glasses. A's Mum brought them back as a present from their trip to Thailand, they have pointy bottoms so they roll around like spinning tops, which looks cool but turned out to be a pain to keep still for photos, haha! I also made a larger one with the leftover ingredients in a loaf tin that was line with cling film so that I could lift it out after freezing it and slice up. It froze beautifully and you could clearly see all the neat layers of sponge, apples and cream. It even tasted great and was really smooth while it was still frozen, like a semifreddo. But I still preferred the individual portions the best, it was the easiest to eat and the prettiest to look at. And the perfect, light way to top off a very heavy meal.
appletira-3
Apple Pie Tiramisu
To assemble the Apple Pie Tiramisu:
Zabaglione
Vanilla Pastry Cream
Whipped Cream
2 cups/470ml fresh apple juice
1/2 cup brandy
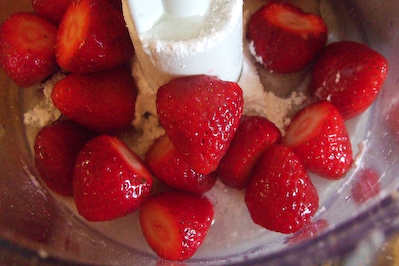
750g granny smith apples, peeled, cored and diced
1/2 cup caster sugar
30g butter
1 tsp ground cinnamon
1/3 cup/75gms mascarpone cheese (Vera's recipe)
36 savoiardi/ ladyfinger biscuits (you may use less) (Check Aparna or Deeba's challenge posts for the recipe, when they get posted)

For the crumble:
85g self raising
60g sugar
30 butter
1 tbsp water for mixing
ground cinnamon

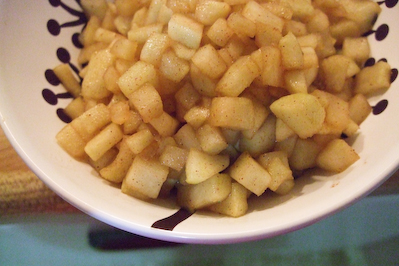
Placed diced apples and butter in a medium saucepan and add sugar and cinnamon. Stirring regularly, cook apples on medium heat until tender and golden. Remove from heat and cool completely. (Can be done the night before and kept in the fridge)
appletira-17
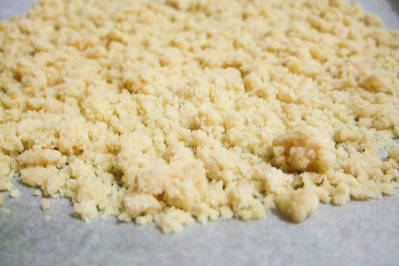
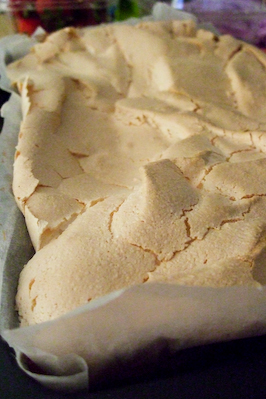
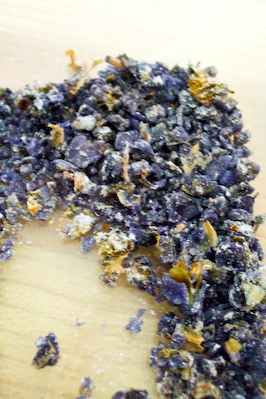
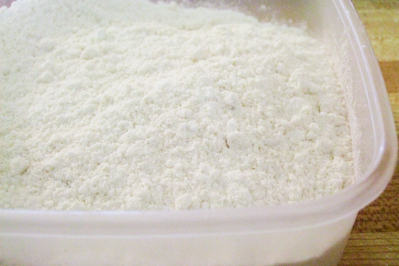
Preheat oven to 180 degrees C. Place butter, flour and sugar in a bowl and rub the mixture between your fingertips to combine them. Lift the mixture up high with your hands and let it fall so it traps a bit of air. Add about 1/2 tsp of ground cinnamon, then gradually add a 1/2 tablespoon of water at a time, while still combining mixture with your fingertips until it starts to clump together in nice crumbly pieces. Spread in an even layer on a lined baking tray and bake until golden, fluffing regularly with a fork. If the bits of crumble are stuck together after removing from the oven, allow to cool completely and then break up using your fingers. Can be stored in an air-tight container until ready to serve.
appletira-18
Have ready a rectangular serving dish (about 8" by 8" should do) or one of your choice. I prefer using individual serving glasses.
Mix together the apple juice and brandy in a shallow dish, whisking to mix well. Set aside to cool.
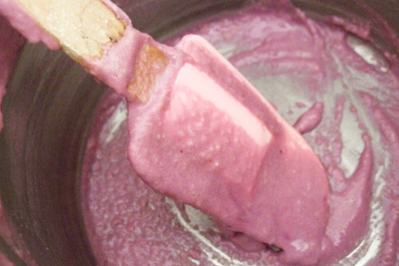
In a large bowl, beat the mascarpone cheese with a spoon to break down the lumps and make it smooth. This will make it easier to fold. Add the prepared and chilled zabaglione and pastry cream, blending until just combined. Gently fold in the whipped cream. Set this cream mixture aside.
appletira-23
Now to start assembling the tiramisu. I first used cookie cutters to give each of my round ladyfingers a neat edge, so that it fit well against the side of my serving glasses. Working quickly, dip 12 of the ladyfingers (or one disc at a time if making individual glasses) in the apple juice mixture, about 1 second per side. They should be moist but not soggy. Immediately transfer each ladyfinger to the platter, placing them side by side in a single row. You may break a lady finger into two, if necessary, to ensure the base of your dish is completely covered.
appletira-24
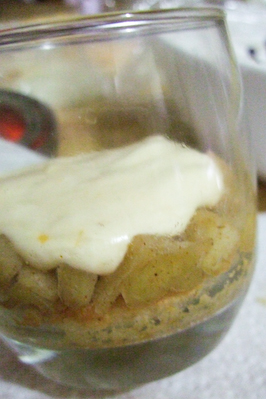
Spoon a single layer of cooked apple mixture on top of the ladyfingers. Cove this with one-third of the cream mixture (about two table spoons for an individual dish) , then use a rubber spatula or spreading knife to cover the top evenly, all the way to the edges. Repeat to create 2 more layers, using 12 ladyfingers and the cream mixture for each layer. (I only had enough to create two layers) Clean any spilled cream mixture; cover carefully with plastic wrap and refrigerate the tiramisu overnight. (I froze my larger tiramisu to make it easier to slice up into portions before defrosting in the refrigerator)
appletira-25
To serve, carefully remove the plastic wrap and sprinkle the tiramisu with cinnamon crumble. Cut into individual portions (or keep in individual glasses) and serve.
appletira-4
Many thanks to Aparna and Deeba for being lovely hosts this month and selecting an awesome challenge recipe!
Print Friendly and PDF

Monday, February 22, 2010

Strawberries & Cream Meringue Cake (aka an Eton Neat)

etonneat
Summer is nearly over. And while I am looking forward to being able to snuggle up in bed on cool nights, to wearing tights and eating warm puddings, I'll still be sad to see the month draw to a close. I'll especially miss all the summery desserts, chilled or packed full of summer berries. One of my favourite summer desserts is an Eton mess. For those who don't know, an Eton mess is a English dessert of strawberries, cream & meringue , traditionally served at Eton college . It's so simple and kind of ugly but it's just happiness in a bowl, that's why I love it. The combination of the sweet, crunchy meringue and the rich cream with a slightly tangy strawberry sauce and fresh strawberries, oh it's so good.
etonneat-2
The dessert in these photos might look familiar to you. I'm fairly certain I was one of many people who spent the last month drooling at the sight of this beautiful peaches and cream meringue cake from Gourmet Traveller. It's just a total celebration of summer, and I wanted to make it really badly. The recipe is very straightforward as well. But then I had that craving for eton mess, and I had two punnets of very ripe strawberries sitting in my fridge that were begging to be eaten. I thought, why not combine the two and see what happens? It would be like an eton mess...but not messy! And so the Eton Neat was born.
etonneat-6
Unfortunately, while concocting this idea in my head I forgot the fact that I am not neat. I am very, very messy. I am a proud slob. That's why the eton mess is so well suited to me. So as I attempted this recipe for the first time, rushing to finish it in the dying minutes of daylight after work, I made a total mess of it. And you can't call it an Eton neat if it's not even neat! I am definitely not up to Gourmet Traveller standards :( So I stuck the meringue back in the oven to harden up a little and made an Eton mess instead. I guess that means it wasn't a total failure, just remember you can make an Eton mess if you screw up your Eton neat, haha! And it still tastes so goood.
etonneat-5
But I rallied, determined to get this dessert to work. Now that I was more comfortable with the recipe, I tried again and this time managed to get it sort of neat. Even though it's not perfect, I think it's quite pretty anyway, and it tastes so good. The meringue is fluffy with just enough of a crunchy outer layer to make the whole dish reminiscent of an Eton mess. On my first attempt I also mixed some leftover mascarpone into the cream mixture and it added some extra decadence to the dessert, so keep that in mind as an alternative. But as long as you have some fresh, ripe strawberries, it will taste good no matter what. That strawberry sauce is lip-smackingingly good.
etonneat-9
Strawberry & Meringue Cream Cake (Eton Neat)
(adapted from this recipe from Gourmet Traveller)
For the meringue:
4 large egg whites
200g caster sugar
1 tsp white vinegar
1 tsp cornflour, sieved
Vegetable oil, for greasing
Pure icing sugar, sieved for dusting

For the strawberry sauce:
1 punnet strawberries (250g), stems removed
50ml lemon juice
60g (1/3 cup) pure icing sugar

1 punnet strawberries (approx 250g), stems removed and thinly sliced
300ml thickened cream (and/or mascarpone)

Preheat oven to 170 degrees C. Line a 28x18x3cm slice tin with baking paper and lightly grease with oil. Whisk egg whites in a large mixing bowl with an electric beater until they form stiff peaks.
etonneat-10
Gradually add caster sugar, whisking constantly, until the mixture is glossy. Gently fold in sifted cornflour and vinegar, then pour into lined tin and smooth surface with a spatula.
etonneat-12
etonneat-13
Bake for approximately 15 minutes, until golden on the surface. Cool in tin for 5 minutes and then gently turn out onto a piece of baking paper heavily dusted with icing sugar and cool completely. Be careful when handling meringue as it is very delicate. (For a crunchier meringue, spread thinner and for much longer, until dry)
etonneat-14
In the meantime, place strawberries, lemon juice and icing sugar in a food processor or plenty and pulse until smooth. Strain to remove seeds and refrigerate until cake is ready to assemble. Whisk cream gently in a small mixing bowl until soft peaks form and refrigerate.
etonneat-17
etonneat-18
Trim the edges of the meringue and the cut in half widthways. From this point you can place a layer of sliced strawberries on top of one half, spoon a little bit of strawberry sauce followed by a layer of cream on top and then sandwich with remaining meringue half. (I actually cut up my meringue into 8 equal slices so that I could assemble each portion of cake separately, but either way is fine)
etonneat-15
Place remaining slices of strawberry over the top of the meringue and then serve with strawberry sauce. Best eaten within 20 minutes of assembly. Serves 4.
etonneat-7
The photos might be a little misleading, I didn't pour too much sauce on this cake slice since my earlier attempt showed how easy it was to make your cake look like it was bleeding profusely. But feel free to drown your cake in as much sauce as possible, or at least serve the remaining sauce on the table. It's a very simple recipe and will take you hardly any time at all. And I'm sure you will be less of a slob compared to me, so it will turn out even nicer! If not, just make an Eton mess ;)
etonneat-8
P.S. This post is dedicated to my most fabulous cousin YL, since it is her birthday tomorrow (23rd Feb). Happy Birthday YL! This cake is for you :)
Print Friendly and PDF

Tuesday, February 16, 2010

Violet Macarons with Lemon Curd

violetmac-2
Wowsers, it's been a long break between macaron posts hasn't it? I completely admit to being utterly sick at the sight of them, after a frenzied month of macaron making, followed by a ridiculously excessive amount of macaron consumption in one day. But the amount of frozen egg whites crammed into a freezer reached critical mass the other weekend, so I heaved a sigh and pulled some out to defrost. I hadn't picked the best time of the year to make these, the weather has been incredibly humid in Sydney, and moisture is the arch-nemesis of the macaron. But I took as risk, and it was worth it in the end.
violetmac-3
I've had this flavour combination swirling around in my head for a while, because I always find a lot of macarons overwhelmingly sweet. The thought of balancing the floral sweetness of a violet macaron with a bright yellow, tangy lemon curd was so appealing to me. Plus I will use any excuse to get more purple-coloured things in my life. At the moment I'm completely in love with my little bag of crystallised violets, and sprinkling them on top of anything makes it look delicate and pretty. I decided to try Tartelette's violet macaron recipe for the first time, after hearing how much success so many people had with it, while adding in a few of the little tips that I picked up during the Daring Baker's month.
violetmac-4
Even after making so many batches, I was really rusty and I was using a new recipe with new oven temperatures and times. It was bound to have hiccups. And hiccup it did, the first batch looked fine going in, rose beautifully with feet, but I pulled it out of the oven at the indicated time and they were totally undercooked and their feet collapsed. Sadness! I blame my super thick silicon mat. I rallied and tried the recipe again the next day with a baking paper-lined tray sitting on top of an upturned roasting tray, and they turned out much better! Still not the prettiest macarons I have ever made, the mixture isn't as smooth as ones I've made before, and I forgot to add the pinch of egg white powder. That only seemed to make the macarons turn out a little shinier, which I don't mind. Tartelette's recipe is as reliable as everyone says, it results in beautiful big feet and a perfect crisp shell. As for how they tasted, I loved the combination. My only gripe was that I made the lemon curd a little more sour than I would have liked, it seemed to intensify in the fridge overnight, and it also made the macarons a little wetter than I usually prefer. But they held their shape well enough, and the citrus-lovers that I shared it with were big fans.
violetmac-5
Violet Macarons with Lemon Curd Filling
(Adapted from Tartelette's Violet Macaron recipe)
For the macarons:
110g almond meal
90g egg whites (about 3)
30g granulated sugar
200g pure icing sugar
2 tablespoons crushed violet sugar or candied violet petals
Optional: Violet (or pink + blue) powdered food colouring, powdered egg whites
violetmac-8
For the lemon curd:
1/3 cup (70g) caster sugar
1/4 cup (60ml) freshly squeezed lemon juice
2 tsp finely grated lemon zest
3 large egg yolks
1/4 cup (60g) unsalted butter, cubed

The day before (24hrs), separate your eggs and store the whites at room temperature in a covered container. If you want to use 48hrs (or more) egg whites, you can store them in the fridge. Alternatively, any time that you have extra egg whites, you can pour them into ice cube trays and freeze them. Once frozen, pop them out of the trays into ziploc bags and store in the freezer until needed. The day before, weigh the correct amount of egg whites you need and place in a ziploc bag in the fridge to defrost overnight. Remove from the fridge and allow to come to room temperature.
violetmac-9
Using a stand mixer or electric beater with a whisk attachment, whip the egg whites (you can also add 1 tsp of egg white powder to this for increased stability) to a foam, then gradually add the sugar until you obtain a glossy meringue. I usually beat the meringue to soft peaks, then add my powdered food colouring and then beat to stiff peaks. Some people prefer to add the food colouring to the almond meal, but it's up to you. Do not use liquid food colouring. Do not overbeat your meringue or it will be too dry.
violetmac-10
Spread your almond meal out on a lined baking tray and dry out in a cool oven (around 100 degrees C). Remove from the oven and cool completely. Place the powdered sugar in a food processor and pulse to remove any lumps. Then stir in the almond meal and give a few more quick pulses to combine the two.
violetmac-7
violetmac-11
Add them to the meringue, giving it a quick fold to break some of the air and then fold the mass carefully until you obtain a batter that flows like lava or a thick ribbon. Give quick strokes at first to break the mass and slow down. It's important to get as many of the big air bubbles out, air bubbles are bad. The whole process should not take more than 50 strokes. Test a small amount on a plate: if the top flattens on its own after around 20 seconds you are good to go. If there is a small beak, give the batter a couple of turns.
violetmac-13
Fill a pastry bag fitted with a round tip with batter and pipe small rounds (around 3cm diameter) onto silicon mat lined baking trays, or baking paper lined trays. Bang your baking tray gently on the counter to remove any remaining bubbles. Crush up your candied violets in a mortar and pestle and sprinkle a pinch of violet sugar over the tops of each macaron. Preheat oven to 140 degrees C (280 F) and let your macarons sit out on the counter for 30-60 minutes, to allow the shells to harden slightly.
violetmac-15
If using baking paper lined trays, place on top of an upturned metal roasting tray and then bake for 15-20 mins, depending on their size. Let cool and then remove very gently from tray and cool completely on a wire rack.
violetmac-16
If you have any trouble with the macarons sticking to the tray, you can pour a few drops of water under the parchment tray while the tray is still warm to steam them off, but don't leave it too long or they will get soggy. Alternatively you can try to place them back into your cooling oven for a few minutes after it has been turned off before trying to remove them.
violetmac-17
While the macarons are cooling, prepare the lemon curd. Stir the sugar, lemon juice and zest in a small saucepan over medium heat until the sugar dissolves. Beat the egg yolks in a heatproof bowl and gradually add the hot lemon mixture. Strain the mixture through a fine-mesh sieve.
violetmac-19
Return to the heatproof bowl and place over a saucepan of simmering water. Cook, stirring continuously, until the mixture coats the back of a wooden spoon. Do not allow the mixture to boil. Remove from the heat and add the butter cubes, one at a time, stirring until fully combined. If the mixture is still too sour for your liking you can stir in some powdered icing sugar to your taste.
violetmac-18
Cover mixture with baking paper and refrigerate for 30 minutes, or until it firms up. When you are ready to fill your macarons, spoon or pipe around 1-2 tsp of lemon curd filling sandwiched between two macaron shells, then refrigerate for 30 mins to allow the filling to set. Serve on the same day, or can be stored over night in the fridge in an airtight container.
violetmac-6
Print Friendly and PDF

Sunday, February 14, 2010

Happy Chinese Valentine's New Day Year!

yeesang-2
Happy Chinese New Year and Happy Valentine's Day Everybody! Wishing you a very prosperous new year and a lovey dovey Valentine's Day. Every year, even though our parents and all of our relatives are celebrating the new year in Malaysia, my brother and I will still try to whip up a fabulous new year for friends and loved ones. And the star of this meal is always the yee sang, an amazing sashimi salad which takes a fair amount of time and effort. It's always my job to arrange all the different elements of our yee sang together on a big platter, and this year I decided to make it Valentine's Day themed.
yeesang-3
As you can see, there are a lot of things that go into this salad. This year included plump scallop sashimi and salmon sashimi, radish, cucumber, lettuce, jellyfish, carrot, pomegranate and ruby grape fruit. I arranged the sashimi in a heart shape and even carved the grapefruit. See?
yeesang-13
This is by far the BEST salad ever! As you can tell, a lot of time and effort goes into it's construction, and it is almost impossible to do without a mandoline. (But not completely, we used to do it!)
yeesang-4
I used to think that everyone around the world had yee sang when they celebrated Chinese New Year, but quickly learnt that it's really only common in Malaysia and Singapore. So what's so great about this salad? Well what you see above is only half of it. The fun part is coming up next.
yeesang-5
First we sprinkle the contents of our red packets over the top (toasted sesame seeds and five spice). Then we pour over our beautifully thick salad dressing made of plum sauce, honey, lime juice, chilli, sesame oil and a little bit of kaffir lime.
yeesang-6
yeesang-7
Deep fried wonton skins (expertly fried by A) are scrunched up and sprinkled over the top.
yeesang-8
...Then everyone grabs their chopsticks...
yeesang-9
...And tosses like crazy! The higher your can lift the salad up with your chopsticks the better, and the messier the better!
yeesang-10
And finally, you dig in! This was the BEST yee sang we've made so far, the scallops were so fresh and sweet and were still so fat even though we had sliced them in half. The dressing was sweet and zingy, and there was a perfect balance of textures and flavours. Heaven.
yeesang-11
And if that wasn't enough for you, my brother whipped up two more amazing dishes for us to enjoy. The first was the most delicious thing ever, braised pork with chinese mushrooms, dried scallops and 'hair algae'. Don't be put off by the sound of the algae, it has a beautiful slippery texture and soaks up all the rich sauce. This was an adaptation of a dried oyster and hair algae dish which is quite common during New Years, because when you say dried oyster and hair algae (pronounced 'fat choy') in Cantonese it sounds similar to the Chinese New Year greeting of either "Good deeds and prosperity", or "Good business and prosperity". And it's like an explosion of umami on a plate. Soooooo goooooood.
yeesang-12
We also enjoyed a whole steamed snapper, and a dessert which will have to remain a secret for now. Needless to say, we had WAYYY too much food and didn't finish anything except for our yee sang. I hope everyone else is enjoying the festivities today, and have a very happy New Year!
Print Friendly and PDF