Tuesday, May 27, 2014

Maple & Blueberry Cheesecake

Maple & Blueberry Cheesecake
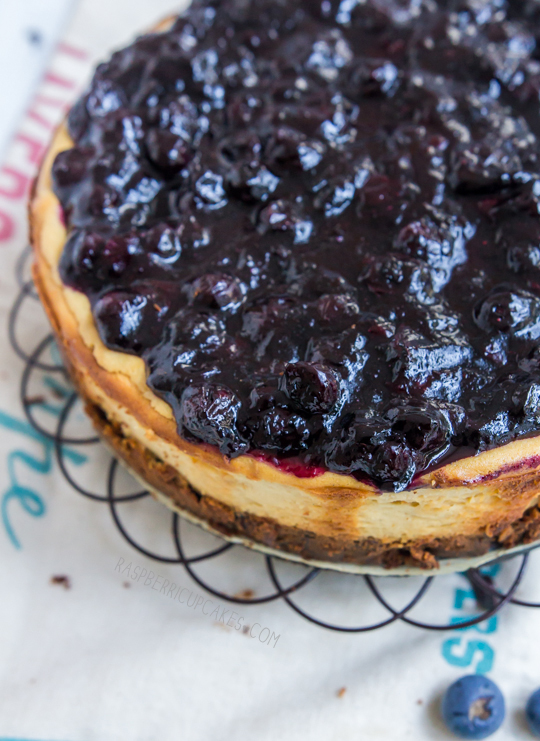
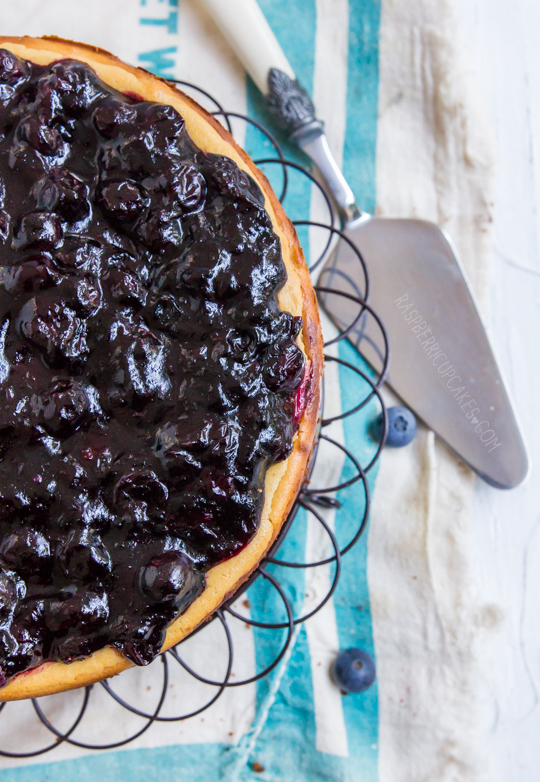
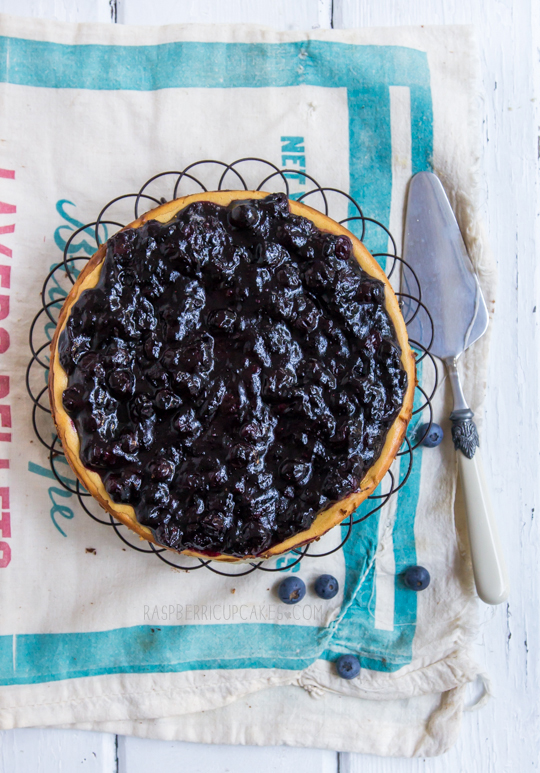
Another week, another birthday cheesecake. But this one is very different to the last one, it's baked and it happens to be gluten free. I'm not experienced at all in gluten-free baking, but my sister in law can't have gluten and she loves cheesecake and requested a blueberry cheesecake (same as last year!). It isn't the prettiest of cheesecake (my baked cheesecakes always seem to turn out kinda fugly), but it's really, really tasty. The base is made with gluten free gingernut biscuits (which you could always replace with regular ginger biscuits), the filling is a baked ricotta cheesecake with maple syrup and vanilla bean and I made a thick blueberry topping similar to a pie filling.
Maple & Blueberry Cheesecake
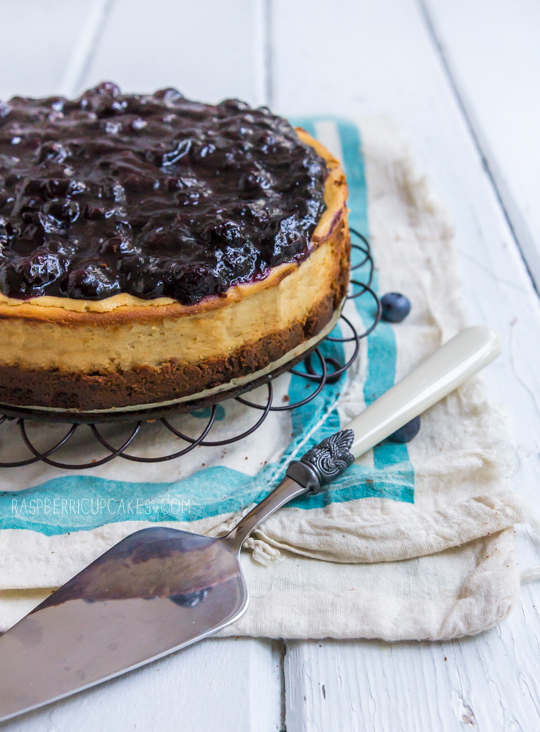
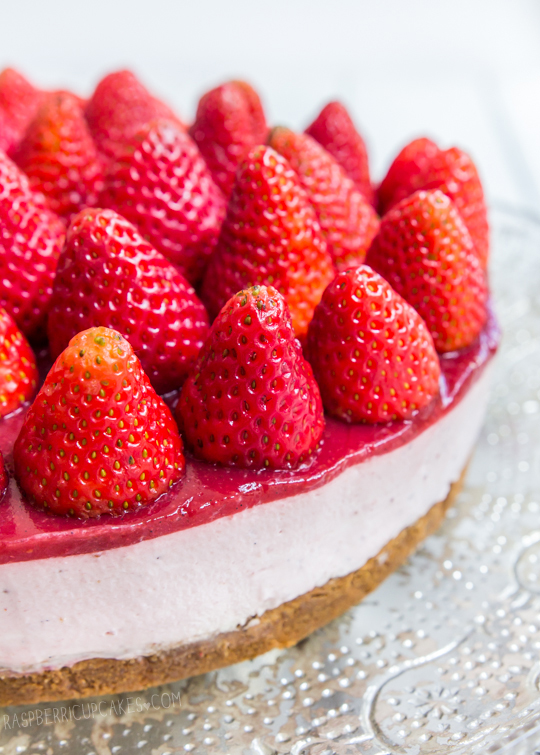
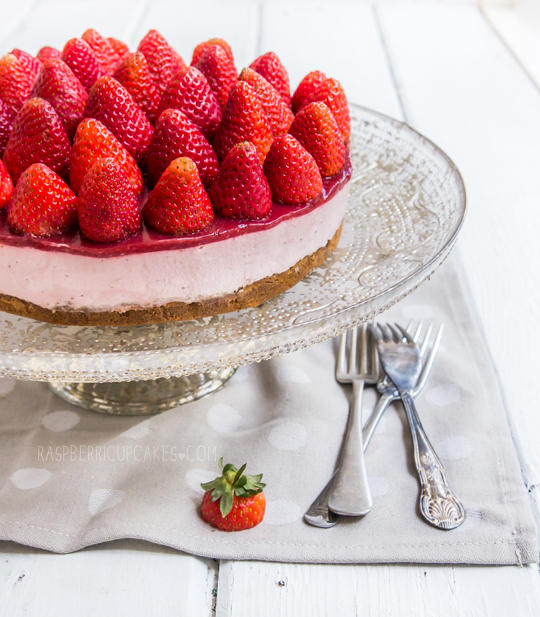
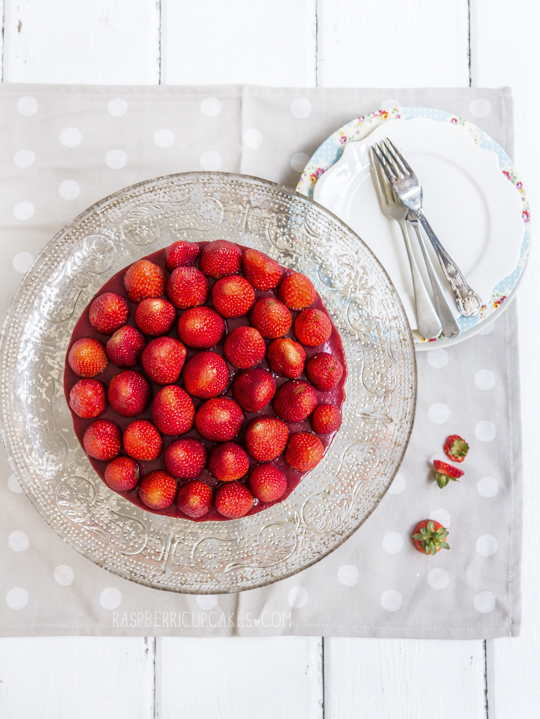
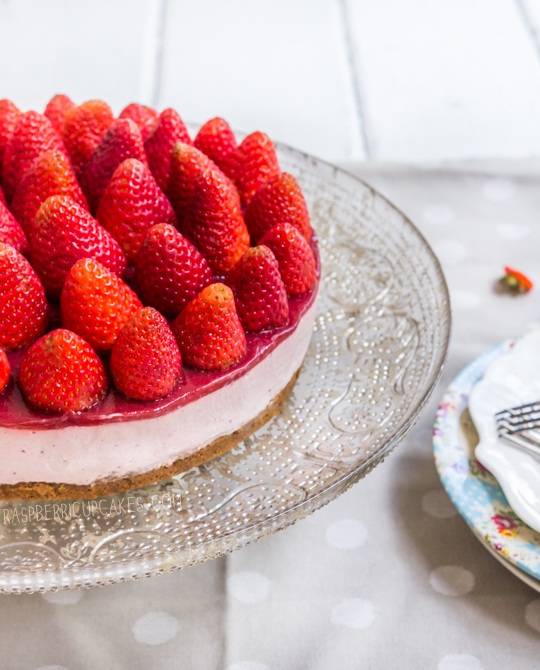
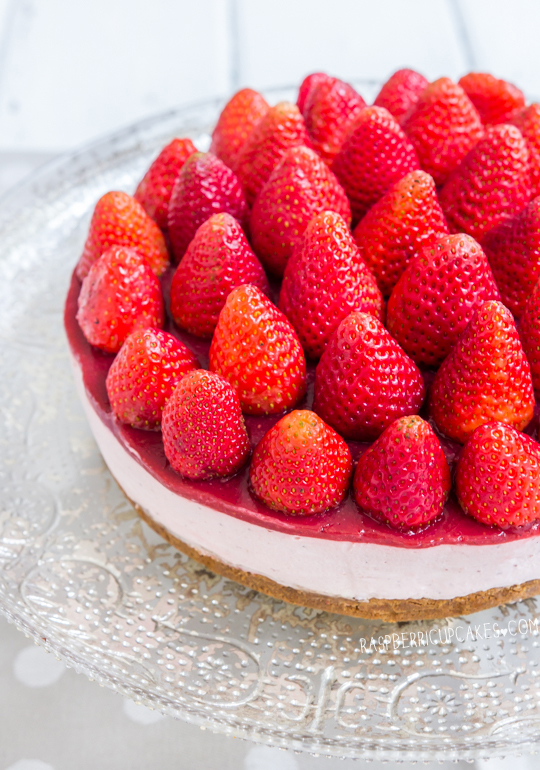
No innards shots as this is a birthday dessert, but you all know what the inside of a cheesecake looks like. It's the same recipe as this strawberry ricotta cheesecake, with a few tweaks. The ricotta keeps the filling light and fluffy, which is good since I usually find baked cheesecakes too dense for my liking.
Maple & Blueberry Cheesecake
I nearly had another cheesecake disaster, can you believe it? The latch on my springform tin broke off while I was trying to carefully remove the cheesecake from the tin, and the tin was jammed shut and refusing to spring loose. I had to pry the thing apart with pliers. Luckily the cheesecake is in one piece and ready for dinner. Hopefully I'll be back soon blogging about something other than a cheesecake recipe!
Maple & Blueberry Cheesecake
(makes one 20cm cheesecake, serves 8-10)
For the cheesecake:
250g (1 packet) Ginger Nut biscuits (ginger snaps for those in the US, homemade recipe here), I used store-bought gluten free ones from Coles this time
80g butter (about 3/4 stick butter), melted
330g (11.6oz) cream cheese, softened
500g ricotta (17.6oz) ricotta
2/3 cup maple syrup
1 tbsp grated lemon zest
1 tsp vanilla bean paste or scraped seeds from 1 vanilla bean pod (or 1 tsp pure vanilla extract)
4 eggs
1.5 tbsp cornflour (cornstarch)
1.5 tbsp water
  1. Preheat oven to 165°C (330°F) (150°C(300°F) for fan-forced), grease and line the base of a 20cm round springform tin.  
  2. Place ginger nut biscuits in a food processor and pulse until they are broken down to even crumbs. Add butter and pulse to combined. 
  3. Press into the base of your prepared tin and  bake in oven for about 10 minutes, take care that it does not burn. 
  4. Prepare the filling; place cream cheese, ricotta, maple syrup, lemon zest and vanilla bean in the bowl of a food processor and pulse until smooth. 
  5. Mix water and cornflour together in a separate bowl until smooth and then add the mixture and the eggs to the food processor bowl, pulse until combined. (If you don't have a processor, beat cream cheese and ricotta until smooth and fluffy in a large mixing bowl with an electric mixer on high. Add the rest of the ingredients and then beat again until smooth.) 
  6. Pour mixture over the chilled base and bake for an hour. The edges should be just golden and the centre might still be wobbly. Do not remove cheesecake from oven, turn off the heat and keep the door closed and allow the cheesecake to rest in the oven for another hour. Then remove from the oven and sit in tin on a wire rack until completely cool.
For the blueberry topping:
150g (2 punnets/5oz) blueberries, fresh or frozen
1/3 cup sugar
2 tsp lemon juice
1/4 tsp pure vanilla extract or vanilla bean paste
1 tbsp cornflour (cornstarch) + 2 tsp cold water
  1. Place blueberries, sugar, lemon juice and vanilla in a medium saucepan and place on medium heat. Stir over heat until sugar dissolves. 
  2. Mix cornflour and water together in a separate small bowl then add to the saucepan and stir over medium heat until mixture thickens, about 3-4 minutes. Set aside to cool.
  3. When cheesecake and filling are cool, spread mixture carefully over the top of the cheesecake. Run a sharp knife around the inside edge of the pan and then carefully remove from the springform tin. Keep chilled until ready to serve.
Maple & Blueberry Cheesecake
Print Friendly and PDF

Tuesday, May 13, 2014

Strawberry Cheesecake (with Speculoos Crust)

Strawberry Cheesecake (with Speculoos Crust)
Don't let this cheesecake fool you with its prettiness. It's EVIL I tell you! This will forever be known to me and Asian Gaga as the Cheesecake Disaster of 2014. It was close (but not quite) as devastating as the Trifle Disaster of 2012. I've decided that my birthday dessert attempts for Asian Gaga must be cursed. They've resulted in some of the biggest fails in my recent baking history.
Strawberry Cheesecake (with Speculoos Crust)
So why was this such a fail? It looks fairly good in the photos, doesn't it? Well it was all fine while I was taking these photos, and then slowly I started to realise that it hadn't set properly and the whole thing was starting to melt into a puddle in front of me. In a panic I rushed to try and get it back onto a plate, but the stupid (but gorgeous) cake stand I was taking the photos with doesn't have a flat base, so the crust had split into four or five pieces which made it impossible to lift up, and there was a bloody super high lip on the edge of the stand so I couldn't just slide the damn thing off! ARGH! By this point there were smears of cheesecake everywherrrreee and the strawberries had started sliding off the edges and I was starting to freak out. I eventually got it on to a flat plate (with a lot of swearing). And then I realised that because it was totally not set, the sides were probably going to collapse even if I put it back the fridge. So I had to move it again into a cake tin to hold the sides up. This was a MESS. The cake was threatening to completely fall apart. Strawberries were rolling on to the ground. I was getting hysterical. AND THE TIN WAS TOO BIG. So I had to move it AGAIN. 

By the end of it there was cheesecake all over me and the kitchen and about 3 different tins because I couldnt match up my springform tins with their matching bases (I have a lot of them). It was awful. My husband actually fled the house to go shopping in the middle of my meltdown, because he knows better than to be anywhere near the vicinity of one of these disasters. I felt so bad because the cheesecake actually tasted really great, and I had this feeling while I was making it (I was sorta loosely making it up as I went along) that I hadn't added enough gelatine but I was on the cold and flu meds and kinda out of it so I just kept going (I also exploded a ton of melted butter all over the inside of my microwave, I'm just that good). I knew better, but I still managed to completely stuff it up.
Strawberry Cheesecake (with Speculoos Crust)
The cheesecake somehow still tasted great, even though it was a little melty as it came back to room temp. If I had the time I would have just started from scratch again, but Asian Gaga was already in her car and on the way when this was all happening. Of course she was a dutiful best friend and ate it all anyway, told me it was great and ignored the smears of cheesecake on the floor. The cheesecake itself is a chilled Strawberry Cheesecake with Strawberry Jelly on top and Fresh Strawberries. The crust is made with speculoos (aka Biscoff cookies for those of you in the US). I was so excited to find the Lotus brand in Coles (on special!) and bought about 10 packets, I'm not kidding. These lovely spiced biscuits make an excellent cheesecake crust that match so well with the strawberry and I really recommend you try it if you can find the biscuits. But if you can't get your hands on them, ginger nut biscuits/ginger snaps will work well with this flavour combo too. Anyway, since I'm still completely happy with the flavour of the actual cheesecake, I'm going to share the recipe with you with some modifications so that you can avoid any of my pain (I've more than doubled the gelatine amount so it should be nicely set - if you make this recipe please let me know if it is too firm or not firm enough!).
Strawberry Cheesecake (with Speculoos Crust)
Strawberry Cheesecake (with Speculoos/Biscoff Crust)
(makes one 7 or 8 inch cheesecake)
For the crust:
250g (about 9oz) speculoos (aka Biscoff cookies), I used Lotus brand (you can substitute with ginger nuts/snaps or any other biscuit of your choice)
75g (about 5 tbsp) butter, melted
  1. Preheat oven to 180°C (350°F) and grease and line the base of an 18cm (7inch) or 20cm (8 inch) springform cake tin with baking paper (I used 18cm). 
  2. Place biscuits in a food processor and blend until crushed to small crumbs, then add melted butter and blend until just combined.
  3. Press mixture in an even layer on the base of the prepared tin.
  4. Bake in oven for about 7-10 mins, make sure it does not burn.

For the strawberry mixture:
400g (about 1.5 punnets/14oz) fresh or frozen strawberries, hulled
1/3 cup (about 65g) sugar
3 tsp lemon juice + grated zest of 1/2 lemon
1 vanilla bean pod, split and seeds scraped (or 1 tsp vanilla extract/vanilla bean paste)
4 tsp powdered gelatine
  1. Place gelatine in a small bowl with 3 tsp of cold water and set aside to soften.
  2. Place strawberries, sugar, lemon juice and zest and vanilla bean pod and seeds into a medium saucepan on medium heat.
  3. Simmer until sugar is completely dissolved and fruit softens, about 10 minutes.
  4. Add gelatine and whisk mixture over heat until gelatine is completely dissolved. 
  5. Set aside to cool for 5 minutes. Place 1 cup of mixture aside to use for topping later, the remaining amount will be added to the cheesecake.

For the cheesecake:
3/4 cup thickened/heavy cream
400g (14oz) cream cheese, softened
1/2 cup (100g) sugar (preferably caster/superfine)
Remaining strawberry mixture from above, should be just over 1 cup
Optional: Extra fresh strawberries to decorate, about 2 punnets
  1. Place cream in a large mixing bowl and beat with an electric mixer on high until it reaches stiff peaks (take care not to overwhip). Place cream in fridge until ready to use.
  2. Place cream cheese and sugar in another large mixing bowl and beat with an electric mixer on high until smooth and fluffy. 
  3. With the mixer on low, gradually add the remaining strawberry mixture from above (making sure you leave 1 cup behind for topping) to the cream cheese mixture. Beat until completely combined.
  4. Gently fold in in whipped cream until smooth. 
  5. Pour mixture over prepared crust and chill in the fridge until just set, about 2 hours (or about half an hour in the freezer).
  6. Reheat remaining 1 cup of strawberry mixture in saucepan until it is pourable, then pour over top of chilled cheesecake. Return to the fridge to set overnight.
  7. Run a sharp knife under hot water to warm it up, then carefully run knife around the inside edge of the cake tin. Carefully remove from springform tin. Top with extra fresh hulled strawberries. Keep chilled until ready to serve.
Strawberry Cheesecake (with Speculoos Crust)
Print Friendly and PDF

Thursday, May 8, 2014

Strawberry Jam & Brown Butter Melting Moments

Strawberry Jam & Brown Butter Melting Moments
I know, it's ANOTHER brown butter recipe. I'm sorry. I'm addicted! The call of that golden, nutty, delicious elixir cannot be denied. This time it's in biscuit form. I have a special place in my heart for melting moments (also known as yoyos).  They are one of the first things I ever learnt how to bake, and they never disappoint. Melt in your mouth shortbread biscuits sandwiched with a buttery icing? You can't go wrong.
Strawberry Jam & Brown Butter Melting Moments
These melting moments are made with loads of browned butter, and the icing is mixed with strawberry jam to make that lovely pink shade. If you have read my blog before, you know my fondness for using strawberry jam as an icing flavouring. It's a really quick and easy way to get a fantastic strawberry flavour into an icing with very little work.
Strawberry Jam & Brown Butter Melting Moments
It's like the most girly version of milk and cookies ever. Just in time for Mother's Day! These biscuits were extremely well received by my friends and family. I brought the whole batch to my brother's house expecting them to have a few so that I could take most of them to work the next day but we sat down with a pot of tea and destroyed about 15 of them in one go. So I'm warning you now, they are super, super moreish. One will not be enough!
Strawberry Jam & Brown Butter Melting Moments
Strawberry Jam & Brown Butter Melting Moments (Shortbread Biscuits)
(adapted from this Gourmet Traveller recipe, makes about 22-24 biscuits)
For the brown butter:
250g (about 2 sticks + 2 tbsp) butter for the biscuits (I used salted, add 1/2 tsp salt to flour mixture if using unsalted)
+ an additional 100g (7 tbsp) butter for the icing

Prepare the brown butter ahead of time as you will need to chill it, you can do the two amounts listed above in the same pan and separate them later, or brown each amount separately:
  1. Place butter in a small saucepan on low-medium heat and stir until it melts completely.
  2. Continue cooking, stirring frequently until the milk solids turn brown and the butter smells nutty, about 5 minutes longer (or as long as it takes to turn golden brown). Take care not to burn (it will continue to brown even after you remove it from the heat, so take it off early).
  3. Scrape the melted butter and browned bits into small bowl and chill until solidified (about half an hour in the freezer, an hour or so in the fridge). When ready to make cake, remove from the fridge long enough that the butter is soft enough to be beaten with an electric mixer.
For the brown butter biscuits:
250g (weight before browning) brown butter, softened (prepared above)
80g (about 2/3 cup) icing (confectioner's) sugar, sifted
1 tsp pure vanilla extract/vanilla bean paste or scraped seeds from 1 vanilla bean pod
75 g (½ cup) cornflour/cornstarch
225 g (about 1½ cups) plain/all-purpose flour
  1. Preheat oven to 180°C (350°F) and line two baking trays with baking paper.
  2. Place brown butter and sugar in a large bowl and beat with an electric mixer on high until light and fluffy.
  3. Add vanilla and beat until just combined.
  4. Sift flours over butter mixture and, using a wooden spoon, stir to form a soft dough.
  5. Keeping your hands lightly floured, form level ½ tablespoons of mixture into balls, then place 5cm (2 inch) apart on baking paper-lined oven trays, flatten slightly to 3.5cm (1.5 inch) rounds, then, using a floured fork, press tines gently into dough rounds, to create grooves.
  6. Bake 10-12 minutes or until lightly coloured. Allow biscuits to cool on trays for 5 minutes, before transferring to wire racks to cool completely.
Strawberry Jam & Brown Butter Melting Moments
For the strawberry jam icing:
100g (weight before browning) brown butter, softened (prepared above)
275g (about 2 and 1/4 cups) icing (confectioner's sugar)
3 tbsp strawberry jam 
  1. Place butter and icing sugar in a large mixing bowl and beat on low until just combined, then beat on high until smooth and fluffy.
  2. Add strawberry jam and beat until combined. Icing should be soft enough to be spooned or piped, but stiff enough to hold its shape.
  3. Spoon or pipe mixture between cooled biscuits. Serve immediately, or can be stored in the fridge in an airtight container for several days.
Strawberry Jam & Brown Butter Melting Moments
Print Friendly and PDF