Sunday, July 25, 2010

Chocolate & Avocado Macarons for Gourmet Rabbit!

chocavomac
Hello! Just a quick post to share some fun things with you. First of all, I'm very excited to have a little article up on the wonderful Gourmet Rabbit, which is (for those of you who don't know) an awesome print and online magazine for foodies. My amazing friend and graphic design extraordinaire Lisa is the art director for GR and when she told me that the theme for July was going to be 'Weird & Wonderful' I thought it was right up my alley. And it was super fun to because not only did I get to come up with my own recipe for it, Lisa made me some cute artwork to go with it and even made me a shiny new banner for my blog to match it! See that angry cupcake? That's Neville. He's angry. And a cupcake. And awesome.
gr
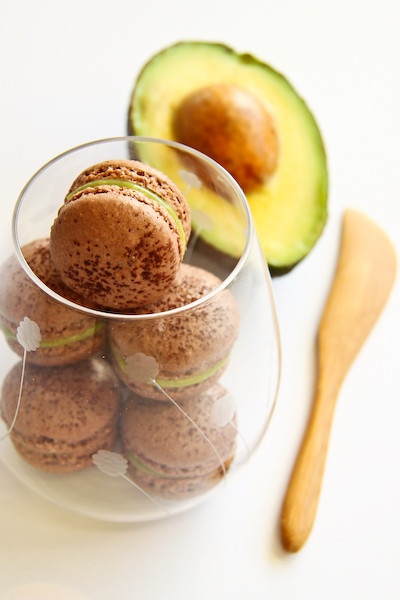
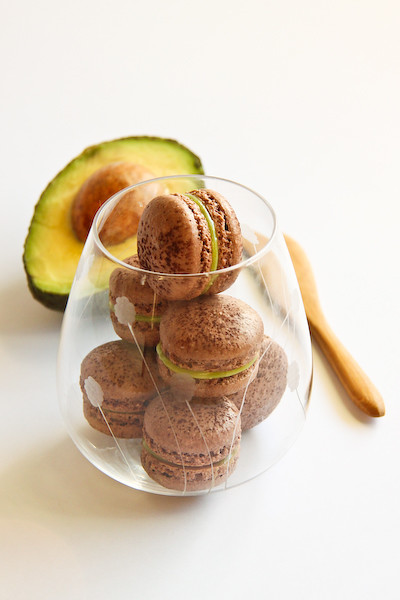
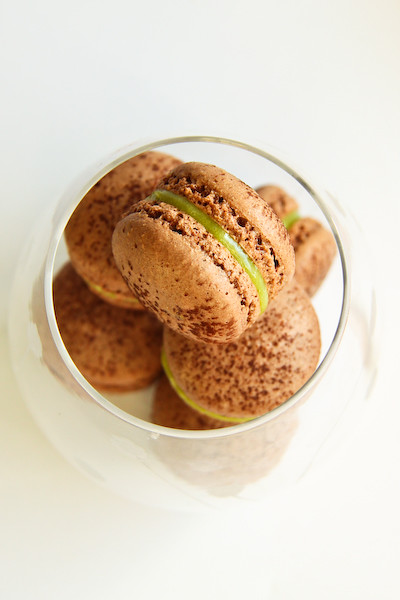
Anyways, you can check out my article on Gourmet Rabbit HERE (EDIT: Eep it seems they no longer have the article on their site, however the recipe has been featured in Issue #2 of the print version of the magazine. I have attached the text and recipe from the original online article below), where I have a bit of a ramble and there's also a pretty crazy recipe for Chocolate Macarons with an Avocado and Condensed Milk filling. I thought I'd share a couple of extra pics from that recipe, because I had sooo much trouble picking one photo to submit with the article! Hope you like it, and hope you like Neville and the new banner! I desperately needed a new banner, that old one has been there for nearly a year now! Thanks again to Lisa for designing it :)
chocavomac-3
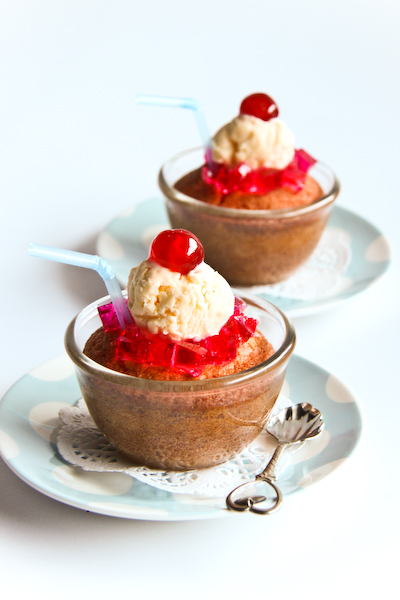
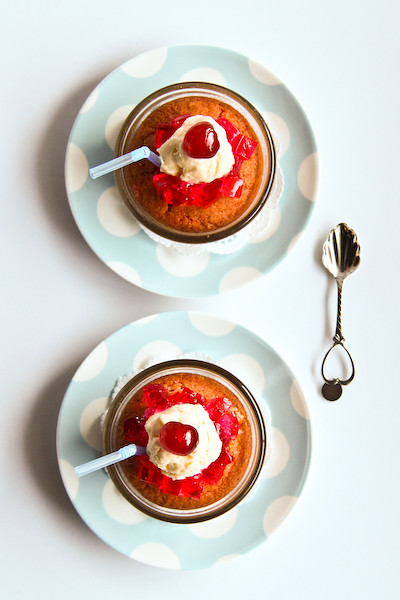
I love food blogging. It makes me feel like I'm living a double life. During the day I am an engineer who sits in front of the computer for most of the day. But in my free time I am a learning home baker and food blogger, and I love to come up with the weirdest, wackiest combinations of sweet treats that I can think of. My blog Raspberri Cupcakes is a place for me to share my crazy baking experiments, even when they are spectacular failures. I love adding something unexpected to a traditional dessert to make it more fun and (hopefully) more delicious, whether it's a different ingredient or a interesting way of presenting the dish. I've made eclairs filled with chocolate pastry cream, with squiggles of raspberry and lemon sauce so that they look like hot dogs with tomato sauce and mustard. And milo cupcakes with condensed milk icing. Apple pie tiramisu. A croquembouche that was stacked into the shape of a giant cupcake. Black forest self-saucing puddings. A birthday cake for my best friend that looked like Lady Gaga. A tasting plate of beetroot and chocolate desserts. A gingerbread igloo with little gingerbread eskimo men. It might sound silly or unappealing at first, but that is part of the challenge for me; to make an unexpected combination look and taste awesome. And maybe make people giggle. Usually I will get the urge to make a particular dessert, and will then try to decide what flavours I want to have in it. This brainstorming usually leads me somewhere strange, and there have definitely been some ideas that have never quite made it out of my imagination and on to a plate. I'm quite fond of capturing childhood memories in my desserts, like when I made marshmallows in the shape of letters and served them with hot chocolate, because I always enjoyed eating alphabet soup when I was little.
chocavomac-2
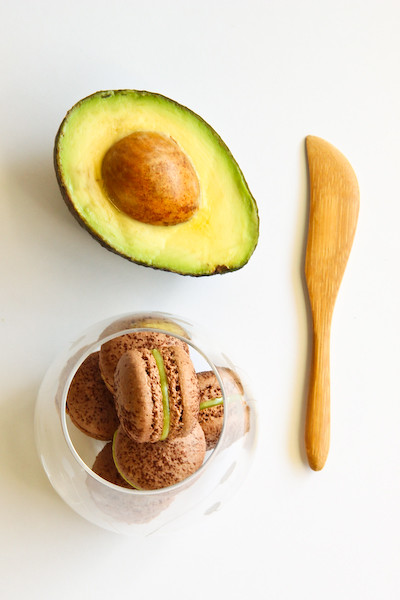
Learning to bake macarons is a fascinating challenge because they are so hard to get right. So many things can go wrong! It took many, many batches of failed, ugly macaron shells before I finally got the hang of it. Once I got more confident, I could to adapt the recipes and make my own special flavours. Like my doughnut macarons, flavoured with cinnamon and strawberry jam buttercream, and ice kacang macarons, inspired by a Malaysian dessert of shaved ice, rose syrup, condensed milk and creamed corn. Here is another macaron that uses an ingredient that you might not have considered using in a dessert: avocado. Keep an open mind, avocado in desserts works really well and is quite common in South East Asia. My favourite example of this is the Vietnamese avocado shake. I always buy an avocado shake from the Vietnamese drinks shop whenever I visit Cabramatta in Sydney's south-west. The avocado is blended with ice and sweetened condensed milk, and the richness in flavour and creamy texture from the avocado is unbelievably good. I tried to capture what I love about those avocado shakes in this recipe, by pairing a smooth avocado and condensed milk filling with a chocolate-flavoured macaron shell. The slight bitterness from the Dutch process cocoa powder is a great partner for the rich, sweet filling, and the vibrant green colour from the avocado is particularly eye-catching. If this is your first time making macarons at home, I would definitely encourage you to do a bit of research before starting. Food blogs like Tartelette are a wonderful resource when learning to make these tricky little meringue biscuits. Make sure you use aged egg whites (these are egg whites that have been stored in the fridge for at least 24 hours to reduce their water content), as this makes the meringue more stable and will help you achieve those frilly little feet on the bottom of your shells. The most important step of the macaron-making process is when you combine your meringue and your dry ingredients; you need to mix them together quite vigorously at first to beat the air out of the mixture but you must take care not to overmix or the mixture will be too runny and will not hold its shape when piped. And finally, the timing and temperature for baking is highly variable depending on your oven, so you may need to bake few test batches before you figure out the best settings for your oven.
chocavomac-4
Chocolate & Avocado Macarons
(makes about 25 macarons)
100g aged egg whites at room temperature (you can use fresh eggs too, just make sure they are room temperature. I always use fresh these days, and zap it in the microwave on defrost for 10 seconds)
110g almond meal, sifted and dried in an 80°C oven for 10 minutes
190g icing sugar
10g Dutch process cocoa powder, plus extra for dusting
50g caster sugar
Optional: 1 tsp egg white powder to help stabilise your meringue (available from The Essential Ingredient)

1/2 medium sized avocado, peeled and pitted
2 tsp lemon juice
100g icing sugar, sifted
1 tbsp sweetened condensed milk

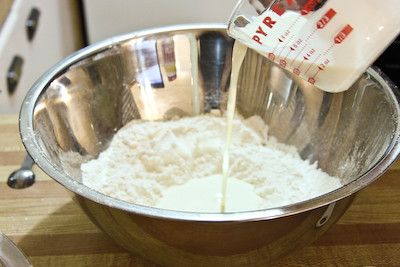
Line two baking sheets with baking paper. Place icing sugar in food processor and pulse for a minute to remove any lumps. Stir in cocoa powder and pulse to combine well. Stir in almond meal and give a few quick, short pulses to just combine. (If no food processor available simply sift all dry ingredients together) Place in a large mixing bowl and set aside. Using an electric mixer, beat egg whites and egg white powder in a medium mixing bowl until the egg white powder dissolves and it reaches soft peaks. With the mixer on high speed, gradually add caster sugar and beat until it reaches stiff peaks.

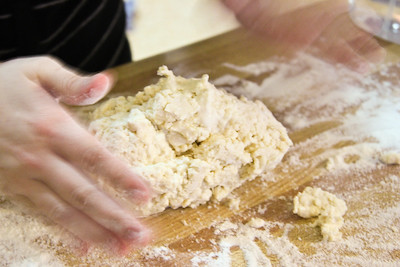
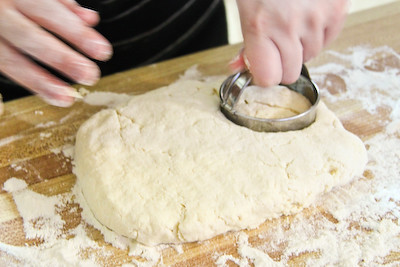
Add the meringue to your dry mixture and mix, quickly and roughly at first to beat out as much of the air bubbles as you can out of in the egg whites, then fold carefully as the dry mixture becomes incorporated and it starts to become shiny again. Take care not to overmix, the mixture should flow like lava and a streak of mixture spread over the surface of the rest of the mixture should disappear after about a minute. Place in a piping bag with a plain round tip and pipe rounds of about 3cm diameter on lined baking sheets (or silicon baking mats), about 2cm apart. Gently rap the baking sheets on the bench top to remove any extra bubbles from your piped shells. Leave shells on bench to dry for about an hour, so that when you press the surface of one gently it does not break.

Preheat your oven to 140-150°C (temperature varies depending on your oven). Place on top of an overturned roasting tray or another baking sheet if they are not professional grade. Bake for 13-15 minutes, depending on the size of your shells. Remove from the oven and cool on the tray for a few minutes, then gently remove from the sheet and place on a wire rack to cool completely. (If shells are stuck to the sheet then you may need to return the tray to the oven for a few more minutes)

To make the filling, place avocado flesh and lemon juice in a medium mixing bowl and beat with an electric mixer until light and fluffy. Strain mixture to remove any large lumps. Return to the mixing bowl and add sifted icing sugar, then beat to combine. Add condensed milk and beat again until combined. Refrigerate the mixture for 15 minutes and then sandwich macaron shells with about half a teaspoon of avocado filling each. Refrigerate overnight and then serve at room temperature. These can be stored in an airtight container in the fridge for several days.
Print Friendly and PDF

Thursday, July 22, 2010

Ice Cream Soda Cupcakes

icecreamsodacupcakes
In my previous post I mentioned how I had been busy experimenting and failing miserably in my kitchen. It was all because of creaming soda. I LOOOOVE creaming soda. It's so sugary and addictive. Creaming soda is on par with red cordial for it's ability to make kids go super crazy sugar high hyperactive. I didn't realise that it came in so many forms - here in Australia it's bright pink and is awesome with a scoop of vanilla ice cream. It's intensely sweet and I've been drinking way too much of it recently. My recent obsession with it has spawned all these crazy creaming soda baking ideas. The first was a creaming soda macaron, but that was where I failed miserably. It turned out that it was really hard to get the flavour of creaming soda into a macaron, and that creaming soda itself has a very mild flavour, especially after it has gone flat. So many failed creaming soda buttercreams, icings, ganaches and macaron shells in the bin :(
icecreamsodacupcakes-6
But during my experimenting, I did notice that one easy way of successfully retaining the flavour of creaming soda was in jelly form. And I love jelly. It's so wobby and fun and makes cakes look cool. So I forced myself to give up on the macaron idea (for the moment) and adapt it into something just as cute and much, much easier to do - cupcakes! And yes, I've done cupcakes with decorative, non-functional straws in them before with the ginger beer cupcakes, but I can't help myself, it looks so cute!
icecreamsodacupcakes-2
The toppings do make the cupcakes a little too difficult to eat straight out of your hand, so it's definitely better to serve with some spoons. I happened to have these cute little pyrex baking cups which I thought would be appropriate, and they were definitely easier to eat out of compared to the ones I used paper cupcake liners for. So if you have some individual silicone, glass or ceramic baking cups I would definitely recommend you use them for this recipe. The cherry and straw complete the look, I think they would be so great for a kids birthday party. There's not much flavour of the creaming soda in the cupcakes, so you need to heap on lots of that awesome tasting jelly to have with the cake to get that creaming soda taste. If you can't use ice cream because you want to transport the cakes, just top with some whipped cream instead.
icecreamsodacupcakes-7
Ice Cream Soda Cupcakes
(makes 10-12 medium cupcakes, 6-8 large cupcakes)
500ml creaming soda
1 tbsp caster sugar
1 tbsp powdered gelatine

125g unsalted butter, softened
150g caster sugar
2 eggs
225g self-raising flour, sifted
100ml creaming soda
1/2 tsp pure vanilla extract
pink food colouring

To serve: Vanilla ice cream.
Optional: Glace cherries & plastic straws to decorate
icecreamsodacupcakes-8
Make the creaming soda jelly:
Place 100ml of creaming soda and the tbsp of caster sugar in a small saucepan and gently bring to the boil. Add powdered gelatine and stir to dissolve completely over the heat. Add the remaining 400ml of creaming soda and pour the mixture into a wide shallow bowl or tin. Place in the fridge and chill until set (2 hours-overnight).
icecreamsodacupcakes-10
For the cupcakes:
Preheat oven to 180 degrees C. Cream butter and sugar with an electric mixer in a large mixing bowl until light and fluffy. Add eggs one at a time, beating well to combine after each addition. Add vanilla essence and food colouring and beat a little more. Fold in flour and creaming soda gently with a spatula, then spoon mixture into a lined cupcake tray, or into greased individual baking cups/ramekins. Make sure they are no more than 3/4 full. Bake in oven for 15-20 mins for a regular sized cupcake 20-25 mins for a larger cupcake (as seen in this post).
icecreamsodacupcakes-11
When you are ready to serve the cupcakes, carve a hole in the top of the cupcakes so there is a well to place the jelly in. Dice up the jelly and spoon it on top of the cake and top off with a small scoop of ice cream, cherries and a straw. Cupcake and jelly can be stored separately for a couple of days, jelly in the fridge, cupcakes in an airtight container.
icecreamsodacupcakes-3
Print Friendly and PDF

Monday, July 19, 2010

Strawberry, Rhubarb & Pink Moscato Trifles

strawberrytrifle-2
It was a quiet week on my blog last week, I didn't want it to be but I have a very good reason for disappearing! I've been experimenting with a very fun, silly baking idea but after about 4 days of uber fails in the kitchen I finally had to let the idea (and all the wasted ingredients) go down the drain :( And then, I spent my entire weekend eating myself into a stupor at Billy's awesome Christmas in July feast with a big group of food bloggers. (Read about it here, here & here) My wasted time due to fail baking meant that I had hardly any time to put together a dessert to bring along with me, but I managed to whip up these super easy individual trifles. Because you can't have a Christmas feast without a trifle, right?
strawberrytrifle
These trifles are nothing mind-blowing, but I think they are quite cute and really easy to make. And they are super light and go down very easily, even after a really heavy meal. Which was kind of perfect because I was ridiculously full after all the awesome food we ate in our Yuletide dinner. I'm always a fan of splitting big desserts up into neat individual portions, it's much easier to serve up and really good for a trifle, since a single big bowl starts to look like a total mess once you start digging into it. Not that I have anything against a big single trifle, I totally love it, it's part of the fun! But if you prefer to keep things pretty and tidy, here is a great alternative.
strawberrytrifle-4
Rhubarb and strawberry are such a famous combination and they go so well with the sweet, light pink moscato to make a deliciously moreish jelly. I could just eat the jelly on its own with some vanilla ice cream to be honest. (I was always a sucker for jelly ice cream cups when I was little) I was totally lazy and didn't make my own sponge cake. I am not ashamed to admit I used store-bought cake this time. But for a trifle where you are soaking it in loads of other stuff I don't think it matters too much. To be honest I couldn't taste much of the booze I put into the trifles, but I thought I put heaps in! So feel free to go nuts with the booze :D Happy Christmas in July everyone! Thanks heaps and heaps to Billy and Pete for being awesome hosts.
strawberrytrifle-3
Strawberry, Rhubarb & Pink Moscato Trifles
(serves 8-10, you need to start this recipe a day ahead, custard recipe from Gourmet Traveller)
1/2 cup caster sugar
1 tbsp powdered gelatine
300ml Pink Moscato (or any other sweet sparkling) + another 150 ml for soaking
2 cups diced rhubarb (about one bunch)
2 punnets strawberries
1/4 cup brandy
2 sponge cakes, store bought or homemade and sliced horizontally to about 1 cm thick

4 egg yolks
1/4 cup caster sugar
1 tbsp cornflour
2 cups pouring cream
1 vanilla bean, split and seeds scraped
300ml pouring cream + extra sliced strawberries to serve
strawberrytrifle-8
In a small bowl, add 100ml of moscato to the gelatine to soften it. Dice 1 punnet of the strawberries (about 1 1/4 cups of fruit. Thinly slice the remaining punnet of strawberry, place in a flat dish and pour 150ml of moscato over it. Refrigerate the sliced strawberries. Place caster sugar and diced rhubarb in a medium saucepan and gently bring to the boil. Simmer until sugar is dissolved and rhubarb is tender, but not falling apart. Add gelatine to the mixture and stir over medium heat until it dissolves completely. Removed from the heat and stir in diced strawberries and the remaining moscato. Pour into separate serving glasses (about 375-450 ml, I used plastic wine cups). Refrigerate for 3 hours or until set.
strawberrytrifle-6
For the custard, whisk egg yolks, sugar and cornflour in a bowl. Place cream and vanilla in a small saucepan and bring just to the boil. Gradually whisk hot cream mixture into egg yolk mixture until combined. Return to pan and stir continuously over low heat until mixture thickens and coats the back of a wooden spoon (watch it carefully or you'll get scrambled eggs). Strain out the vanilla bean pod and pour into a bowl, cover surface with plastic wrap and refrigerate for 1 hour.
strawberrytrifle-7
Using a round cutter, cut 8 rounds of sponge cake and place on top of the strawberry & rhubarb jelly. Spoon over brandy, about 2 tsp each. Arrange a single layer of sliced strawberries over the top and spoon any remaining liquid from the dish over the top. Spoon vanilla custard over the strawberries and refrigerate overnight. When ready to serve, whip cream and spoon over the top, top off with extra fresh strawberries.
Print Friendly and PDF

Sunday, July 11, 2010

Gold Kiwifruit & Coconut Upside-Down Cake

kiwiupsidedown-3
It wasn't until I started making this cake that I realised I was missing summer. This was a little bit of a surprise, since I am one of those strange people that enjoys winter. It might seem a little insane, but I love snuggling up in a warm bed on a cold night, and wearing winter clothes and eating hearty winter food. And though I will whinge when I'm outside in the shivering cold, I'm secretly loving it at the same time. Probably because I lived without a proper winter for a large portion of my life, so it still feels kind of novel to have 4 different seasons. Plus the cold weather is the perfect excuse to turn on the oven and bake an awesome cake like this.
kiwiupsidedown-6
I've always been fond of upside-down cakes. There's that moment of anticipation after you've taken the cake out of the oven and are about to flip it over to see how it turned out. And this one turned out better looking than I thought it would. It might not be the prettiest cake ever, but I think the kiwi gives it a really eye-catching, interesting pattern. The flavour and smell of the kiwifruit was surprisingly strong and appealing.
kiwiupsidedown
The flavours really feel summery & tropical, with the sweet, tangy golden kiwis and a rich, creamy coconut with a touch of lime. I thought the cake might be really sour since I put so much lime juice in the batter, but it mellowed a lot in the oven. The coconut milk made the cake a little denser, but it added a lovely fragrance and fluffy texture to it. My favourite part was that the dessicated coconut in the batter gave it a lovely crunch on the golden exterior, I think next time I might make individual cakes like I did in my rhubarb mandarin upside-down cakes so that I have even more of the crunchy edges.
kiwiupsidedown-7
This cake is for my cousin Pris for tomorrow, Happy Birthday dear!! Wish you were here in Sydney so we could take you to Bill's for a birthday breakfast.
kiwiupsidedown-2
Gold Kiwifruit & Coconut Upside-Down Cake
(adapted from this recipe from Taste.com.au)
30g melted butter
2 tbsp (30g) brown sugar
4-5 gold kiwifruit, peeled and cut into 1cm slices
100g butter, softened
250g caster sugar
2 large eggs
225g self-raising flour
1/2 cup (45g) dessicated coconut
Juice of 2 limes (about 100ml)
80ml coconut milk

Preheat oven to 180 degrees C. Grease and line a 20cm round cake tin. Pour the butter over the base of the pan and sprinkle with the brown sugar, then top with a single layer of kiwifruit.
kiwiupsidedown-8
Use an electric beater to beat the butter and sugar for 3 minutes or until pale and creamy. Add the eggs one at a time, beating well after each addition. Fold in the flour, coconut, coconut milk, and lime juice until combined.
kiwiupsidedown-9
Pour cake mixture over the kiwifruit and smooth top with a spatula. Bake for 40-45 minutes or until a skewer inserted into the centre comes out clean. Cool on a wire rack for 10 minutes and then turn out of tin. Don't freak out of the kiwifruit stick to the base of the pan, just gently place them back on top of the cake and return the cake to the oven on a low temperature for a few minutes until the fruit is set on top. Can be stored for several days in an airtight container.
kiwiupsidedown-4
Print Friendly and PDF

Wednesday, July 7, 2010

CWA Scones Take 2!

cwascones-6
There's been a lot of interest in my old CWA scone recipe post, thanks to a Masterchef episode that aired recently where the contestants had to bake a few CWA recipes, including lamingtons, neopolitan cake, fruit cake, and the famous scones with jam. These are the awesome, fluffy scones that they sell at the Easter show, the one recipe I always turn to for plain scones. And let's be honest, the Masterchef contestants made a complete mess of it. It was a total disaster. And then everyone complained about the unfair conditions, the unfamiliar ovens and gusty winds and yadda yadda yadda...Yeah, whatever. Anyway, the episode made me look back at my original post and cringe. Ack, the awful photos taken at night! The messy, uneven scone cutting :( I felt like I had to do the recipe justice.
cwascones-4
I was also fortunate enough to get a very lovely, helpful comment on that post from Yvonne, who shared the recipe she uses for CWA functions. It just required a bit of tweaking to the original ratios, but it is essentially the same. I used scone cutters this time, which meant they were much prettier and more uniform in size, so they didn't take a ridiculous long time to bake like last time. The high ratio of cream to flour meant that the scones were even softer and richer. They were so, so good. They had a very thin crust on the outside, and were uber soft and light in the middle. Not the least bit dry, and they smelt amazing! Even better than the previous recipe. Karen helped me wolf down these freshly baked scones with loads of strawberry jam. Those CWA ladies really are the scone masters, I bow down to you!
cwascones-2
For me, one of the most important things when making a scone is how you handle the dough. The more you work the dough, the tougher it will be. I was nearly weeping when I watched Aaron knead his scone dough on that train-wreck of a Masterchef challenge. And surprise, surprise they turned out chewy. Please, please, don't knead your dough, pat it together gently! You'll get your best scones from the first rounds you cut out, and they will get tougher each time you have to re-gather and re-pat the dough to cut more rounds, so try to get as many as you can out of that first disk of dough.
cwascones-5
CWA Scones
(recipe from Yvonne Dighton, see comments from previous CWA Scones attempt, makes 8-9 scones)
2 cups self-raising flour
1/4 tsp salt
150 ml pouring cream (35% fat)
Approx 2/3 cup milk
cwascones-3
Sift dry ingredients and preheat oven to 220-230 degrees C. Begin to cut cream into dry ingredients with a flat bladed knife, then gradually add milk until there is enough to form a soft dough. (I usually save a small amount of milk to brush the tops of the scones)
cwascones-7
Working quickly and gently, gather dough together on a floured bench. Try to handle the dough as little as possible, using lightly floured hands to stop dough sticking to you, and pat the dough into a rectangle about 3-3.5cm thick. You can lightly knead the dough with your hands for a smoother appearance but overknead it and your scones will be tough and hard.
cwascones-8
Cut out round using a 5-6cm scone cutter (push the cutter into the dough, don't twist) and place next to each other in a lined/greased heavy based baking dish that has sides (scones baked close together will rise higher and thus be lighter). I usually manage to cut about 5-6 scones, then I pat the scraps together and cut out another 2-3 and finally pat the scraps from that together into a ball to form the final scone. Lightly brush the tops of the scones with some extra milk using a pastry brush.
cwascones-9
Bake for 10-15 mins, until scones are cooked through and tops are lightly browned. Serve immediately with jam and cream. (I like to cover my waiting scones with a clean tea towel to keep them from going hard) Scones can be stored in the freezer for up to 3 months.
cwascones
Print Friendly and PDF