Monday, February 25, 2013

Date & Strawberry Oatmeal Cookies

Date & Strawberry Oatmeal Cookies
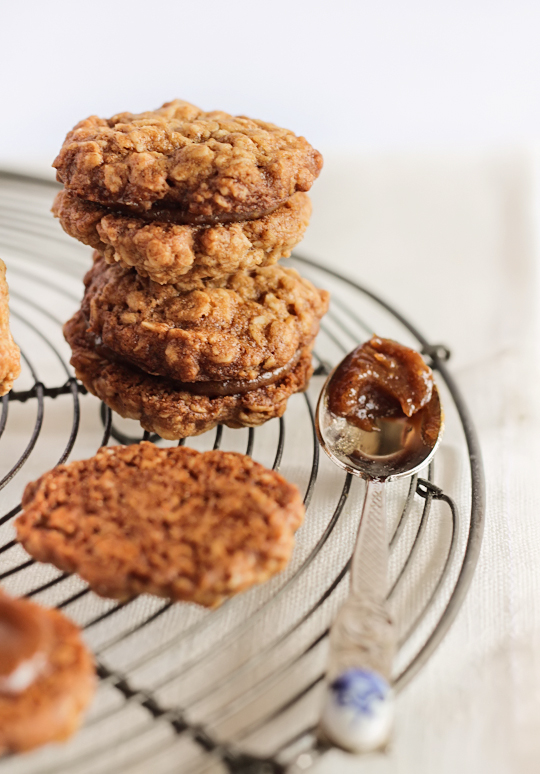
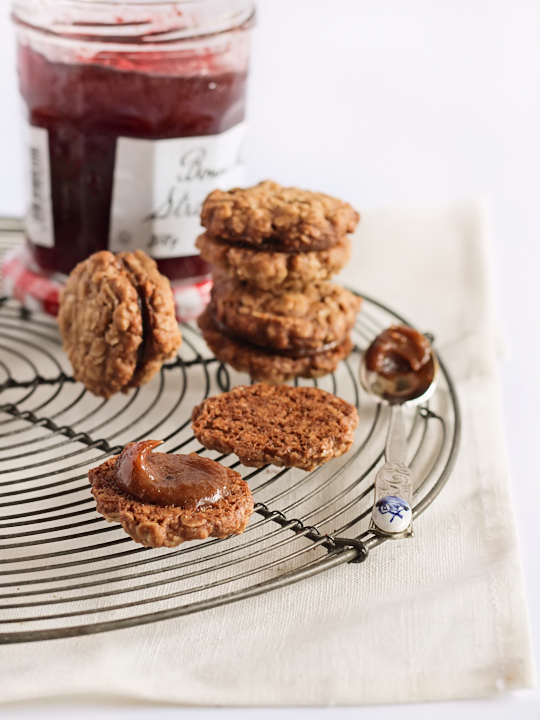
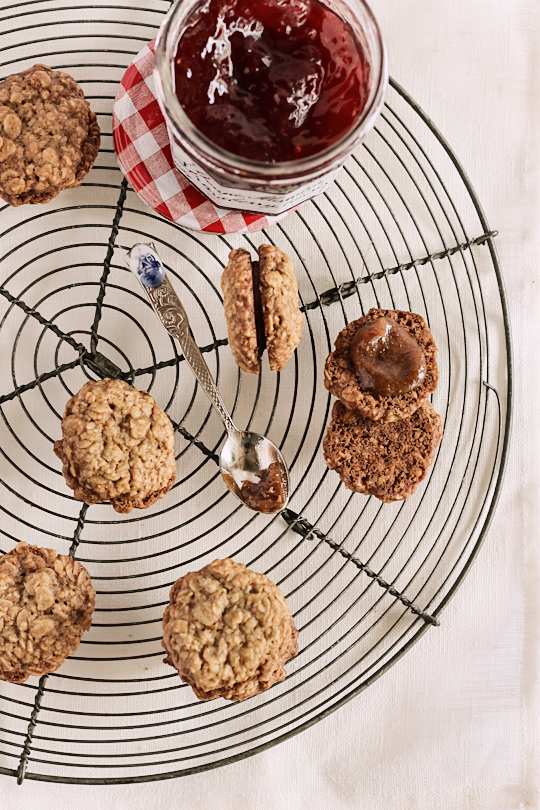
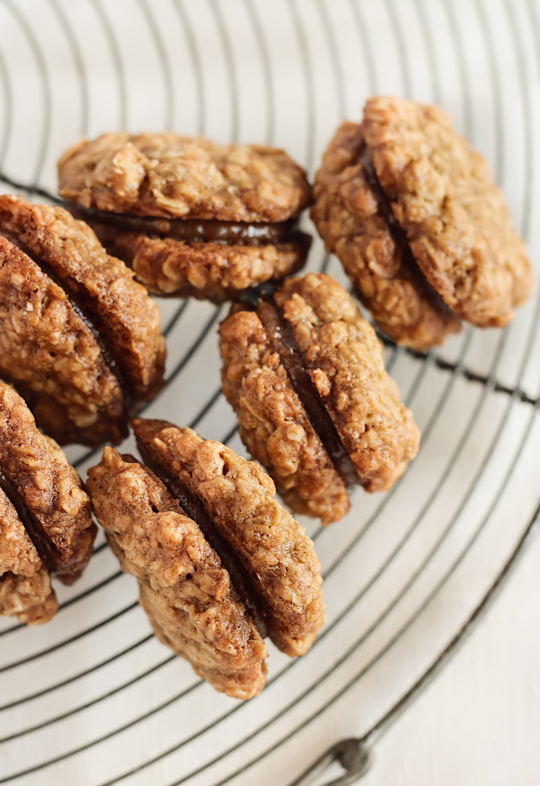
In case you can't already tell, I'm sticking to the really easy comfort-food recipes at the moment. I wanted something that I could whip up really quickly to have with a cup of tea while I whinged about how tired I was and how achey all my muscled are from packing and moving. These oatmeal cookies sandwiched with a date & strawberry filling were perfect.
Date & Strawberry Oatmeal Cookies1
I didn't realise until after I was done making these that they would be the last thing I would ever bake in my current kitchen. It's made me a little sad because this is the kitchen where I really learnt to bake, the kitchen where I started my baking blog. Oatmeal cookies are definitely not the prettiest of baked goods, but something about them is so happy and warm. It wasn't a bad way to say goodbye to my current oven.
Date & Strawberry Oatmeal Cookies
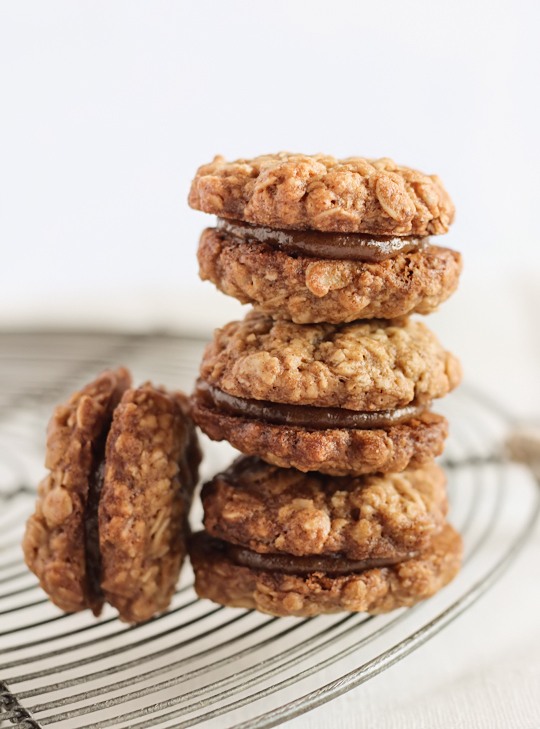
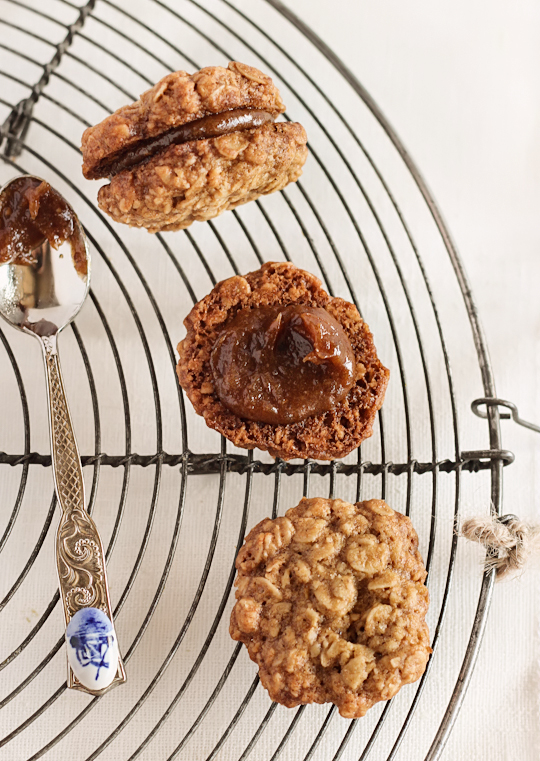
The original recipe that I used for the cookies was a fantastic one from Joy of Baking, but it was a tad too much oats and not enough cookie for my liking so I have adjusted the quantities of the oats slightly in the recipe below. Feel free to use the original recipe though, it may be because the original recipe mixes fruits and nuts into the cookie dough as well. Vanilla beans and strawberry jam are mixed into a date puree to make the filling, which was quite sweet so I reduced the amount of sugar in the recipe. They look a bit like Kingston biscuits, so there was some initial confusion from the people tasting them when they realised it was fruit and not chocolate in the middle. It's not usually a good thing to give people fruit when they are expecting chocolate but these biscuits are pretty great so they'll just have to get over it.
Date & Strawberry Oatmeal Cookies
It took me nearly three days to pack up all my props. I can't believe how much blogging-related crap I have accumulated over the last four years! A got all judgey and was like, "Do you really need that many cake stands?". The answer is OF COURSE. Have you seen how many cakes I bake?! Geez. The next post will be coming to you from my new place, it will definitely be interesting to find out how the oven over there performs, and to get used to photographing with different light. I really need a nap right now.
Date & Strawberry Oatmeal Cookies
(makes about 20 sandwiched cookies, adapted from Joy of Baking)
170 g (3/4 cup) butter, room temperature
3/4 cup (about 150 g) packed brown sugar
1 large egg
1 tsp pure vanilla extract
3/4 cup (about 100g) plain/all-purpose flour
1/2 tsp baking soda
1/2 teaspoon salt
1/2 teaspoon ground cinnamon
2 1/2 cups (about 220g) old-fashioned rolled oats

For the date filling:
1 1/2 cups (about 200g) dried pitted dates
1/2 cup water
1/2 tsp vanilla bean paste or pure vanilla extract
1/3 cup strawberry jam

Preheat oven to 180°C (350°F) and line two cookie trays with baking paper. Cream butter and sugar in a large mixing bowl with an electric mixer on high until light and fluffly. Add egg and vanilla extract and beat to combine. In a separate bowl, whisk together the flour, baking soda, salt, and ground cinnamon. Add the flour mixture and beat on low until incorporated. Stir in the oats until mixture is uniform. Roll about 1 tbsp worth of mixture in your hands and gently flatten into the prepared trays so they are about 1cm thick. Make sure to leave about 1.5 cm space around each cookie as they will spread slightly. Bake for about 10-12 minutes or until golden brown but still soft in the centre. Cool for 5 minutes on the tray then transfer to a wire rack to cool completely.
Date & Strawberry Oatmeal Cookies
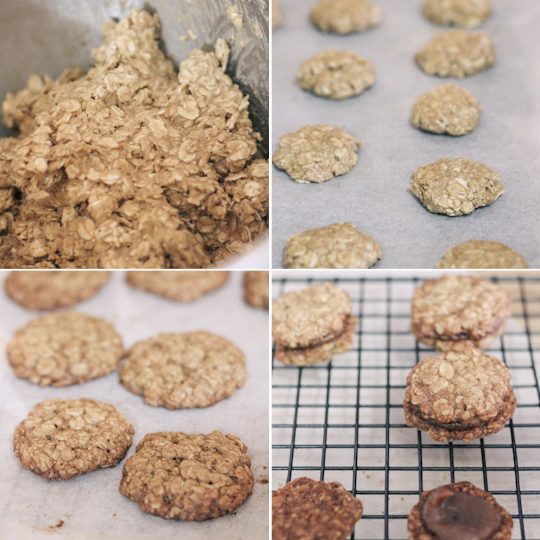
For the filling, place dates. vanilla bean paste and water in a small saucepan on low heat and stir occasionally, until the dates are soft and have absorbed most of the water (about 5-10 minutes). Cool to room temperature and puree in a food processor or blender with the strawberry jam. Sandwich biscuits with a small dollop of filling. Store in an airtight container for up to 3 days (I kept mine in the fridge to stop them from getting too soggy).
Date & Strawberry Oatmeal Cookies
Print Friendly and PDF

Sunday, February 17, 2013

Blueberry, White Chocolate & Lime Muffins

Blueberry, White Chocolate & Lime Muffins
I AM SO TIRED. Moving is tiring, and I've barely even started. It's a bit of a struggle to lift my arms to type.
Blueberry, White Chocolate & Lime Muffins
There is no long explanation for these muffins, I'm trying to get rid of stuff from my kitchen. Frozen blueberries, limes from Mum and a random block of white chocolate went into these Blueberry, White Chocolate & Lime Muffins.
Blueberry, White Chocolate & Lime Muffins
I based it on a muffin recipe from Exclusively Food, they always have great basic recipes. These muffins are great; a crisp, golden crunchy muffin top and not the least bit dry inside. No mixer needed, just two bowls and some stirring.
Blueberry, White Chocolate & Lime Muffins
You may notice in the before pics I had different muffin papers than the ones that ended up in the after photos. Yeah, the original papers had some serious structural integrity issues. It got messy. Anyway muffins good, Steph tired. I gave up after taking a few photos and ate a muffin right there.
Blueberry, White Chocolate & Lime Muffins
(adapted from Exclusively Food, makes 9-12 muffins)
2 tsp lime juice + finely grated zest of 1 lime
250ml (about 1 cup) milk, at room temperature
1 large egg
300g (about 2 1/3 cups) self-raising flour
150g (3/4 cup) brown sugar (can replace with white sugar)
200g (7oz, about 1 cup) white chocolate chopped into small chunks
200g blueberries (I used frozen (not defrosted) but fresh will work too)
125g butter, melted (can replace with vegetable oil)

Preheat oven to 190°C (375°F) (170°C (340°F) if fan-forced). Line a muffin tray with papers. Whisk lime juice, zest, milk and egg in a medium bowl until well combined. Place self-raising flour, brown sugar and white chocolate in a large bowl. Add blueberries and gently stir to combine.
Blueberry, White Chocolate & Lime Muffins
Add butter and egg mixture to the dry ingredients. Gently stir until just combined and take care not to overmix. Fill prepared muffin papers about 3/4 full. Bake for about 22-27 mins, a skewer or knife inserted into the centre of a muffin should come out without any batter attached and if you press lightly on the centre of a muffin; if it springs back, it's ready. (I used oversized muffin papers so it took a bit longer.) Best eaten fresh out of the oven, but can be stored in an airtight container at room temp for a couple days (and can be microwaved before eaten, or frozen to store).
Blueberry, White Chocolate & Lime Muffins
Print Friendly and PDF

Monday, February 11, 2013

Chocolate Buttermilk Cupcakes with Earl Grey Buttercream & Salted Caramel

Chocolate Buttermilk Cupcakes with Earl Grey Buttercream & Salted Caramel
Gong Hei Fatt Choy! Happy Lunar New Year everyone! If you follow me on instagram you would have seen my favourite part of CNY eve is arranging the yee sang. This year I made it look like a snake. It was tricky because I was trying my hardest to make sure it didn't look too, er, phallic. And I was sad to destroy him (even though it was very tasty). I named him Harold, I don't know why.
Chocolate Buttermilk Cupcakes with Earl Grey Buttercream & Salted Caramel
I didn't have the chance to bake any new year treats this year and my Mum brought back heaps of cookies from KL, so I randomly baked up these cupcakes instead. Chocolate Buttermilk Cupcakes with Earl Grey Icing and Salted Caramel. It was a good excuse to use up some leftover buttermilk and I love doing dessert recipes involving any kind of tea, especially Earl Grey.
Chocolate Buttermilk Cupcakes with Earl Grey Buttercream & Salted Caramel
You might think it sounds like a strange combination, but the moist, slightly bitter dark chocolate cake is heavenly when you add the fluffy meringue-style icing with a hint of bergamot. It's pretty much chocolate and orange! And salted caramel goes with everything. I just love the way it looks drizzled into the swirls of icing.
Chocolate Buttermilk Cupcakes with Earl Grey Buttercream & Salted Caramel
I know Valentine's Day is coming up soon but this year I seem to be allergic to anything pink or heart-shaped when it comes to V-day baking. I've done it before but I'm avoiding it this year. Maybe because my husband totally loathes the holiday I'm try not to cheese it up. To be honest I find this cupcake a way more sexy, awesome treat to make for someone you love.
Chocolate Buttermilk Cupcakes with Earl Grey Buttercream & Salted Caramel
I totally over-estimated how much icing I would need for the cupcakes (but adjusted the amounts in the recipe below), so I doubled the same chocolate buttermilk batter recipe to make a full-sized cake. It was just as good, if not better. I brought the big cake over for dessert with my family and even after all our reunion dinner feasting everyone still went back for seconds of this cake.
Chocolate Buttermilk Cupcakes with Earl Grey Buttercream & Salted Caramel
The cupcakes might be a more sensible option if you want to stop yourself from eating too much of this cake. It's so moreish because surprisingly it's not that sweet and there's so many contrasting textures in one bite. Hopefully in the next few weeks I can keep up the regular posts because I'm in the middle of moving apartments. I'm nervous to see how the oven in my new place performs! There may be several baking failures coming up.
Chocolate Buttermilk Cupcakes with Earl Grey Buttercream & Salted Caramel
Chocolate Buttermilk Cupcakes with Earl Grey Icing & Salted Caramel
(cupcake recipe from Martha Stewart, icing adapted from Honey & Jam)
Note: This recipe yields 10-12 cupcakes, if you want to make a whole cake, double the cake batter quantity and bake in a 18-20cm round tin greased and lined with baking paper for about 45 minutes or until a skewer comes out clean
For the cupcakes:
3/4 cup (about 95g) plain/all-purpose flour
3/4 cup (about 170g) sugar (I used caster/superfine but white/granulated is fine too)
1 tsp baking powder
1/2 tsp baking/bicarb soda
1/4 tsp salt
6 tbsp unsweetened cocoa powder, preferably Dutch-process
85g (6 tbsp) butter, melted
6 tbsp (about 90ml) buttermilk
1 large egg
1 large egg white

Preheat oven to 180°C (350°F). Line a standard cupcake tray with papers. In a large mixing bowl, combine flour, sugar, baking powder, bicarb soda, and salt; set aside. With an electric mixer, combine cocoa and 3 tablespoons hot water until a thick paste forms (this process intensifies the chocolate flavor). Add butter, buttermilk, egg, and egg white; beat until combined. Whisk in flour mixture until smooth. Scoop (or spoon) batter into prepared papers, filling them about 3/4 full. Bake until a toothpick inserted in the center of a cupcake comes out clean, about 20 minutes. Transfer cupcakes to a wire rack to cool completely.
Chocolate Buttermilk Cupcakes with Earl Grey Buttercream & Salted Caramel
For the Earl Grey Icing:
2 large egg whites
3/4 cup tightly packed brown sugar
1/4 tsp cream of tartar
1/8 teaspoon salt
1/2 cup strongly brewed Earl Grey tea (I used 3 teabags/about 3 tsp loose leaf tea)

Beat egg whites in a large mixing bowl until foamy & thick, they should mound, but not peak. In a saucepan, combine the sugar, cream of tartar, 1/4 cup Earl Grey tea & salt. Bring to a boil. Boil for 3-4 minutes, or until a candy thermometer reads 117°C (242°F) and all sugar is dissolved. Begin beating the egg whites again and slowly pour in boiling sugar syrup in a slow steam. Continue to beat on high for 7 minutes or until stiff peaks form. Add remaining tea by the tablespoon, beating after each addition. Continue beating until icing reaches desired consistency (it should hold its shape when piped and cooled), about 2 minutes.

For the salted caramel, I made a half batch of this recipe from Brown Eyed Baker. To assemble, pipe or spread icing on the cupcakes. Spoon cooled salted caramel over the top. Serve immediately or store in an airtight container for several days.
Chocolate Buttermilk Cupcakes with Earl Grey Buttercream & Salted Caramel
Print Friendly and PDF

Monday, February 4, 2013

Banana Layer Cake with Passionfruit Cream Cheese Icing

Banana Layer Cake with Passionfruit Cream Cheese Icing
Sorry this post is slightly late and will probably be slightly incoherent and delirious. It was a very busy weekend and I woke up this morning totally sick and gross. Damn you immune system, you were doing so well this year! Anyway this weekend we were celebrating my niece's one month with a traditional Chinese full moon party. It was a pretty small gathering with pretty much just family and I was in charge of the cake.
Banana Layer Cake with Passionfruit Cream Cheese Icing
My brother & sis-in-law requested their favourite cake flavour, banana cake with passionfruit cream cheese icing, a flavour combination we learnt about from Simmone Logue and have loved ever since. The construction of this cake was a nightmare, nothing went to plan for me. But we'll talk about that later. It was worth all the effort because it was for this cute face:
Full Moon Party
All together now: AWWWWWWWWWWWWWWWWWWWWWWWWWWW.

So anyway, I used the same recipe as last time but I was gonna make it special by baking four layers of cake and using this petal icing technique. I usually stay far away from icing techniques like this that require tidy and precise work. I am not good at either. But the tutorials online make it look so doable that I just had to try it. I learnt very quickly that the cream cheese icing I had made was WAY WAY too runny for it. And it was so runny that my cake semi-collapsed, so I had to make a whole new batch of icing and start over. The macarons I wanted to make in rainbow colours spelling out her name turned out so uneven and ugly but I didn't have time to redo them. BAH.
Banana Layer Cake with Passionfruit Cream Cheese Icing
Like any full moon celebrations there was ang koo kueh from Alice's (tortoise-shaped glutinous rice flour cakes filled with mung bean paste). I love this kueh.
Full Moon Party
I also helped prepare the red eggs, which are meant to symbolise fertility and harmony.
Full Moon Party
Lunch was ordered off the Mamak catering menu; a gigantic pile of fried chicken, huge serves of nasi lemak, mee goreng and chicken satay and a HUGE 4 FREAKIN LITRES of teh o ais limau (Malaysian iced tea with lime). I drank a lot of tea and ate a lot of chicken.
Full Moon Party
We had to wake up little Sarah to cut the cake...
Full Moon Party
...which made her bawl her eyes out at first, hence the funny face below.
Full Moon Party
And there's a shot below of the layers inside the cake. Not as wonky as I thought, and super moist and delicious. Yay! I also decorated the cake with gold coin chocolates and some red Lindt chocolate eggs. It's the first time that having the supermarkets selling Easter eggs ridiculously early has actually come in handy! I don't want to talk about the macarons, sometimes you just make a bad batch of macs. Now I need to go make myself some chicken soup.
Banana Layer Cake with Passionfruit Cream Cheese Icing
(based on this recipe, makes a 4-layer 20cm square or round cake)
For the banana cake:
250g softened unsalted butter (salted is fine too)
2&1/4 cups (about 500g) sugar (I used caster/superfine but granulated white sugar is fine too)
4 eggs
2 cups mashed very over-ripe bananas (about 4 bananas)
1 tsp pure vanilla extract
500g (4 cups) plain flour
2 tsp bicarb (baking) soda
1 tsp salt
1&1/2 tsp ground cinnamon
1/3 tsp ground allspice
1 cup buttermilk (or 1 cup milk + 2 tsp lemon juice)

Preheat the oven to 180°C (350°F), grease well and line the base of two 20cm square tins with baking paper (or round tins if you prefer a round cake). Cream butter and sugar in a large mixing bowl with an electric mixer on high until pale and fluffy. Beat in eggs one at a time until combined then add banana and vanilla and beat until combined. Sift dry ingredients (flour, bicarb, salt, cinnamon, allspice) together in a separate bowl. Add half the dry ingredients and half the buttermilk to them mixture, fold until just combined, then add the remaining dry mixture and buttermilk and repeat. Divide mixture between the tins and bake for 50-60 mins or until a skewer inserted into the centre comes out clean and the cake is golden brown. (If you only have one tin bake one cake after the other) Cool cake in its tin on a wire rack for a few minutes before turning out.
Banana Layer Cake with Passionfruit Cream Cheese Icing
For the passionfruit cream cheese icing:
500g (about 4.5 sticks) unsalted butter, softened
250g (about 9oz) cream cheese, softened
3-5 passionfruit pulp(adjust to taste, you need more if you strain out the seeds)
2 tsp lemon juice (optional)
About 500g (4 cups) icing sugar, sifted, adjust to correct texture

Place  butter and cream cheese in a large mixing bowl and beat on high until smooth and fluffy. Add passionfruit pulp and lemon juice (I strained the seeds out of the passionfruit pulp so I would have a smooth pipable icing but this isn't necessary). Gradually add icing sugar and mix on low until it starts to come together, then mix on high until fluffy. You may need to add more icing sugar to get the ideal consistency, you want the icing to be easy to pipe but to hold its shape. 

To assemble cake, slice the two banana cakes if half if you wish to have four layers. Sandwich a layer of icing between the cake layers and crumb coat the outside. You may need to chill the cake and the leftover icing if it is too runny. Spread or pipe remaining icing on the outside of the cake. If you wish you try the petal icing technique I used in the photos, there is a tutorial here but I wouldn't recommend it for a soft icing like this cream cheese one.
Full Moon Party
Print Friendly and PDF