Tuesday, July 22, 2014

Cookies and Cream Baked Chocolate Doughnuts

Cookies and Cream Baked Chocolate Doughnuts
I love doughnuts. I eat them more often than I should. They're one of the few things that I would rather buy than make myself, mostly because I hate deep-frying anything. Me and hot oil don't mix well. You're talking to a girl who managed to stab a blunt knife all the way through her finger when she was sleepily trying to remove a pit from an avocado early one morning. I'm not to be trusted around sharp things, flames or anything boiling hot.
Cookies and Cream Baked Chocolate Doughnuts
This is why I like the idea of baked doughnuts. I've made cinnamon ones before and they were pretty good. Of course, they'll never taste as soft and fluffy as the real deep-fried thing, but it comes very close. And then you don't have to deal with all the mess of getting rid of all that oil. And no need for a special doughnut pan!
Cookies and Cream Baked Chocolate Doughnuts
So I saw lots of gorgeous looking chocolate doughnuts on pinterest while trying to get ideas for this recipe, but all of them were basically cake batter that needs to be poured into a special doughnut-shaped pan to be baked. They sound delicious, but I usually prefer not to have to buy another pan for one specific purpose (there are exceptions to this but you know what I mean). So I decided to play around with the original plain baked doughnut recipe (which is more like bread than cake) and turn it into a chocolate doughnut. My first attempt was noooot good. The yeast didn't activate and they stayed like hard, poo-like lumps in the oven. But the second attempt with a few tweaks came out perfectly.
Cookies and Cream Baked Chocolate Doughnuts
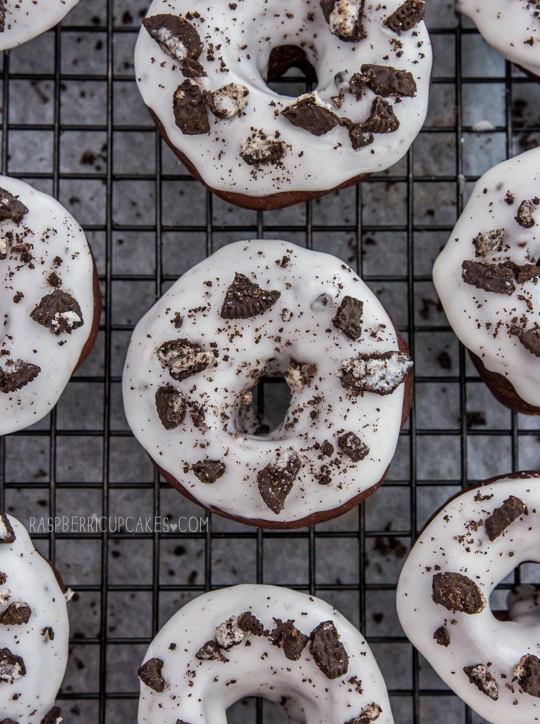
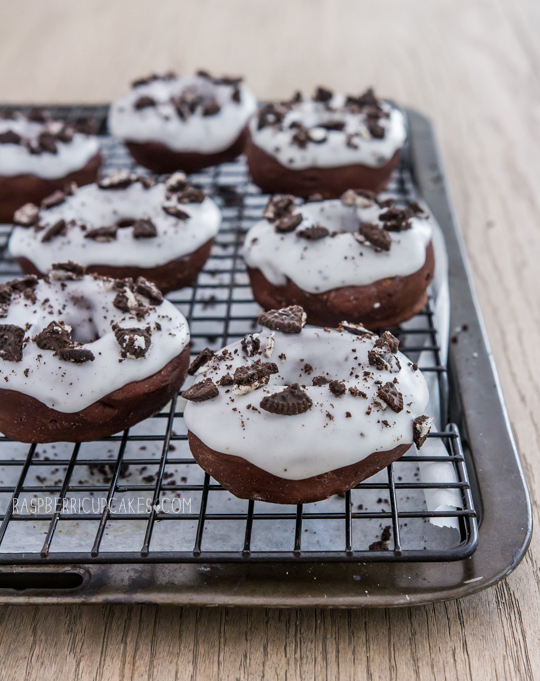
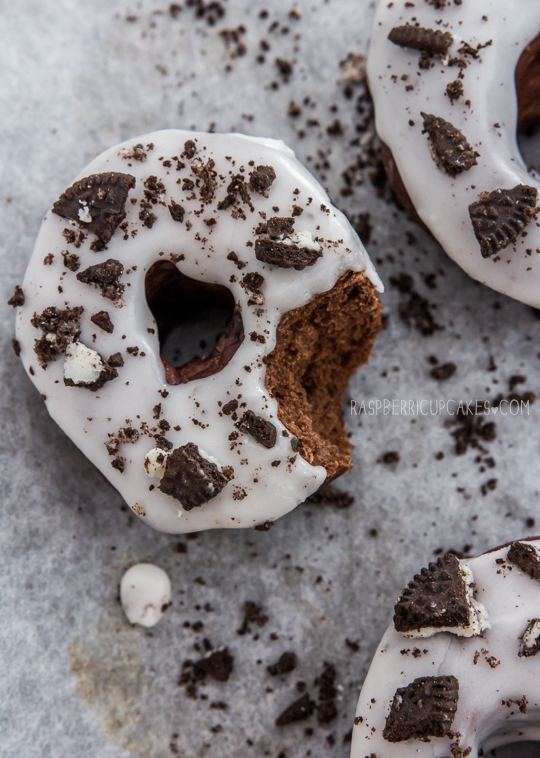
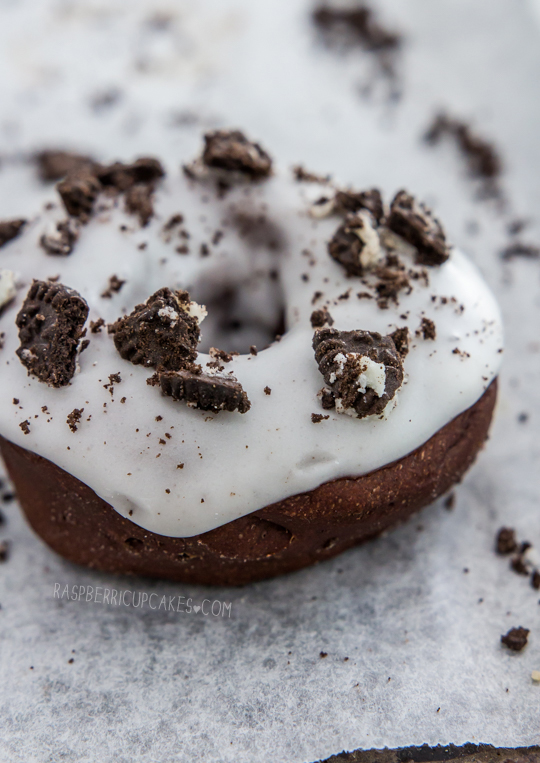
I topped these doughnuts with a cookies and cream flavoured topping. It was a simple icing glaze and lots of Oreo bits. I've always wanted to do a cookies and cream flavoured recipe but nothing has seemed like a fun enough idea until this one. To be perfectly honest, the baked version of these doughnuts can be fairly dry at room temperature, but I find that if you warm it up ever so slightly in the microwave before eating it, it keeps makes them super soft and more like the fried version, without melting the icing. So please, serve these warmed up! They are so much better. 
Cookies and Cream Baked Chocolate Doughnuts
Anyway, these were fun for a baking day where I wasn't in a rush and had time to wait for the dough to rise. I don't get many of those days anymore so I had a lot of fun with it. The only thing I'd like to work on is how to make these even softer and less dry at room temperature, maybe if I did a dough that had more butter, like brioche. Oooooh. And apologies for the slightly dark photos, I'm still getting used to my new computer screen!
Cookies and Cream Baked Chocolate Doughnuts
(adapted from these baked doughnuts, makes about 12)
For the doughnuts:
1 cup milk
1 1/2 teaspoons (1 packet/7g) instant dried yeast
20g (1.5 tbsp) unsalted butter, melted
350g (about 2.5 cups) plain flour
50g (about 0.5 cups) cocoa powder (I used dutch-processed but regular is fine)
1/2 cup (100g) caster/granulated sugar
1/2 teaspoon ground cinnamon
Mixture to help rolling dough: 2 tbsp icing (confectioner's) sugar and 2 tsp cocoa powder, sifted together
  1. Heat milk to lukewarm (I did this by placing it in a microwave-safe jug and zapping it on medium-high (75%) for about 20 seconds). Make sure it's not too hot, then stir in yeast and let it sit for a minute so it starts to froth up. 
  2. Sift flour and cocoa powder together into a large mixing bowl. Stir in sugar and cinnamon. Make a well in the centre. Add melted butter, then add milk mixture. Mix to form a soft dough. 
  3. If you have a mixer with dough hooks, beat on high for about 5-7 minutes until smooth and elastic. If not, turn out onto a surface dusted with the icing sugar/cocoa powder mixture (rather than using flour which will affect the colour of your dough). Knead for 10 minutes or until smooth and elastic.
  4. Place dough in a lightly oiled bowl. Cover with plastic wrap. Set aside in a warm place for 1 hour or until doubled in size (mine took a little longer during winter). 
  5. Line 2 baking trays with baking paper. Using your fist, punch dough down. Dust your surface with more icing sugar/cocoa mixture. Knead until smooth. 
  6. Roll dough out until about 1 cm (1/3 inch) thick. Using a 6.5cm (2.5 inch) cutter, cut 12 rounds from dough. Using a 3cm (1 inch) cutter, cut circles from the centre of each round. 
  7. Place doughnuts (and doughnut holes), 5cm apart, on prepared tray. (You can try rerolling the dough scraps and holes to cut more doughnuts but I found that these ones turned out a lot uglier.) Cover with lightly greased plastic wrap. Set aside in a warm place for 30 minutes or until doubled in size.
  8. Meanwhile, preheat oven to 180°C (350°C). Bake doughnuts for 10 to 12 minutes or until cooked through (make sure not to overbake or they will be hard and dry. The easiest way to test if they're ready is to sacrifice one for tasting).
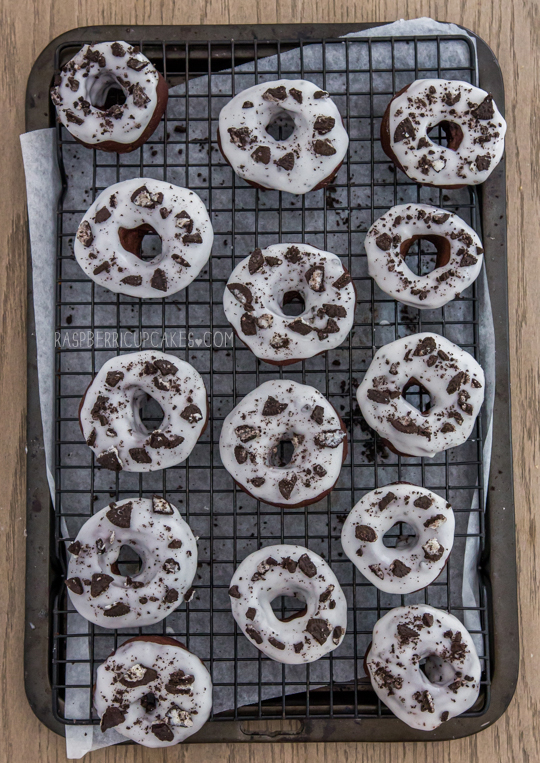
  9. Place on a wire rack and cool completely before icing. They must be completely cooled or the icing will melt! Note: doughnuts are best served after being warmed slightly in the microwave for about 15 seconds.
Cookies and Cream Baked Chocolate Doughnuts
For the icing:
2 cups (150g) icing sugar, sifted
About 2 tbsp (30-40 ml) milk
Oreo biscuits, full sized or mini (I used mini)
  1. Place several biscuits in a ziploc bag and crush with a rolling pin (or blitz in a food processor) to make fine oreo crumbs (I used about 1/3 cup of fine crumbs)
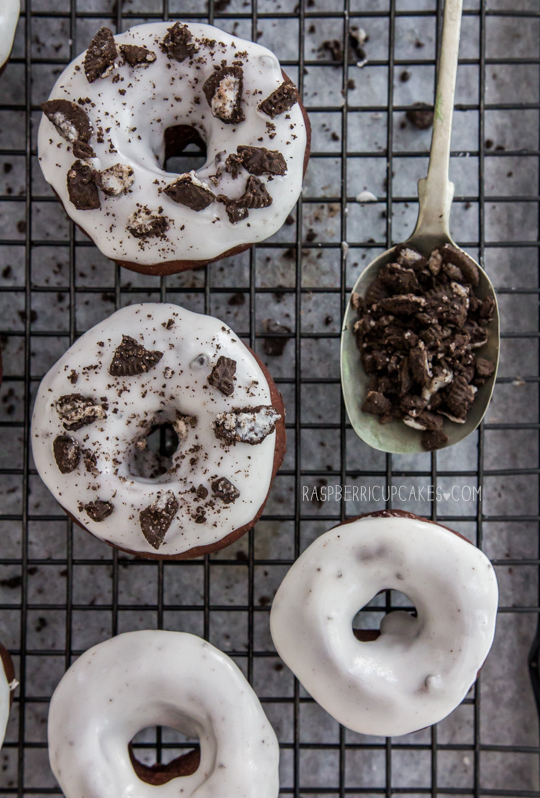
  2. Using a sharp knife, chop up several biscuits into larger chunky bits for decorating (about 3/4 cup of bits).
  3. Place icing sugar in a bowl and gradually mix in milk until it becomes a very thick paste (add the milk very slowly until it is all mixed in before adding more milk). You want it to be smooth but even thicker than tooth paste, so it doesn't run straight off your doughnuts.You can add a small pinch of fine Oreo crumbs to the icing at this point if you want it to look a little more like cookies and cream icing, but you don't need to.
  4. Dip the tops of your doughnuts in the icing, or use a spoon to spread a thick layer of icing over the top of each doughnut (icing should settle back down after being spread on, if it is too thick/starting to dry out then add a tiny bit more milk, and if it is running too thin add more icing sugar).
  5. Place in a wire rack to allow icing to set. While icing is still set, sprinkle several big chunks of Oreo pieces over each doughnut and sprinkle a pinch of fine crumbs over each doughnut as well. Set aside to set for about half an hour, then store in an airtight container until ready to serve. Doughnuts will store in an airtight container at room temp for about 2 days. Note: doughnuts are best served after being warmed slightly in the microwave for about 15 seconds.
Cookies and Cream Baked Chocolate Doughnuts
Print Friendly and PDF

Monday, July 14, 2014

Lemon Syrup Sponge Cake with Whipped Cream Cheese Icing and Berries

Lemon Syrup Sponge Cake with Whipped Cream Cheese Icing and Berries
It's been a crazy couple of weeks. I lost my tiny, ancient budgie who has been with me since I moved to Sydney and who I thought was going to live forever. I finally, FINALLY got my Ps, so have a newfound sense of freedom (don't judge, I lived right next to a train station for over 10 years so there wasn't much motivation to drive until recently). We bought a couch. So yeah...life. Anyway. This past weekend we had my cousin from Singapore visiting for her birthday, and I demanded to make her birthday cake.
Lemon Syrup Sponge Cake with Whipped Cream Cheese Icing and Berries
She requested anything with berries, preferably with sponge and cream cheese. So I made a simple vanilla sponge cake and soaked the sponge in a sticky lemon syrup, sandwiched it with one layer of raspberry filling and another layer of blueberry filling, and covered it in a fluffy whipped cream cheese icing, fresh berries and raspberry heart macarons. My original idea was to tint half the icing with blueberries to make it purple, and the other half with raspberries to make it pink and to ice the cake with an ombré effect. I did it, but the tinting was so faint that you can barely see it so it probably wasn't worth it.
Lemon Syrup Sponge Cake with Whipped Cream Cheese Icing and Berries
I'm still having issues with hollow macarons in my new oven, I'm going to have to keep experimenting to get the right temperature. It's driving me nuts. Anyway, it was one of the several things that I wasn't 100% happy about with this cake, but whatever it tasted great! Everyone was saying that they loved that the sponge wasn't too dry, the filling was super tasty and the icing tasted almost like ice cream! (Sneaky shot of the innards from my cousin) Surprisingly the whipped cream and cream cheese holds up fairly well at room temperature, the cake didn't melt at all (though it probably helps that it was friggin freezing). I think the icing worked particularly well with the sponge since both were quite delicate in texture and flavour, but the icing is so great that I want to try it out with some white cake next time. Happy Birthday P!
Lemon Syrup Sponge Cake with Whipped Cream Cheese Icing and Berries
(makes a 3 layer 18cm (7") round cake, sponge recipe from Gourmet Traveller)
For the Lemon Syrup Sponge Cake:
Note: If you are new to sponge cakes make sure you click through to the Gourmet Traveller link above for extra tips. This sponge cake relies solely on the whipped eggs for leavening and it is important you follow all the steps carefully.
Sponge cake:
60g (about 4.5 tbsp) butter, melted and cooled plus extra for greasing tins
180g (about 1 &1/3 cups) plain/all-purpose flour, plus extra for dusting
6 eggs, at room temperature
165g (about 3/4 cup) caster/superfine sugar
1 tsp pure vanilla extract
  1. Make sure your eggs are at room temp and preheat oven to 180°C (350° F) (you may need to adjust to 160-170°C (340° F) for fan-forced). 
  2. Brush three 18cm (7 inch) round cake tins with melted butter, line base and sides with baking paper, grease paper with a little extra butter and then dust lightly with flour. 
  3. Triple-sift flour and set aside. 
  4. Whisk eggs, sugar and vanilla in an electric mixer until thick, pale and tripled in volume (about 7-8 minutes). Sift over flour in two batches, folding each batch in with a large metal spoon or spatula.
  5. Fold in melted butter. 
  6. Carefully pour equal amounts into prepared tins and bake until light golden and centre springs back when pressed lightly with your fingertip (about 20 minutes). 
  7. Pull cake gently away from sides of tin with your fingers or carefully loosen with a knife. Turn onto a wire rack, remove baking paper, turn back over swiftly and cool completely. 
Lemon Syrup:
Zest of 1 lemon
Juice of 2 lemons, about 1/2 cup
1 cup (about 200g) sugar
1/2 cup water
  1. Place all ingredients in a medium saucepan over medium heat and stir until sugar dissolves. 
  2. Increase heat slightly and allow mixture to come to the boil, then simmer for about 3-5 minutes to allow syrup to thicken slightly. 
  3. Set aside to cool for 10 minutes.
  4. Use a fork or skewer to poke holes over the surface of your cooled sponge cakes. Use a brush or a small spoon to carefully drizzle lemon syrup over the surface of all three cakes (you don't need to use all of it, just enough to generously cover the surface of all three). 
  5. Cakes can be wrapped in clingfilm and stored in the fridge overnight, until ready to assemble.
Lemon Syrup Sponge Cake with Whipped Cream Cheese Icing and Berries
For the berry filling:
300g (5oz) berries, fresh or frozen (I used 1 punnet raspberries to fill between one layer, and blueberries for the other layer)
1/3 cup sugar
4 tsp lemon juice
1/2 tsp pure vanilla extract or vanilla bean paste
2 tbsp cornflour (cornstarch) + 4 tsp cold water
  1. Place berries, sugar, lemon juice and vanilla in a medium saucepan and place on medium heat. Stir over heat until sugar dissolves. 
  2. Mix cornflour and water together in a separate small bowl then add to the saucepan and stir over medium heat until mixture thickens, about 3-4 minutes. Set aside to cool.
For the whipped cream cheese icing:
250g (about 9oz) cream cheese, softened
1/2 cup (about 100g) sugar
300ml (about 1 & 1/3 cups) thickened (heavy) cream
Optional: 1/4 tsp vanilla extract or 2-3 tbsp of berry filling from above to flavour icing
  1. Place cream cheese and sugar in a large mixing bowl and beat with an electric mixer on high until smooth.
  2. With the mixer still running on medium speed, gradually add cream to mixture.
  3. Beat on high until mixture reaches stiff peaks, take care not to over mix or cream will split.
  4. Fold in vanilla or berry filling to flavour mixture.
To assemble cake:
  1. Place first cake layer on your serving plate or stand. 
  2. Spread a layer of berry filling over the top of the cake (I started with blueberry for the bottom layer and raspberry on top).
  3. Sandwich with another cake layer and repeat. 
  4. Crumb coat cake with cream cheese icing and chill cake for 15 minutes.
  5. Cover cake with remaining icing, smoothing with an offset spatula.
  6. Decorate with additional fresh berries and/or macarons (recipe here).
Lemon Syrup Sponge Cake with Whipped Cream Cheese Icing and Berries
Print Friendly and PDF