Monday, April 30, 2012

Banana Scones with Whipped Honey Butter

Banana Scones with Whipped Honey Butter
My love of scones is well-documented. But one thing has always irked me about my homemade scones; they're not very photogenic. In fact, the lumpiness and uneven shape of my original CWA scone post makes me cringe so much that I keep wanted to redo the photos. But then I made this batch of Banana Scones with Whipped Honey Butter, and I realised that all my scones look pretty lumpy and uneven. It's my fault, I'm terrified of over-working the dough because there is nothing worse than a tough, rock-hard scone. I want my scones to be fluffy clouds of deliciousness. So I guess I still have a way to go before I improve the look of my scones to the level that you see from the CWA ladies.
Banana Scones with Whipped Honey Butter
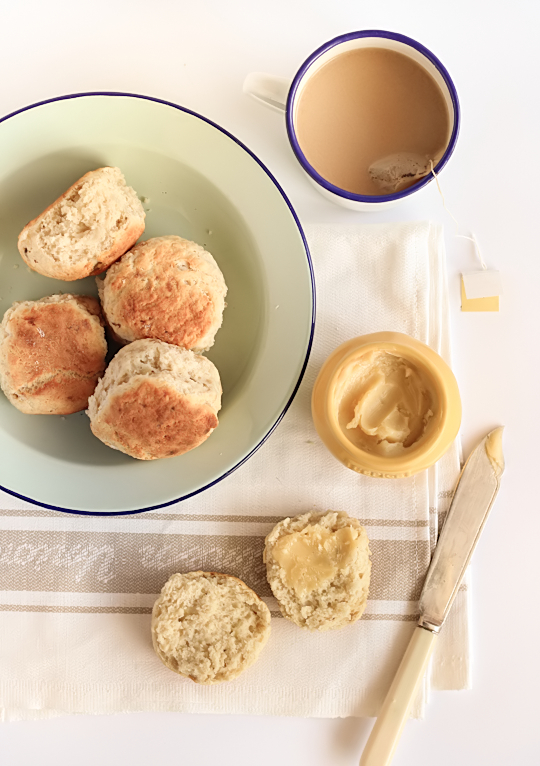
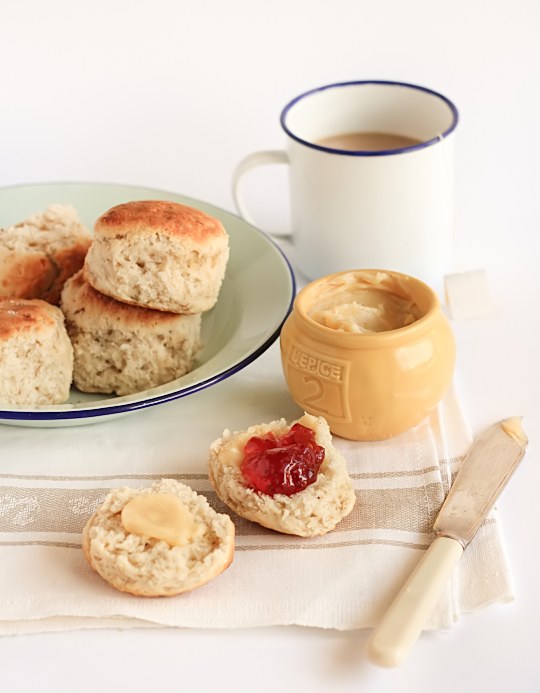
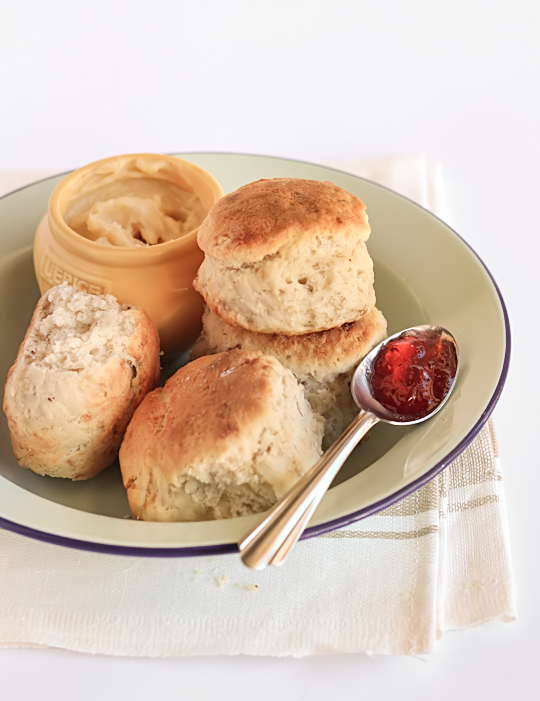
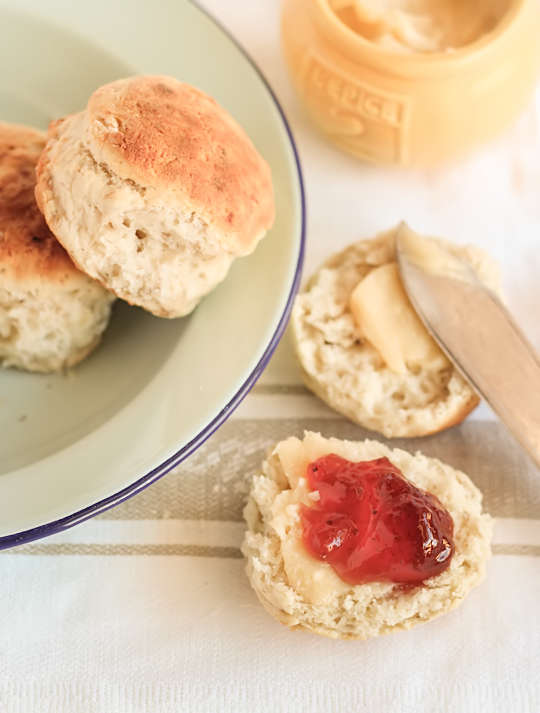
So I may not be 100% happy with how these look, but I do love how they taste. It's a great way to use up those bananas that are too ripe, and that extra cream you might have in your fridge (I always have extra cream but that's me). The scones are super soft and light, and they are really meant to be served with some kind of sweet topping, like the whipped honey butter and strawberry jam, or cream & jam. The scones themselves are not sweet at all, so you'll have to add some icing sugar and spices to the scone mixture if you plan on eating them on their own.
Banana Scones with Whipped Honey Butter
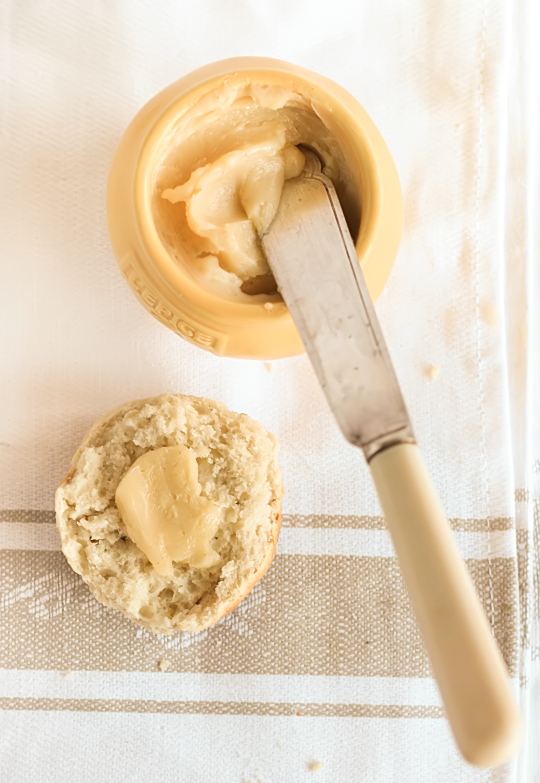
Originally I was planning to make some honeycomb butter to go with these scones, but I was too lazy to make my own sugar honeycomb, and I managed to eat the two Crunchie bars that I bought for it. Chocolate bars do not last very long in my house. But this fluffy honey butter works just as well with the banana scones, with the added sweetness and just a hint of cinnamon. It's so good melted on a warm, freshly baked scone.
Banana Scones with Whipped Honey Butter\
My favourite part about making these scones was opening up my oven to be greeted with the smell of the warm banana in these scones. It smells amazing! Because the scones are so light the flavour is not super intense, but it's definitely noticeable. I'm quite happy to eat these for breakfast, brunch, tea or dessert. In fact I've been slowly making my way through a batch over the last day, zapping them in the microwave until they're piping hot, slathering them with the honey butter and strawberry jam and enjoying them with a giant steaming mug of tea.
Banana Scones with Whipped Honey Butter
(makes 9-10 scones, adapted from my plain scone recipe)
300g (about 2 1/3 US cups flour, closer to 2 metric cups) self-raising flour, sifted
1 over-ripe medium banana, well mashed (about 1/3 cup)
1/4 tsp salt
100ml (about 1/2 cup minus 1 tbsp) pure/pouring cream (min 35% fat, heavy whipping cream in the US)
160ml (about 2/3 cup) milk
Note: if you are not planning to make the butter or to serve with jam, I recommend you add about 2 tbsp sifted icing sugar and 1/2 tsp ground cinnamon to the flour mixture

For the butter: (Alternatively you could make Bill's honeycomb butter)
115g (1 stick) unsalted butter, at room-temperature
4 tbsp honey
1/8 tsp ground cinnamon
To serve: strawberry (or any other flavoured) jam, can replace butter with clotted cream

Remove the butter ahead of time to allow it to soften. Preheat oven to 230°C (445°F), 220 °C (430°F) fan-forced. Sift flour and salt together in a large mixing bowl and make a well in the centre, place the mashed banana in the centre. Gradually pouring the cream into the bowl, begin to cut cream and banana into dry ingredients with a flat bladed knife so that it starts to come together, then gradually add milk (using the same cutting motion with the knife to combine the ingredients) until there is enough to form a soft dough. (I usually save a small amount of milk to brush the tops of the scones)

Working quickly and gently, gather dough together on a floured bench. Try to handle the dough as little as possible, using lightly floured hands to stop dough sticking to you, and pat the dough into a rectangle about 3-3.5cm thick. You can lightly knead the dough with your hands for a smoother appearance but overknead it and your scones will be tough and hard. 
Banana Scones with Whipped Honey Butter
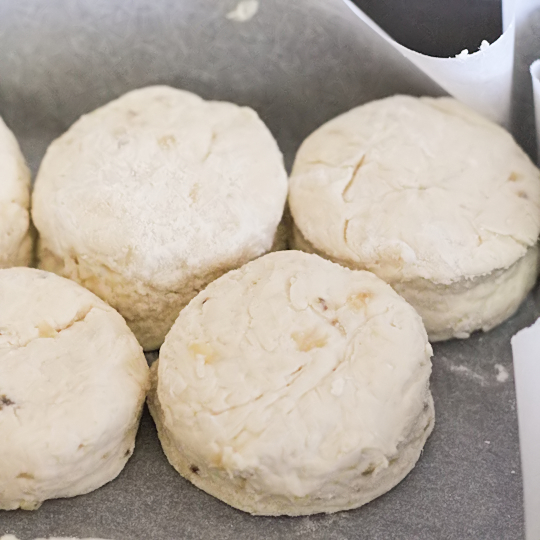
Cut out round using a 5-6cm scone cutter (push the cutter into the dough, don't twist) and place next to each other in a lined/greased heavy based baking dish that has sides (scones baked close together will rise higher and thus be lighter). I usually manage to cut about 5-6 scones, then I pat the scraps together and cut out another 2 and finally pat the scraps from that together into a ball to form the final scone. Lightly brush the tops of the scones with some extra milk using a pastry brush.

Bake for 10-15 mins, until scones are cooked through and tops are lightly browned. While scones are baking, prepare the butter; chop the softened butter into small cubes. Place the butter, cinnamon and honey in a large mixing bowl and beat well on high speed with an electric mixer until smooth and fluffy. Place in a serving dish and store in the fridge until ready to serve. Cover with a clean tea towel to keep scones soft, serve immediately with honey butter. Strawberry jam is also a great addition to the butter. You can substitute the butter with clotted cream. Store leftover scones in an airtight container, warm up in the microwave for about 30 seconds. Best eaten on the same day but scones can also be stored in the freezer for up to 3 months. 
Banana Scones with Whipped Honey Butter
Print Friendly and PDF

Monday, April 23, 2012

Rolo Chocolate Brownie Cake

Rolo Chocolate Brownie Cake
After the disaster that was my Twix Cake experience I thought I would be avoiding anything chocolate and caramel-related for a long time. But caramelly, chocolately goodness is an evil temptress and I was itching to make a Rolo covered cake. Rolos are an awesome baking ingredient. I mean, look at these beauties. I had also promised Tomred a birthday cake for today (Happy Birthday Tomred!). Considering the fact that for Tomred's birthday last year I came up with one of my favourite inventions ever, the Tim Tam Cake, this Rolo Cake had big shoes to fill.
Rolo Chocolate Brownie Cake
About 5 seconds after deciding to make this big-shoe Rolo Cake for Tomred's birthday, I forgot all about it. Completely, totally forgot about it until I was just starting to wake up yesterday morning. A little, nagging thought was poking the edge of my brain and stopping me from getting out of bed to make the banana scones I was planning and then OH SHIZZ I remembered about the cake. I then spent the rest of the morning running around my suburb trying to find ANYWHERE that sold Rolos, because (as per usual) the one thing that I desperately needed was nowhere to be found. I may have been a little too excited when I finally found them and bought about 10 tubes.
Rolo Chocolate Brownie Cake
When I finally got around to making this cake, I realised that it would not be a cake for the faint-hearted. Two layers of fudgy brownie cake (adapted from Lisa's PX Brownie Cake), with a pack of Rolos baked into each layer, a (salted) caramel (dulce de leche to be specific) filling just like a Rolo, covered in a milk chocolate ganache and topped off with a mountain of Rolos. Yep. I won't even try to pretend this isn't decadent and over the top. But I DID try to make it less sickly-sweet and unbalanced by halving the sugar and eggs in the cake. But there is a lot of butter, which is always something I always freak out about when I make a brownie recipe. I used salted butter in the cake and sea salt in the dulce de leche, and made the ganache milk instead of dark chocolate to make it less rich. In the end it's still quite rich, but not enough to make you feel totally ill after a slice. Or three. But one slice is enough!
Rolo Chocolate Brownie Cake
It was so much easier boiling up a can of sweetened condensed milk to make the caramel this time around, rather than worrying about candy thermometers and hot sugar syrups. And it's also so easy to spread swirls of 'rustic' (*cough* lazy & messy *cough*) ganache on the outside. If you're wondering how you're able to see a slice of this birthday cake before the birthday boy has seen it; my workmates and I have an unspoken agreement. They help me finish off most of the baked goods that I make for this blog no matter how strange my experiments are, and they also understand that every birthday cake they get from me will probably have a slice pre-removed for blogging purposes. Hopefully they'll enjoy this cake as much as all the other cakes minus one slice that they've tried.
Rolo Chocolate Brownie Cake
Rolo Chocolate Brownie Cake with Caramel Filling
(makes one 20cm cake, adapted from spicy ice cream's PX Brownie Cake)
400g (about 3.5 sticks) butter (I used salted but unsalted is fine too)
200g (7oz) dark chocolate, coarsely chopped
4 large eggs
200g (1 scant cup) caster sugar (superfine sugar, using white sugar is fine too)
200g (about 1 2/3 cups) plain flour
2 tubes Rolos + (optional) 4+ tubes Rolos to decorate the top of cake
1 can (395g/14oz) dulce de leche (instructions on how to make it here) or store-bought thick caramel
Note: you can replace the dulce de leche and put a layer of Rolos in the middle of the cake instead, now that would be crazy awesome.

For the chocolate ganache:
400g (about 14oz) good quality milk or dark chocolate, finely chopped (I used milk)
300ml (1 1/4 cup) pure/pouring cream (min 35% fat, heavy whipping cream in the US)

Preheat the oven to 150°C (300°F), grease and line 2 x 20cm springform tins (or you can bake one cake after another if you only have one tin). Melt butter and chocolate in a heatproof bowl over a saucepan of simmering, stirring occasionally until smooth. Whisk eggs and caster sugar in an electric mixer until thick and pale (about 3-5 minutes), fold through chocolate mixture then fold in flour until just combined. Pour batter into the prepared tins, smooth top and (if you wish) press rolos over the surface of each cake (1 pack for each) and bake until just firm to touch (25-30 minutes). Cool completely in pan, then very carefully transfer one cake to a serving dish. If you are making your own caramel, make sure you prep it ahead of time so it is cool and ready to be spread at this point.
Rolo Chocolate Brownie Cake
Whisk dulce de leche to remove any lumps, add a couple pinches of crushed sea salt if you would like to have salted caramel filling. Whisk until combined, then spread a generous layer of caramel over the top of the first cake. Refrigerate this for at least 30 mins, this will keep your dulce de leche firm. Carefully sandwich the second cake on top (upside-down). Don't worry if either of your cakes crack, icing covers everything. Prepare the ganache; place chopped chocolate in a large heatproof mixing bowl. Place cream in a small saucepan over medium heat and bring just to the boil, then remove from heat and pour hot cream over the top of chopped chocolate and leave in bowl for 5 mins. Use a whisk to bring mixture together, if there are still unmelted lumps of chocolate after this, you can place the bowl over a pan of simmering water and stir until it is completely melted. Chill in the fridge until thick but spreadable and just under room temperature (I sped up this process by placing the bowl in the freezer and whisking the mixture every 5 minutes until it was ready). Using a spatula, spread ganache over the top of the cake. Decorate cake with extra Rolos, I chopped half of them in half so you could see the caramel innards. Can be served immediately, or stored in the fridge until ready to serve. Can be stored in an airtight container in the fridge for several days.
Rolo Chocolate Brownie Cake
Print Friendly and PDF

Monday, April 16, 2012

Heart Polka Dot Macarons & Vanilla Bean Blueberry Cupcakes

Heart Polkadot Macarons & Vanilla Bean Blueberry Cupcakes
I was feeling a little selfish when I decided to make these. I was meant to be baking up something sweet to bring along to a BBQ, but I used it as an excuse to practice piping my heart-shaped macarons (which I have made twice before) before the wedding, plus I felt like making something pretty rather than coming up with some crazy flavour combination. Early in the morning I was determined to make some brightly coloured cupcakes with heart macarons on top. Three hours later, and two inedible batches of hideous failcakes in the bin and I was about ready to tear my hair out. Maybe it was the curse of Friday the 13th, even the simplest things were going wrong.
Heart Polkadot Macarons & Vanilla Bean Blueberry Cupcakes
When I'm having a seriously bad day in the kitchen the best thing for me to do is to put my feet up and try again another day. But my stubbornness prevailed and I pushed on, falling back to my foolproof cupcake recipe, which is so easy and never lets me down. At the last minute I decided to throw in 2 punnets of blueberries instead of 1, which ended up being wayyyy too much fruit for the batter. But it still tasted pretty good. Simple, but classic.
Heart Polkadot Macarons & Vanilla Bean Blueberry Cupcakes
I made the macarons in a bright teal shade, I love teal. In a random spasm of sprinkle-loving insanity, I grabbed some white heart-shaped sprinkles and dotted them over the surface of the macarons. I wish I had the regular round confetti sprinkles but the heart ones were kinda adorable too. It's probably an unnecessary embellishment, but it's damn cute. It was comforting that my macarons turned out well, considering all the issues I had with my over-complicated cupcakes. Obviously it's just better to keep things simple sometimes so I went with a old-faithful icing flavour; vanilla bean.
Heart Polkadot Macarons & Vanilla Bean Blueberry Cupcakes
I whipped up the icing with a ton of vanilla bean, I just love the way the little black dots are speckled throughout the fluffy icing. I also added some natural pink food colouring to the icing to give it a light pink tinge as I was inspired by the pink & teal colour combination of this beautiful cake by Sweetapolita. I'm a little bit in love with how dainty and girly the whole thing looks. These cupcakes and macarons are nothing particularly original or different but it looks and tastes fantastic.
Heart Polkadot Macarons & Vanilla Bean Blueberry Cupcakes
Heart Polka Dot Macarons & Vanilla Bean Blueberry Cupcakes
(makes 12 cupcakes, plus a few extra macarons)
For the macarons: (if you are a beginner with macarons, read up and practice plain macarons first. BraveTart has lots of useful advice and info on the subject)
100g aged egg whites (you can use fresh eggs too, just make sure they are room temperature. I always use fresh these days, and zap it in the microwave on defrost for 10 seconds)
110g almond meal, at room temperature and well sifted
200g icing/confectioner's sugar
50g caster/superfine sugar
Optional: 1 tsp powdered egg whites (available from The Essential Ingredient), helps to stabilise egg whites but is not necessary
To decorate: blue/green food colouring (powdered or gel), white sprinkles

For the cupcakes:
1/3 cup freshly squeezed orange or mandarin juice
2 eggs
125g (1 stick plus about 1 tbsp) unsalted butter, at room temperature
155g (3/4 cup) sugar
225g (about 1 + 3/4 cups) self-raising flour
1/4 tsp vanilla extract
1 punnet (150g) fresh or frozen blueberries

For the vanilla bean icing:
250g unsalted butter
575g (about 4.5 cups) icing sugar , sifted
1/4 cup milk
1 vanilla bean pod, seeds scraped and pod discarded (or 1 tsp vanilla bean paste/vanilla extract)
(I also added a few drops of natural pink food colouring for decoration)

Prepare the macarons first; line two baking sheets with baking paper. Place icing sugar in food processor and pulse for a minute to remove any lumps. Stir in almond meal and pulse for about 30 seconds to combine. Place in a large mixing bowl and set aside. Using an electric mixer, beat egg whites and egg white powder in a medium mixing bowl until the egg white powder dissolves and it reaches soft peaks. With the mixer on high speed, gradually add sugar and beat until it reaches stiff peaks. (You can add the blue/green food colouring to the meringue as you are beating it to stiff peaks, it makes it easier to adjust how much colouring to add. Otherwise add it in the next step.)

Add meringue to your dry mixture and mix, quickly at first to break down the bubbles in the egg white (you really want to beat all the large bubbles out of the mixture, be rough!), then mix carefully as the dry mixture becomes incorporated and it starts to become shiny again. Take care not to overmix, the mixture should flow like lava and a streak of mixture spread over the surface of the rest of the mixture should disappear after about 30 seconds. Place mixture in a piping bag with a 1cm round piping tip. Pipe heart shapes using a 1cm piping tip and piping fat 'V' shapes (see end of this post for a video example). Tap baking sheets carefully and firmly on the benchtop a couple times to remove any large bubbles. If you wish, you can decorate the shells with sprinkles to create a polka dot effect, I used the softer (not nonpareils) heart-shaped sprinkles.

Leave to dry for about an hour, so that when you press the surface of one gently it does not break. This will help prevent any cracking and help the feet to form on the macs. These macarons seem to need a longer drying time than regular round ones as they are prone to cracking. Preheat your oven to 140-150°C (285-300°F), depending on your oven. Place on top of an overturned roasting tray or another baking sheet if your sheets are not professional grade, for better heat distribution. Bake for 20-25 minutes, depending on the size of your shells. Carefully test if the base of the shell is ready by gently lifting one and if it's still soft and sticking to the baking paper, then it needs to bake for a few minutes longer. Remove from the oven and cool on the tray for a few minutes, then gently remove from the sheet and place on a wire rack to cool completely.
Heart Polkadot Macarons & Vanilla Bean Blueberry Cupcakes
Make the cupcakes; Preheat oven to 180°C (350°F). Place sugar and butter in a food processor and pulse until smooth, then add juice, eggs, flour and vanilla and pulse until just smooth. (If you don't have a processor, cream butter and sugar in a large mixing bowl with an electric mixer at high speed, beat in eggs one at a time and then fold juice, flour and blueberries into the mixture until smooth.) Fold in blueberries with a spatula and then spoon into a 12-hole cupcake tray lined with papers. Bake for about 20 minutes or until cupcakes are golden brown and a skewer inserted into the centre of a cupcake comes out clean (ignoring blueberry juice). Remove from the oven and cool in tin for 5 minutes and then cool completely on a wire rack.

Prepare the icing; remove the butter from the fridge 30 minutes before starting. Place in a large mixing bowl and beat at high speed, gradually adding icing sugar (and adding the milk and vanilla about halfway through) and beating until light and fluffy. Place in a piping bag, pipe on top of cupcakes and sandwich between macarons. Place macarons on top of cupcakes and refrigerate for at least 2 hours, or overnight in an airtight container. Remove from the fridge and allow to come back to room temperature before serving. Can be stored in the fridge for several days.
Heart Polkadot Macarons & Vanilla Bean Blueberry Cupcakes
Print Friendly and PDF

Tuesday, April 10, 2012

Lemon Cake Squares with Cherry Meringue Icing

Lemon Cake Squares with Cherry Meringue Icing
Ahhh I love long weekends. All that extra sleep, lazing around catching up on TV shows and doing all those extra chores you usually don't have the time for. And of course, more baking time. I was inspired to make this bright and light cake slice because of the beautifully sunny weather we had this weekend, and the big bunch of white daisies that I picked up on a whim. I really love daisies and I wanted to bake something that was equally sunny and happy. So here are some delicate Lemon Cake Squares with a Cherry Meringue Icing. They are a lot lighter than a big slice of cake, which makes them perfect for afternoon tea or brunch.
Lemon Cake Squares with Cherry Meringue Icing
I adapted the lemon cake squares from a lemon pound cake recipe and it turned out just like I hoped it would. There's not much rising agent in the cake so it doesn't have much height, but it's not too dense or heavy. It has a lovely fine crumb, crisp golden edges and it's bursting with lemon-y goodness thanks to all the lemon juice and zest in the batter, leaving a really gorgeous lemon flavour lingering in your mouth. It's almost like a lemon brownie but it's more cakey than fudgy. So derrricioussss!
Lemon Cake Squares with Cherry Meringue Icing
Rather than making a regular buttercream or glaze, I decided that a very fluffy Italian meringue icing would be a great match for the not-as-fluffy cake. I had heaps of frozen cherries leftover so I defrosted and pureed them, folding them through the Italian meringue to give it a beautiful pink tinge. The cherry flavour works well against the lemon in the cake too. I'm not usually a huge meringue fan, but I do love the velvety texture of the cooked Italian meringue, it looks so pretty spread over the top of this cake. It's sorta like a marshmallow cream spread, so fluffy! (But not too sweet) If you're not too keen on that idea, you can alway substitute it with a butter icing, or a glaze of some sort.
Lemon Cake Squares with Cherry Meringue Icing
Anyway I hope everyone had a good long weekend, I have to spend the next few days weaning myself off the chocolate egg diet. Back to work we go, but at least I can comfort myself with these pretty cake squares. And by the way, thanks to anyone who has commented, tweeted or emailed me photos/feedback of their own versions of the Cheesecake Filled Chocolate Easter Eggs, it makes me super happy to see all the people who were inspired to try it out after seeing my post :) Also, I honestly didn't realise it wasn't that easy to find hollow eggs in the US, they're so commonplace in Australia! That was a bit of a bummer, I love hollow chocolate easter eggs!
Lemon Cake Squares with Cherry Meringue Icing
(makes about 16 squares, cake recipe loosely adapted from Martha Stewart's Lemon Pound Cake)
70g (5 tbsp) unsalted butter, softened, plus more for greasing tin
170g (about 3/4 cup) sugar
125g (1 cup) plain (all-purpose) flour
1/4 tsp salt
1/4 tsp baking (bicarb) soda
4 tbsp fresh lemon juice, plus finely grated zest of 1 lemon
1/4 cup milk
2 large eggs

For the icing:(meringue icing can be substituted with a regular butter icing or a glaze)
2 large egg whites
1/4 tsp cream of tartar
170g (about 3/4 cup) sugar
3 tbsp water
1/4 tsp salt
1/3 cup (about 70g) fresh or frozen pitted cherries, pureed (if frozen, drain excess liquid before pureeing) (can be replaced with strawberry or other berries)

Preheat oven to 180°C (350°F), grease and line the base of a 17x27cm rectangular slice/brownie tins (or a 20cm square cake tin) with baking paper. Whisk together flour, salt and baking soda in a bowl and set aside. Stir milk and lemon juice together in a cup. Place softened butter and sugar in a large mixing bowl and beat on high speed with an electric mixer until pale and fluffy, about two minutes. Add zest, and add eggs one and a time, beating until well combined. Reduce speed to medium-low and add half the flour mixture, followed by half the milk mixture mixing until just combined, then add the rest of the flour followed by the rest of the milk and beat until smooth. Pour batter into prepared tin and bake for about 25 minutes or until a skewer inserted into the centre comes out clean and the cake is golden brown on the outside. Cool in tin on a wire rack for 10 minutes then carefully remove from tin and cool completely on wire rack.
Lemon Cake Squares with Cherry Meringue Icing
Prepare the icing; in a large mixing bowl beat egg whites and cream of tartar to soft peaks. Place sugar, salt and water in a small saucepan with a sugar thermometer attached. Stir over medium heat until the mixture dissolves, increase heat and let it come to the boil. Cook without stirring until it reaches 115°C (238°F) (about two minutes), then remove from the heat and very carefully pour a thin stream of the hot sugar syrup over the egg whites as you beat them at high speed until stiff peaks form. Gently fold in the cherry puree. Spread an even layer of icing over the top of the cooled cake with a spatula. Chill in an airtight container in the fridge for about 30 minutes, then cut into equal sized squares before serving. Can be stored in an airtight container in the fridge for several days, you can also make the cake a day or so in advance and prepare the meringue right before serving.
Lemon Cake Squares with Cherry Meringue Icing
P.S. I nearly forgot to mention, I finally got around to putting a Pinterest button on my posts for all the people who have been asking! It's hiding next to the Facebook 'like' button at the end of each post. You can't see it from the home page of my blog, so you'll have to click on the title of each blog to open the post page to find it. I freakin' love Pinterest. I also included a link to my own Pinterest, and created a board with pins from my blog for anyone who wants to repin my stuff easily. I was reluctant to do it at first (in the same way that I am still resisting the urge to make a Facebook page for my blog due to sheer laziness) but went ahead and made it after getting a few requests. So feel free to follow me on Pinterest!
Print Friendly and PDF

Monday, April 2, 2012

Cheesecake Filled Chocolate Easter Eggs

Cheesecake Filled Chocolate Easter Eggs by raspberri cupcakes
It's hard to believe Easter is just around the corner. This year is going too fast for me to keep up! I swear it felt like yesterday that I was laughing at how quickly the Easter displays went up to replace the Christmas stuff at the beginning of the year, it has managed to creep up on me. My days are getting busier and busier, so I am easily drawn to the simpler, quicker desserts that I can pull together at the last minute. This recipe could not be any easier; there's no baking involved and it takes hardly any time to create these cute Cheesecake-Filled Chocolate Easter Eggs with a 'yolk' made of passionfruit sauce.
Cheesecake Filled Chocolate Easter Eggs by raspberri cupcakes
I took it as a compliment when Lisa (who hates eating eggs) said that these looked so much like real eggs that she was a little creeped out by them. The texture of the chilled cheesecake and the passionfruit sauce looks just right, making it a great filling for some regular hollow chocolate easter egg shells that I cut the tops off. I was inspired by the chocolate-mousse filled Easter egg cups that I've seen on sale and decided to do my own spin on that idea but with a cheesecake filling and a deliciously fruity filling in the centre that would look like an egg yolk. So it looks a little like a creme egg. It's not the same but it's just as tasty.
Cheesecake Filled Chocolate Easter Eggs by raspberri cupcakes
I used my regular chilled cheesecake filling recipe for this, and made up a sauce using passionfruit pulp, apricot jam and a little bit of butter. There's enough sourness from the passionfruit (and the lemon in the cheesecake) to make this a light, creamy and not overly sweet dessert. And it does not get easier than this. It's quite interesting to see how simple this recipe is compared to the Easter Bunny Macarons (including all the hilarious scenarios that I got carried away with while photographing them) and Hot Cross Bun Ice Cream Sandwiches that I came up with last year. This recipe is much quicker and less complicated, but hopefully just as enjoyable to eat!
Cheesecake Filled Chocolate Easter Eggs by raspberri cupcakes
Alright, I admit I may have taken a few too many photos of these little treats. Probably more than was necessary. But I am still a little scarred from all the trouble I had with the ugliness that way my Twix Cake so I was just happy to have something cute and not falling apart to photograph. Surprisingly A was all excited when he saw these in the fridge and quickly ate two of them, I can never guess which of my recipes he'll end up liking but he was a big fan of the fluffy cheesecake filling and the small hit of passionfruit in the centre. Technically it's more of a cheesecake mousse since there's no crust (though you could put some crust at the bottom of each egg if you wanted) and it's not baked, or a cake.
Cheesecake Filled Chocolate Easter Eggs by raspberri cupcakes
So if you're looking for a really, really, REALLY easy and light dessert to serve up after a big meal during the Easter break then these are for you. They can be eaten with a small spoon or devoured like a creme egg, whatever floats your boat. I bought the chocolate eggs from the supermarket, but if you're feeling really adventurous you could try making your own. Any plain, regular-sized hollow chocolate eggs will do. I got some very pretty ones that had all different flavours, I especially liked the look of the white chocolate and strawberry shell below. I hope everyone has a wonderful Easter holidays, I am looking forward to some time off!
Cheesecake Filled Chocolate Easter Eggs by raspberri cupcakes
Cheesecake-Filled Chocolate Easter Egg Cups
(makes 6-8 regular sized easter egg cheesecakes, you may need to adjust the amount of cheesecake filling depending on the size of your eggs)
6-8 hollow chocolate easter egg shells (mine were from the supermarket, approx 6cm tall and 4cm at its widest width, apparently they're not so easy to find in the US so if anyone can find a good online store let me know and I'll link it, apparently you can find them in the US at See's Candy and Costco, thanks Birgit! And on eBay. And HERE at Amazon.com, thanks Tuscadero! Or make your own here. Another commenter rolled melted chocolate around the inside of a cleaned out egg shell and then peeled away the shell when it was set.)
150g (about 5oz) cream cheese, softened
30g (about 1/4 cup) icing sugar (confectioners' sugar), sifted
1/2 tsp lemon juice
1/2 tsp pure vanilla extract
125ml (about 1/2 cup) thickened/heavy whipping cream
For the 'yolk': 1 passionfruit, 1 tbsp apricot jam, 1 tbsp (about 15g) unsalted butter (passionfruit juice can be replaced with about 2 tsp of freshly squeezed orange, mandarin juice or mango, peach nectar, you can adjust the amount of juice to taste), alternatively you can substitute with any fruit curd you prefer.
Optional: you can include some cheesecake crust crumbs at the base of each egg if you really want to include some sort of crust into the dessert.

Using a small serrated knife, carefully remove the tops of the chocolate eggs. (A couple of people have mentioned that heating the knife under warm water will make this easier and neater, thanks for the tip! But personally I like having the jagged edges.) Place the eggs in the fridge to keep them chilled while you prepare the cheesecake filling, you can use egg cups or your fridge egg holder (Don't use an egg carton like me. I shouldn't have used it but I was desperate at the time, I bought the egg cups the day after!). Place the cream cheese, icing sugar, lemon juice and vanilla in a large mixing bowl and beat on high until the mixture is smooth and fluffy, about 3-4 minutes. Set aside and carefully whip the thickened cream in a separate mixing bowl to stiff peaks (watch it closely as thickened cream is very easy to overwhip and split). Using a whisk, gently combine the whipped cream into the cream cheese mixture until it is smooth. Carefully spoon or pipe the mixture into the prepared chocolate shells. Chill eggs for at least 30 minutes to allow it to set.
Cheesecake Filled Chocolate Easter Eggs by raspberri cupcakes
Prepare the passionfruit sauce; strain passionfruit pulp to remove the seeds and place in a small saucepan with the apricot jam and butter. Gently heat on low, whisking until the butter melts and the mixture is smooth. Remove from the heat and allow to cool. (If your apricot jam is chunky you should strain the sauce at this point) Place in the fridge and chill until it thickens slightly. Using a small spoon, carefully scoop out a hole in the centre of each cheesecake, about 1 cm deep and wide. Fill hole with some of the chilled passionfruit sauce and return the eggs to the fridge to chill again for at least 30 mins. Remove eggs from the fridge about 10 minutes before serving. Can be made 2-3 days in advance, keep eggs in the fridge in a holder inside an airtight container or covered tightly with clingfilm to stop them drying out.
Cheesecake Filled Chocolate Easter Eggs by raspberri cupcakes
Print Friendly and PDF