Monday, August 31, 2009

Pandan Madeleines (and Happy Merdeka Day!)


Happy Merdeka Day everyone! Today is Malaysia's national day, so it only seemed right to include a post on my blog which is tinged with the flavours of the country. I lived in Malaysia for 5 years and my parents still live there, and although I was a fussy eater while growing up there, I now miss and crave the amazing food there. One of the things that I miss the most is the abundance of 
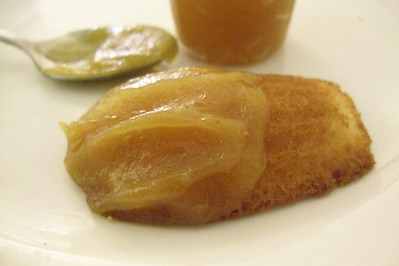
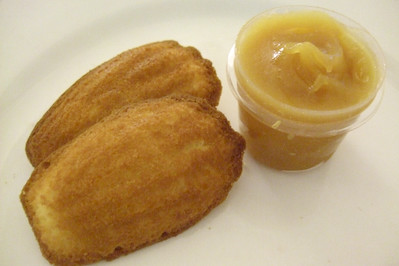
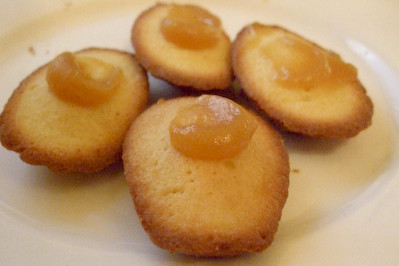
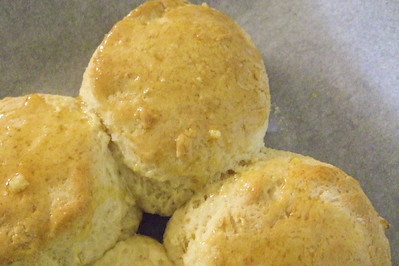
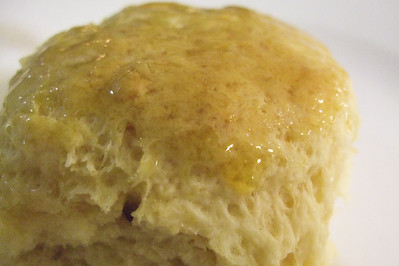
pandan flavoured goodies there, including my favourite spread; kaya, made with coconut, eggs and pandan extract. So the other day I decided to whip up a batch of madeleines, these sweet little sponge cakes, which were flavoured with pandan essence that I picked up at the Asian supermarket and I served them with some kaya. Unfortunately I haven't had the time to make my kaya from scratch yet, I swear I will soon though!

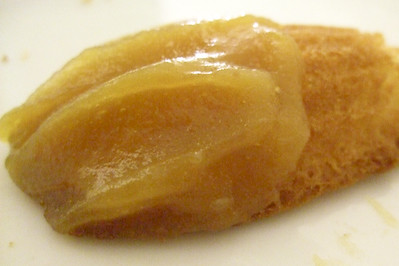
You can find a lot of pandan flavoured sponge cakes in Asian supermarkets here in Sydney, easily spotted due to their neon green appearance, but good kaya is a little hard to come by. There is one quite common brand called Nonya brand which is sold in a glass jar which my brother swears he has seen them using in Mamak for their roti kaya (I'm not sure how much I believe this), but my favourite one so far is a canned version I found in Cabramatta which is Yeo's brand and is by far the smoothest, eggiest, coconutiest(?!) version I've found off the shelf. I was a little disappointed with the pandan flavouring I bought, it was very weak and watery and not green enough! Definitely getting a much stronger paste version next time.

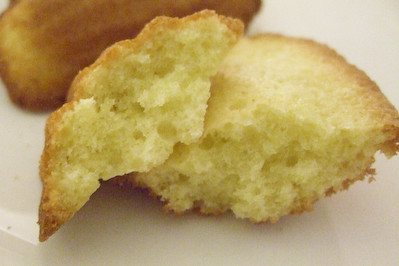
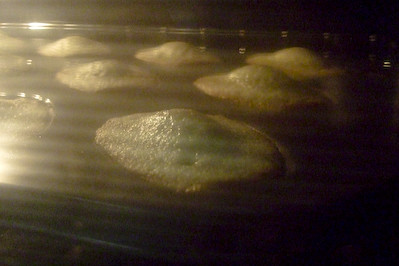
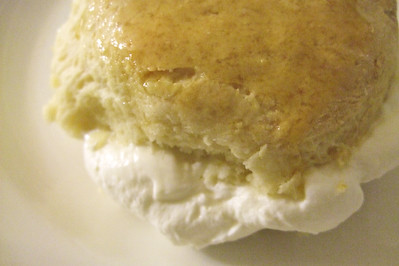
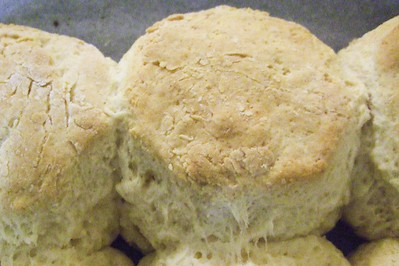
I believe the madeleine recipe is one that my brother found which is very old and works a charm. We fell in love with these little sponge cakes after coming across this recipe while having cake cravings and at the time we just threw the batter into a patty cake tin and it still tasted amazing. It's by far the most reliable madeleine recipe I've come across, other ones I have tried can be too dry and dense. In fact I'd tried so many bad madeleine recipes that I gave up for a while and my almost new madeleine tin gathered dust at the back of my cupboard until I decided to switch back to this great recipe. I was delighted that this mixture did develop a small bump on the tops, something which I have never managed to get with other recipes. It may have been small but there was definitely a bump!

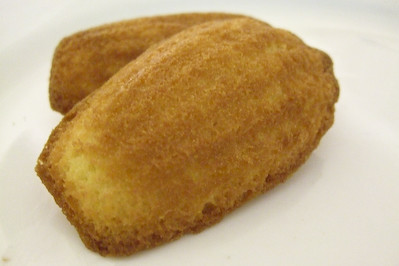
The only thing you have to take care of with this recipe is to not heat up the mixture too much, or you will cook the egg in the batter enough to make the whole mixture taste and smell very eggy. But done right, these madeleines are super light, fluffy and moist with a lovely golden layer on the outside that is fantastic to sink your teeth into. And serving it with kaya enhances the great pandan flavours and had me very pleased with the combination.

Pandan Madeleines
(makes about 24 madeleines)
2 eggs
3/4 cup caster sugar
1 cup plain flour, sifted
150g butter melted
Pandan flavouring (essence or paste)

Preheat oven to 180 degrees C. Grease madeleine tin very well, then dust lightly with flour. This will make it easier to remove the madeleines later (I think I can thank Rick Stein for that tip).

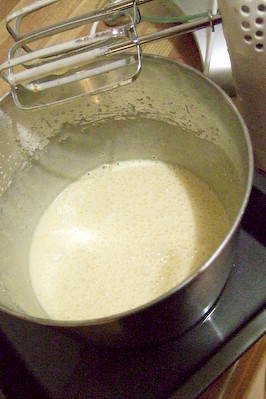
Fill a wide, low tin with hot water, large enough that you can place your mixing bowl inside it and the water level goes up the sides of the mixing bowl by 2cm. Combine eggs and sugar in the mixing bowl and beat with an electric mixer until the mixture is very light and fluffy and has tripled in volume. (If the water starts to get cool, you can top it up with a bit more hot water, just take care that its not hot enough to scramble the eggs, you'll know if this starts to happen because the mixture will start to smell very eggy)

Add pandan flavouring to taste. Since mine was the weak watery kind, I used almost a tablespoon and it was still quite subtle. If you are using the paste you will need a lot less. Add sifted flour and carefully fold into mixture. Finally, stir in the melted butter until just combined.

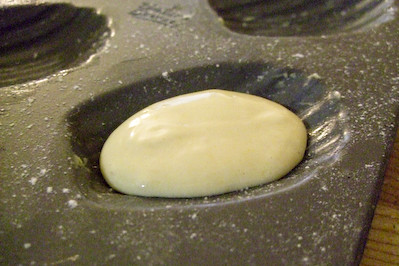
Carefully spoon mixture into the moulds filling them about 3/4 full (a bit less than a tablespoon). Bake for 10 minutes or until the tops of the cakes are just turning golden. Immediately and carefully remove the madeleines from the tin and cool on a wire rack.

Peering into the oven: I see bumps!
Can be served on their own dusted lightly with icing sugar or with kaya. I swear I will do a recipe for homemade kaya soon! Best eaten straight out of the oven, but if you really want you can cool them completely and then place in a very airtight container for the next day.

The only thing I wish I could have improved was the colour of the madeleines, they really should be much greener from the pandan flavouring, so don't be alarmed if yours turn out greener if you use a better pandan flavouring than I did. The flavour was lovely though, pandan always works well in a light sponge cake (I was originally going to do a typical pandan chiffon cake but didn't have time to find a good recipe since my mum had lost hers :( ), so it was just perfect for the madeleines. I'm not sure why but the heat from the hot water really helps create the perfect texture and flavour in the cakes.

Happy Merdeka Day!

Print Friendly and PDF

Friday, August 28, 2009

Sweetcorn & Rosemary Polenta Bread


I don't post savoury recipes often. This is probably something you have noticed if you have visited my blog before, as I have an insatiable sweet tooth that I seem to have inherited from my father (he loves his fruit & nut chocolate bars). But sometimes I come across a savoury recipe that I just have to try, and this is probably more likely to happen if the recipe includes sweetcorn. Yep there goes my sweet tooth again. But it's still a savoury recipe I swear!

I was on the fence about whether I would post this recipe or not. I didn't really adapt the recipe much from the original, since I haven't baked much with polenta before. But it was very tasty, (especially the cream & parmesan crust on top) and I served it with some spiced grilled chicken breasts and a haloumi salad. So I thought I would share it with you anyway, if only to prove that I eat other things besides scones! I was shocked to discover that A had never heard of haloumi before, and so I insisted on frying some of that lovely squeaky cheese up for him. He loved it (of course) and we had to squabble over who would get the last piece of precious golden haloumi.

Sweetcorn & Rosemary Polenta Bread
(recipe from cuisine.com.au)

1 tbsp extra-virgin olive oil
60g parmesan cheese, weighed then grated
1/4 cup cream
2 cobs sweetcorn
2 cups coarse polenta (cornmeal)
2 tsp salt
1 tsp bicarbonate of soda (baking soda)
6 x 3cm rosemary stalks, leaves separated and finely chopped
2 cups buttermilk
2 eggs

Preheat the oven to 220C. Use the pastry brush to lightly grease a 20cm square baking dish or tin with olive oil. Line the bottom of the dish with baking paper. Combine the cheese with the cream in a small bowl. Stand the cobs on the board and, using a fork, rake the kernels to split the skins. Cut the kernels from the cob. Put the polenta, salt and bicarbonate of soda into a large bowl and mix well.

Add the corn kernels to this mixture.Put the rosemary, buttermilk and eggs into a medium bowl and whisk well. Make a well in centre of the polenta and tip in the buttermilk/egg mixture. Use a wooden spoon to mix it well to form a wet batter.

Tip or spoon the batter into the prepared dish. Spread the cheese/cream mixture over the batter. Bake for 30 minutes. Test by inserting a skewer - the bread is cooked if the skewer comes out dry and clean. Remove from the oven. Allow to cool in the dish for at least 10 minutes, then turn out onto a wire rack. Cut the polenta bread into 16 slices and serve as is, or toasted with butter.

The bread went very well with the rest of the meal, it appealed to the side of me that likes to shred up my food with my hands, I had a little bit too much fun tearing up chunks to get to the kernels of juicy sweetcorn on the inside. It was a little bit dry the day after, so I would recommend serving it fresh out of the oven. And I ran out of parmesan otherwise I would have made the top even cheesier!

Print Friendly and PDF

Thursday, August 27, 2009

Golden Syrup Scones


I'm sorry! I know I've posted far too many scone recipes on this blog, but I swear this one is worth it. I thought I had completed my quest for the perfect fluffy scone after having much success with the CWA scone recipe but this one is even better. After enjoying some delicious lamb shank pies and date tart at Gazebo, Lisa and I couldn't resist stopping by the British Lolly shop to buy rhubarb flavoured lollies and my favourite, Lyle's Golden Syrup. This stuff is liquid gold I tell you. I went on the hunt for some good recipes to make the best use of my precious syrup and found this winner. Fluffy cream scones with golden syrup added to the dough, as well as brushed over their warm tops to give them a caramel-like glaze.

Golden Syrup Scones
(from Donna Hay Magazine)
2 cups self raising flour
2 tbsp caster sugar
2 tbsp golden syrup (I definitely recommend Lyle's Golden Syrup if you can get it!)
1/2 cup (125ml) milk
1/2 cup (125ml) single cream
1 tablespoon golden syrup extra for glazing

Preheat oven to 180 degrees C and line a baking tray with paper. Sift flour and sugar into a bowl and mix a little with a butter knife. Make a well in the centre, place the golden syrup in and then pour the milk and cream on top. Mix lightly and quickly with your butter knife until just combined.

Place on a lightly floured surface and press out until about 3cm high. Use a 5cm scone cutter to cut out the dough. This recipe cuts about 8 scones for me.

Place on your lined baking tray so they are just touching and bake for about 20 minutes or until the scones are cooked through and light golden brown on top.


Once they are cooked, remove from the oven and brush the tops of the scones generously with the extra golden syrup.

Allow to cool for a few minutes and then slice in half and serve with cream (and extra golden syrup if you are a nut like me).

To be honest I really don't know if these will be as nice if they were made using the dark golden syrups you get in the supermarkets here, since the Lyle's stuff is so much lighter and less bitter. A proclaimed these to be the best tasting scones I had ever made and proceeded to scoff down two huge ones with a ton of cream, which is high praise from a well-known anti-sconner. I absolutely fell in love with them. The golden syrup makes them smell and taste amazing, especially with their sticky, golden tops. I loved them so much that I made them again and almost used up the entire jar of syrup on these scones alone. And I would do it again!

Print Friendly and PDF

Tuesday, August 25, 2009

Chicken & Moghrabieh with a Greek Yoghurt Sauce

I recently went on a bit of a shopping spree at The Essential Ingredient. And by spree, I mean that I got a raised eyebrow from the shop assistant. It's a very dangerous place for me to be left alone in...yeah I went a little bit nuts! One of the things that I picked up was a huge bag of moghrabieh, a large couscous made from semolina. After trying it for the first time at Fouad's secret dinner, I was instantly enamoured with the texture of these little pearls. I had no idea what I was going to do with it, but I couldn't resist buying some for myself.

Uncooked moghrabieh
I originally wanted to just do some sort of creamy sauce with smoked chicken, but I had a bit of a failure with the grocery shopping that day and had to throw together whatever random bits I could get my hands on. I am probably mixing random foods from random cuisines that don't really go together, hopefully it's not insulting to anyone! ...But it tasted good, so that was enough to make me and the boy happy! A bit of Greek yoghurt added the creamy texture and tang that I was looking for, without being too heavy or rich. I also wanted to add broadbeans but had to substitute it with frozen peas since I couldn't find any at the time. The sauce may have been random, but was happily gobbled up, and would be good with any sort of pasta if you're not able to get your hands on some moghrabieh.

Moghrabieh with a Greek Yoghurt, Chicken & Pancetta Sauce
6 chicken thighs, sliced into chunks (I originally wanted to serve this with 200g smoked chicken)
100g pancetta
1 onion, diced
2 carrots, peeled & diced
2 cloves garlic, finely diced
6 sage leaves, or whatever fresh herbs you prefer
1 cup Greek yoghurt
1 cup chicken stock
1 cup white wine (I used a sweet sparkling one)
1 cup baby peas (or broadbeans)
1/2 cup shaved parmesan
1 cup moghrabieh (or a serve of any other pasta of your choice)
freshly ground pepper & salt

Heat some olive oil in a large frying pan or pot over medium heat. Fry your onions and carrot first, allowing them to sweat and soften without burning. If you want to get your onions a bit caramelised, turn up the heat and add a teaspoon of sugar but make sure to stir it regularly to stop it from burning completely.

Put another large pot filled with water on the stove to boil for the pasta. Once the onions and carrot are very tender, add the garlic and fry for a few more minutes. Add the chicken and pancetta and cook for 3 minutes or so, until the chicken is sealed.


Add some salt then the moghrabieh to the boiling pot of water. Cook in boiling water for 20-25 minutes until tender. Add the sage and the chicken stock and simmer for a few minutes, then add the wine and allow the sauce to reduce by about half (arouns 10-15 minutes). Reduce the heat to low and stir in the peas and yoghurt. When the mograbieh is ready, drain water well and then stir into the sauce along with the parmesan cheese. Season to taste with salt and pepper.

The sauce itself is quite light but the moghrabieh was surprisingly filling. I'm still in love with their texture, pop in your mouth morsels with a smooth, soft exterior which yields to a firm middle with a bit of bite to it. I couldn't only manage the smallest serving for dinner, so this meal lasted us for ages! I have a feeling that my 1 kilo bag of moghrabieh will take me a very long time to finish, which makes it seem like good value :)
Print Friendly and PDF

Saturday, August 22, 2009

Fig & Raspberry Teacake


Sometimes it's better to keep things simple. I can get in strange moods and come up with the most ridiculous baking experiments, which more often that not leave me with a messy kitchen and a Fail cake of some sort. Now and then I get fed up of doing the weird stuff and just want to whip together something easy but equally delicious.

This teacake is nothing special but was a good way to use up some of the random non-fresh fruit and leftover buttermilk I had sitting around in my larder. I had frozen raspberries and dried figs, which work really well together.

Obviously it would be even better if I had fresh raspberries and figs, but that wasn't possible at the time. You could replace these with any fruit of your choice, it's a basic but lovely light and buttery cake that's perfect for afternoon tea.

Fig & Raspberry Teacake
150g sugar
200g butter
225g plain flour
75g self-raising flour
1 tsp bicarbonate soda
2 eggs
300ml buttermilk (You can substitute this with regular milk and 1 tsp lemon juice if you can't get buttermilk)
2 tbsp brown sugar
1 tsp cinnamon
100g raspberries (fresh or frozen)
150g figs (dried or fresh, roughly chopped)

Preheat oven to 180 degrees C. Sift flours together in a medium bowl. Cream butter and sugar in a large mixing bowl with an electric mixer until it is light and fluffy. Add eggs one at a time, beating after each one until well combined. Mix buttermilk in and then fold flours into the mixture carefully.

In a small bowl, stir fruit, brown sugar and cinnamon together. Pour half the cake batter into a medium, round springform tin and then sprinkle the fruit mixture over the top. Cover with the rest of the batter. Bake for 45-50 minutes or until a skewer inserted into the centre of the cake comes out clean. Some of the fruit mixture may ooze out the sides depending on how close you placed it near the edge of the pan.

Stand for 5 minutes and then remove from tin and stand on a wire rack to cool further. When cooled, dust the top with icing sugar. Can be served on it's own or with cream.

PSSST! You can still vote for my pupcakes in the Creative Cupcake Competition on the RSPCA website! You can vote multiple times as long as you are in a new session on your browser ;) Click here to register your vote! Thanks so much to everyone who voted, I know I won't win but it's still fun heehee!
Print Friendly and PDF

Friday, August 21, 2009

Two Cheese & Rosemary Tart


Dear Stephanie Alexander, I ♥ you. The Cook's Companion has never failed me. Okay there is the date scone recipe which I swear has a typo in it because the dry to wet ratio never seems to work for me no matter how many times I retry it, but ignoring that it's my old faithful. The orange teacake recipe is the basis of my cupcake recipe and am always pulling out the chocolate self-saucing pudding, sticky date pudding and banana cake recipes when I am in need of comfort desserts. Much love, from another Stephanie :)

Originally I bought some cheese with wild fantasies of whipping together a fabulous two cheese souffle, after being challenged to bake one by Peter Pad Thai, my Iron Chef judge. But that particular night I was was getting bad vibes from my kitchen (does that sound insane?) and was feeling a little tired. So I lost my nerve and went with a slightly safer but equally yummy option. Stephanie's gruyere tart caught my eye. Shortcrust pastry and melty cheesy innards, you can't go wrong with that. Obviously I replaced the gruyere with the cheeses I had in my fridge which happened to be a wheel of double cream brie and my most favourite cheddar, a Tasmanian cheese mixed with fresh wild wasabi.

Two Cheese Tart with Rosemary
(Adapted from Stephanie Alexander's recipe from A Cook's Companion)
1 sheet shortcrust pastry (I used Stephanie's recipe, will post it up soon)
250g of cheese of your choice (I used 100g wild wasabi cheddar and 150g brie)
1 cup cream
salt
freshly ground pepper
freshly grated nutmeg
2 eggs + 1 egg yolk
2 tsp fresh rosemary finely chopped

Line a 22cm loose-bottomed flat tin with pastry and blind bake at 200 degrees C for 15 minutes and then bake uncovered for 5 minutes. Allow to cool

After blind baking

Cut cheese into tiny dice and scatter over pastry.

Warm cream in a pan over low heat and season it with salt, pepper, rosemary and nutmeg. Mix eggs and egg yolk into cream and pour gently into pastry case.

Okay so my pastry was a tiny bit wonky
Bake at 200 degrees C for 20 minutes or until the top is golden and the middle is just set. Allow to cool for a few minutes before cutting.


Mmm melty...
The tart puffed up a tiny bit and was light, airy and full of small pockets of gooey cheese. The shortcrust pastry recipe I used was so buttery and short and so easy to make that I instantly fell in love with in. I even had enough leftover pastry to make a sweet dessert, but I'll save that for another post ;)

I would definitely recommend buying some of the wasabi cheese for this tart, it was a lovely surprise of flavour to find in the tart and the rosemary matched it quite well, which was unexpected (I only added the rosemary because I have too much of it and needed to use some up).

My only complaint was that it was still a little too eggy for a tart filling, I think next time I might increase the amount of cheese and not use that extra egg yolk, so feel free to try doing that if you use the recipe above.

Print Friendly and PDF