Wednesday, July 29, 2009

Cherry Coconut Brownies

Donna Hay was so right when she said that brown doesn't photograph well. I had a bad day with the camera with these brownies, but they tasted so damn good that I had to tell you about them anyway. The main problem I had was that I didn't have the right sized tin and I was making up the recipe in my head, so my brownies were too thick. So I had to cut narrow, tall pieces of brownie rather than fat, short rectangles. Oh well, no one seemed to mind.
I was making a big tin plus a small ramekin of the mixture because I had a tiny bit left over and I got so excited about tasting the ramekin brownie that I forgot about the big tin and managed to slightly burn the very top of them. It was very upsetting because it meant I lost that lovely crackly top that you expect to see on a good brownie. But just to prove the recipe works, I'll show you the lovely texture of the mini brownie I was testing:
See?! If only I hadn't forgotten about the big tin! Oh well, luckily I remembered to rescue them before they tasted burnt, so they were still great to eat. It was fudgy without being raw or too dense which is something I'm not a huge fan of in brownies. The tart cherries and crunchy bits of coconut were amazingly good in this super moist brownie. I always knew it would be, I mean bloody hell, these are the ingredients of a Cherry Ripe. I was obsessed with Cherry Ripe as a child when I was stuck in the Middle East and Malaysia for years without any access to them. My brother used to bring me them over from Perth and one time he brought so many that I overdosed on them and haven't been able to enjoy them with the same gusto since.
Cherry Coconut Choc Brownies
250g dark chocolate
245g butter + 5 g for greasing tin
1 cup shredded coconut
1 1/2 cups chopped cherries (fresh, frozen or canned, whatever you can get. I used canned)
150 self-raising flour
200g caster sugar
3 eggs
Preheat oven to 180 degrees C. Grease and line a 20x30cm baking tin. Drain cherries if they are in syrup and chop into halves.
Cut butter into cubes and roughly chop up chocolate and place both in a heatproof bowl. Melt chocolate and butter together over a double boiler and then set aside to cool.

Mmm chocolatey...
Beat eggs and sugar together with an electric mixer on low speed until they are well combined. Beat in melted chocolate and butter until smooth. Stir in cherries. Fold flour and coconut gently into the mixture until just combined, taking care to not overmix. Pour into prepared tin, smooth over with a spatula and bake for about 20-30 minutes, or until a skewer inserted into the centre comes out with moist crumbs and no raw batter stuck to it.
Cool completely in its tray on a wire rack then turn out onto rack and cut into squares.
These were a huge hit with everyone, I'm happy because these days I get permission from the boyfriend to bake as much as I want because he can feed it to his workmates as well as mine. It's funny how nothing seems to get people more excited than super chocolatey things. The boy being his usual tactful self mentioned that the dark fudgy brownie with the bits of white coconut looked like worms or maggots crawling through the dirt. Thanks. But then I thought, this could be a great thing to do as part of a halloween dessert! Ooh yes, going to have to brainstorm this idea...
Print Friendly and PDF

Monday, July 27, 2009

Dry Wonton Mee


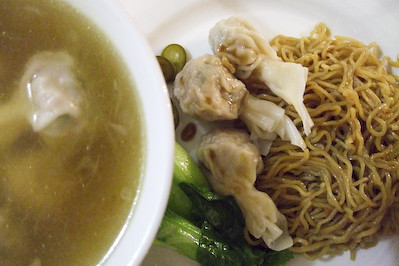
If you've ever read the earlier posts in this blog, you will know about my obsession with Malaysian style dry wonton mee. It's a dish you can really only find in Malaysia, and even in Malaysia there's only certain places that do it well. Very different to the Hong Kong style of wonton noodles, these are served in a thick, dark, pork fat laden sauce with lots of pickled green chillies. It's one of those things I get the worst cravings for and make me extremely homesick for Malaysia, even if I do call Sydney my home. I have yet to find a place in Sydney that sells an authentic version.

My mum used to pick me up this dish from a nearby hawker stall for lunch all the time, and it would come packed up in plastic freezer bags, held together with pink plastic string. It doesn't feel the same without the plastic, or the pork fat, but this version that we try and make at home is about as close as I've managed to get to the real thing. Anyway, it's just a really tasty dinner.

Wonton Mee
(Recipe adapted from Lee Sook Chings 'Cook Malaysian')
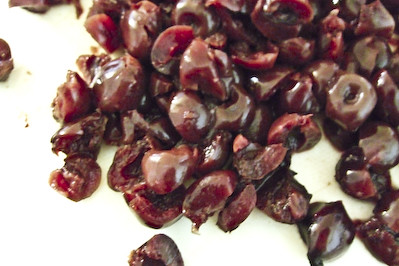
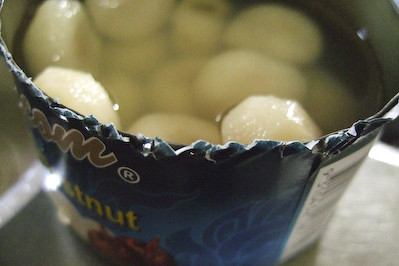
Water Chestnuts
For the wontons and soup:
1 tbsp water chestnuts or yam bean, finely diced
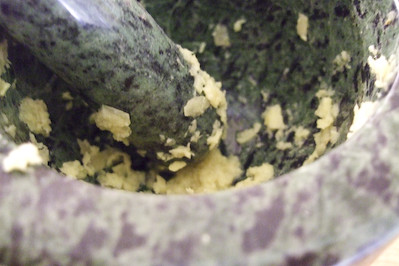
1 knob ginger (approx 1 cm)
100g minced pork
2 tsp chopped spring onion
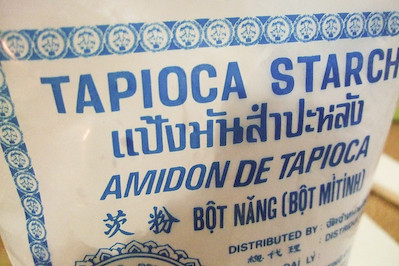
1 tsp tapioca flour
1 tsp salt
3 tsp light soy sauce
1 tsp sesame oil
1 egg white, beaten
White pepper
Wonton skins (1 pack, 25-30 pieces)
2 tbsp oil (vegetable or olive)
3 shallots, sliced
6 cups stock (I used chicken stock)
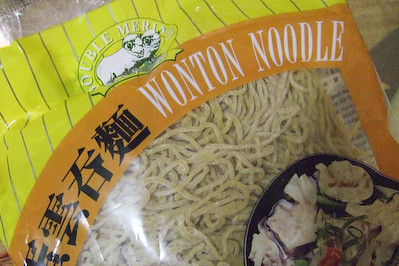
1 pack wonton egg noodles (I recommend the Double Merino brand shown below)
Optional: Chinese vegetables (e.g. choy sum or bak choy), char siew (bbq pork) to serve

For the serving sauce:
2 tbsp vegetable oil
3 tsp sesame oil
1 tbsp oyster sauce
1 tbsp kecap manis
3 cloves garlic, finely diced
white pepper, to taste

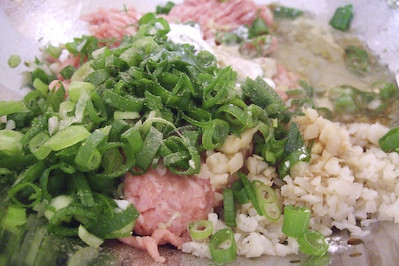
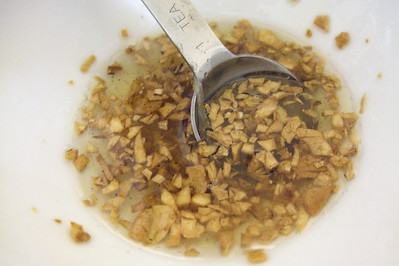
Cut off two thin slices of ginger and pound the rest to extract the ginger juice (I squeezed the pounded ginger through a fine sieve). Mix minced pork with water chestnuts or yam bean, ginger juice, sping onion, tapioca flour, 1/2 tsp salt, 1 tsp light soy, 1/2 tsp sesame oil, egg white and a good shake of pepper.


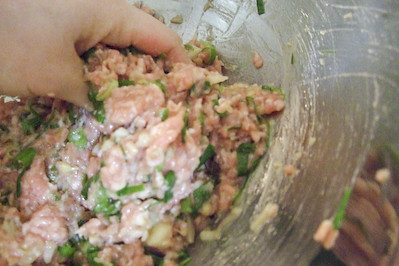
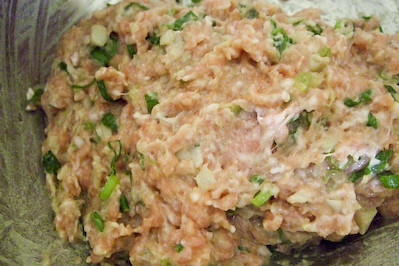
Knead well to mix the ingredients thoroughly. Get your hands right in there!


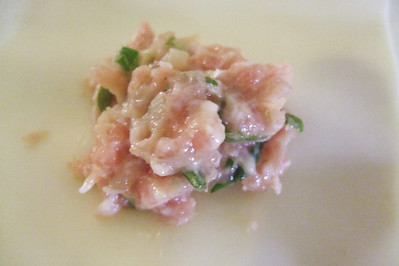
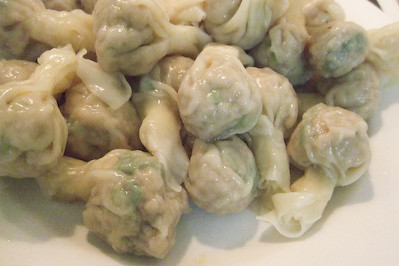
Spread out a wonton skin and moisten the edges with some water on your finger tip. Spread out a wonton skin and place a spoonful of this filling in the centre. Press wonton skin together to enclose filling completely.

I know, there are a million pretty and better ways to fold a wonton together but when I'm in a rush I just twist the top together, it's quick and it stays together, which is good enough for me!

These dumplings can be made ahead of time and refrigerated until they are ready to be boiled and served with the noodles. Heat 1 tbsp cooking oil and brown the shallot and ginger slices. Add the stock with the remaining salt and light soy with a good shake of white pepper. Keep the stock hot.

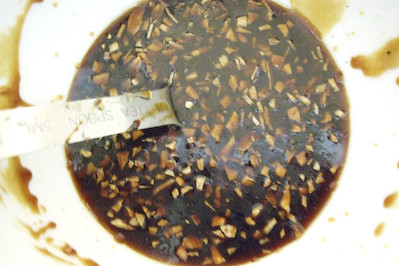
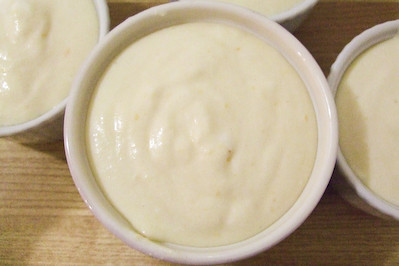
Prepare your serving sauce ahread of time: heat the vegetable oil in a small frying pan until hot and then add the diced garlic. Remove from the heat and stir fry the garlic until it is brown. Remove from the pan before the garlic starts to burn and place in a small bowl. Add all other ingredients, feel free to adjust the ratios of all the sauces to your taste.

The sauce should be thick and black, salty and sweet with a strong hit of garlic. The original recipe only uses regular soy instead of kecap manis and no garlic, but I love the extra flavour you get from these two ingredients.

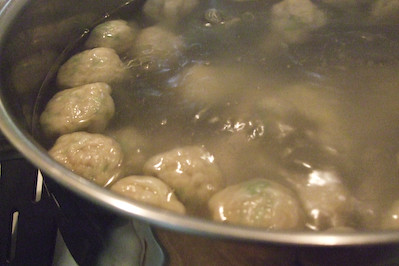
In a saucepan, boil water and add the wontons and cook for 4 minutes or until they float. Lifed the cooked wontons from the water and plunge them into a basin of cold water. Drain well and keep aside.

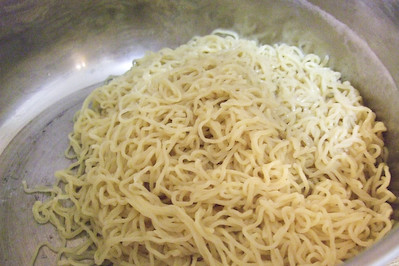
Allow water to come to the boil again in the saucepan. Loosen the stands of your pack of wonton noodles and drop it into the boiling water. Stir with chopsticks and cook for 1 minute. Use a large slotted spoon or a sieve to lift the noodles from the boiling water and plunge them in a basin of cold water (I just run it under a cold running tap).

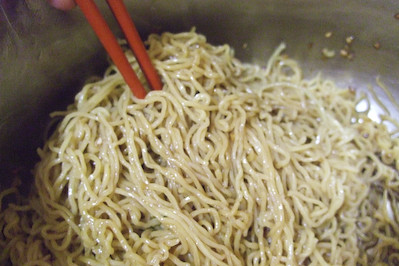
Remove, shake out excess water and plunge into the boiling water again (I usually skip this step due to laziness). Lift out at once, drain well and place in a large bowl or pot. Pour serving sauce over the noodles and mix through well using chopsticks until all the noodles are coated in the sauce.

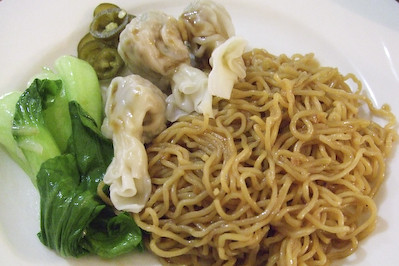
Boil chinese vegetables in the stock prepared earlier, when cooked serve vegetables, sliced char siew & noodles with some pickled green chillies. Wontons can either be served in a bowl of the stock or mixed into the noodles.

The type of noodles that you use for this dish will make a big difference. At the chinese supermarket they usually sell egg noodles and wonton noodles. Make sure you get the wonton noodles, they should be firmer. Try and get the brand I mentioned if you can find it, I see it at most chinese supermarkets and it's the best brand I've tried so far.
Print Friendly and PDF

Friday, July 24, 2009

Lemon Cherry Delicious


It's cold. You have a lot of lemons leftover. Lemon delicious is the answer to all you problems!! I have to admit, I am completely in love with this recipe. Anything with a golden top, fluffy middle and gooey, saucy bottom is a winner in my books. The addition of cherries gives it some colour and tang and I think it was even better than a regular lemon delicious.

Lemon Cherry Delicious
(Adapted from this Gourmet Traveller recipe)
1 cup (220 g) caster sugar
90 g unsalted butter, softened
2 lemons, finely grated rind and juice
3 eggs, separated
120 g self-raising flour
3 cups (750 ml) milk
1/2 cup cherry jam
To serve: pure icing sugar and pouring cream (Optional)

Preheat oven to 180 degrees C. Beat sugar, butter and lemon rind with an electric mixer until pale and fluffy, then add egg yolks, beating well after each addition. Add flour and milk alternately in batches and beat well until a smooth batter forms. Add citrus juices and beat until just combined.

In a separate bowl, whisk eggwhites with a pinch of salt until stiff peaks form, fold one third of the eggwhites through batter to lighten, add remaining eggwhites and fold in until just combined. Divide mixture among six 1¼ cup-capacity buttered ovenproof dishes (I used lots of little ramekins), and drop blobs of cherry jam over the tops, or swirl into the mixture.

Place in a deep roasting pan and pour in enough hot water to come halfway up sides of dishes. Bake until puffed and golden (30-35 minutes). Dust generously with icing sugar and serve immediately with cream.

A was his usual blunt self and said the cherry bits looked like wounds. Yeah thanks. I do see what he means though. But please don't let that put you off, the cherry bits go so well with the sweet lemon pudding! Some icing sugar dusted on top will get rid of any 'wounds'. I just always forget to dust off the tops with icing sugar because they smell so good that I impatiently dug into them as soon as they came out of the oven! Anyway, A shut up as soon as he tucked into one of these, he loved them.

The best part is all the different textures you get throughout it. It's very wet down the bottom, like a self-saucing pudding, and the lemon sauce goes so well with that crisp top. I may have left mine in for a liiiittle bit too long so you can see some of them got a bit brownie than I would have liked. I was surprised by how many serves I got out of this recipe, I ran out of ramekins. It's a light, heart-warming dessert which is sure to please any lemon lover.

Print Friendly and PDF

Wednesday, July 22, 2009

Pear & Pinenut Cake


Pine nuts are awesome. Why? Because I'm not allergic to them! They're not really nuts, they're seeds and it was a happy happy day many years ago when I realised I could eat them. They are fantastic and the closest thing to actual nuts that I can get.

I've had pears on the brain recently and was thinking of trying a pear crumble cake, similar to the apple crumble cake that my Mum always makes. Then I came across this recipe for a pear and pine nut cake which was very interested in since I haven't tried using pine nuts in a dessert before. It's also quite light and not too fatty which is always a bonus.

Pear & Pine Nut Cake
(from Cooking Light)

1 1/4 cups plain flour
3/4 cup sugar
1/8 teaspoon salt
1/4 cup chilled butter, cut into small pieces
2 tbsp pine nuts, toasted
1 tsp ground cinnamon
1/3 cup light sour cream
1/4 cup low-fat milk (I used Smart Milk)
1 tsp grated lemon rind
1 tsp vanilla extract
1/2 tsp baking powder
1/4 tsp bicarb soda
1 large egg
2 cups thinly sliced peeled pears

Preheat oven to 180 degrees C. Grease and line the bottom of a 9 inch round cake tin. Combine flour, sugar, and salt in a large bowl; stir well with a whisk. Cut in butter with a pastry blender or 2 knives until mixture resembles coarse meal. (I just rubbed it in using the tips of my fingers, being careful not to warm/melt the butter with my hands) Remove 1/3 cup flour mixture, place in a small bowl and stir in pine nuts and cinnamon into this; set aside.

Combine the remaining flour mixture, sour cream, milk, lemon rind, bicarb soda, baking soda and egg in a large bowl. Beat with a mixer at medium speed until well blended. Pour the batter into the prepared tin. Arrange the pear slices evenly over the batter. Sprinkle with pine nut mixture. Bake for 45 minutes or until a wooden skewer inserted in center comes out clean; cool completely on a wire rack.

I was pleasantly surprised by how wonderful this cake was. The topping worried me as it was baking be cause it looked so powdery and dry, but once it browns up in the oven it is wonderfully crunchy, nutty and sweet.

The cake itself is very light and moist, and the pears are just lovely when paired with the pine nuts. A & I ate this all by ourselves over a couple of days, the cake tasted best when it was warm. I even tried drizzling some cream on it which was naughty but yum. It doesn't need it though, it's great on its own!

Print Friendly and PDF

Monday, July 20, 2009

Cocoa Nib & Salted Dulce de Leche Biscuits


I love my baking experiments. Sometimes. Well I love them when they work out...and I get REALLY cranky when they are a disaster. I will moan and sulk and bang things around the kitchen like a petulant child. So lucky for everyone around me, my latest experiment was an almighty success.

The idea for these biscuits came to me after staying up late one night. I don't know quite how it came to me but I suddenly fell in love with the idea of mixing salt with dulce de leche. I find that a lot of people think dulce de leche is a little too sweet and insanely rich (a couple people freaked out the first time I fed them banoffee pie for the first time). I know, I know, the whole salted caramel thing is a total trend thing going around at the moment, but I am all for balancing out flavours in my dessert.

These turned out to be a huge hit. The biscuits are not very sweet but have a slight bitterness from the cocoa and nutty flavour and textre from the cocoa nibs. The caramel is rich and sticky and super sweet and it matches so well with the little surprises of salt crystals. The only issue I have is that they are so sticky because of the dulce de leche that they are really hard to transport, so I experimented turning them into sandwich cookies. Not bad...not quite as pretty though.

Cocoa Nib & Salted Dulce de Leche Biscuits
70g unsalted butter, softened
1/4 cup caster sugar
1/2 cup plain flour
1/3 cup self-raising flour
1 tbsp Dutch process cocoa powder
1 tbsp cocoa nibs (substitute with more cocoa powder if you cannot get these)
2 tbsp milk
1 can (395g) sweetened condensed milk
sea salt flakes

Remove any labels from the sweetened condensed milk can and place the can (still sealed) in a medium saucepan full of boiling water. Cover with a lid and boil for 2 hours, keeping a careful eye on the pan and topping up with water regularly. Do not allow the water level to drop below half the height of the can to ensure it does not explode. When the 2 hours are up, remove from the heat and allow to cool (or place under running cold water to cool it down quicker). At this point it is compulsory to open up the can and eat a spoonful of your dulce de leche (because I say so).

Preheat the oven to 180 degrees C. Line two baking trays with baking paper. Cream the butter and sugar with an electric beater until it is light and fluffy. Add the sifted flours and cocoa alternatively with the milk. Mix with a knife until the mixture forms a soft dough.

Turn out onto a floured surface and gather together into a rough ball. Roll the dough between two sheets of baking paper to a thickness of 2mm (you may need to split the dough into half and do this in two sheets). Refrigerate for 15 minutes or until firm. Cut the dough using a cookie cutter and re-roll and cut the dough scraps.

Place on baking trays, allowing some room for spreading (not much). Bake for 10 minutes or until firm. Be careful as these can burn fairly easily as they are so thin.

Transfer to a wire rack to cool completely.

At this point I like to scoop the dulce de leche out of the can into a mixing bowl and beat it for a couple minutes with an electric mixer until is it smooth. This makes it light and easier for spreading over the biscuits.

Using a spatula or a spoon, carefully spread a layer of dulce de leche over each cookie. Place on a tray to set.

When you are ready to serve, sprinkle a pinch of sea salt flakes over each biscuit.

I got my brother to taste test these and he was impressed and only had one small suggestion of adding some acid with maybe some orange zest. If you knew my brother you would realise that the lack of criticism means that these biscuits rated SUPER high. I was suitably pleased :D

Print Friendly and PDF