Showing posts with label Bread/Yeast. Show all posts

Tuesday, July 22, 2014

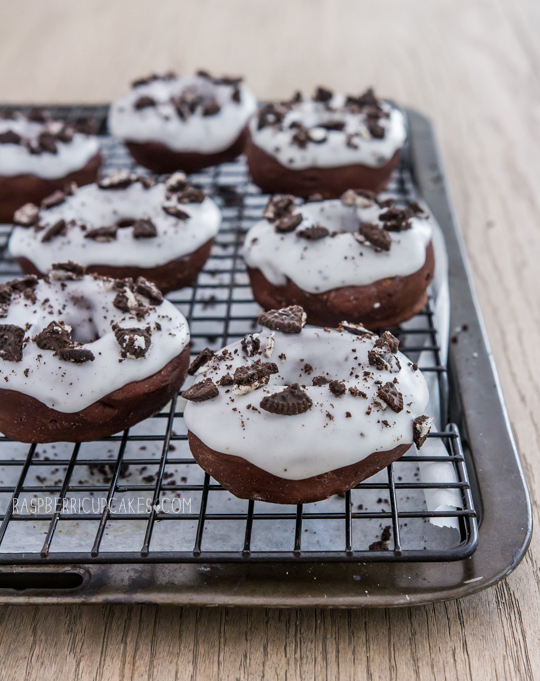
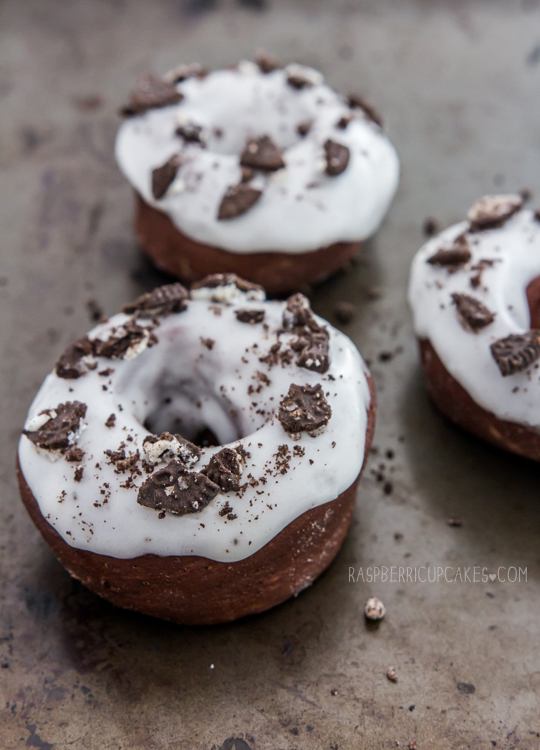
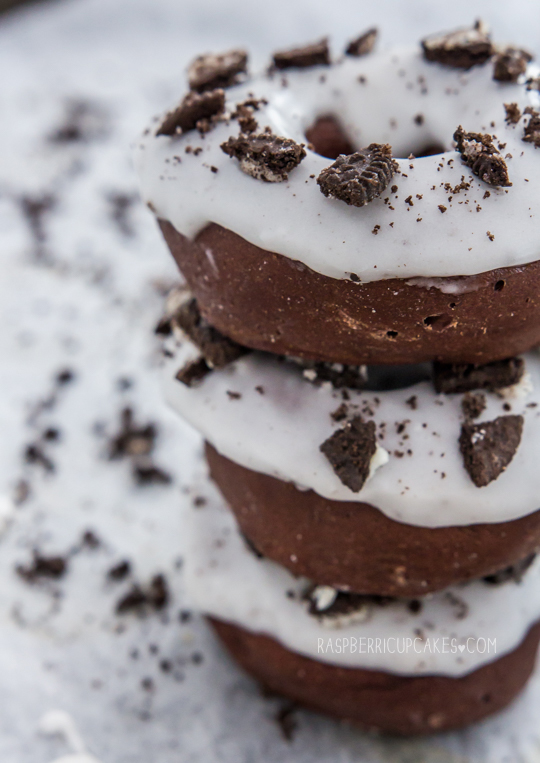
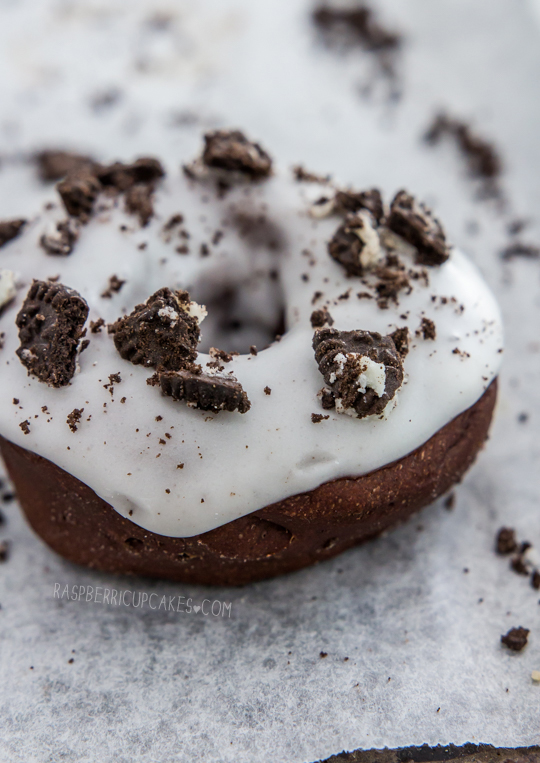
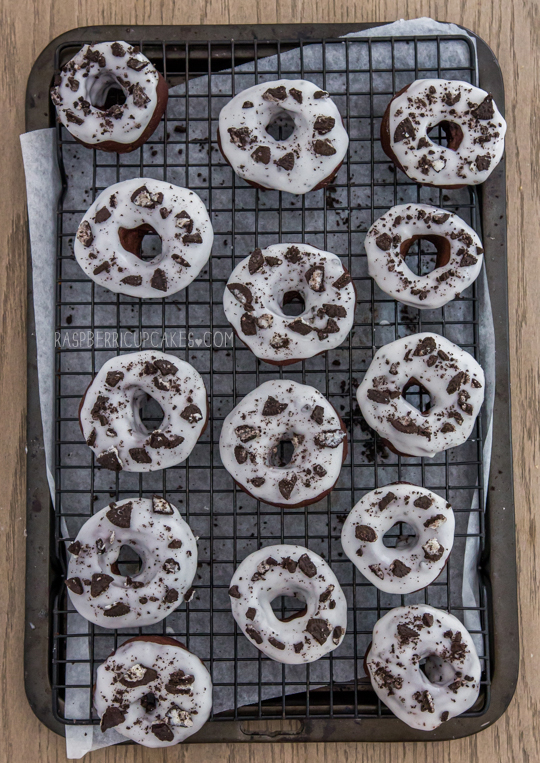
Cookies and Cream Baked Chocolate Doughnuts

Cookies and Cream Baked Chocolate Doughnuts
I love doughnuts. I eat them more often than I should. They're one of the few things that I would rather buy than make myself, mostly because I hate deep-frying anything. Me and hot oil don't mix well. You're talking to a girl who managed to stab a blunt knife all the way through her finger when she was sleepily trying to remove a pit from an avocado early one morning. I'm not to be trusted around sharp things, flames or anything boiling hot.
Cookies and Cream Baked Chocolate Doughnuts
This is why I like the idea of baked doughnuts. I've made cinnamon ones before and they were pretty good. Of course, they'll never taste as soft and fluffy as the real deep-fried thing, but it comes very close. And then you don't have to deal with all the mess of getting rid of all that oil. And no need for a special doughnut pan!
Cookies and Cream Baked Chocolate Doughnuts
So I saw lots of gorgeous looking chocolate doughnuts on pinterest while trying to get ideas for this recipe, but all of them were basically cake batter that needs to be poured into a special doughnut-shaped pan to be baked. They sound delicious, but I usually prefer not to have to buy another pan for one specific purpose (there are exceptions to this but you know what I mean). So I decided to play around with the original plain baked doughnut recipe (which is more like bread than cake) and turn it into a chocolate doughnut. My first attempt was noooot good. The yeast didn't activate and they stayed like hard, poo-like lumps in the oven. But the second attempt with a few tweaks came out perfectly.
Cookies and Cream Baked Chocolate Doughnuts
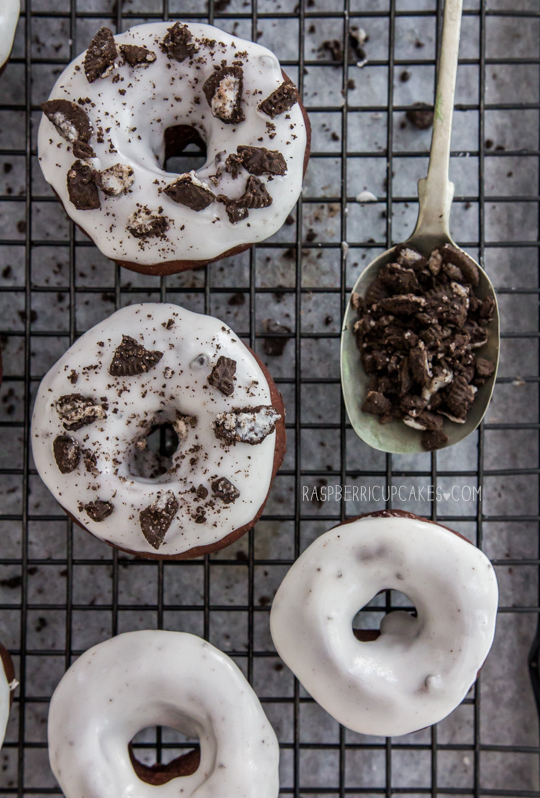
I topped these doughnuts with a cookies and cream flavoured topping. It was a simple icing glaze and lots of Oreo bits. I've always wanted to do a cookies and cream flavoured recipe but nothing has seemed like a fun enough idea until this one. To be perfectly honest, the baked version of these doughnuts can be fairly dry at room temperature, but I find that if you warm it up ever so slightly in the microwave before eating it, it keeps makes them super soft and more like the fried version, without melting the icing. So please, serve these warmed up! They are so much better. 
Cookies and Cream Baked Chocolate Doughnuts
Anyway, these were fun for a baking day where I wasn't in a rush and had time to wait for the dough to rise. I don't get many of those days anymore so I had a lot of fun with it. The only thing I'd like to work on is how to make these even softer and less dry at room temperature, maybe if I did a dough that had more butter, like brioche. Oooooh. And apologies for the slightly dark photos, I'm still getting used to my new computer screen!
Cookies and Cream Baked Chocolate Doughnuts
(adapted from these baked doughnuts, makes about 12)
For the doughnuts:
1 cup milk
1 1/2 teaspoons (1 packet/7g) instant dried yeast
20g (1.5 tbsp) unsalted butter, melted
350g (about 2.5 cups) plain flour
50g (about 0.5 cups) cocoa powder (I used dutch-processed but regular is fine)
1/2 cup (100g) caster/granulated sugar
1/2 teaspoon ground cinnamon
Mixture to help rolling dough: 2 tbsp icing (confectioner's) sugar and 2 tsp cocoa powder, sifted together
  1. Heat milk to lukewarm (I did this by placing it in a microwave-safe jug and zapping it on medium-high (75%) for about 20 seconds). Make sure it's not too hot, then stir in yeast and let it sit for a minute so it starts to froth up. 
  2. Sift flour and cocoa powder together into a large mixing bowl. Stir in sugar and cinnamon. Make a well in the centre. Add melted butter, then add milk mixture. Mix to form a soft dough. 
  3. If you have a mixer with dough hooks, beat on high for about 5-7 minutes until smooth and elastic. If not, turn out onto a surface dusted with the icing sugar/cocoa powder mixture (rather than using flour which will affect the colour of your dough). Knead for 10 minutes or until smooth and elastic.
  4. Place dough in a lightly oiled bowl. Cover with plastic wrap. Set aside in a warm place for 1 hour or until doubled in size (mine took a little longer during winter). 
  5. Line 2 baking trays with baking paper. Using your fist, punch dough down. Dust your surface with more icing sugar/cocoa mixture. Knead until smooth. 
  6. Roll dough out until about 1 cm (1/3 inch) thick. Using a 6.5cm (2.5 inch) cutter, cut 12 rounds from dough. Using a 3cm (1 inch) cutter, cut circles from the centre of each round. 
  7. Place doughnuts (and doughnut holes), 5cm apart, on prepared tray. (You can try rerolling the dough scraps and holes to cut more doughnuts but I found that these ones turned out a lot uglier.) Cover with lightly greased plastic wrap. Set aside in a warm place for 30 minutes or until doubled in size.
  8. Meanwhile, preheat oven to 180°C (350°C). Bake doughnuts for 10 to 12 minutes or until cooked through (make sure not to overbake or they will be hard and dry. The easiest way to test if they're ready is to sacrifice one for tasting).
  9. Place on a wire rack and cool completely before icing. They must be completely cooled or the icing will melt! Note: doughnuts are best served after being warmed slightly in the microwave for about 15 seconds.
Cookies and Cream Baked Chocolate Doughnuts
For the icing:
2 cups (150g) icing sugar, sifted
About 2 tbsp (30-40 ml) milk
Oreo biscuits, full sized or mini (I used mini)
  1. Place several biscuits in a ziploc bag and crush with a rolling pin (or blitz in a food processor) to make fine oreo crumbs (I used about 1/3 cup of fine crumbs)
  2. Using a sharp knife, chop up several biscuits into larger chunky bits for decorating (about 3/4 cup of bits).
  3. Place icing sugar in a bowl and gradually mix in milk until it becomes a very thick paste (add the milk very slowly until it is all mixed in before adding more milk). You want it to be smooth but even thicker than tooth paste, so it doesn't run straight off your doughnuts.You can add a small pinch of fine Oreo crumbs to the icing at this point if you want it to look a little more like cookies and cream icing, but you don't need to.
  4. Dip the tops of your doughnuts in the icing, or use a spoon to spread a thick layer of icing over the top of each doughnut (icing should settle back down after being spread on, if it is too thick/starting to dry out then add a tiny bit more milk, and if it is running too thin add more icing sugar).
  5. Place in a wire rack to allow icing to set. While icing is still set, sprinkle several big chunks of Oreo pieces over each doughnut and sprinkle a pinch of fine crumbs over each doughnut as well. Set aside to set for about half an hour, then store in an airtight container until ready to serve. Doughnuts will store in an airtight container at room temp for about 2 days. Note: doughnuts are best served after being warmed slightly in the microwave for about 15 seconds.
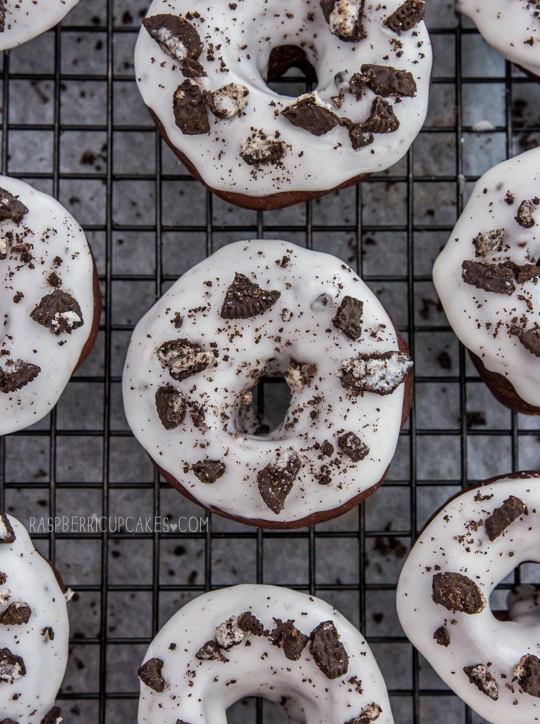
Cookies and Cream Baked Chocolate Doughnuts
Print Friendly and PDF

Monday, November 25, 2013

Spiced Sticky Buns

Spiced Sticky Buns
YUM.
Spiced Sticky Buns
Seriously, I could end my post there. The pictures speak for themselves. These sticky buns are my new baking love. And not just because putting the word 'sticky' and 'bun' together makes me giggle a little bit.
Spiced Sticky Buns
Look at that caramel sauce dribbling down the sides. Total food porn. Can you tell how much I am loving my new cast iron skillet? I baked with it again this week. It was my inspiration for trying out this recipe, because I knew my new skillet would be perfect for something that involved baking with a layer of sauce bubbling at the bottom.
Spiced Sticky Buns
Rather than trying a traditional cinnamon bun or scroll, I decided to try these sticky buns. Similar in shape to the cinnamon bun, but baked with a sticky sauce on the bottom and then inverted after baking so the sauce oozes down into the bread. It makes me salivate just by writing about it. And instead of just limiting myself to cinnamon, I went crazy with all kinds of spices. I added vanilla bean to the caramel sauce, along with star anise. I added cardamom, ginger, nutmeg and cloves to the filling. If you're like me and you like your spices then this is the recipe for you. If not, you can tailor the spices mix to your liking or stick to just plain cinnamon. I won't judge.
Spiced Sticky Buns
Awwwww yeah.
Spiced Sticky Buns
This recipe is quite long-winded, I would definitely recommend saving it for a day when you have plenty of time to wander in and out of the kitchen throughout the day. I picked a rainy Saturday with the cricket on the tele when I was supposed to be cleaning the house for a rental inspection. I'm pretty sure that I ended up making more mess than I cleaned. It was so worth it. They actually tasted even better a day later because it gave it time for the sauce to really seep into the bun and reheating them in the microwave allowed it to steam and soften the bread slightly. These buns are soft, gooey and moreish and you should definitely make them.
Spiced Sticky Buns
Spiced Sticky Buns
(Adapted from this Cinnamon Bun recipe)
For bread:
1 tsp white sugar
1 (7g/.25 oz) package active dry yeast
1/2 cup warm water (45°C/110°F)
1/2 cup milk
1/4 cup white sugar
55g (1/4 cup) butter
1 teaspoon salt
2 eggs, beaten
4 cups (about 520g) plain/all-purpose flour

For topping:
170g (3/4 cup) butter
1 vanilla bean pod, split and seeds scraped (or 1 tsp pure vanilla extract/vanilla bean paste)
1 star anise
3/4 cup brown sugar
1/4 cup maple syrup

For filling:  
55g (1/4 cup) melted butter
3/4 cup brown sugar
1 tbsp ground cinnamon
1 tsp ground ginger
1/4 tsp ground cardamom
1/4 tsp ground nutmeg
1/4 tsp ground cloves
Optional: 1 cup chopped pecans, divided between topping and filling

In a small bowl, dissolve 1 tsp sugar and yeast in  warm water. Let stand until creamy, about 10 minutes. Warm the milk in a small saucepan until it bubbles, then remove from heat. Mix in 1/4 cup sugar, 1/4 cup butter and salt; stir until melted. Let cool until lukewarm.

In a large bowl, combine the yeast mixture, milk mixture, eggs and 1 1/2 cups of flour; stir well to combine. Stir in the remaining flour, 1/2 cup at a time, beating well after each addition (I used my dough hook attachment on my electric mixer for this). When the dough has pulled together, turn it out onto a lightly floured surface and knead until smooth and elastic, about 8 minutes (or continue to use your dough hook attachment on an electric mixer for about the same amount of time)

Lightly oil a large bowl, place the dough in the bowl and turn to coat with oil. Cover with a damp cloth and let rise in a warm place until doubled in volume, about 1 hour. While dough is rising, melt 170g (3/4 cup) butter, with vanilla bean pod and seeds and star anise in a small saucepan over medium heat. Stir in 3/4 cup brown sugar and maple syrup, whisking until smooth. Remove vanilla pod and star anise and pour into greased 9x13 inch baking pan (I used a 10 inch skillet with high sides). 

Melt remaining 55g (1/4 cup) butter; set aside. Combine remaining 3/4 cup brown sugar, cinnamon, cardamom, ginger, cloves and nutmeg (I also added a bit of black pepper too) in a small bowl. Turn dough out onto a lightly floured surface, roll into an 45x35cm (18x14 inch) rectangle (about 0.5cm thick). While leaving a 1.5cm (about half an inch) border uncovered, brush evenly with half the melted butter and sprinkle with brown sugar spice mixture. Starting at long side, tightly roll up, pinching seam to seal. Brush outside with remaining butter. With serrated knife, cut into 15 pieces (since I used a smaller pan I cut it into about 12 taller pieces); place cut side down, in prepared pan. Cover and let rise for 1 hour or until doubled in volume. Meanwhile, preheat oven to 375 degrees F (190 degrees C). (You can place on top of another baking tray in case the topping bubbles up the sides.)

Bake in preheated oven for 25 to 30 minutes, until golden brown. Take care not to overbake or they will be dry.  Let cool in pan for 3 minutes, then invert onto serving platter. Scrape remaining filling from the pan onto the rolls. Best served warm, can be stored in an airtight container for several days and reheated before serving.
Spiced Sticky Buns
Print Friendly and PDF

Monday, October 8, 2012

Brioche Chocolate Buns - Karen from Citrus and Candy Guest Post

Note from Steph: If you're trying to contact me at the moment you won't have much luck because I'm in Europe on my honeymoon! But I thought it would be cruel of me to abandon my poor blog for several weeks, so I lined up some amazing guest bloggers to take over for me while I'm away. The baking blog community is so lovely and I was blown away by how willing everyone was to jump in and lend a hand. This week is a guest post from one of my favourite Sydney bloggers and also one of my closest friends; Karen from Citrus and Candy. If you aren't already a regular visitor to her blog, shame on you! I'm constantly in awe of her beautiful, moody photos, she is hilarious and she makes food that looks and sounds super schmexy. Check out this wonderfully buttery and chocolate-filled post. 
Brioche Chocolate Buns
I admit, I'm a little terrified to be guest posting for Steph. She happens to be one of my closest friends but this girl is a baking genius and the amazeball creations on her blog never fail to astound me. But I'm more than thrilled to be here on Raspberri Cupcakes while she's living it up overseas (and I certainly hope she is because she deserves an awesome holiday!). Cheers for having me!

If there's one thing that I love intensely, it's butter. I just cannot live without it and I need it thickly slathered on everything; crusty bread, sourdough, muffins, banana bread and most of all, brioche. Omg brioche, I love it so much that it brings tears of joy to my eyes whenever I catch a whiff of the buttery aroma as it's baking and I would happily polish loaves of it in one afternoon with extra slabs of butter (before quietly disposing of all my skinny jeans afterwards).
So here I present to you the king of breads. But I'm not done yet; I just had one of those weeks and I needed extra back up. Brioche + chocolate? Excuse me while I have a moment.

Please, please do not be intimidated by the thought of making brioche for yourself. If you have a bread machine or Kitchenaid mixer, there's really nothing to be scared of since the appliances are doing all the hard work for you. Plus it's a cinch to put the whole loaf together. All you need is a little time and a warm spot for the bread (and a quiet spot to enjoy it all by yourself). I promise you it'll all be so worth it in the end because there are few things in the world better than homemade bread. Especially one that comes with lashings of butter and chocolate.
Brioche Chocolate Buns
Ingredients:
40ml milk, slightly warmed to 100-115°F (37-46°C)
50g caster sugar
1 packet / 7g of instant dried yeast
250g plain flour
1/2 tsp fine sea salt
3 eggs
175g good quality unsalted butter, softened then chopped
1 extra egg for egg wash, lightly beaten

Filling:
170g good quality dark chocolate, very finely chopped
35g butter, at room temperature
35g light brown sugar
1/2 tsp ground cinnamon

To make the dough; whisk one teaspoon of the sugar into the milk then the yeast. Cover with a tea towel and leave to prove in a warm place for about 10 minutes until frothy.

In a stand mixer fitted with a dough hook, add the flour, salt, eggs, remaining sugar and frothy yeast mixture. Mix on low speed until it comes together in a dough (making sure to scrape the flour off the sides to incorporate properly) then turn it up to medium speed and knead for 5 minutes. Scrape down the sides of the bowl, then knead for a further 10 minutes. Dough should be smooth and elastic.
Brioche Chocolate Buns
Add a few pieces of butter into the dough then after it’s incorporated, lower the speed and add the rest of the butter one piece at time, waiting until it’s mixed in before adding the next. When all the butter is in, turn up the speed and knead for at least 6-10 minutes or until the dough is very smooth, shiny, unsticky, elastic and comes away from the sides of the bowl perfectly (it’ll make slapping sounds while it's kneading).

Remove the dough hook then cover the bowl with cling film and leave to rise at room temperature (no warmer than 24°C) for about 45-60 minutes or until doubled in size. Meanwhile, to make the filling, add the butter, sugar and cinnamon to the finely chopped chocolate then mix until it's all crumbly (use a food processor or a knife to cut the butter in).
Brioche Chocolate Buns
Knock the dough down a couple of times then turn out onto a lightly floured surface. Gently pat out the
dough on a sheet of greaseproof baking paper into a rectangle approximately 24 x 35cm with the long
side facing you. Layer as much chocolate filling as you like on the bottom half leaving a half-inch border.
Note - I made mine a thin singer layer because my family isn’t as nuts for chocolate as I am. Personally I would’ve had it bulging and ripping at the seams lol.
Brioche Chocolate Buns
Brush the edges with egg wash then fold the top half over the filling and pinch the edges to seal. Loosely cover with glad wrap then leave to rise in a warm place for about 45 minutes or until it has doubled in size and is soft and pillowy. Meanwhile preheat oven to 180°C. Place the brioche and baking paper onto a tray, gently brush the entire surface with egg wash then bake for about 30-35 minutes until golden and it sounds hollow when you tap the top. Rotate the bread halfway through cooking to brown evenly.

Leave to cool on tray for about 20 minutes then transfer to a rack. Slice and serve slightly warm. Best eaten within a few hours however brioche can be stored at room temperature wrapped in cling wrap for up to two days. To serve, reheat in a low oven until softened and warmed (or for an out-of-this-world indulgence, make French toast with it).

*Brioche dough recipe adapted from Michel Roux
Print Friendly and PDF

Monday, July 23, 2012

White Chocolate & Raspberry French Toast

White Chocolate & Raspberry French Toast
It was one of those weekends where I didn't feel like baking. Not one little bit. A lazy Sunday morning (after catching up on the sleep that I lost during the week) needed French toast. It had to be done. I had a loaf of day-old brioche, a bar of white chocolate and a punnet of raspberries. Raspberries are totally out of season in Australia at the moment and stupidly expensive, but you know when you see something in the store that you just can't resist? I'm so glad I didn't fight the urge in this case because it led to this White Chocolate & Raspberry Brioche French Toast. So ridiculously good.
White Chocolate & Raspberry French Toast
I didn't realise until I started looking at the photos just then how they look a bit like grilled cheese sandwiches, which I admit is a little gross. It's a pity because this was such an indulgent, delicious dish that I wouldn't want anyone to be put off by mistaken appearances. The similarity couldn't really be helped since I used white chocolate, you could probably use milk or dark chocolate and it would taste great. But I think white chocolate works the best with all the other flavours going on here.
White Chocolate & Raspberry French Toast
The French toast mixture that I used was perfect, just like Martha promised. It's lightly fragrant with spices and fruit flavours, and when you bite into that thin, crisp outer layer (that I fried in some damn good cultured butter), you will want to do a little dance. The hit of cinnamon, the sweetness from the melted white chocolate and the burst of tangy raspberries, what a combination.
White Chocolate & Raspberry French Toast
I'd definitely recommend going to the trouble of getting your hands on some brioche if you want to make this, store bought or homemade. Though regular white bread will work it doesn't have the same lightness of texture and beautiful richness that brioche bread has. This particular version doesn't even need any maple syrup on top, there's enough sweetness from the white chocolate. And make sure not to soak the bread for too long or it will still be soggy in the middle even after you fry it up. Have it for a very indulgent breakfast for a special occasion, or have it as dessert. Either way you won't be sorry.
White Chocolate & Raspberry French Toast
White Chocolate & Raspberry Brioche French Toast
(adapted from Martha Stewart's Perfect French Toast, serves 2)
4 slices brioche, preferably day-old, sliced 1 inch thick (I bought mine this time, but you could make your own too)
3 large eggs
3/4 cups milk
Juice of 1/2 an orange (about 2-3 tbsp)
Zest of 1/2 a lemon (about 2 tsp)
1 tbsp pure vanilla extract
1 tsp brown sugar
1/2 tsp ground cinnamon
Pinch of freshly ground nutmeg
Pinch of salt
Butter for frying
100g good quality white chocolate, melted (either zapped in the microwave 30 secs a til melted or over a double boiler) - can replace with milk or dark chocolate
About 1/2 punnet raspberries (about 60g, fresh or frozen) - can replace with other berries
Icing sugar to dust
 
(If making a bigger batch, preheat oven to about 95°C (200°F) and keep toast warm in oven on a wire rack while making the rest of the batch) Whisk together eggs, milk, juice, vanilla, sugar, zest, cinnamon, nutmeg, and salt in a shallow baking dish. Place skillet or non-stick frying pan over medium heat and melt about 1 tbsp (15g) of butter in the pan.
White Chocolate & Raspberry French Toast
Dip one slice of bread in mixture and allow to soak for 20 seconds. Place slice dipped side down in the pan and fry for 2-3 minutes until golden brown. While frying, spread a layer of melted white chocolate on the top side of the bread and place a small handful of raspberries over the top. Dip another slice of bread in mixture and allow to soak for 20 seconds again. Sandwich this slice over the raspberries, dipped side facing up and press down to seal sandwich together slightly. Carefully flip over and fry the other side of the sandwich for the same amount of time, until golden brown. Repeat with remaining slices of bread, adding another tbsp of butter to the pan for each sandwich. Serve immediately, dusted with a light coat of icing (confectioner's) sugar. You can add maple syrup if you really want to, but it probably doesn't need it.
White Chocolate & Raspberry French Toast
Print Friendly and PDF

Sunday, February 19, 2012

Roasted Garlic & Gruyere Cheese Toasties

cheese_toastie-3_filtered
I don't have a proper recipe post for you today. I seem to be suffering a bit of baker's block again, and I didn't want to force the issue by baking something when I didn't feel like it. So yesterday, instead of baking, I woke up super late and I made myself a cheese toastie (aka a grilled cheese sandwich to those in the US) for lunch. I recently had an eye-opening experience with a cheese toastie at the Gazebo Wine Garden and I have been craving them ever since. So I made a very simple sandwich with bread, butter, cheese and garlic. In case it's not obvious from 99% of my blog, I love my sugar. But I love cheese and garlic nearly as much. I'm sure everyone has their own favourite way of making a grilled cheese sandwich, and this is now officially my favourite version. I fried this baby up in butter (wishing I had invested in a cast iron griddle), using a nifty trick I read about online to cover the pan with a lid to help the cheese melt faster before the bread burns. It was golden and crunchy on the outside with a perfectly melted inside. This cheese toastie was good. Effing good. Like the combination of a regular boring cheese sandwich and garlic bread plus a sprinkling of fairy dust. So good that I made another one straight away. And I made one for A and took a photo of it because sharing is caring. Then I ran out of cheese and weeped silently to myself.

Roasted garlic is something truly magical, it's sweet, soft, buttery and mild enough to eat on its own, and doesn't give you anywhere near as crazy garlic breath as the garlic sauce from El Jannah (not that the death breath ever stops me from eating it by the bucketload). It might look like a lot of garlic to be eating on its own but the way it's cooked means it's much easier to eat. The caramelisation makes it lovely and sweet, which is the perfect addition to that beautiful melty, creamy gruyère cheese in this toastie. It's something so easy and uncomplicated, but your tastebuds will be so freakin happy they might get up and do a little dance. So this isn't really a recipe as it's just a humble grilled cheese sandwich, more like a public service announcement; if you love cheese and garlic as much as I do, you want to be eating this right now. Sometimes it's best to keep things simple, to go back to the basics. Of course gruyère isn't exactly cheap, but it is so worth splurging for it every now and then.
cheese_toastie-2_filtered
Roasted Garlic & Gruyère Cheese Toasties (Grilled Cheese Sandwiches)
Per sandwich:
1 head of roasted garlic (I prepared it using this recipe from Simply Recipes)
30g (2 tbsp) unsalted butter
2 slices white bread (I grew up with the regular, super processed full of sugar bread so I love it but you can use another bread if you want)
1 fairly thick (about 4 mm or 1/6 inch) slice of Gruyère cheese (or any other good melting cheese you prefer)

Remove the roasted garlic cloves from the head and mash in a bowl. Place cheese on top of one side of bread and spread the mashed roasted garlic over the cheese, top with other slice of bread. Using a non-stick pan or a cast iron griddle, place on medium-low heat with a 15g (1 tbsp) butter and heat until the butter completely melts. Place sandwich in pan, so that the cheese is closer to the bottom of the pan, then cover the pan with a lid or a piece of foil. Fry until the cheese melts and the bread has turned golden brown, about 3 minutes, and then add the same amount of butter to the pan, flip the sandwich over and fry until golden. Eat immediately, try not to make any excessive moaning noises while enjoying the melted cheesy goodness.
cheese_toastie-5_filtered
I was in such a good mood after eating these that I got back in the kitchen and baked something equally simple and satisfying. I guess you just have to stick to the basics every now and then. So I'll be back with a proper baking post in a couple of days.
cheese_toastie-4_filtered
Print Friendly and PDF

Sunday, August 28, 2011

Ginger Beer Pulled Pork on Brioche Buns

ginger_beer_pulled_pork-3
Are you ready for this? I've been slaving away in the kitchen all the weekend so I could bring you this amazing meal. Hah! I lie. I've actually been lazing around watching TV while I let all my kitchen appliances do the work for me. I'm in love with my slow cooker and the dough hook attachment on my stand mixer because it means I get to eat 10-hour slow cooked Ginger Beer Pulled Pork on buttery Brioche Buns and served with a spicy, colourful coleslaw. I love my kitchen appliances.
ginger_beer_pulled_pork
This pork is magical. The smell is unbearably mouth-watering as it cooks, the meat is so fall-apart tender and juicy, and the sauce makes you want to weep with happiness. I might be exaggerating a bit but it's still pretty effing good. An entire pork shoulder (or pork butt to US readers) rubbed in a wonderful spice mix and then slow cooked in a bit of ketchup, onions, mustard, Worchestershire and lots and lots of ginger beer. I just kept adding things to the mixture until I was happy. It tastes so good AND it involves ginger beer. I still blame Lisa for my ginger beer obsession. And my pulled pork obsession. So you can blame Lisa for this post :)
ginger_beer_pulled_pork-4
The ginger beer isn't particularly strong so you can't really distinguish its flavour in the pork or the sauce, but it adds a lovely sweetness and a little kick. If you wanted to up the ginger flavour you could probably add a small piece of fresh ginger into the cooking liquid or add some ground ginger to the spice rub. When you eat this pulled pork mixed up with the sauce on top of buttery, eggy, slightly sweet and freshly baked brioche buns you end up with flavour perfection. There's such a great balance of sweet, salty, spicy and sour.
ginger_beer_pulled_pork-2
I used my usual recipe for brioche that I've blogged about previously. Even though I kept putting off this recipe idea because I kept thinking that the brioche was painfully complicated, I was surprised to find that the recipe was very straightforward; there's just a lot of waiting time while you while the dough is proving. It's definitely worth the wait, the end result are these pillow-soft, rich and buttery rolls that are perfect for eating with the pork. Or with burgers. Or shaped into hotdog buns. Or eaten with strawberry jam. Or kaya and salted butter! It's good with everything and it's good on its own.
ginger_beer_pulled_pork-6
I served these pulled pork buns with a Vietnamese-inspired red cabbage coleslaw with pickled carrots, red onion and coriander and a fish sauce, vinegar, lime and chilli dressing. I love the bright purple colour of this salad and the light dressing that's packed full of flavour. These days I love to make this coleslaw recipe as an alternative to the heavier, creamy mayo coleslaws. And can you believe it, two savoury recipes in the space of one month after a year of no savoury recipes! I need figure out where I left my sweet tooth. While I'm doing that, find some free time to make this recipe. I know the ingredients list looks long but you can adapt the pork depending on what you have available - try it with dijon instead of wholegrain mustard, or cook it in ginger beer and add whatever sauce to the pork later if you're feeling lazy.
ginger_beer_pulled_pork-5
Ginger Beer Pulled Pork
(serves 6-8 people)
1 pork shoulder, about 1.5-2kg
2 small-medium brown onions, diced
1 tbsp paprika
2 tsp cumin seeds
2 tsp hot chilli powder (I love it spicy so I doubled this amount)
3 tsp freshly ground pepper
1 tbsp salt (I used sea salt flakes but not necessary)
1 tsp Wholegrain mustard
2 tbsp apple cider vinegar
2 tbsp ketchup
2 tbsp Worchestershire sauce
2 cups ginger beer plus extra if needed (Replace with ginger ale if you can't get ginger beer)
To serve: Warm brioche buns (recipe below) and spicy coleslaw (recipe here)

You will need to begin this recipe (and the brioche) a day in advance. Place cumin seeds in a mortar & pestle and grind well. Add chilli powder, paprika, salt and pepper and mix together. Rub mixture all over the surface of the pork, you may end up with excess depending on the size of your pork shoulder. Place onions, mustard, apple cider vinegar, ketchup, Worchestershire sauce and ginger beer in your slow cooker pot and add pork. Cook on low for about 9-10 hours or medium for about 6-7 hours. You may want to flip the pork over halfway through, but it's not necessary. (If you don't have a slow cooker you could try placing the ingredients in a cast iron pot with the lid on and baking in the oven at 150°C (300°F) for around 5-5.5 hours (Thanks V!), you may need to top up the liquid in the pot with extra ginger beer every couple of hours, until the pork is tender enough, but I haven't tested this method so no guarantees!)

Remove the pork from its juices, but keep the leftover liquid. Using two forks, shred the pork meat, it should fall apart easily. If not you may need to cook the meat for longer. Either by turning on the slow cooker on medium with the lid open or placing the leftover liquid in a saucepan on medium heat, reduce the liquid until it starts to thicken slightly. At this point you can add any extra condiments to taste, I added about 1/3 cup extra ginger beer to give it a bit more sweetness. You could also add some barbeque sauce if you like. Add the pork back to the reduced sauce and mix together. Serve warm on brioche buns (recipe below), ideally served with a spicy slaw (recipe here)
ginger_beer_pulled_pork-13
Brioche Buns
(makes 12 buns or 24 mini buns, adapted from my previous recipe here)
7g (1 packet) active dry yeast
2 tbsp sugar
1/3 cup lukewarm milk
3 cups plain flour
1 tsp salt
4 large eggs, beaten
200g butter, cut into small pieces and softened
Egg wash: 1 large egg yolk, lightly beaten with 1 tbsp milk
Optional: Sesame seeds to top off buns

Mix the yeast, 1 teaspoon of sugar and the milk in a small bowl. Set aside for 10 minutes until frothy. Combine the flour, remaining sugar and salt in a large bowl. Make a well in the centre and pour the eggs, milk and yeast mixture.

Knead the dough with an electric mixter fitted with a dough hook for 8-10 minutes, until smooth. Beat the butter, one piece at a time, into the dough with mixer at low speed. Mix for 5 minutes, until the dough is smooth and elastic (it will be quite soft). Place in an oiled bowl, cover with a clean kitchen towel, and leave to rise at room temperatre for 2-3 hours, until doubled in bulk. (The temperature should be about 24°C (75°F), no hotter, as the butter will melt and separate out from the dough)

Punch the risen dough down, turn out onto a lightly floured work surface and knead for 2-3 minutes. Return to the bowl and place in the refrigerator for several hours or overnight.

Split dough into 12 equal portions for regular sized buns, 24 portions for miniature buns (I did half-half). Roll into neat balls and flatten slightly. Place on two baking paper lined baking trays, equally spaced apart. Cover and leave for an hour at room temperature. Preheat the oven to 220°C (428°F). Lightly glaze the buns with egg wash and sprinkle a pinch of sesame seeds on top of each. Bake for 10 minutes, then reduce temperature to 190°C (375°F) and bake for another 10 mins (only 5 mins for the mini buns) or until golden brown on top and a skewer inserted into the centre comes out clean. I baked one tray at a time in my small oven, but if you're baking two trays you will want to switch the top and bottom tray around halfway through. Remove the brioche from the tray immediately and let cool on a rack.
ginger_beer_pulled_pork-7
Print Friendly and PDF

Sunday, January 23, 2011

Raspberry Mini Churros with White Chocolate

raspberry_churros-2
These look like very, very burnt churros. They're not. I swear!

They are actually churros that have been tinged a dark pink colour with the addition of raspberry puree. In my head these Spanish doughnuts were going to turn out beautifully golden with a hint of pink. Instead they turned out kinda brown and burnt looking. The raspberry just made them so DARK. But they taste delicious.
raspberry_churros-5
I'm not going to lie, I HATE deep-frying. That's why you hardly ever see it on this blog. I have an old electric cooktop which makes it impossible to hold the oil at a constant temperature. I have a useless exhaust so my entire house stinks of oil for a few days. And I am so uncoordinated I usually end up with some wicked blisters from oil spatter. But I've always wanted to try making churros. I LOVE churros. I fell in love with them for the first time at the Queen Victoria Markets in Melbourne. They were piping hot, golden and crunchy with a dusting of icing sugar. But most places where I've had churros since then have been pretty disappointing, very heavy and stodgy. So I finally decided to try making my own.
raspberry_churros-4
I tried to make it easier on myself by using a narrow piping tip to make mini churros. After a few tests, I realised that the colour of the batter was going to make any straight-shaped churros look like skinny poos. Not appetising. So I came up with a rather cute idea, I cut out some small squares of baking paper and piped heart-shapes with the batter. Then these were carefully slid into the hot oil and voilà! Heart-shaped churros! Perfect for Valentine's Day. And even though the raspberry puree might make the colour of the churros a bit ugly, you can really taste that lovely raspberry flavour in these doughnuts. And it's perfect paired with a big bowl of melted white chocolate.

If you are weirded out by the flavour/colour, feel free to adapt it to plain churros (replace the puree with 1 cup of water) with melted dark chocolate. Dark chocolate is so sexy after all. I'm not sure if I would ever make this recipe again, though I found it intriguing that it was essentially a recipe for choux pastry, which is then deep fried. My issues were more with getting the oil temperature right, and I'm sure someone out there can make these better than me.
raspberry_churros
Raspberry Mini-Churros with White Chocolate
(adapted from this recipe, serves 8-10)
1 punnet (150g) raspberries, fresh or frozen (and thawed)
1/4 cup icing sugar
100g unsalted butter
150g (1 cup) plain flour
1/4 tsp salt
3 eggs, lightly whisked
Vegetable oil, to deep-fry
80g (1/2 cup) icing sugar mixture, sifted
200g good-quality white chocolate, coarsely chopped
250ml (1 cup) milk

Blend raspberries and icing sugar in a food processor or blender until smooth. Strain mixture to remove seeds. Top up puree with water so that there is 1 cup of liquid. Combine liquid and butter in a medium saucepan and bring to the boil over high heat. Cook, stirring, for 3-4 minutes or until butter melts. Remove from heat.

Add the flour and salt and stir with a wooden spoon until well combined and the dough comes away from the side of the saucepan. Cover with plastic wrap and set aside for 15 minutes or until cool. Add the eggs, 1 at a time, beating well after each addition, until well combined. Spoon dough into a piping bag fitted with a 0.5cm-diameter fluted nozzle.
raspberry_churros-10
Add enough oil to a large saucepan to reach a depth of 6cm. Heat to 180°C over medium heat (when oil is ready a cube of bread will turn golden brown in 15 seconds). Cut small squares of baking paper, around 5cm x 5cm. Pipe heart shapes of batter on these small squares. Carefully peel back the baking paper while holding it over the oil so that the piped batter gently drops into the hot oil. Take care to not drop it from too high a height and to pull hands back quickly to avoid splashing hot oil on yourself. Deep-fry for 1-2 minutes or until golden brown, four at a time. Use a slotted spoon to transfer churros to a plate lined with paper towel. Dust with icing sugar. Repeat with the remaining dough, reheating oil between batches.

Meanwhile, combine the chocolate and milk in a medium saucepan over medium heat. Cook, stirring, for 5 minutes or until chocolate melts and the mixture is smooth. Arrange churros on a platter and serve while still warm, with chocolate dipping sauce.
raspberry_churros-3
Print Friendly and PDF

Sunday, August 22, 2010

Baked Cinnamon Doughnuts

baked_cinnamon_doughnuts-5
Deep fried dough; it's that delightfully evil combination of carbs, sugar and oil. Usually I am very controlled with my doughnut intake. As delicious as they are, the amount of guilt that comes with consuming all that heavy deep-fried carbness always outweighs the positives. So when I came across this baked cinnamon doughnut recipe, I had to give it a go. Would it satisfy my doughnut cravings without the guilt and the hassle of deep-frying at home?
baked_cinnamon_doughnuts-3
The answer was undoubtably YES. Obviously they are not exactly the same in texture, baking will not completely recreate the golden exterior doughnut that deep-frying does. The flavour was spot on with that lovely crunchy cinnamon sugar coating on the outside and the super fluffy innards. After the doughnuts had cooled they were quite hard on the outside, but a quick 10-20 second zap in the microwave turned them super soft and super doughnut-like. If anything I would suggest keeping them in the fridge overnight and then zapping them in the microwave before serving because it gives them that perfect soft texture.
extra_gum_ad
Screencap from this youtube video of the Extra gum ad
Do you like the little pink doughnut dude? Those of you in Australia might recognise him from the Extra gum commercial with all the animated food running around (not sure if they've used this ad in other countries). I loved the doughnut in this ad when it first came out, but he's been a bit overused since. Since it was my first time making doughnuts, I couldn't resist recreating this little fella. Isn't he adorable? He's covered with a thick strawberry icing, mini M&M eyes and his arms and legs are made from chopped up doughnut holes stuck in with toothpicks. The toothpicks are a little bit of a choking hazard, so if you wanna make these guys to serve you might want to think of a safer way of attaching the arms and legs. But isn't he adorable?!
baked_cinnamon_doughnuts-4
RAWRRRR!!!!
Speaking of the doughnut holes, they were just as great to eat as the regular doughnuts. For those who can't be bothered making doughnut shapes or would prefer to portion control and only have little doughnuts, just use the smaller cutter to make lots of these little doughnut holes. I couldn't stop popping these little babies into my mouth while I was pottering around the kitchen!
baked_cinnamon_doughnuts-2
These baked doughnuts are a great healthier alternative to their evilly good deep-fried cousins. Obviously they are still not very healthy with all that sugar, but they definitely satisfy those cravings for a warm cinnamon doughnut. Unfortunately the texture is a little too hard once they cool, so they really need to be heated in the microwave and served warm. I don't know if I will have the heart to eat my little doughnut guy :(
baked_cinnamon_doughnuts
Baked Cinnamon Doughnut
(recipe adapted from Taste, makes 12)
1 cup full cream or reduced-fat milk
15g unsalted butter, melted
400g plain flour
1 1/2 teaspoons instant dried yeast
1/4 cup (50g) caster sugar
1/2 teaspoon ground cinnamon

For cinnamon doughnuts:
35g melted butter
1/2 cup (44g) caster sugar
1 tsp ground cinnamon

Optional strawberry doughnut men decorations:
1 cup icing sugar
1/4 tsp strawberry essence
Pink food colouring
Milk
Brown mini m&ms
Toothpicks (or a safer alternative)

Place milk in a heatproof, microwave-safe jug. Microwave on medium-high (75%) for 30 to 40 seconds or until heated through (do not allow to boil). Stir in melted butter and set aside.

Sift flour into a large mixing bowl. Stir in yeast, sugar and cinnamon. Make a well in the centre. Add milk mixture. Mix to form a soft dough. Turn out onto a lightly floured surface. Knead for 10 minutes or until smooth and elastic (or if you are lucky enough to have a mixer with dough hooks like me, beat using dough hooks on high for 5-7 mins).

Place dough in a lightly oiled bowl. Cover with plastic wrap. Set aside in a warm place for 1 hour or until doubled in size. Line 2 baking trays with baking paper. Using your fist, punch dough down. Turn out onto a lightly floured surface. Knead until smooth. Roll dough out until 2cm thick. Using a 6.5cm cutter, cut 12 rounds from dough. Using a 3cm cutter, cut circles from the centre of each round. Place doughnuts (and doughnut holes), 5cm apart, on prepared tray. Cover with lightly greased plastic wrap. Set aside in a warm place for 30 minutes or until doubled in size.
baked_cinnamon_doughnuts-coll
Meanwhile, preheat oven to 180°C. Cook doughnuts for 10 to 12 minutes or until golden brown and cooked through. For cinnamon doughnuts combine sugar and cinnamon in a bowl. Brush doughnuts with remaining butter. Dip in sugar mixture, shaking off excess.

If you can be bothered making the little doughnut dudes, sift icing sugar in a bowl and add strawberry essence and food colouring. Gradually stir in milk, 1 tsp at a time until the icing is smooth and thick and does not flow too quickly. Dip one side of the doughnuts in the icing and place on a wire rack to set. If you icing is too runny either add more icing sugar or chill it until it is the right consistency. Before the icing is completely set on the doughnuts, place m&m 'eyes' on them. Using the doughnut holes, slice these up using a sharp knife and insert toothpicks into them and attach to doughnut to form arms and legs.

Serve doughnuts while still warm, or can be stored in an airtight container in the fridge and warmed up in the microwave for 10-20 seconds before serving. Avoid serving cold.
baked_cinnamon_doughnuts-6
Print Friendly and PDF