Monday, August 26, 2013

Rhubarb & Ginger Blondies

Rhubarb & Ginger Blondies
I've had rhubarb on my mind. I know that's a weird thing to occupy someone's thoughts, but I tend to get an ingredient stuck into my head and it won't go away until I bake something with it. I realised a week or so ago that there hasn't been anywhere near enough rhubarb desserts in my kitchen this winter. This had to be rectified immediately, before winter disappears.
Rhubarb & Ginger Blondies
So I ended up with these Rhubarb & Ginger Blondies. I love me some ginger, and I made sure there was plenty of it in these blondies with candied pieces and a load of ground ginger. The spicy kick is a great match for the tart roasted rhubarb pieces that sit on top of these blondies like jewels. To cook the rhubarb I stuck to my favourite roasting method because I love the way it retains that gorgeous ruby colour in the fruit.
Rhubarb & Ginger Blondies
If you're not into ginger you can replace the candied bits with some white chocolate, or maybe some strawberry pieces. We all know how well strawberry and rhubarb go together! I love playing around with different blondie flavours. Blondies and brownies are so evil, I can eat crazy quantities of both and will still be craving more. It's great that they are so easy to make, you basically just need one big bowl to mix them up.
Rhubarb & Ginger Blondies
The hardest part for me is waiting for them to cool before cutting it up. I can never hold out! The smell of these babies baking in the oven is wonderful, and made the wait even harder. This is probably why I chopped up the pieces in all sorts of wonky sizes. I was rushing just to try a piece!
Rhubarb & Ginger Blondies
The one thing that bugs me is that I tend to overbake my blondies/brownies. I always get nervous if the middle is still a bit wet and I tend to leave it in the oven longer than I should, forgetting that it will cook through a bit more as you wait for it to cool completely in the pan. Don't make this mistake! There's nothing worse than a dried out, overbaked blondie or brownie. Luckily this time around I didn't overbake them too much, they were still lovely and soft in the middle. It seemed like the perfect way to farewell winter.
Rhubarb & Ginger Blondies
Rhubarb and Ginger Blondies
(adapted from Martha Stewart, makes 16)
For the roasted rhubarb:
1 bunch rhubarb (about 200g/7oz, trimmed weight), chopped into 2cm thick pieces
55g (1/4 cup) sugar (or more to taste)
Grated zest of 1/2 a lemon
Preheat oven to 200°C (400°F). Place chopped rhubarb in a baking dish/roasting pan that will hold them comfortably. Sprinkle over sugar and zest and stir until the rhubarb is covered in sugar. Set aside for about 5 minutes, or just long enough for a little syrup to start to form. Cover baking dish with foil and roast in preheated oven for about 10 minutes. Take a peek and if the sugar isn't almost completely melted, stir the rhubarb, re-cover the pan with the foil  and roast a few minutes more.  Remove the foil and let the rhubarb roast for another 2 minutes or so, until the syrup is bubbling. Remove from oven and cool before using. Can be prepared the night before serving and chilled in an airtight container.
For the blondies:
115g (about 1 stick) butter, melted, plus more for pan
1/2 cup (about 100g) packed light-brown sugar
1/3 cup (about 75g) granulated sugar
1 large egg
1/2 tsp pure vanilla extract
125g (1 cup) plain/all-purpose flour, (spooned and leveled)
1 tbsp ground ginger
1/2 teaspoon salt 
2 tbsp (about 35g) candied/glace ginger, chopped into small cubes
Roasted rhubarb, prepared above 

Preheat oven to 180°C (350°F), Brush a  20cm (8 inch) square baking pan with butter; line pan with a piece of baking paper, leaving a 2-inch overhang on two sides. Butter paper. In a large bowl, whisk butter and sugar until smooth. Whisk in egg and vanilla. Add flour, salt, ground ginger and chopped candied ginger; stir together just until moistened (take care to not overmix). Transfer batter to prepared pan; smooth top as best as you can (mixture will be quite sticky). Carefully press pieces of rhubarb into the surface of the mixture, try to avoid the very edges of the pan. Bake until top is golden brown and a toothpick/skewer inserted into the center (a non-rhubarb part) comes out clean, about 30 mins depending on your oven. Set pan on a wire rack, and let cool completely. Using parchment overhang, lift cake from pan and transfer to a cutting board; cut into 16 squares. Can be stored in an airtight container for two days.
Rhubarb & Ginger Blondies
Print Friendly and PDF

Monday, August 19, 2013

White Chocolate Hi-Hat Cupcakes with Sprinkles

White Chocolate Hi-Hat Cupcakes
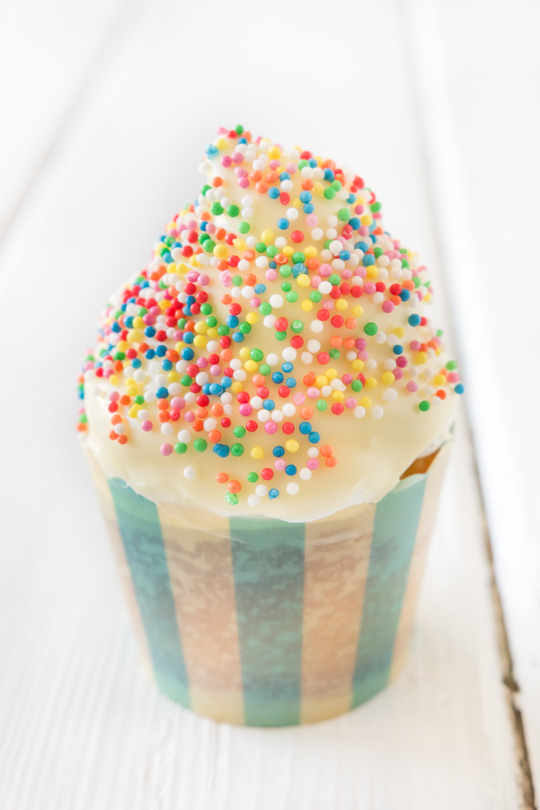
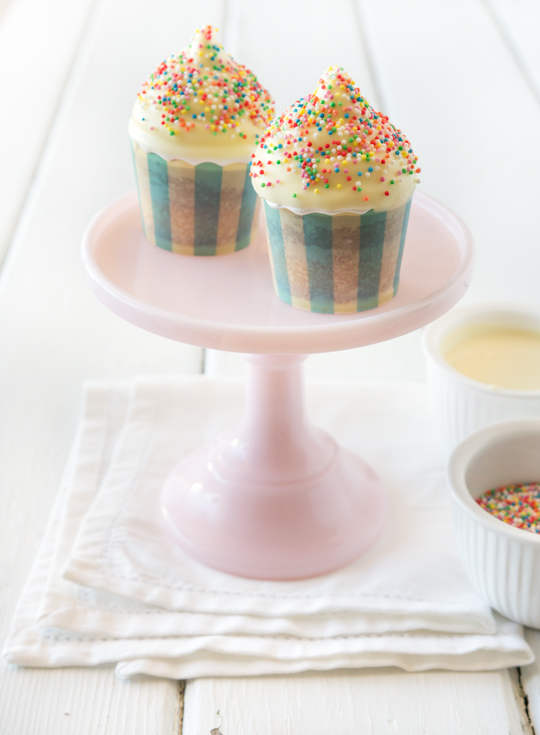
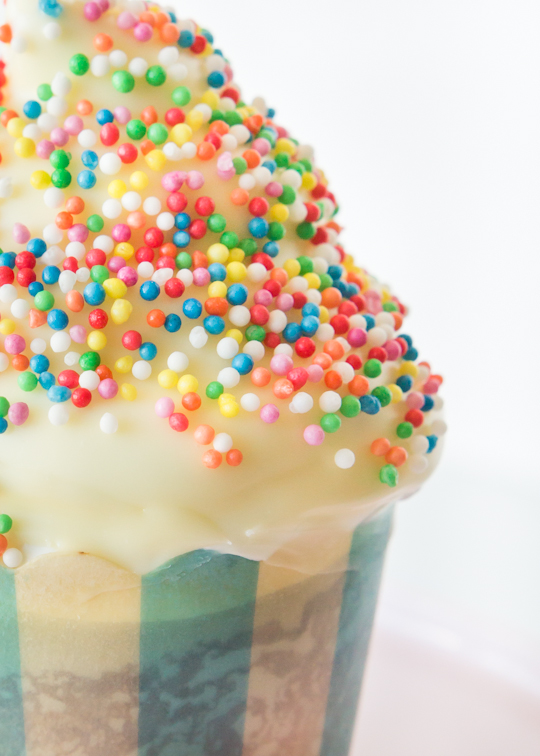
YAY SPRINKLES. They instantly cheer me up. Isn't everything so much better with rainbow sprinkles on top? I've always wanted to try making hi-hat cupcakes, but I've been a bit terrified of anything to do with coating things in chocolate because it usually leads to mess and tears in my kitchen. But I pushed ahead regardless and made a white chocolate version.
White Chocolate Hi-Hat Cupcakes
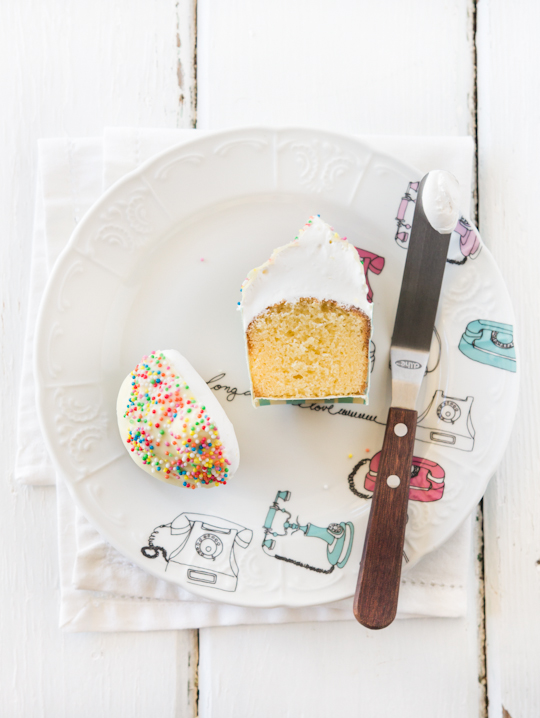
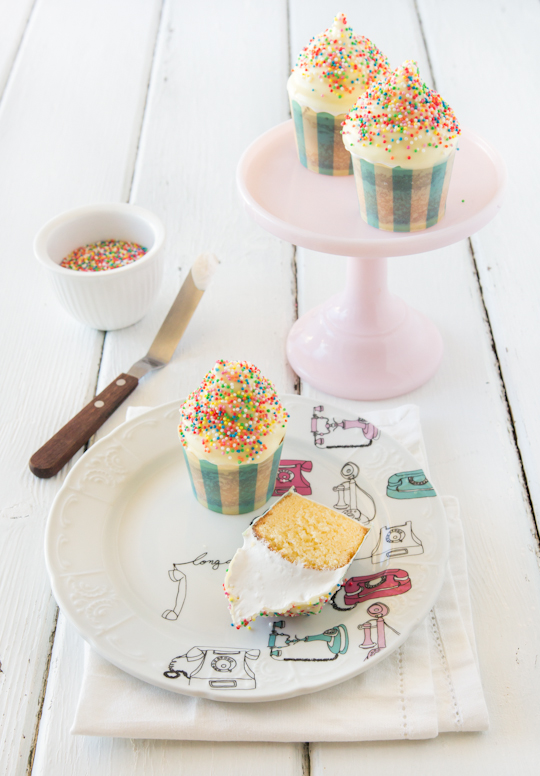
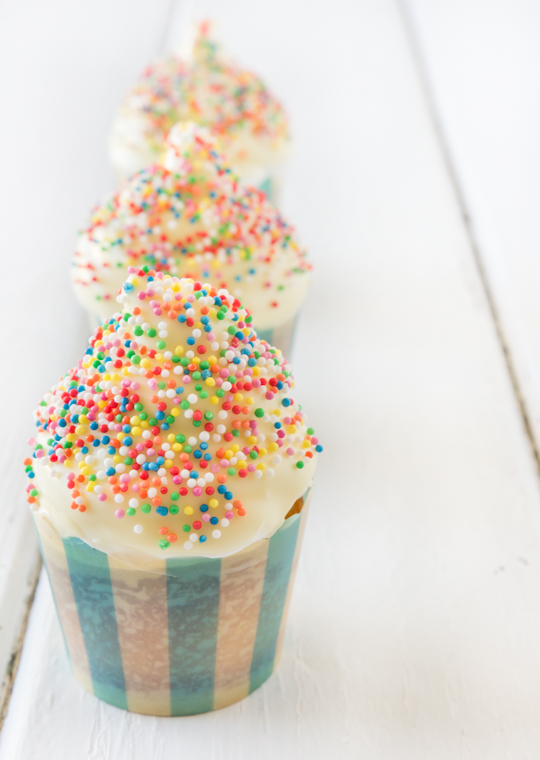
Aren't these cupcakes so cute? I love the look of the fluffy white icing on top of the cupcakes. It was almost a shame to cover up the pretty swirls of icing with  white chocolate and sprinkles. The cupcakes are also white chocolate flavoured and had a lovely fine crumb. Even though I forgot about them while they were in the oven and over-baked them a little, they weren't dry at all.
White Chocolate Hi-Hat Cupcakes
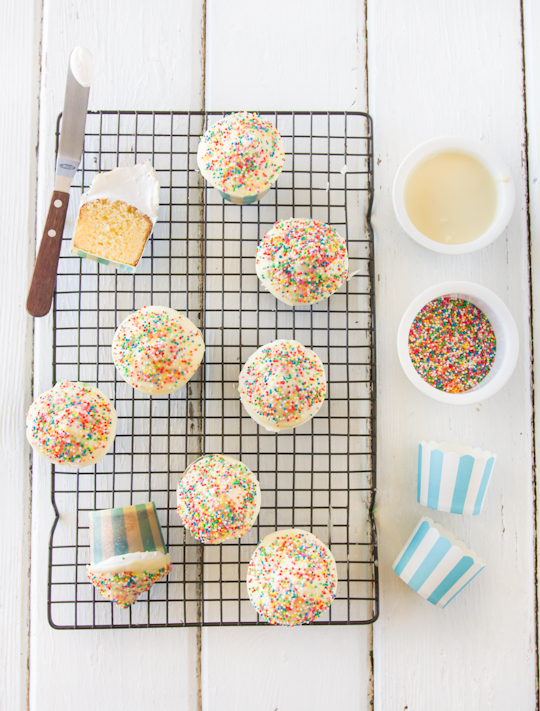
There's a couple tricky bits to these cupcakes. First is making sure you whip your meringue until it is stiff enough. Mine was a little under mixed, so it didn't pipe to quite the glorious heights that I was hoping for. The second part is to make sure your melted white chocolate mixture is cool enough before dipping the tops of the cupcakes into it, otherwise your meringue icing will just melt as soon as it hits the chocolate. I kept my cupcakes in the freezer until they were ready to dip to make sure they held their shape.
White Chocolate Hi-Hat Cupcakes
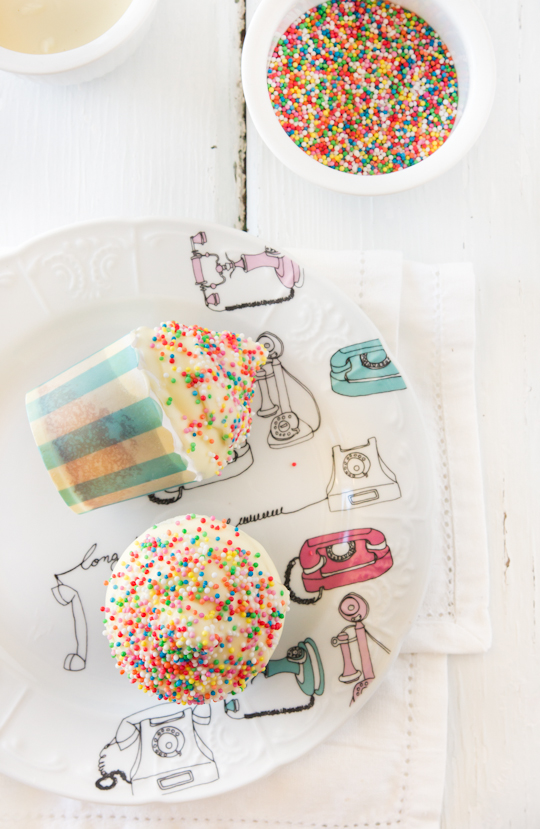
The only thing I haven't quite worked out is the best way to eat these cupcakes. The mountain of meringue icing and chocolate coating makes it a little hard to bite into, and I haven't figured out a way to eat it without getting icing on the tip of my nose. One of my friends tried to twist the whole top half off and ended up with a melting mess of icing in his hand, which was definitely not the right way to eat it!
White Chocolate Hi-Hat Cupcakes
They're a bit more effort than a regular cupcake but so worth the extra time! I love how the coating makes it look like one of those soft-serve cones from Wendy's with the chocolate coating and sprinkles on top. I almost wish I had stuck a Kit-Kat into the side as well.
White Chocolate Hi-Hat Cupcakes
YAY SPRINKLES!
White Chocolate Hi-Hat Cupcakes
White Chocolate Hi-Hat Cupcakes with Sprinkles
(cupcake recipe adapted from Gourmet Traveller, icing from Martha Stewart)
For the cupcakes:
165g (about 1 & 1/2 sticks) butter, softened
150g (about 2/3 cup) sugar (I use caster/superfine)
4 eggs
110g (about 4oz) white chocolate, melted
150g (about 1 & 1/4 cups) plain/all-purpose flour
1 & 1/3 tsp baking powder (alternatively, use 155g self-raising flour)

Preheat oven to 180°C (350° F)and line a 12-hole cupcake tray with paper liners. Using an electric mixer, beat butter and sugar until light and fluffy, add eggs one at a time, beating well after each, then add white chocolate and stir to combine. Sift flour and baking powder over cake batter and fold in until combined. Fill cupcake liners with batter until they are about 2/3rd full. Bake for 18-20 mins or until golden brown and a skewer inserted into the centre comes out clean. Cool in tin for 5 mins and then cool completely on a wire rack.

For the meringue icing:
400g (about 1 & 3/4 cups) sugar
3 large egg whites
1/4 tsp cream of tartar
1 tsp pure vanilla extract
1/2 tsp almond extract (optional)

In a large heatproof bowl, combine sugar, 1/4 cup water, egg whites, and cream of tartar. Place bowl over a pot of simmering water and whisk regularly. Heat until a candy thermometer inserted into the mixture reads 70°C (160° F), mixture should be hot to the touch. Remove from heat and whisk with an electric mixer on high speed for about 10 minutes as mixture cools, until mixture is thick, white and very stiff. Place in a large piping bag with a 1cm round tip and pipe a high spiral of icing on top of each cupcake. If your meringue is not holding its shape then it is undermixed and needs to be whisked for longer. Place piped cupcakes in the freezer while you prepare the chocolate coating (if you don't have enough space in your freezer, place in the fridge for at least 30 mins).

For the white chocolate coating:
340g (12oz) white chocolate, chopped
3 tbsp vegetable or canola oil
To decorate: 100s & 1000s (rainbow sprinkles)

Melt chocolate and oil together in a heatproof bowl over a pot of simmering water until smooth and combined. Set mixture aside for at least 15 mins to allow it to cool or it will melt your icing. Place mixture in a deep, narrow bowl or cup. Take your cupcakes out and dip the cupcake in the chocolate mixture to coat all the icing, allowing the excess to drip off. Sprinkle rainbow sprinkles over the top while the coating is still wet (don't dip your cupcakes into the sprinkles). Return to the freezer/fridge for 5 mins to allow the coating to set, then store in the fridge in an airtight container until ready to serve.
White Chocolate Hi-Hat Cupcakes
Print Friendly and PDF

Monday, August 12, 2013

Cream & Lemon Curd Layered Sponge with Berries & Meringue

Cream & Lemon Curd Layered Sponge with Berries & Meringue
These type of cream and sponge cakes might look familiar since I've done a few of them in the past. But you better get used to it. I am particularly fond of eating these types of cakes, and it turns out my in-laws are as well. I brought my Vanilla Bean Sponge and Salted Caramel Apple cake to afternoon tea and it went down so well that my father-in-law requested a very similar sort of cake for his birthday. Except he loves fresh berries, so I made sure to get my hands on some punnets of blueberries and raspberries even though they're not in season yet.
Cream & Lemon Curd Layered Sponge with Berries & Meringue
(Excuse the slightly fuzzy photos, I was rushing to take these as the sun was setting.) Originally this was just going to be a two layered sponge with cream in the middle, and maybe some lemon icing on top. Then somehow the idea sat in my brain for a bit and blossomed into this four-layer sponge cake, with alternate layers of cream and lemon curd filling and topped with a lemony glaze, fresh berries and crunchy little mini meringues.
Cream & Lemon Curd Layered Sponge with Berries & Meringue
The mini meringues were a last minute addition. I had egg whites leftover from the lemon curd and I prefer it when recipes don't leave you with random egg whites or yolks leftover so I decided to use them up with some piped mini meringues for extra texture and decoration. I'm so glad that I did, they were probably the best part of the cake, the crunchy bits worked well with the softer textures of the rest of the cake. You end up with a fair few leftover meringue cookies but no one is going to complain about that, trust me.
Cream & Lemon Curd Layered Sponge with Berries & Meringue
Sometimes nothing beats a plain old vanilla sponge with cream. The berries and lemon curd add some tang and colour, and the cream ensures it's light and fluffy. My one regret was that I had to assemble the layers of this cake the night before I served it to save time, and by the next day the cream layers were a little deflated so the cake wasn't quite as gloriously tall and pretty as it was in the photos. My advice would definitely be to try and serve your cake on the day you assemble it. It will also ensure your meringues stay crunchy and there's no juice that escapes from your berries. I swear looking at this cake almost makes it feel like Spring here!
Cream & Lemon Curd Layered Sponge with Berries & Meringue
(serves 8-10, sponge recipe from Gourmet Traveller)
Note: If you are new to sponge cakes make sure you click through to the Gourmet Traveller link above for extra tips. This sponge cake relies solely on the whipped eggs for leavening and it is important you follow all the steps carefully.
For the lemon curd:
100g (1/2 cup) sugar
1/4 cup (60ml) freshly squeezed lemon juice
2 tsp finely grated lemon zest
3 large egg yolks (save the egg whites for the mini meringues)
60g (1/4 cup) unsalted butter, cubed

Stir the sugar, lemon juice and zest in a small saucepan over medium heat until the sugar dissolves. Beat the egg yolks in a heatproof bowl and gradually add the hot lemon mixture. Strain the mixture through a fine-mesh sieve. Return to the heatproof bowl and place over a saucepan of simmering water. Cook, stirring continuously, until the mixture coats the back of a wooden spoon. Do not allow the mixture to boil. Remove from the heat and add the butter cubes, one at a time, stirring until fully combined. Cover surface of mixture with clingfilm and refrigerate to allow it to set, at least 30 mins.

For the meringues:
3 egg whites, at room temperature
A pinch of salt
165g (about 3/4 cup) caster/superfine sugar

Preheat oven to 120°C and measure all your ingredients. Line two baking trays with baking paper. Place egg whites and salt in a large, clean mixing bowl and beat with an electric mixer until soft peaks form. With the mixer on low, add sugar 1 tbsp at a time then whisk until thick and glossy (at least 2-3 mins). Pinch a small amount of mixture between your thumb and forefinger. If mixture is smooth then the sugar has dissolved, if it is still grainy, beat for a minute or so more and check again. Beat until sugar has dissolved. Place mixture in a large piping bag with a star tip and pipe small rosettes on the prepared baking trays. Place in oven and reduce oven temp to 90°C. Leave the oven on for 60-75 mins or until the meringues are crisp, then turn off oven and allow the meringues to cool completely in the oven (2-3 hours). Store in an airtight container until ready to serve cake.

For the sponge cake:
60g (about 4.5 tbsp) butter, melted and cooled plus extra for greasing tins
180g (about 1.5 cups) plain/all-purpose flour, plus extra for dusting
6 eggs, at room temperature
165g (about 3/4 cup) caster/superfine sugar
1 vanilla bean, scraped seeds only

Preheat oven to 180°C (350° F) (you may need to adjust to 170°C (340° F) for fan-forced). Brush two 18cm (or 20cm but layers will be thinner) round cake tins with melted butter, line base and sides with baking paper, grease paper with a little extra butter and then dust lightly with flour. Triple-sift flour and set aside. Whisk eggs, sugar and vanilla seeds in an electric mixer until thick, pale and tripled in volume (about 7-8 minutes). Sift over flour in two batches, folding each batch in with a large metal spoon or spatula. Fold in melted butter. Carefully pour into prepared tin and bake until light golden and centre springs back when pressed lightly with your fingertip (about 25 minutes). Pull cake gently away from sides of tin with your fingers or carefully loosen with a knife. Turn onto a wire rack, remove baking paper, turn back over swiftly and cool completely. Best eaten on the day of baking, but you can store it in an airtight container overnight and assemble the rest of the cake the next day.

To assemble cake:
600ml thickened/heavy cream, cold
1/2 tsp pure vanilla extract
1/2 cup icing/powdered sugar, sifted
Glaze: 1 cup icing sugar, sifted, 1 tbsp lemon juice, 1-2 tbsp milk
Fresh berries to serve

Place cream and vanilla in a large mixing bowl and start to beat on medium speed with an electric mixer. Gradually add icing sugar and then beat on high until soft peaks form. Take care not to overmix. Carefully cut your two sponge cakes in half using a long serrated knife. Place one layer of sponge on your serving plate/stand and spread half the cream on top. Sandwich with another layer of sponge and then spread the lemon curd on top (you may need to whisk it gently to ensure it is smooth). Top with another sponge, followed by the rest of the cream (you can always adjust the amount of cream you prefer, you don't need to use all of it). Top with the final layer of sponge. Mix glaze ingredients in a bowl, only add enough milk to ensure it is a thick paste. Pour enough glaze to just cover the top the of cake and then decorate with berries and mini meringues. If you are not serving straight away then don't place the meringues and berries on the cake until you are ready to serve. P.S. Video of me assembling it here.
Cream & Lemon Curd Layered Sponge with Berries & Meringue
Print Friendly and PDF

Monday, August 5, 2013

Chocolate Mousse Tart with Chocolate Chip Cookie Crust

Chocolate Mousse Tart with Chocolate Chip Cookie Crust
This tart is FRIGGIN AMAZING. I know that it's entirely predictable of me to praise a recipe that I'm posting up on this blog but I LOVE THIS TART. I love it so much I completely broke my diet and ate three slices of this tart in the last 24 hours. It is that good. I've been having such a hard time coming up with a dessert recipe that I've wanted to bake recently, and then this tart/pie/thing of beauty came to me. A Chocolate Mousse Tart with a Chocolate Chip Cookie Crust. Oh yes.
Chocolate Mousse Tart with Chocolate Chip Cookie Crust
I've wanted to try making a pie or tart with a chocolate chip cookie dough crust for a long time now. Since I haven't been able to get my hands on a decent cast iron skillet, I have yet to try making my own skillet cookies and it's something that I've always wanted to try. So this is will have to do for the moment. The tart shell really does look and taste like a giant chocolate chip cookie. It's so amazing. It doesn't require any blind baking with weights, and it is a pretty easy dough to handle. Even if it cracks as you place the dough in the tin, you just need to press it back together and it should be fine, so dont freak out like I did when I lifted my rolled dough and it cracked into about 5 pieces. I was a little worried at first because I made it quite thick (to ensure it was stable) so it was quite hard, but after a night in the fridge with the chocolate mousse filling it had softened just enough to make it fantastic to eat.
Chocolate Mousse Tart with Chocolate Chip Cookie Crust
The chocolate mousse filling is a dream. It's a pretty standard chocolate mousse, which does use raw/low temperature cooked eggs so if you have issues with that you can try a heavier cooked or eggless mousse but I am a big fan of this recipe. It's so light and super smooth, it's the perfect filling for this crust. I used salted butter in both to ensure it wasn't too sweet, the salt is really important for this recipe and will make it taste more like a chocolate chip cookie.
Chocolate Mousse Tart with Chocolate Chip Cookie Crust
With the cream on top it kind of reminds me of an American style cream pie, but I'm gonna keep calling it a tart for the moment. Whatever its called, I think you should try making it. You won't regret it (except for the part where you can't stop yourself from eating it and then you might curse it for being too addictive).
Chocolate Mousse Tart with Chocolate Chip Cookie Crust
(makes one 24cm tart, tart shell adapted from this recipe and mousse from this Food Network recipe)
For the choc chip cookie tart dough:
130g  (about 4.5oz) brown sugar
1 tsp pure vanilla essence
1/4 tsp salt
125g (4.5 oz/just over 1 stick) butter, room temperature
3 egg yolks
300g (10.6oz/ about 2.5 cups) plain/all purpose flour, sifted
1/2 cup milk or dark chocolate chips, or more if you prefer

With a hand or stand mixer, combine brown sugar, vanilla extract, salt and butter on medium speed. Mix only until ingredients are thoroughly combined, but by no means light and fluffy. Add in the yolks, one at a time then reduce speed to low. Add in the flour and chocolate chips all at once and mix until homogenous, add more chips if you wish. If you’re comfortable with dough and a pin, you can roll it right away with very lightly floured hands and rolling pin. Otherwise, form the dough into a disk, wrap in plastic, and refrigerate about 15 minutes to make the it easier to handle. You can refrigerate the dough for up to a week or freeze for several months. Before rolling, set the dough out and let it slowly come to room temperature over a few hours. Preheat the oven to 180°C (350° F) and lightly grease a 22-24cm loose bottomed tart tin. Dust the counter with a very, very light coat of flour. Roll to 0.75cm (1/3") thickness.Carefully set dough over the tart shell and use your thumbs to press the dough into the corners of the pan. Press the overhanging dough against the edges of the tart pan to trim off the excess and leave the dough flush with the edges. Dock tart lightly with a fork. The dough is extremely forgiving and can be rerolled two or three times, you should be able to press any cracks together to mend them or fill any defects with leftover dough by pressing it gently together. Bake for 20-25 minutes. After 10 minutes or so, check on the tart. If it has formed an air bubble; use a skewer to gently poke a small hole in the bubble to deflate it. Continue baking until the tart is golden brown and firm and dry to the touch. (It is better to slightly overbake than underbake to prevent any raw taste.) Cool in tin for about 10 minutes, then carefully remove from tin and cool completely on a wire rack. Shell can be stored in an airtight container overnight.
Chocolate Mousse Tart with Chocolate Chip Cookie Crust
For the chocolate mousse filling:
(Note the amounts below will yield leftover mousse if you only fill your tart to be level with the edges. You can either pile the mousse filling a bit higher or set the extra mousse in a separate bowl. Who would ever complain about having a bit more mousse?!)
225g (8 oz) bittersweet or semisweet chocolate, chopped
55g (4 tbsp) butter
3 large eggs, separated (Note this recipe uses raw/slightly cooked eggs, ensure they are fresh and be aware of any risks)
55g (1/4 cup) caster/superfine sugar
375ml (about 1.5 cups) cold thickened/heavy cream
Extra chocolate chips to top

In a large heat-proof bowl set over a pot of simmering water, melt the chocolate and butter, stirring. Remove from the heat and whisk until smooth. Return to the heat and add the yolks, 1 at a time, whisking after the addition of each. Remove from the heat and set aside. In a clean bowl, beat the egg whites until soft peaks start to form. Gradually add only half (1/8th cup) of the sugar and beat until stiff peaks form. In a separate bowl, beat the cream until it becomes frothy. Add the remaining  sugar (1/8th cup) and continue beating until it holds stiff peaks.

Fold the egg whites into the chocolate mixture until no white specks appear. Using only half of the whipped cream, gradually fold in until smooth. Spoon the mousse into the pre-baked tart shell and smooth the top with a rubber spatula. Refrigerate until well chilled, tart is best served after being chilled overnight. To serve, spoon the remaining whipped cream on top and garnish with extra chocolate chips. Cut into wedges and serve. Leftover tart can be stored in an airtight container (even with the extra cream on top) in the fridge for up to two days.
Chocolate Mousse Tart with Chocolate Chip Cookie Crust
Print Friendly and PDF

Monday, July 29, 2013

Beef & Caramelised Onion Sausage Rolls with Blue Cheese Dipping Sauce

Beef & Caramelised Onion Sausage Rolls with Blue Cheese Dipping Sauce
A savoury recipe! What in the world is going on? It must be opposites day. I was in a baking funk this weekend. There were about 10 bazillion different dessert ideas whizzing around my head but nothing was inspiring me enough to make it a reality. So I went in an entirely different direction and made some homemade sausage rolls. I find it hard to believe this was my first time making them at home. They are so easy and such a classic. You can't go wrong with a bit of meat wrapped in puff pastry, though it's not the most photogenic of dishes!
Beef & Caramelised Onion Sausage Rolls with Blue Cheese Dipping Sauce
To mix things up a little, instead of serving them with tomato sauce (the default condiment for all sausage rolls) I got a little bit weird. I made these delicious beef and caramelised onion sausage rolls (my sweet tooth still manages to rear its ugly head) and served them with a blue cheese dipping sauce. Don't freak out. It totally works. I knew it would, because one of my favourite dinners is this grilled steak with onion-blue cheese sauce. Even people who don't usually like blue cheese enjoy it. So keep an open mind.
Beef & Caramelised Onion Sausage Rolls with Blue Cheese Dipping Sauce
Sausage rolls might be one of the few times where I have no issues with using store-bought pastry. It's one of those crowd-pleasing party snacks that you want to be able to make on the day, and making puff pastry from scratch (as amazing as it tastes) can be quite time consuming. So this weekend I cheated and used the frozen stuff. Still deliciously buttery and flaky.
Beef & Caramelised Onion Sausage Rolls with Blue Cheese Dipping Sauce
I would definitely urge you to try it with the blue cheese sauce at least once. The sausage rolls are actually not very salty on their own because of all those lovely caramelised onion bits, so it really needs the saltiness from the blue cheese to balance it out. If you can't bring yourself to do it, make sure you add extra salt or some cheese to the rolls themselves. Almost cruelly, the one weekend where I decided to make savoury baked goods for my dessert-averse husband, he suddenly had a craving for chocolate. Bugger.
Beef & Caramelised Onion Sausage Rolls with Blue Cheese Dipping Sauce
(adapted from this Taste recipe, makes 24 mini sausage rolls)
For the onions:
3 red or brown onions, peeled and thinly sliced
2 tbsp olive oil
15g (1 tbsp) salted butter
2 tbsp brown sugar
1 tbsp balsamic vinegar

Place butter and olive onion in a large frying pan or pot on medium heat until butter has melted. Add onions and stir regularly until softened and just starting to colour. Add sugar and balsamic vinegar and stir until combined. Continue cooking, stirring regularly until onions are a deep brown in colour, about 15 mins. Transfer to a dish and set aside to cool.
Beef & Caramelised Onion Sausage Rolls with Blue Cheese Dipping Sauce
For the sausage rolls:
Caramelised onions, prepared above
500g (about 17.5 oz) beef mince
1 carrot, peeled and finely grated
1.5 tbsp finely chopped flat-leaf parsley
1 tbsp dried thyme
1.5 tbsp freshly cracked pepper  
Small pinch of sea salt
3 sheets butter puff pastry, partially thawed (if you have the time to make yours from scratch you can try the recipe at the bottom of this post and roll thin sheets approx 25x25cm)
Egg wash: 1 egg + 1 tbsp milk whisked together
Note: If not using the cheese dipping sauce, add a generous pinch of salt to the mixture or you can crumble some of the cheese to the mixture (the rolls are quite sweet without the cheese sauce)

Preheat oven to 220°C (430°F) and line 2-3 baking trays with baking paper. Place beef, carrot, parsley, thyme, pepper in a bowl and add the cooled onions. Mix until well combined. Cut pastry sheets in half. Prepare egg wash and brush egg wash along one long edge of each piece of pastry. On the opposite long edge, shape a 3cm diameter sausage of the beef mixture (about 1/6th of the whole mixture). Starting from the long edge with the beef, roll pastry up so that it seals along the edge with egg wash. Cut roll into four equal pieces and place equally spaced on the lined baking trays, seam side down. Brush tops with egg wash. Repeat with remaining pastry and beef mixture. Bake for 20-25 mins or until golden brown and puffed. (You can prepare the dipping sauce below while waiting for them to bake.) Don't worry if moisture/grease leaks out the sides a bit, it doesn't really affect it but you can mop some if it up with a paper towel if necessary. Remove from oven and use tongs to carefully transfers to a wire rack to cool. Best served while still warm and fresh from the oven, but can be refrigerated in an airtight container for several days reheated in the oven or microwave.
Beef & Caramelised Onion Sausage Rolls with Blue Cheese Dipping Sauce
For the blue cheese dipping sauce:
250g (about 9oz) sour cream
100-120g (3.5-4oz) your favourite blue cheese, finely crumbled (adjust to taste)
1/4 cup flat-leaf parsley, chopped

Place sour cream and blue cheese in a large mixing bowl and whisk together until smooth then stir in parsley. You can adjust the amount of cheese to your liking, I used 120g because I like it strong-flavoured. You can also prepare this in a blender or food processor to save time and ensure smoothness. Serve together with sausage rolls, and extra celery sticks for any leftover dip.
Beef & Caramelised Onion Sausage Rolls with Blue Cheese Dipping Sauce
Print Friendly and PDF

Monday, July 22, 2013

Mickey & Minnie Mouse Macarons

Mickey & Minnie Mouse Macarons
You know how much I love a gimmicky macaron. This blog is full of them. They might horrify some of the macaron purists out there but I can't resist them. Macarons are still cookies and we shouldn't take them too seriously. Even so, I was planning to avoid making the cutesy animal faced ones for a while. They've been done. But then my super cute sister-in-law asked if I could make some macarons for her Disney-themed party (along with another one of these Sweet 16 cakes), and it was too fun an idea to pass up. Mickey Mouse macarons seemed like the perfect treat for a Disney party.
Mickey & Minnie Mouse Macarons
I made two batches; Milk Chocolate Mickey Mouse Macarons and Strawberry Minnie Mouse Macarons. I've gotta say that I love the Minnies just a little bit more with the little pink bow and the eyelashes. Plus the strawberry ganache is amazing. I wanted the strawberry flavour to be very obvious so I cheated a little and added some strawberry essence to the ganache even though it already has strawberry puree. It makes it taste just like the strawberry flavoured chocolate you can find in Asian supermarkets, which I have a serious soft spot for.
Mickey & Minnie Mouse Macarons
I had a quick look on Google, figuring that Mickey Mouse macarons would have been done to death by other bakers already since the round shapes make it pretty easy to pipe. Surprisingly there weren't many around, I thought these ones were particularly impressive but I wanted to make something a little less complicated. So I went with just a plain white shell with black ears and a nose, and drew on the faces with black food colouring after baking like I normally do. I found it really hard to get the eyes right, the first few I drew ended up looking more than pandas than Mickey or Minnie. But I think by the end I nearly got the hang of it.
Mickey & Minnie Mouse Macarons
As always, I'd recommend practicing with plain macaron shells until you're comfortable enough to give these a try. Splitting up the batter into two colours, the piping of the ears and nose, and  the sprinkles on top make this macaron very susceptible to cracking so they need to be dried for a bit longer than normal macs. Mine still cracked a little around the ears because I had to use liquid black food colouring instead of gel or powder, but the majority of them turned out pretty good. Just don't make my mistake of using soft sugar pearls on the bows instead of the cachous, they tend to disintegrate in the oven. The important thing was the birthday girl was stoked with them and I hear they disappeared pretty fast at the party.
Mickey & Minnie Mouse Macarons
Milk Chocolate Mickey Mouse Macarons and Strawberry Minnie Mouse Macarons
For one batch of 10-12 of macarons, double amounts if you are making two batches: (if you are a beginner with macarons, read up and practice plain macarons first. BraveTart has lots of useful advice and info on the subject)
100g egg whites, at room temperature
1/2 tsp salt
110g almond meal, at room temperature and well sifted
200g icing (confectioner's) sugar
50g sugar (I use caster/superfine)
Optional: 1 tsp powdered egg whites (available from The Essential Ingredient), helps to stabilise egg whites but is not necessary, black food colouring (preferably gel or powdered)

Line two baking trays with good quality baking paper. Place icing sugar in food processor and pulse for a minute to remove any lumps. Stir in almond meal and pulse for about 30 seconds to combine. (If you don’t have a processor just sift together with a fine sieve.) Sift into a large mixing bowl and set aside. Using an electric mixer, beat egg whites and salt (and egg white powder) in a medium mixing bowl until it reaches soft peaks. With the mixer on high speed, gradually add sugar and beat until it reaches stiff peaks.

Add meringue to your dry mixture and mix together with a spatula, quickly at first to break down the bubbles in the egg white (you really want to beat all the large bubbles out of the mixture, which is easily done by smearing the mixture on the bottom and side of the bowl with your spatula), (as it just starts to come together you can place about 1/3 of the mixture in a separate bowl and add black food colouring to it) then mix carefully as the dry mixture becomes incorporated and it starts to become shiny again. Take care not to overmix, the mixture should flow like lava and a streak of mixture spread over the surface of the rest of the mixture should disappear after about 30 seconds.

Place white mixture in a piping bag with a 1cm round piping tip. Pipe rounds about 2.5cm diameter on your prepared trays, leaving at least 3cm space around each one. Tap baking sheets carefully and firmly on the benchtop a couple times to remove any large bubbles. Place your black piping mixture in a bag with a narrow round piping tip (2-5mm) and pipe the ears ( you can pipe a small dot in the middle for the nose on half the shells, remember half will have faces and half will not). If you are decorating for Minnie Mouse macarons, use heart-shaped sprinkles and pink cachous to create a small pink bow decoration. Leave to dry for at least an hour, so that when you press the surface of one gently it does not break/stick to your finger. This will help prevent any cracking and help the feet to form on the macs.

Preheat your oven to 130-150°C (265-300°F), depending on your oven. You can place the sheet of piped shells on top of an upside-down roasting tray or another baking tray, for better heat distribution. Bake for 20-25 minutes, depending on the size of your shells. Carefully test if the base of the shell is ready by gently lifting one and if it’s still soft and sticking to the baking paper, then it needs to bake for a few minutes longer. Remove from the oven and cool on the tray for a few minutes, then gently remove from the sheet and place on a wire rack to cool. At this point you can use a wooden skewer dipped in black food colouring or an black edible ink pen to draw on the eyes and mouth on the shells that have noses. Leave to cool completely on rack.
Mickey & Minnie Mouse Macarons
For the milk chocolate ganache (for Mickey):
100g good quality milk chocolate, finely chopped
75ml pure/heavy cream (min 35% fat unthickened)

For the strawberry white chocolate ganache (for Minnie):
100g good quality white chocolate, finely chopped
75ml pure/heavy cream (min 35% fat unthickened)
60g (about 1/4 of a punnet) fresh/frozen strawberries, pureed
Optional: 1-2 tsp of strawberry essence

For both flavours of ganache, place chopped chocolate in a bowl and set aside. Heat cream in a small saucepan on medium-low heat until it just comes to the boil and then pour over the chocolate. Leave for about 3 minutes to allow chocolate to melt. Use a whisk to combine mixture until it is smooth. For the strawberry ganache, gradually whisk strawberry puree into the white chocolate ganache and then add strawberry essence to taste. Chill both ganaches, whisking it every 5 minutes to ensure it stays smooth, until the mixtures thicken but are still pipable. Place in small piping bags (ziplock bags with a corner snipped off are handy for this) and fill macaron shells, using the strawberry ganache for the Minnie Mouse macarons and chocolate ganache for the Mickey Mouse macarons.
Mickey & Minnie Mouse Macarons
Print Friendly and PDF

Monday, July 15, 2013

Chocolate Raspberry Layer Cake with Macarons

Chocolate Raspberry Layer Cake with Macarons
I am pretty excited to share this post with you guys. Earlier this year I was contacted by the lovely Amanda from i am baker. That in itself was pretty exciting, her blog is a HUGE source of inspiration for me. I mean she made the original rose cake and heart-hidden-inside cake, just to mention a couple of the hugely creative ideas she has pioneered. Amazing. So when she proposed a food-styling challenge to me, I didn't even think twice before saying yes. Style a chocolate cake with a budget of $25 for props? It was on like Donkey Kong.
Chocolate Raspberry Layer Cake with Macarons
So the challenge was as follows; style a chocolate cake however you want and with any recipe you want but you only have $25 to spend on styling props (background not included). The cake was a no-brainer, you know how much I love to bake chocolate cakes these days. The budget was more than a little bit tricky. Those of you living in Sydney know how hard it is to find good, affordable homewares. I gave myself a little leeway, taking into account the exchange rate at the moment and stretching my budget to $AU27. Even then, I had to go to my one of my hidden away antique stores to find a few items that were special enough and still fit the price.
Chocolate Raspberry Layer Cake with Macarons
I managed to dig around and find this gorgeous silver serving tray for $20, a slightly cracked cake server for $3 and a lovely old lace doily for just $2. I'm particularly in love with the tray and the etchings on the surface, apparently quite a common item to find in antique stores which is why it wasn't too pricey. It also helped to have the lovely vintage door my husband gifted to me as an anniversary present, which has been my favourite photography surface for the last few weeks (in case you hadn't already noticed).
Chocolate Raspberry Layer Cake with Macarons
The cake layers are made from one of my favourite go-to recipes; David Lebovitz's Devil's Food Cake recipe. Love that guy, love this cake. I filled the rich chocolate cake layers with a white chocolate and raspberry ganache. It was preeeeeety. And tasted so great that it also made the perfect filling for some heart-shaped macarons. I could not resist topping the cake with more of these macarons, you know how much I love them. I just think that macarons make the perfect cake topper. I especially love how the colour of these ones offset all the glossy brown chocolate. And I splashed out and spent a fortune on fresh raspberries (totally not in season right now), because they are so photogenic on top of a chocolate cake. The cake itself was so pretty I didn't even need the props. But it was fun to play with them anyway.
Chocolate Raspberry Layer Cake with Macarons
The cake is covered in a rich layer of dark chocolate ganache and is best enjoyed in small portions. The finish is what we baking bloggers like to call 'rustic' (translation: I can't be bothered spending forever smoothing it out perfectly). I actually prefer it when chocolate ganache looks like this, the swirls of chocolate look so luscious and inviting. On a random note; I also picked up this lovely beat-up white enamel colander but it didn't fit into the budget for the challenge so the photo below is me totally cheating.
Chocolate Raspberry Layer Cake with Macarons
TIme to stop bombarding you with photos, there were so many that I liked that I couldn't edit them down! I just wanted to say a huge thank you to Amanda for letting me be a part of this challenge. It was SO MUCH FUN and hugely inspiring. It was really great to have a goal to focus on for my weekly baking and I managed to pick up a few props that I will definitely get plenty of use out of. As always, this recipe can be easily adapted from three layers to two, you can replace with filling with other flavours and you can top the cake with other fruits or toppings.
Chocolate Raspberry Layer Cake with Macarons
(Serves 12-16, Devil's Food Cake recipe from David Lebovitz)
For the cake:
9 tbsp unsweetened cocoa powder
1 1/2 cups (about 185g) cake flour (not self-raising, I just used plain flour and replaced 3 tbsp with cornflour/cornstarch, well-sifted together)
1/2 tsp salt
1 tsp bicarb/baking soda
1/4 tsp baking powder
115g (1 stick) unsalted butter, at room temperature
1 1/3 cups (about 300g) caster/superfine sugar (white/granulated works too)
2 large eggs, at room temperature
1/2 cup water + 1/2 cup milk

Grease and line the base of a three 18cm cake tins (or two 20-22cm tins, if you only have one tin you can split up the batter and bake one layer of cake at a time in the same tin) and preheat oven to 180°C (350°F) (lower by 10°C for fan-forced). Sift together the cocoa powder, flour, salt, bicarb soda, and baking powder in a bowl. Using an electric mixer with a large mixing bowl, beat together the butter and sugar on high about 5 minutes until smooth and creamy. Add the eggs one at a time and beat until fully incorporated.

Mix together the water and milk. Stir half of the dry ingredients into the butter mixture, the add the milk mixture. Finally stir in the other half of the dry ingredients until smooth. Split batter mixture between the prepared tins. Bake for about 20-25 minutes, or until a skewer inserted into the centre of the cake comes out clean. Remove from the oven and cool in tin about 5 mins, then place on a wire rack and cool completely before icing. Cake can be baked the night before and stored in an airtight container overnight before assembly.
Chocolate Raspberry Layer Cake with Macarons
(Optional) For the macaron shells:
Prepare heart macarons as per these instructions, but instead of blue colouring and sprinkles I split the mixture in half and coloured half with pink food colouring.

For the raspberry ganache:
(makes enough to fill a three layer cake plus one batch of macarons, feel free to halve quantities if doing less layers or skipping macarons)
Note: Can be replaced with raspberry icing or raspberry buttercream
500g good quality white chocolate, finely chopped
300ml pure/heavy cream (min 35% fat unthickened)
125g (1 punnet) raspberries (fresh or frozen), pureed and strained

Place chocolate in a large mixing bowl. Heat cream over low-medium heat in saucepan until just boiling, pour over cream and set aside for 5 minutes. Use a whisk to combine mixture until smooth, then gradually add raspberry puree to taste. Chill until it thickens but is still pourable (take care not to leave too long or it will make it hard to spread). This mixture is prone to splitting as it cools, if this happens just reheat the bowl over a simmering saucepan of water and add a bit more cream. Place one layer of chocolate cake on your cake stand and cover with ganache. Sandwich second layer on top and repeat. Fill macarons with remaining ganache. It is best to chill your macarons overnight to allow the flavour to mature. I left both the cake and macarons in the fridge overnight before covering with the dark chocolate ganache on the day of serving.

For the chocolate ganache:
400g dark chocolate (I used semi-sweet), finely chopped
300ml pure/heavy cream (min 35% fat unthickened)
Optional: fresh raspberries, to decorate

Place chocolate in a large mixing bowl. Heat cream over low-medium heat in saucepan until just boiling, pour over cream and set aside for 5 minutes. Use a whisk to combine mixture until smooth. Chill until it thickens and just holds its shape but is still pourable. Use a spatula to spread over the outside of your cake. I used an offset spatula to smooth the surface. Place macarons around the border of the top of the cake. Decorate center of the cake with raspberries. Chill cake until ready to serve, remove from fridge at least 30 mins before serving.
Chocolate Raspberry Layer Cake with Macarons
Print Friendly and PDF