Monday, January 30, 2012

Lychee & Raspberry Mousse with Candied Violets

lychee_raspberry_violet_mousse-2
After all the festivities that we've had over the last month, it felt like a good time to step back from doing gimmicky stuff and do something easy and pretty instead. This dessert seemed like a perfect way to enjoy the summer fruit that has been available in Sydney at the moment, but it also has the added bonus of being just as delicious when made with frozen and canned fruit for those who aren't as lucky as us Sydney-siders. I adapted one of my favourite past recipes; a Watermelon & Honeydew Mousse, to make this light and girly Lychee & Raspberry Mousse with Candied Violets.
lychee_raspberry_violet_mousse-6
Originally I wanted to do this dessert with homemade candied rose petals to make it a total Pierre Hermé ispahan-inspired dessert, but I wasn't able to get my hands on pesticide free roses in time. So I settled for some crushed candied violets instead, which was fine with me because I love the subtle floral flavour and gorgeous purple colour of the violets. I've been holding on to my tiny stash of candied violets with all my stingy Asian stubborness because they are bloody expensive, but I think this dessert was decent enough to use up a few of them. Feel free to adapt this recipe to include a rose element if you prefer!
lychee_raspberry_violet_mousse
This is such a simple dessert to whip up, the actual prep time is about 20 minutes, but there's a little bit of waiting time in between the prep while you let things cool and set. I used fresh raspberries for the raspberry mousse because the ones available at the moment are so cheap and great looking. I realised that recently I've been using raspberries to flavour a lot of my desserts, which I had avoided a lot in the past. I usually get pretty irritated eating fruits that have a lot of tiny seeds, because one of those little seeds inevitably lodges itself in the small gap between two of my back teeth and refuses to budge. But these days I can't resist adding raspberry puree to lots of my recipes because it adds such a rich flavour and colour, and I make sure to strain out as many of those pesky seeds as I can. The raspberry mousse layer is a lovely blush colour with a slightly tart berry flavour.
lychee_raspberry_violet_mousse-4
In my opinion the lychee mousse layer is the star of this dessert. I was surprised by how strong the flavour of the lychees came through in the mousse, it is absolutely divine. It provides a great balance against the more sour raspberry layer, and the violets help to finish it off perfectly. I ended up using canned lychees for my puree because the fresh ones at my supermarket weren't as great as the other ones I've seen around recently, I'm sure the fresh ones would taste even better in this.
lychee_raspberry_violet_mousse-3
I made a few tweaks to the original mousse recipe; taking out some of the gelatine in the hopes it would give it a more delicate texture and completely get rid of the tiny aftertaste of gelatine that I really don't enjoy. The result is this wondefully fluffy mousse, I probably could have reduced the amount of gelatine even more but I was too scared that it wouldn't set. The timing of this super pink and girly dessert might make it perfect for those planning a Valentine's Day meal, though personally I think this dessert will probably be enjoyed more by the girls than the boys. It will definitely be enjoyed a lot more by this girl than her boy :P
lychee_raspberry_violet_mousse-5
Lychee & Raspberry Mousse with Candied Violets
(serves 4-6 people, adapted from my Two Melon Mousse recipe)
For the raspberry mousse:
1 punnet (125g) fresh or frozen raspberries, pureed and strained (makes about 2/3 cup puree)
1 1/2 tsp powdered gelatine
1/8 cup cold water
1/4 cup (60g) sugar
2 tsp lemon juice
1/4 tsp pure vanilla extract
1/2 cup cold pouring cream (min. 35% milk fat unthickened pure cream)

For the lychee mousse:
200g peeled and pitted lychees, pureed and strained (I used 1 can of lychees, which made about 3/4 cup of puree)
1 1/2 tsp powdered gelatine
1/8 cup cold water
1/4 cup (60g) sugar
2 tsp lemon juice
1/4 tsp pure vanilla extract
1/2 cup cold pouring cream (min. 35% milk fat unthickened pure cream)
To decorate: 1 crushed candied violet per serve, or make your own candied rose petals (make sure they are pesticide free)
lychee_raspberry_violet_mousse-12
Prepare the raspberry mousse first; place gelatine and cold water in a small bowl to allow the gelatine to soften. Add about 1/3 cup of water to the raspberry puree, or enough so that it makes 1 cup liquid in total. Place this in a medium saucepan with sugar and lemon juice and heat on low until the sugar dissolves completely. Add softened gelatine to the mixture, heat and stir until the gelatine dissolves completely. Remove from the heat and chill mixture in fridge until it reaches just below room temperature and is starting to thicken. Whip cream in a large mixing bowl to soft peaks. Add vanilla to raspberry mixture and then fold whipped cream into it until all the lumps are removed. Pour into 4-6 individual serving glasses, half-filling each of them, and chill in the fridge until set, at least 45 mins.

Prepare the lychee mousse; repeat same steps for raspberry mousse but with lychee puree. Pour over the top of set raspberry mousse and chill until set or overnight. When ready to serve, remove from the fridge about 10 minutes before serving, then sprinkle candied violets over the top of each mousse (don't do it too early or the sugar from the violets will dissolve and stain the top of the mousse blue). Otherwise, you can top it with candied rose petals or fresh raspberries and lychees or whipped cream flavoured with rose water.
lychee_raspberry_violet_mousse-7
Print Friendly and PDF

Monday, January 23, 2012

Chinese Lantern Macarons with Jackfruit Buttercream

chinese_lantern_macarons-15_filtered
Happy Chinese New Year (or Lunar New Year) everyone! I hope everyone who was celebrating with a big dinner last night had a great time and lots of delicious food. I definitely did, we prepared our usual masses of dishes including my favourite, the yee sang (I wrote about it a couple years ago if you have no idea what it is). As an extra treat I decided to make a little Chinese New Year-themed sweet, these Chinese Lantern-shaped Macarons with Jackfruit Buttercream. I have yet to try to master any of the traditional biscuits and sweets that are usually served during Chinese New Year, but I thought it might be fun to do something with my own spin instead.
chinese_lantern_macarons
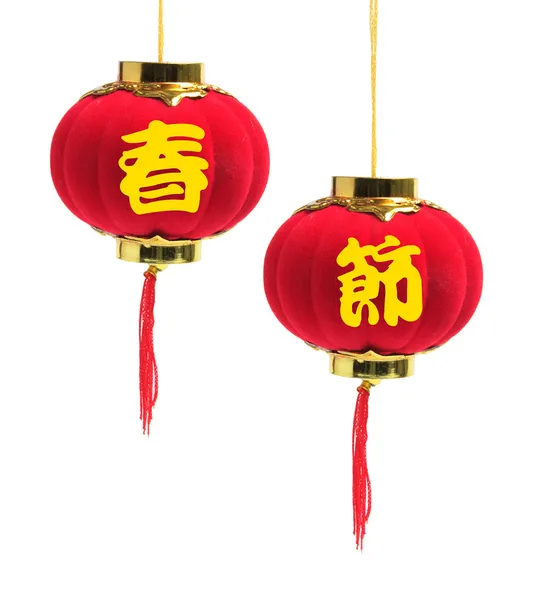
In case it's not immediately obvious, I was attempting to make my macarons look like the red paper laterns that are usually hung up as decoration during Chinese New Year (something like this) It was pretty easy to pipe the basic shape of the lantern, but originally I had wanted to put a bit more detail on them by using gold glitter sugar, but that just made them look ugly and messy. So I kept them plain, and stole a bunch of little gold strings off my old Christmas ornaments (I knew they would come in handy eventually!), and some little red tassles from some other Chinese New Year decorations. I'm pretty satisfied with the result; they're quite cute and very festive, if a little plain.
chinese_lantern_macarons-4
I struggled a lot with choosing an appropriate flavour for these macarons. Something orange seemed like the obvious choice but it was little too boring for me. I was tossing up between lychee, mango or jackfruit and finally decided on jackfruit because it was the most unusual and strongest flavoured fruit. I have no idea if jackfruit is a good or bad fruit to serve during CNY (I've only heard that pears are a nono), for all I know I've just given myself 444 years of bad luck. But jackfruits are something that I strongly associate with going back to Malaysia to visit all my relatives, so it seemed appropriate for me. The flavour of the fruit is something that not everyone will like, it has a very strong smell that's nowhere near as pungent as durian but definitely still distinctive. I used the canned jackfruit in sugar syrup which isn't quite as strong smelling/flavoured, and I think it worked beautifully.
chinese_lantern_macarons-5_filtered
I added the jackfruit puree and some of the sugar syrup to my usual Swiss Meringue Buttercream, since it is capable of taking up quite a lot of liquid while still staying thick and creamy. Overnight the flavour matured well and you could really taste the jackfruit in the macaron. If that flavour of filling doesn't appeal to you or you have no idea what the heck a jackfruit is, I mention in the recipe below that you can replace it with lychee or mango. You could completely switch it up and make this pineapple jam as the filling instead. I would have loved to make the jam but I didn't have enough time, or the patience to carve the pineapples :P Wishing everyone a happy and prosperous new year, and sending my love to my parents and all my other relatives overseas. I would love to be in Malaysia right now eating all kinds of yummy things and receiving red packets, it's the last year I'll be able to receive them!
chinese_lantern_macarons-11
Chinese Lantern Macarons with Jackfruit Buttercream
(makes approximately 10-12 macarons)
100g aged egg whites (you can use fresh eggs too, just make sure they are room temperature. I always use fresh these days, and zap it in the microwave on defrost for 10 seconds)
110g almond meal, at room temperature and well sifted
200g icing sugar
50g caster sugar
Optional: 1 tsp powdered egg whites (available from The Essential Ingredient), helps to stabilise egg whites but is not necessary
To decorate: red and yellow food colouring (powdered or gel), gold string

For the jackfruit buttercream:
2 egg whites
1/2 cup caster (superfine) sugar
150g unsalted butter
1/2 cup canned jackfruit puree (about 3-4 pieces of canned jackfruit) + 1/4-1/3 cup jackfruit sugar syrup from can to taste
Note: if you don't like jackfruit or it is unavailable, you can replace with canned lychee, fresh mango or even durian if you're feeling adventurous
(If you're new to making Swiss meringue buttercream, these wonderful tutorials from two of my favourite bloggers will help)

Line two baking sheets with baking paper. Place icing sugar in food processor and pulse for a minute to remove any lumps. Stir in almond meal and pulse for about 30 seconds to combine. Place in a large mixing bowl and set aside. Using an electric mixer, beat egg whites and egg white powder in a medium mixing bowl until the egg white powder dissolves and it reaches soft peaks. With the mixer on high speed, gradually add sugar and beat until it reaches stiff peaks.

Add meringue to your dry mixture and mix, quickly at first to break down the bubbles in the egg white (you really want to beat all the large bubbles out of the mixture, be rough!), then mix carefully as the dry mixture becomes incorporated and it starts to become shiny again. As it just comes together, place about 1/4 of the mixture in a separate bowl. Add yellow food colouring to the smaller amount and red colouring to the other and continue mixing until it is the right consistency. Take care not to overmix, the mixture should flow like lava and a streak of mixture spread over the surface of the rest of the mixture should disappear after about 30 seconds. Place red and yellow mixture in separate piping bags, the red with a wider 1cm tip and the yellow with a much narrower tip (see photo). Pipe fat oval shapes with the red mixture, and then carefully pipe smalls strips of yellow on the top and bottom of the ovals. Tap baking sheets carefully and firmly on the benchtop to remove any large bubbles.
chinese_lantern_macarons-14
Leave to dry for at least half an hour to an hour, so that when you press the surface of one gently it does not break. This will help prevent any cracking and help the feet to form on the macs. Preheat your oven to 140-150°C (285-300°F), depending on your oven. Place on top of an overturned roasting tray or another baking sheet if your sheets are not professional grade, for better heat distribution. Bake for 15-20 minutes, depending on the size of your shells. Carefully test if the base of the shell is ready by gently lifting one and if it's still soft and sticking to the baking paper, then it needs to bake for a few minutes longer. Remove from the oven and cool on the tray for a few minutes, then gently remove from the sheet and place on a wire rack to cool completely.

Prepare the buttercream; whisk together egg white and sugar in a large heatproof bowl. Clip a candy thermometer to side of bowl. Set bowl over a pan of simmering water, and whisk until mixture reaches 70°C (160°F) and sugar has dissolved, about 5 minutes.

With a mixer fitted with the whisk attachment, beat egg white mixture on high speed until cooled and thick, about 5 minutes. Reduce speed to medium, and add butter, 1 tablespoon at a time, beating until incorporated after each addition. If mixture is runny at this point, refrigerate for 10 minutes and then continue beating until it starts to hold its shape (this can take a while). Mix in jackfruit puree and then gradually add the jackfruit sugar syrup from the can depending on how strong you want it, taste testing as you go. Spoon or pipe buttercream on to macaron shells, sandwiching them together and adding a gold string sticking out of the top of each one if you wish. Refrigerate overnight in an airtight container to allow the flavours to mature, serve at room temperature.
chinese_lantern_macarons-2
Print Friendly and PDF

Monday, January 16, 2012

Green & Gold Checkerboard Cake with Milo Ganache

green_gold_checkerboard_cake-4
Okay so I know Australia Day isn't for another week and a half, but I'm attempting to be a good planner/organiser this year and trying not to leave things to the very last minute. Plus as soon as I decided I wanted to make this crazy Green & Gold Checkboard Cake covered in Chocolate Milo Ganache for Australia Day, I knew I better give myself an extra weekend buffer just in case I completely effed it up on my first attempt. This cake took a bit of planning and had a lot of potential to go horribly wrong. But YAY for me, it turned out pretty good! As someone who was born in Australia and has spent the majority of my life in this country, it's important to me to have recipes on the blog that celebrate being Australian. In that same spirit you could also try my Arnott's inspired Tim Tam Cake, Mint Slice Cake or Iced Vovo Cake for any Australia Day BBQs you might have planned.
green_gold_checkerboard_cake-2
I've always wanted to try making a checkerboard cake, ever since seeing instructions for it in my Le Cordon Bleu book. It's usually done with vanilla and chocolate flavours, and to get that lovely checkerboard effect when you cut into the cake you need to create alternating layers with the two flavours so that each layer looks like a bullseye/the Target logo. It looked like a lot of work, especially since that recipe involved piping concentric circles of cake batter. A lot of recipes on the internet instruct you to use a special pan that has these circular plastic dividers so that you can bake your layers with two alternating colours, but personally that felt a bit like cheating and I don't like buying a whole new pan for one specific purpose. So I decided to do it the third way, by baking cake layers in two different colours and then cutting concentric circles out of the layers and then swapping the middle circle of the two colours so that they alternated. (It's a mouthful to explain in words but if you look at the picture in my recipe below you should be able to get what I mean.)
green_gold_checkerboard_cake-5
As for using the bright green and yellow colours for the cake rather than just chocolate and vanilla, I was particularly inspired by the gorgeous and brightly coloured Battenburg cakes that Sprinkle Bakes made. I thought it would be a great idea to use green and gold in the cake as a celebratory Australia Day cake, and that idea was enough to give me the courage to try this cake. After all, I had managed to pull off the Purple Ombré Cake pretty well (that cake still makes me smile from ear to ear), so I had a pretty good feeling about this cake. Of course, there's no reason why you can't do this cake in different colours for other occasions, you could change the recipe from 4 layers into just 3 layers and use red, white and blue for 4th of July celebrations in the US, or do red velvet and vanilla for Valentine's Day. I ended up using the same trusty yellow cake recipe from the purple cake and it didn't let me down. I even tried my best to convert the measurements into volumes for US readers but no guarantees I did it correctly since there's so much variation in cup sizes and all that (and I'm still a firm believer that if you are a baker you should invest in digital kitchen scales. David Lebovitz agrees, you should listen to him. He has much knowledge).
green_gold_checkerboard_cake-7
To hold the cake layers together, I made a quick white chocolate ganache which I spread thinly between each layer. It worked just as I expected, holding the cake together quite nicely without being too visible. I would really recommend you don't skip this step since the cake is likely to fall apart if you don't put some sort of icing/filling in between each layer, especially if you manage to crack some of the circles of cake that you have cut out. I managed to crack a few of the circles, but the ganache and the way the circles fit snugly into each other held it together. The only crack that caused me any trouble was the top outer ring of yellow, which you might be able to see going a bit wonky in some of the photos. So be extra gentle with those outer rings of cake.
green_gold_checkerboard_cake-3
Originally I was going to cover the outside of the cake with my usual salted butter icing recipe like I did for the sprinkles cake to give it that stark white exterior with the colourful surprise on the inside, but I decided I wanted something a little more Australian. I was seriously, seriously tempted to try something like a chocolate vegemite ganache, but I chickened out since I'm not a huge fan of vegemite myself. Maybe next year! So I decided to use my sexy chocolate & Milo ganache instead, because it's so tasty and Australians love their Milo. And who doesn't love chocolate malt? The texture of the icing might look a little odd in the photos because I had just taken the cake out of the fridge and it had small beads of condensation on the surface, but I can assure you that it's shiny, smooth, gorgeous and so addictive. So if you're feeling up for it try this checkerboard cake for Australia day, it's not actually too hard or complicated so long as you plan ahead. And it's so pretty!
green_gold_checkerboard_cake
Green & Gold Checkerboard Cake with Chocolate Malt Ganache
(makes one round 18cm 4-layer cake, yellow cake recipe adapted from Le Cordon Bleu Complete Cooking Step-by-Step)
Note: For US readers, you could also do this cake using only three layers of red, white and blue cake. I tried my best to convert the measurements for you!
355g (approx 2 & 1/2 cups) plain flour
1 tbsp baking powder
1/2 tsp salt
225ml (about 1 cup minus 1 tbsp) milk
2 tsp pure vanilla extract
400g (approx 1 & 3/4 cups) white sugar (I used caster/superfine)
225g (approx 2 sticks) unsalted butter, softened
4 medium eggs
Green and yellow food colouring (I used Wilton gel colouring)

For the white chocolate ganache filling:
200g white chocolate, chopped
200ml pouring cream (min. 35% milk fat unthickened pure cream)

For the chocolate malt ganache:
Note: If you prefer a white exterior, look here for a salted butter icing recipe that you can use instead
400g good quality dark chocolate, chopped
300ml pouring cream (min. 35% milk fat unthickened pure cream)
1/2 cup Milo powder (you can increase this to 3/4 cup if you like it more malty, can be substituted with Ovaltine if unavailable)

Preheat oven to 180°C (350°F) and grease whatever 18cm (7 inch) round cake tins you have (I only had one so I had to bake each cake one after the other and this worked fine). You can also use 20cm (8 inch) pans but the layers will be thinner, or use the special checkerboard cake tins that come with the circular dividers. Line the base of tins with baking paper and grease paper and dust tins with flour. Combine flour, baking powder and salt in a medium bowl and set aside. Mix milk and vanilla together in a measuring jug.

Using an electric mixer on low speed, beat sugar and butter in a large bowl until blended. Increase speed to high and beat for 2 mins or until pale and creamy. Reduce speed to medium low, add eggs 1 at a time, beating well after each addition. Alternately add flour mix and milk mixture, beginning and ending with flour mixture (I did it by adding 1/4 of of the dry mixture followed by 1/3 of the wet mixture at a time). Beat until smooth, occasionaly scraping bowl with a spatula. Divide mixture evenly into 2 medium bowls (I did this by weighing the batter, it ended up being about 700g per bowl for me). Gently fold yellow colouring into one bowl and green colouring into another bowl until it's smooth.
green_gold_checkerboard_cake-15
Pour HALF of each bowl of batter into the prepared tins (so you end up with two yellow layers and two green layers) bake each layer for about 15-20 minutes or until a skewer into the centre comes out clean and the outside is golden. Cool in tin for 5 mins and then turn out onto wire racks to cool completely. Wrap in clingfilm and chill in the fridge for at least 1 hour or overnight. If your cake layers are slightly domed in the middle you may need to slice a little bit off the top of them to make sure they are flat. If you are not using the special checkerboard cake pans you will have to cut concentric circles out of your cake layers as shown in the photo above. For an 18cm cake, I cut a 6cm diameter circle out of the centre of the cake, then cut a 12cm diameter circle out of the centre of the remaining cake by tracing my knife around a plate of the same diameter, so you end up with one central circle and two outer 'rings'. (Obviously if your cake layers are a different size you will have to calculate the right diameter to cut your circles, mathematics is fun!) Swap the middle 'ring' of a yellow cake layer with the middle 'ring' from a green layer, and fit the cut pieces back together as shown in the bottom left photo above. Try your best to handle the cake pieces without cracking them, especially the outer 'rings'.

Prepare the white chocolate ganache, this will act as the 'cement' to hold your cake layers together. Place white chocolate pieces in a medium heatproof mixing bowl and heat your cream in a medium saucepan to gradually bring it just to the boil. Remove from heat and pour hot cream over the chocolate, leave to sit for 5 minutes while the chocolate melts. Whisk gently until the mixture is smooth, then chill until it is just below room temperature, thick but still pourable. Place one of the prepared layers, I started with layer that had a yellow outer ring, and spread a thin layer of white chocolate ganache over the top, then place a layer with a green outer ring over the top of it. Repeat with the remaining layers, so that the colours alternate. Chill in the fridge for at least an hour.

Prepare the milo ganache; place the finely chopped chocolate in a large mixing bowl. Gradually heat the cream and milo powder together until it just starts to boil, then remove from the heat and pour over the chocolate. Leave to sit for 5 minutes while the chocoltae melts. Whisk gently until the mixture is smooth. If the mixture is quite runny you may need to chill it until it thickens more, it should be easily spreadable but should not run straight off the sides of your cake. If it starts to run everywhere simply scrape it back into your mixing bowl and chill for longer. Spread over the outside of your prepared cake, smoothing with an offset spatula. You can achieve a smoother finish if you dip your spatula in a cup of hot water regularly, or run it under hot water in the sink. Chill cake for at least half an hour, serve at room temperature (I find it is best to leave it sitting out of the fridge for at least an hour to allow the ganache to soften nicely). Can be stored in an airtight container in the fridge for several days.

green_gold_checkerboard_cake-6
Print Friendly and PDF

Monday, January 9, 2012

Salted Caramel Apples with Popcorn

popcorn_caramel_apples
I was feeling very selfish this weekend. It was very much a weekend full of 'me' time. I made these salted caramel apples coated in popcorn bits for purely selfish reasons. I wasn't trying to make anything interesting, original or pretty for the blog, I just really wanted to eat a toffee apple and I really wanted caramel popcorn, so I decided to kill two birds with one stone. I figured that if it turned into an ugly mess, I would just eat it and no one would ever have to know. Turns out they look quite pretty, so here they are. It might seem like a stupid, unnecessary or even gross combination to some people, but I wanted it. So I made it, I ate it and it was deeelicious.
popcorn_caramel_apples-3_filtered
In Australia we call them toffee apples, and they're usually coated in a hard, clear (or red tinted) toffee. I loved them when I was a kid, though my Mum hardly ever let me buy them because I would always eat all the toffee and throw out the apple and then run off in a sugar-high daze. It was understandable, the toffee apples were always from the supermarket and the apple inside was always an old, bruised, sad looking thing. And I really like sugar. I found it interesting that the as well as having toffee/candy apples in the US, they also have caramel apples that are covered in a creamy, softer caramel coating and sometimes dipped in toppings. I really love creamy caramel, and I decided that I needed to make these with an awesome salted caramel and then dip them in buttered popcorn.
popcorn_caramel_apples-2
Anything that involves boiling sugar syrup scares me, because it usually ends in me covered in burns. I decided not to take any risks, I did this salted caramel with a candy thermometer and I used David Lebovitz's salted caramel recipe. It worked perfectly, the caramel turned out beautifully smooth, dark and shiny. And I didn't get any sugar burns! It coated the apples nicely, set well and tasted amazing, with just the right amount of salt. I learnt a nifty tip where you should pour hot water over your apples and then rub them dry before you use them for caramel apples; this helps to remove any wax coating and helps the caramel stick to the surface of the apple easier. I still had a little trouble getting the caramel to stick at first, when the caramel is at its hottest it ran off the surface a little too easily. But once the caramel started to cool and thicken slightly it worked fine. I immediately ate as many of these evil apples as I could, and then wandered away from the kitchen in a familiar sugar-high daze. Unfortunately this did mean that I left a few of the leftover caramel apples on the kitchen counter and they didn't keep so well in the open, I woke up the next day and all the caramel had melted off the apples. I really should have wrapped them up in cellophane, so I will have to remember that for next time. There will definitely be a next time. P.S. Your teeth will not be happy with you because of all the chewy caramel, apple skin and popcorn bits.
popcorn_caramel_apples-4
Popcorn Salted Caramel Apples
(makes 8-10 caramel apples, salted caramel from David Lebovitz's recipe)
3/4 cup (180 ml) heavy cream
1/2 teaspoon vanilla extract or bean paste
Heaped 1/2 teaspoon sea salt flakes
1/2 cup (160 g) light corn syrup or golden syrup (I used Lyle’s Golden Syrup)
1 cup (200 g) sugar
4 tbsp (60 g), salted butter, cubed, at room temperature
8-10 small/medium apples (I usually prefer Fuji but this time I had to use Pink Lady) + wooden sticks
100g popcorn, popped and crushed into smaller pieces (I just used microwave butter popcorn as this was all I had available)

NOTE: This recipe creates a soft, chewy and creamy caramel to coat the apples. If you prefer to making a hard, clear toffee apple, this recipe from BBC good food looks decent.
Line a baking tray with baking paper. Remove stalks from apples and place in a large bowl and pour hot water over them and leave for a few seconds, then remove from the water and dry thoroughly. This supposedly helps to remove the wax coating on the apples and helps the caramel to stick to their surface better. Push a wooden stick into each apple, take care not to spear the stick all the way through. Place cream, vanilla, salt and half the butter (30g/2 tbsp) in a small saucepan and gently heat, stirring every now and then until the mixture just comes to the boil. Cover and set aside, keeping it warm while you prepare the sugar syrup.
popcorn_caramel_apples-13
In a medium or large heavy based saucepan fitted with a candy thermometer, place golden syrup and sugar and place on medium heat, stirring gently until the sugar dissolves. Once the mixture is melted together and the sugar is evenly moistened, only stir is as necessary to keep it from getting any hot spots. Cook until the syrup reaches 155°C(310°F). Remove the pan from the heat and stir in the warm cream mixture (take care as it will bubble up a lot) until it is smooth and even. Return to the heat and cook the mixture to 127°C(260°F). Remove the pan from the heat, lift out the thermometer, and stir in the cubes of butter, until it's melted and the mixture is smooth.

Working quickly, dip and swirl your prepared apples in the hot caramel mixture, hold it over the pan to let the excess drip off then carefully dip the caramel covered apple into the crushed popcorn. With the first few apples the caramel may be quite hot and run off the surface of the apples too easily, so you may need to leave these to set for a few minutes before coating with popcorn. If you work slowly (like me) and the caramel starts to get too viscious for dipping the apples, return it to a low heat and stir until it's runny enough. Place apples on the prepared baking tray and leave to cool completely. Serve immediately, the sooner the better as the popcorn will get soggier and the caramel will soften the longer you leave it/the longer it sits uncovered, you can try wrapping it in cellophane once they are cool to help avoid this. You can also mix any leftover popcorn and caramel together for an extra snack.
popcorn_caramel_apples-6
Print Friendly and PDF

Monday, January 2, 2012

Chocolate 'Cupcake' Fudge

choc_cupcake_fudge-8
When all else fails, sprinkles will fix everything. Sprinkles (especially rainbow sprinkles) are awesome. Sprinkles make me happy. And after a trip to the party supply store I had mountains and mountains of of them in all difference colours. I was determined to make something with these sprinkles. The first thing didn't turn out so great. It's not everyday that I have to go around asking people, "Do these unicorn horns look more like mystical penises?". Yeah.
choc_cupcake_fudge-6
I was still determined to make something with these sprinkles. They are just too darn pretty. So I decided to try Karen's recipe for easy chocolate fudge, it looked so freakin delicious. I just made a plain chocolate fudge, but poured it into mini cupcake papers and topped it with vanilla icing so they look just like cupcakes. All so I had something to put the rainbow sprinkles on. So cute!
choc_cupcake_fudge-4
There are many things I love about this fudge recipe. Karen's instructions were super easy to follow and the best part is that there is no sugar thermometer involved. There was a heck of a lot of stirring involved, my arms nearly fell off and my favourite silicon spatula snapped :( But it was totally worth it. The chocolate fudge is so tasty. And with the pink icing and sprinkles on top it looks so fun and cheerful.
choc_cupcake_fudge-5
The two things that usually freak me out about chocolate fudge is the risks of it not setting, or the chocolate seizing and making the whole mixture turn grainy. This recipe worked perfectly, the mixture sets pretty quickly so you have to work fast. I even kept my fudge at room temperature all day and it didn't go soft or melty at all. My first batch of fudge actually seized up as soon as I stirred in the chocolate and I completely freaked out, but I returned it to the heat and gradually added hot water to the mixture and it totally fixed it. It was like magic!
choc_cupcake_fudge-2
I wish I had been able to make these in time for our New Year's celebrations, the confetti sprinkles are just perfect for that kind of occasion. But these little cupcake shaped fudge bites are perfect for any party, they are nice and bite-sized, which I prefer since the fudge is quite sweet and you don't want to eat too much of it in one go. And everyone needs more rainbow sprinkles in their life.
choc_cupcake_fudge-3
Chocolate 'Cupcake' Fudge
(slightly adapted from Citrus & Candy's Easy Chocolate Fudge, makes 24 'cupcakes')
1 x 395g tin of condensed milk
80g butter (I used salted, but you can use unsalted and add 1 tsp salt)
200g light brown sugar
2 tbsp golden syrup
180g dark chocolate, finely chopped

For the icing:
125g butter
2 cups icing sugar, sifted
Optional: Pink/Red food colouring, a few drops
Sprinkles to decorate

Line two 12-hole mini muffin trays with papers. Place condensed milk, butter, sugar, and golden syrup in a heavy-based saucepan. Stir constantly over low heat for about 5 minutes or until the mixture is glossy and sugar has dissolved (do not boil whatsoever).

Increase the heat to medium-low and bring to a simmer while stirring (there’s gonna be a lot of stirring involved here!). Continue to stir and cook for about 6-8 minutes until the mixture has thickened and it 'comes away from the sides' (check out Karen's video at the end of her post, it was a really useful reference for this part). Fudge is ready when a teaspoon of mixture forms a soft ball when dropped into cold water.
choc_cupcake_fudge-16
Remove from heat and working quickly, add in the finely chopped chocolate, stir until chocolate has melted (work fast otherwise the mixture might seize. Don't fret if it does, return it to the heat and add hot water 1 tbsp at a time and stir until the mixture turns molten again). Carefully spoon into prepared cupcake papers, smooth tops with a spatula and cool for 30 mins on a wire rack. Chill in fridge until firm.

Prepare the icing; remove butter 30 mins before starting. Chop up butter and beat in a large mixing bowl on high with an electric mixer until light and fluffy. Reduce speed to low and gradually add sifted icing sugar, vanilla and food colouring. Increase speed to high and beat until smooth and fluffy. Peel cupcake papers away from the set chocolate fudge (I sliced a thin layer off the tops of each of them before doing this, so they had flatter tops). Place icing in a piping bag with a 1cm star tip and pipe over the top of the fudge and decorate with sprinkles. Store fudge in an airtight container in the fridge for up to 2 weeks.
choc_cupcake_fudge-7
Print Friendly and PDF

Wednesday, December 28, 2011

Bourbon & Brown Butter Brownies

brown_butter_bourbon_brownies
As 2011 draws to a close and people make plans to welcome in the new year, I can think of nothing but brownies. Brownies are one of those things that I will randomly get cravings for every few months, and then I will make them and gorge myself to the point where I can't look at brownies for another few months. So this New Year's Eve, you could either work up the energy to make this stunning Pink Champagne & Strawberry Cake, complete with sparklers and chocolate covered strawberries, or you could take the easy route and make these incredibly quick and deliciously satisfying Bourbon & Brown Butter Brownies.
brown_butter_bourbon_brownies-3
I've already gone on and on about the magic of adding brown butter to baked goods, so I knew that bit was going to be fantastic. But this time I took a leaf out of Lisa's book and boozed these babies up. These brownies are strictly for the grown ups. It's for New Year's Eve after all! The bourbon adds a wonderful depth to these gooey, fudgy brownies (extra gooey and fudgy because I doubled the amount of chocolate in them!). I was also tempted to whip up some boozy chocolate ganache to spread over the top but they tasted pretty great on their own so I decided against it, though feel free to do it if it tickles your fancy.
brown_butter_bourbon_brownies-5
I hope everyone has had a lovely holidays and is ready for the new year. It's been an exciting, exhausting and tough year for me but I'm ready to take on 2012. These boozy brownies are the perfect dessert to make for any New Year's Eve dinner, serve it warm with some vanilla ice cream and everyone will love it. I am now going to eat way too many of them and will probably regret it later. See you in 2012!
brown_butter_bourbon_brownies-4
Bourbon & Brown Butter Brownies
(makes 16 brownies)
250g good quality bittersweet chocolate (if you want them to be less gooey/fudgy then only use 175g)
100g butter
120ml (about 1/2 cup) bourbon
2 eggs
3 tbsp dutch process cocoa powder, sifted
75g (about 1/2 cup) plain flour
190g (about 3/4 cup) sugar

Preheat oven to 160 degrees C. Grease very well and line the bottom and two long sides of a 20x30cm slice/brownie tin (can be substituted with a 20cm square cake tin but you may have to bake it slightly longer as it will be thicker). Let the baking paper hang over the long edges, it will make it easier to lift brownie out later. Prepare the brown butter; place butter in a small saucepan on low heat until it melts, continue to stir over low heat but keep a close eye on it, as it begins to bubble and the milk solids separate and settle at the bottom of the pan. Stir it frequently at this point, so that the milk solids do not settle at the bottom of the pan for too long and burn. Continue until the mixture turns brown and smells nutty but take care not to leave it for too long or it will taste burnt. Remove from the heat.
brown_butter_bourbon_brownies-15
Break up chocolate into small pieces place in a heatproof bowl. Heat over a saucepan of boiling water, or very carefully in 30 sec bursts in the microwave. Stir and set aside to cool for a few minutes, then add the brown butter and stir to combine. Sift cocoa powder, sugar and flour into a large mixing bowl. Add melted ingredients, bourbon and eggs to the dry mixture and stir with a wooden spoon until just combined. Take care not to overmix or the brownies will be tough. Pour into prepared tin.

Bake for about 25 mins, or until a skewer inserted into the centre comes out with a few moist crumbs attached (start checking on it from the 20 minute mark, it is better to undercook it and have to return it to the oven later than to overcook it and let it go dry). Remove from the oven and place tin on a wire rack. Cool completely in tin before removing and cutting into 16 pieces. Can be stored overnight in an airtight container (they actually taste best the day after).
brown_butter_bourbon_brownies-2
Print Friendly and PDF

Friday, December 23, 2011

Christmas Red Velvet Snow Cake

red_velvet_snow_cake-3
Ohhhh my god. This cake was a freaking nightmare. A messy, messy nightmare. For a few weeks now I've had this image in my head of a pristine white cake that looks like it's made of snow. I kept putting off making it because I couldn't think of the right flavour cake or the right toppings. I saw Mowie's stunning Snow Cake and nearly gave up the idea entirely because I knew I couldn't make anything near as perfect. I don't know why but a few days ago I suddenly decided I had to go ahead and make this cake. I wanted it to look like it was covered in snow on the outside by topping it with coconut, with little Snowman macarons on top and a vibrant red velvet cake with cream cheese icing hiding inside. I thought it would be the perfect dessert to bring along to Christmas lunch.
red_velvet_snow_cake-6
Things went pretty smoothly at first; I piped the macarons and was halfway through decorating them when I realised that I had forgotten to leave half the macaron shells undecorated for the back of each snowman. I really didn't want to have creepy double sided snowmen with faces on their fronts and backs. I managed to stop myself before I drew the faces on but they still have buttons on their backs. Then came my red velvet drama. I know I should have just gone with my trustly vanilla cake recipe and adapted it with cocoa and red food colouring, but instead I used an internet recipe and it just tasted really strange. Like it was made of playdoh. I have no idea why, it was probably because of something stupid I did. I don't think I'll be able to bring it to Christmas lunch :( So unfortunately I don't have a red velvet recipe to go with this post, but I'm sure most of you will have your own favourite red velvet cake recipe that you can use.
red_velvet_snow_cake-4
Then came the icing drama. I was totally impatient and didn't let my cakes cool for long enough before I started icing them. You'd think I'd have learnt my lesson on this issue by now. The icing started melting down the sides of the cake and it was a total mess. So that's why the cake isn't very straight on the sides, as A described it: 'The cake has hips'. I tried to fix it by patting the coconut on top of the icing and pushing it back up the sides of the cake, but it just made things worse. After the sprinkles mess I made with my purple ombre sprinkles cake you'd think I'd never decorate the sides of my cake with toppings again. But I did. And coconut went EVERYWHERE. At least coconut doesn't bounce as much as sprinkles do when they hit the ground. But it does stick to you. I was this scary coconut covered monster by the end of it.
red_velvet_snow_cake-2
Things didn't get much better the next day when I went to take photographs of it. I managed to drop that poor slice of cake twice, knocking off the poor snowman's nose. I had to perform emergency snowman surgery. And then I slipped and nearly fell into the damn cake. I'm not kidding. There was a lot of swearing. I was pretty much ready to give up on the whole thing, but look at how pretty it looks! I just had to share the idea with you guys.
red_velvet_snow_cake-7
My favourite part is definitely the snowman macarons. I filled them with the same cream cheese icing that I covered the whole cake in, and used orange Starburst chewy lollies to make their little noses. I know they've been done before (I think my favourite version that I've seen are from MiniCuisine), but they were just the perfect topper for this cake, along with the mountains of coconut to make it look like it was covered in snow. I really do love the bright contrast of the super red cake innards against the stark white exterior. It's definitely got a little bit of wow factor for when you cut into the cake. Of course feel free to make the macarons on their own, or you could just make the cake and icing. The cake would look just as cute topped with coconut macaroons or those white ferrero chocolates. And that's it from me for this year's Christmas baking, have an fabulous holidays everyone! Eat, drink and be merry :)
red_velvet_snow_cake-5
Red Velvet Snow Cake with Snowman Macarons
(makes 10-12 macarons)
2 x 8-inch round cakes, use your favourite red velvet recipe (mine was a bust unfortunately)
250g cream cheese, softened
250g unsalted butter, softened
2 tsp of lemon, or adjust to taste (you can also add the zest of one lemon if you wish)
6 cups (about 750g) icing sugar, sifted
About 125g dessicated coconut

For the macarons:
100g aged egg whites (you can use fresh eggs too, just make sure they are room temperature. I always use fresh these days, and zap it in the microwave on defrost for 10 seconds)
110g almond meal, at room temperature and well sifted
200g icing sugar
50g caster sugar
Optional: 1 tsp powdered egg whites (available from The Essential Ingredient), helps to stabilise egg whites but is not necessary
To decorate: black food colouring or edible ink pen, silver cachous and orange Starburst chews

Bake the red velvet cakes and cool completely. Prepare the macarons; Line two baking sheets with baking paper. Place icing sugar in food processor and pulse for a minute to remove any lumps. Stir in almond meal and pulse for about 30 seconds to combine. Place in a large mixing bowl and set aside. Using an electric mixer, beat egg whites and egg white powder in a medium mixing bowl until the egg white powder dissolves and it reaches soft peaks. With the mixer on high speed, gradually add sugar and beat until it reaches stiff peaks.

Add meringue to your dry mixture and mix, quickly at first to break down the bubbles in the egg white (you really want to beat all the large bubbles out of the mixture, be rough!), then mix carefully as the dry mixture becomes incorporated and it starts to become shiny again. Take care not to overmix, the mixture should flow like lava and a streak of mixture spread over the surface of the rest of the mixture should disappear after about 30 seconds. Place in a piping bag and pipe snowman shapes (I piped small 2cm rounds next to 4cm rounds) on baking sheets. Tap baking sheets carefully and firmly on the benchtop a couple times to remove any large bubbles. If you wish, decorate with silver cachous for the snowman 'buttons'.
red_velvet_snow_cake-17
Leave to dry for at least half an hour to an hour, so that when you press the surface of one gently it does not break. This will help prevent any cracking and help the feet to form on the macs. Preheat your oven to 140-150°C (285-300°F), depending on your oven. Place on top of an overturned roasting tray or another baking sheet if your sheets are not professional grade, for better heat distribution. Bake for 15-20 minutes, depending on the size of your shells. Carefully test if the base of the shell is ready by gently lifting one and if it's still soft and sticking to the baking paper, then it needs to bake for a few minutes longer. Remove from the oven and cool on the tray for a few minutes, then gently remove from the sheet and place on a wire rack to cool completely. Decorate half the macarons with the black food colouring to draw on the faces and cut a small triangle of orange Starburst chews for the nose.

Prepare the cream cheese icing; place cream cheese and butter in a large mixing bowl and beat with an electric mixer on high until smooth and fluffy. Add lemon and icing sugar, one cup and a time, and beat until smooth. You may need to adjust the amount of icing sugar to obtain the right consistency, it should be spreadable but not runny. Spread over the top of one cake and then sandwich the other cake on top and crumb coat with more icing. Chill for about 15 mins to set the crumb coat slightly. While it is chilling, sandwich the macarons with some of the cream cheese icing and chill in the fridge in an airtight container. Cover the cake with the remaining cream cheese icing, smoothing with a spatula. Chill in the fridge for about half an hour. Place cake in a wide container/tray and carefully sprinkle coconut all over the top and sides of the cake to decorate. Top with macarons and chill in the fridge overnight. Serve at room temperature.
red_velvet_snow_cake
Print Friendly and PDF