Showing posts sorted by relevance for query mint. Sort by date Show all posts

Monday, January 13, 2014

Chocolate Buttermilk Waffles with Fresh Mint Ice Cream

Chocolate Buttermilk Waffles with Fresh Mint Ice Cream
It was about time I got more use out of our waffle maker! I had leftover buttermilk and cream from last week's epic baking efforts, so the only thing I bought was a bunch of fresh mint and I had all the making of waffles with homemade, no-churn ice cream. I shared Lisa's awesome no-churn ice cream recipe with you not too long ago. It really is a time-saver, so long as you're not averse to the slight tint of flavour from the sweetened condensed milk.
Chocolate Buttermilk Waffles with Fresh Mint Ice Cream
I based the waffle recipe on a plain buttermilk recipe, replacing some of the flour with cocoa powder. However I did find them a little too salty and not quite sweet enough because of the addition of cocoa so I've adjusted the amounts in the recipe below to fix that. You definitely still need to serve it with something sweet and light like the mint ice cream. The buttermilk does it's job of keeping the waffles wonderfully fluffy and soft while still crisp on the outside thanks to the wonders of wafflemakers.
No-Churn Fresh Mint Ice Cream
I know a lot of people commented on the last no-churn ice cream recipe about the strong condensed milk flavour in the ice cream. Unfortunately that's the cost of using a no-churn recipe that still stays as smooth as a normal ice cream, but I did try to tone down the strength of the condensed milk flavour by infusing the condensed milk with fresh mint leaves in this recipe. I've always wanted to try making fresh mint ice cream. As much as I love mint flavouring, I really did enjoy the subtle flavour of fresh mint in this ice cream. Of course there's nothing stopping you from using peppermint extract/essence instead, or creme de menthe if you want to get some green colour into the ice cream as well.
Chocolate Buttermilk Waffles with Fresh Mint Ice Cream
I made the ice cream so quickly on Friday evening after work that I totally forgot to take any progress shots and didn't even save a single leaf of fresh mint for the photos. So you'll just have to take my word for it that the ice cream is well-infused with the flavour. I was a little worried that the condensed milk would overpower the light flavour of the mint leaves especially while tasting the warm mixture, but after freezing it overnight I found the flavour was just the right amount of mint for me. You don't want it to be too strong as it's quite herby, if you know what I mean. If you like it strong you could always blend up the leaves into the mixture rather than straining them out.
Chocolate Buttermilk Waffles with Fresh Mint Ice Cream
I served my waffles with a drizzled of warm melted chocolate mixed with a tiny bit of cream, you could also make chocolate awesomesauce or plain melted chocolate. I was tempted to mix chocolate through the ice cream itself to make my favourite mint chocolate chip flavour, but instead I topped the whole thing off with some cocoa nibs instead. It added a nice bite with a bit of nuttiness to the whole thing. I don't know why I'm tagging this under the breakfast tag as this is strictly a dessert kinda waffle, but out of habit I feel the need to categorise anything waffle-related under breakfast. Okay I'm rambling now, see ya next week!
Chocolate Buttermilk Waffles with Fresh Mint Ice Cream
Chocolate Buttermilk Waffles with No-Churn Fresh Mint Ice Cream
(waffle recipe adapted from Brown Eyed Baker, ice cream recipe adapted from spicyicecream)
For the ice cream:
1 large bunch of mint, about 70g, chopped
1 can (395g) sweetened condensed milk
2 cups cream (pure/pouring cream (or heavy cream in the US, min 35% fat unthickened))

Place chopped mint and sweetened condensed milk in a small saucepan on low heat and stir regularly. Do not allow to come to the boil. Stir over heat to allow mint to infuse, about 10 minutes. Set aside to cool completely and then chill for about an hour.

Place cream in a large mixing bowl and beat with electric mixer on high until it reaches soft peaks (take care not to overmix). Gently fold in condensed milk mixture until combined and then pour mixture into a large loaf tin (about 1.5L capacity). I find it easier to use a whisk to combine them, to avoid pockets of condensed milk mixture remaining unmixed. Freeze overnight. Best eaten within 1 week.
No-Churn Fresh Mint Ice Cream
For the waffles:
(makes about 8 regular waffles or 5 large Belgian style waffles)
1 & 1/4 cups (about 175g) plain/all-purpose flour
1/2 cup cocoa powder, sifted
4 tbsp sugar
2 tsp baking powder
1 tsp baking (bicarb) soda
1/4  teaspoon salt
1 & 3/4 cups buttermilk at room temperature
115g (½ cup) butter, melted and cooled to room tempeature
2 eggs, at room temperature
1 tsp pure vanilla extract
Optional: chocolate sauce and cocoa nibs or chocolate chips to serve

In a large bowl, whisk together the flour, cocoa powder, sugar, baking powder, baking soda and salt; set aside.In a medium bowl, whisk together the buttermilk, butter, eggs and vanilla extract. Add the wet ingredients to the dry ingredients and gently whisk to combine. Do not overmix.

Spray a waffle iron with non-stick cooking spray or brush with melted butter, then preheat. Once the waffle maker is ready, add the batter according to the manufacturer's instructions and cook for 2 to 3 minutes, or until the waffle maker indicates they are ready. Serve immediately, or place in oven to keep warm. Leftover waffles can be wrapped in plastic wrap, placed in a ziploc bag and stored in the refrigerator for 2 days or in the freezer for up to 1 month. Serve warm with a scoop of ice cream and drizzled with chocolate sauce and nibs.
Chocolate Buttermilk Waffles with Fresh Mint Ice Cream
Print Friendly and PDF

Monday, February 3, 2014

Rhubarb & Ginger Cordial with Mint & Raspberry Ice

Rhubarb & Ginger Cordial with Mint & Raspberry Ice
I had a pretty awful week last week and it was bloody hot over the weekend, so the last thing I wanted to do was turn on my oven and bake something. I was dreaming about popsicles and icy, cool refreshments. So you'll have to excuse me for not having a dessert recipe for you this week, but instead a lovely homemade cordial that will not only make a great cold drink, but is also a fantastic cocktail mixer and will make some pretty delicious popsicles too.
Rhubarb & Ginger Cordial with Mint & Raspberry Ice
A few months ago I saw David Lebovitz's fresh ginger syrup recipe and knew that I needed to make it. Anything ginger is up my alley. I've made the original recipe many times and it is fantastic as is, I totally recommend you try it. There was obviously no point reposting his version here, but this week I had a fresh bunch of rhubarb to play around with as well, so I decided to try a version with a bit of a twist.
Rhubarb & Ginger Cordial with Mint & Raspberry Ice
While dreaming about my wonderfully cold drinks, I kept imagining cups mixed with fresh raspberries. It might seem a little excessive when you consider the price of fresh raspberries, but it looks so pretty and is so perfect for summer. So I made up a batch of ice cubes with fresh raspberries and bits of fresh mint leaves frozen into them. SO PRETTY. I included instructions below but it seems a bit silly to be writing instructions on how to make ice.
Mint and Raspberry Ice
Yep, I couldn't resist pulling out my heart-shaped ice cube tray for this. And then I realised Valentines Day is coming up shortly, so I guess this would be a great idea for that...even though I usually tend to avoid anything heart-shaped for the day because it's so overdone and cheesy. We don't really celebrate it in my house since my husband hates the day, but feel free to use this idea for your Valentine.
Mint and Raspberry Ice
Once the ice melts you have the mint which makes a great extra flavouring for the drink and you can eat the raspberries. Pretty AND helpful. I didn't have any booze in the house so I couldn't test it out as a cocktail but I imagine it would be fantastic. Rhubarb and ginger always work great together, however this is definitely a drink for people who are already a big fan of ginger (as it's rather spicy).
Rhubarb & Ginger Cordial with Mint & Raspberry Ice
I love the light pink hue the rhubarb gives the drinks when you mix it up (it's quite a bright pink in its concentrated form, which is also great). I definitely think it's worth making this up with the fancy ice cubes, and it looks so pretty in my shiny new blue-green jug and glass set! This set is actually the very first thing I bought for my new house. Not something useful like a washing machine or a bed; I bought a jug with matching glasses. I was standing there staring at the pretty blue-green glass and imagining how great they would be for serving cold drinks on my sunny new porch, so I had to get them. Of course I need to get some tables and chairs for my porch and to get rid of my ridiculous mosquito situation before I can actual realise this dream, but at least I have the pretty glasses.
Rhubarb & Ginger Cordial with Mint & Raspberry Ice
Homemade Rhubarb & Ginger Cordial
(adapted from David Lebovitz's Fresh Ginger Syrup recipe, makes about 2 cups/0.5L)
200g fresh ginger, unpeeled (you can peel it if you prefer, but my ginger was very young so it didn't need to be removed)
200g chopped rhubarb pieces (about 2cm thick pieces)
4 cups (1L) water
450g (2 1/4 cups) sugar
Pinch of salt
  1. Chop ginger into thin slices, then run knife over the slices to roughly chop it into smaller pieces.
  2. Place chopped ginger, rhubarb,  water, sugar and salt in a large saucepan. Heat to a boil, then reduce the heat to a steady simmer, and cook for 45 minutes to one hour.
  3. Let cool, then strain the cordial through a fine-mesh strainer. Store the strained cordial in the refrigerator, covered, until ready to use. (I kept mine in an airtight bottle) It should keep for about 2 weeks in the fridge.
  4. To serve; Mix cordial with water or soda/sparkling water and a squeeze of fresh lemon or lime juice. Add some mint and raspberry ice cubes (directions below) if you want to pretty it up. Adjust amount of cordial to taste, I think a good ratio of cordial to water is about 1:3 depending on how sweet you want it. Will also make a great cocktail mixer or can be mixed with water to make some fantastic popsicles.
Mint and Raspberry Ice
Fresh Mint & Raspberry Ice Cubes
1 punnet fresh raspberries
A small bunch of fresh mint leaves
  1. In your ice cube trays (heart-shaped ones are great for this), place one raspberry per ice cube space, or a rip up a few small pieces of mint leaf. 
  2. Fill trays carefully with water, you may need to gently press the raspberries down with a fork to remove any big air bubbles.
  3. Freeze until ready to serve, at least 4 hours.
Rhubarb & Ginger Cordial with Mint & Raspberry Ice
Print Friendly and PDF

Monday, March 18, 2013

Mint Chocolate Chip Macarons

Mint Chocolate Chip Macarons
The fun thing about working with an unfamiliar oven is having an excuse to go back to basics. I was super scared to try macarons in the oven in my new place since it took me many, many failed batches to get used to my last oven. But I decided bite the bullet and try a pretty uncomplicated recipe. It's essentially the macaron version of my Mint Chocolate Chip Cake, which included the icing version of the ice cream flavour. It's like dessert inception!
Mint Chocolate Chip Macarons
I used the same mint chocolate chip icing from the cake recipe, with a slightly stronger peppermint flavour since you're not going to be eating a whole slice worth of icing. I made some plain macaron shells tinted with a bit of green and blue colouring and sprinkled with cocoa nibs. I love using cocoa nibs and they are perfect for this macaron flavour. I know they're not that easy to get a hold of so you can always substitute it with a dusting of cocoa powder instead.
Mint Chocolate Chip Macarons
Thankfully the my first batch of macaron shells turned out pretty good. A little bumpy, but the shells had good feet and weren't hollow inside. But I have learnt that my oven is much hotter than the previous oven, so I pretty much have to lower the temperature about 20 degrees from what is stated in most recipes. It's an important thing to learn; every oven is totally different and you need to get to know how hot or cool your oven operates and adjust the oven temperature accordingly. It's handy to get an oven thermometer but I tend to get a feel for it over time.
Mint Chocolate Chip Macarons
You might end up with some extra icing after filling your macarons. You could throw it out, or ice some cupcakes, or go totally nuts and bake some Salted & Malted Chocolate Chip Cookies and sandwich it with a bucketload of icing. Oh yeahhhh.
Mint Chocolate Chip Macarons
I know this macaron flavour has totally been done before, but it was fun to try out anyway. I knew that the macaron would probably look a lot more elegant with a simple mint flavoured chocolate ganache, but I wanted to get the full mint chocolate chip experience by using the fabulous icing that looks just like the ice cream flavour. Of course I couldn't resist picking up some mini ice cream cones to play with too!
Mint Chocolate Chip Macarons
(makes about 15-16 macarons)
For the macarons: (if you are a beginner with macarons, read up and practice plain macarons first. BraveTart has lots of useful advice and info on the subject)
100g aged egg whites (you can use fresh eggs too, just make sure they are room temperature. I always use fresh these days, and zap it in the microwave on defrost for 10 seconds)
110g almond meal, at room temperature and well sifted
200g icing sugar
50g caster sugar
Optional: 1 tsp powdered egg whites (available from The Essential Ingredient), helps to stabilise egg whites but is not necessary
Blue/green food colouring (powdered or gel)
To decorate: cocoa nibs (also available from The Essential Ingredient)

Line two baking sheets with baking paper. Place icing sugar in food processor and pulse for a minute to remove any lumps. Stir in almond meal and pulse for about 30 seconds to combine. Sift into a large mixing bowl and set aside. Using an electric mixer, beat egg whites and egg white powder in a medium mixing bowl until the egg white powder dissolves and it reaches soft peaks. With the mixer on high speed, gradually add sugar and beat until it reaches stiff peaks. (You can add the food colouring to the meringue as you are beating it to stiff peaks, it makes it easier to adjust how much colouring to add. Otherwise add it in the next step. I used a green gel colouring with a hint of aqua gel as well.)

Add meringue to your dry mixture and mix, quickly at first to break down the bubbles in the egg white (you really want to beat all the large bubbles out of the mixture, be rough!), then mix carefully as the dry mixture becomes incorporated and it starts to become shiny again. Take care not to overmix, the mixture should flow like lava and a streak of mixture spread over the surface of the rest of the mixture should disappear after about 30 seconds. Place mixture in a piping bag with a 1cm round piping tip. Pipe rounds about 3cm diameter, leaving at least 2cm space around each one. Tap baking sheets carefully and firmly on the benchtop a couple times to remove any large bubbles. If you wish, you can decorate the shells with cocoa nibs or a dusting of cocoa powder.

Leave to dry for about an hour, so that when you press the surface of one gently it does not break. This will help prevent any cracking and help the feet to form on the macs. Preheat your oven to 130-150°C (265-300°F), depending on your oven. You can place the sheet of piped shells on top of an overturned roasting tray or another baking sheet if your sheets are not professional grade, for better heat distribution. Bake for 20-25 minutes, depending on the size of your shells. Carefully test if the base of the shell is ready by gently lifting one and if it's still soft and sticking to the baking paper, then it needs to bake for a few minutes longer. Remove from the oven and cool on the tray for a few minutes, then gently remove from the sheet and place on a wire rack to cool completely.
Mint Chocolate Chip Macarons
For the mint chocolate chip icing:
125g salted butter, softened (or use unsalted and add 1/2 tsp salt)
1 1/2 cups icing sugar (about 190g)
3 tsp peppermint essence
75g semi-sweet dark chocolate, either very, very finely chopped (I pulsed mine down in a food processor, sifting away the finer powder) or mini chocolate chips
Optional: green/blue food colouring

Place butter in a large mixing bowl and beat on high using an electric mixer until the butter is smooth and fluffy. Gradually beat in icing sugar until smooth. Add peppermint essence and food colouring, try to match the colour of the shells. Stir in chocolate bits gradually, you want to make sure you don't add too much and that your chocolate isn't too fine or it will turn the icing brown. Spoon or pipe into the macaron shells, sandwiching them together. Store in an airtight container overnight to allow them to mature. Serve at room temperature.
Mint Chocolate Chip Macarons
Print Friendly and PDF

Thursday, May 5, 2011

Mint Slice Cake

mint_slice_cake
At the risk of being a one-cake-gimmick wonder, I'm posting yet another biscuit-inspired cake. Think of it as a thank you cake for the amazing response to my Tim Tam Cake. I seriously didn't expect it but I guess everyone loves Tim Tams/chocolate cake so it's not too unbelievable. This Saturday is my best friend Asian Gaga's birthday. You might remember that for her last birthday I attempted my infamous Lady Gaga Cake, the photos of which make me cringe but she loved it. This year she asked if I could make the Tim Tam Cake for her, but could I make it smaller and mint flavoured? So I thought, why not just make a Mint Slice Cake? The Mint Slice (it doesn't have its own wiki page, aww.) is basically a chocolate biscuit with a thick layer of peppermint icing on top and the whole thing is covered with a layer of dark chocolate. It might not be as popular as the Tim Tam but it's always been a favourite of mine, thanks to my love of dark chocolate and peppermint and the awesome ratio of icing to biscuit.
mint_slice_cake-2
Originally I wasn't going to blog about it but I liked how the photos turned out. My blog was pretty quiet this week and I didn't want to leave it neglected for the whole weekend too! So I'm going to keep this short and sweet - the cake uses the same sponge cake and ganache recipe as the Tim Tam cake, which are both halved in quantity, and the chocolate in the butter icing filling is replaced with peppermint essence so that it's fluffy, white and minty. It was actually harder to make this one resemble the biscuit, the Tim Tams had those recognisable ripples on their surface but the Mint Slice is completely smooth. I suck at keeping ganache smooth. I did my best. The important thing is it tastes great! HAPPY BIRTHDAY ASIAN GAGA!!! I love you, crazy lady.
mint_slice_cake-5
Mint Slice Cake
(adapted from my Tim Tam Cake, sponge recipe from Gourmet Traveller)
2 large eggs
55g (¼ cup) caster sugar
32g cornflour (cornstarch)
17g Dutch-process cocoa
2 tsp plain flour
½ tsp cream of tartar
¼ tsp bicarb soda
25g unsalted butter, melted and cooled

For the mint icing:
100g butter, removed from the fridge 30 minutes before starting
3 cups icing sugar, sifted
2 tsp milk
2 tsp peppermint essence
Optional: Mint Slice biscuits to hide in this layer, I only hid one for fun so it's definitely not needed

For the chocolate ganache topping:
150ml pouring cream (min. 35% milk fat pure cream)
200g dark chocolate (I used 60% cocoa)

Grease and line one 20cm round cake tin. Preheat oven to 180°C (350°F). Whisk eggs and sugar in an electric mixer until thick and pale (5-6 minutes). Sift over cornflour, cocoa, flour, cream of tartar and bicarb soda, fold in with spatula. Fold in butter, spoon into prepared tin. Bake in centre of oven until cake springs back when lightly pressed (10-12 minutes). Turn onto baking paper covered wire rack and cool completely.
mint_slice_cake-12
Prepare the mint icing; beat butter and icing sugar together until light and fluffy, then add mint essence and milk and beat until smooth. Spread over the top of cake and smooth with a spatula. To make the ganache, place cream in a small saucepan on low heat. Just as it starts to come to the boil, remove from the heat and cool for a couple minutes. Pour hot cream over chocolate and set aside 10 minutes to allow chocolate to melt. Mix cream and chocolate together until smooth using a whisk, then cool (I placed mine in the fridge for about 10 mins) until it reaches room temperature and thickens. Pour over the top of the cake, using a spatula to ensure the ganache covers all the top and sides of the cake (the excess will drip off everywhere so make sure you lay down some baking paper to catch the drips). Chill in the fridge until the ganache sets, then peel off the bottom baking paper and serve cake at room temperature.
mint_slice_cake-4
Print Friendly and PDF

Tuesday, February 22, 2011

Mint Chocolate 'Aero' Cake

mint_aero_cake-2
A gigantic chocolate cake is a really nice thing to come home to. Even if it's one that's been thrown together quickly, or one that's taken a days preparation, it's so good when you can dig into a big slice of that gooey, rich homemade goodness. I'd been playing with the idea of making a Mint Chocolate themed dessert for a while, something that reminded me of one of my favourite candy bars; mint Aero. Ever since I saw this great idea for a 'bubble-wrap mousse' from Taste, I knew I wanted to adapt it for my mint Aero dessert. I experiment a little-had a slight failure with small cups of green mint & white chocolate mousse topped with maltesers, and decided it wasn't pretty enough. Eventually I decided it needed to be a giant, four-layered chocolate cake, reminiscent of the triple-triple chocolate cake which was an undeniable hit.
mint_aero_cake-4
So it seemed simple enough, I baked up my usual chocolate cake recipe, and used the Taste recipe for the white chocolate mousse and added a bit of peppermint. After a day of chilling, I was ready to put everything together. The cakes were neatly sliced up into 4 layers, and I started to sandwich the mousse in between them. And then all hell broke loose. In hindsight, I really should have known better. The mousse recipe was never really meant to be used inside a cake. It started turning into mint chocolate SOUP, and started oozing out the sides and soaking into the cake, making the layers collapse around the edges. I really should have used a much more well-set mousse that used gelatine or something. So much fail was going on in my kitchen. I was certain if I waited any longer to do something the top half of the cake was going to slide right off the stand.
mint_aero_cake
It was tempting to throw the towel in, as I frantically scooped up the leaky mint chocolate soup of the cake by the handful. At this point I said, "F*** it, I did a night's worth of prep baking and used up all these ingredients, I'm going to turn this into an edible cake even if it friggin' kills me!". So I whipped up a batch of dark chocolate ganache. It's a good philosophy for the kitchen; if there's a problem, throw some ganache at it. And so my ugly fail cake was hidden under a thick layer of luscious chocolate ganache.
mint_aero_cake-5
Somehow, the cake did not collapse under it's own weight. By the time I was putting the ganache on, I was extremely cranky and swearing loud enough for my neighbours to hear, so I didn't even bother trying to make it smooth. And then while topping it off with Lindt chocolate balls (as inspired by the Taste recipe) I realised I didn't have enough of the chocolates and had to run down to Coles for more. I hate when that happens. And when I woke up this morning to take photos, it was pitch black. I HATE WHEN THAT HAPPENS. So my day was deprived of chocolate cake, but at least I had something to look forward to when I got home. I cut a slice out of the cake, dreading the mess that was hidden inside...yeah...the lovely flavoured bright green filling had pretty much disappeared and the cake was a little denser than usual, but it still tasted great. And I still love the idea, which is why I'm posting the recipe. I will just never ever use that mousse as the filling again, EVER.
mint_aero_cake-6
Mint Chocolate 'Aero' Cake
(adapted from Ina Garten's Beatty's Chocolate Cake recipe, serves 10-12)
Butter, for greasing the pans
275g (1 3/4 US cups) plain flour, plus more for pans
500g (2 US cups) sugar
75g (3/4 US cups) good cocoa powder
2 teaspoons baking soda
1 teaspoon baking powder
1 teaspoon salt
240ml buttermilk, shaken
120ml vegetable oil
2 extra-large eggs, at room temperature
1 teaspoon pure vanilla extract
1 cup freshly brewed hot coffee

For the mint chocolate mousse filling:
I am not including the recipe I used because it was completely inappropriate for this cake. I'd recommend a gelatine based mousse (maybe like this one), a mint buttercream or adapt the dark chocolate ganache recipe below using white chocolate + peppermint essence & green food colouring

Preheat the oven to 180 degrees C. Butter 2 19cm round cake tins. Line with parchment paper, then butter and flour the pans.

Sift the flour, sugar, cocoa, baking soda, baking powder, and salt into the bowl of an electric mixer fitted with a paddle attachment and mix on low speed until combined. In another bowl, combine the buttermilk, oil, eggs, and vanilla. With the mixer on low speed, slowly add the wet ingredients to the dry.

With mixer still on low, add the coffee and stir just to combine, scraping the bottom of the bowl with a rubber spatula. Pour the batter into the prepared tins and bake for 35 to 40 minutes, until a cake tester comes out clean. Cool in the tins for 30 minutes, then turn them out onto a cooling rack and cool completely. Wrap in cling film and chill for at least 3 hours or overnight. If making a mint chocolate mousse for the filling, prepare this and chill for at least 3 hours or overnight.
mint_aero_cake-12
For the chocolate ganache:
450g (approx 1 pound) dark chocolate (I used 70% cocoa Lindt)
600ml (2 1/2 cups) pouring cream
Optional: 3x150g boxes of Lindt chocolates to decorate

Break up chocolate into small pieces and place in a large mixing bowl. Slowly bring cream to just to the boil in a medium saucepan. Remove from the heat and cool for a couple minutes. Pour hot cream over chocolate and set aside to cool for 10 minutes. Mix cream and chocolate together until smooth using a whisk, then cool until it reaches room temperature. Using an electric mixer, beat mixture until it is shiny, fluffy and just holds its shape (take care not to overmix or mixture will split, remelt and rebeat mixture if this happens).

When ready to assemble, use a long serrated knife to slice your two cakes into half (or leave them as two thicker layers if you wish). Sandwich cake layers with a layer of green mint chocolate filling. Crumb coat the outside of your cake with dark chocolate ganache, then use the rest of the ganache to ice your cake. Make sure to work quickly or ganache will set. Decorate top of cake with Lindt chocolates. Chill for at least an hour before serving, run a knife under hot water before slicing up.
mint_aero_cake-3
Print Friendly and PDF

Sunday, September 11, 2011

Mint Chocolate Chip Cake

mint_choc_chip_cake-2
Chocolate cake and I have had a very interesting romance. I started off with quite an intense dislike of chocolate cake. I KNOW. But try not to judge me too harshly, I had many bad experiences with store-bought dry, dense mudcakes covered in grainy baking chocolate icing. So every year when I asked Regex Man what cake he would like for his birthday and every year he replied me with "Chocolate.", it usually filled me with dread. But I took on the challenge and made him a chocolate cake with salted caramel filling and the epic triple-triple chocolate cake covered in macarons. There have been many chocolate cakes since. And somewhere along the way I started to have a grudging respect for chocolate cake, which blossomed into love. Now I can't seem to stop thinking about them, baking them and eating them.
mint_choc_chip_cake-3
So this year for Regex Man's birthday I offered to do a chocolate cake even though he said it didn't have to be chocolate this year. I had this sudden urge to cover an entire chocolate cake with mint chocolate chip butter icing that looked exactly like the mint chocolate chip ice cream you get from Baskin Robbins. I was also incredibly inspired when I saw this cake idea not too long ago and while I was too lazy to do the chocolate ganache even though it looks awesome, I thought it would be cute to use some of the leftover icing to make 'scoops' with mini ice cream cones.
mint_choc_chip_cake-5
I used David Lebovitz's devil's food cake recipe again, my new favourite chocolate cake since making it for my raspberry cupcakes when I launched the new site. While making up the cake batter I misread the recipe and managed to add triple the amount of salt than I was meant to but it tasted so good that I just went with it and have included it in the recipe. It's only a small increase but it works well since I'm pairing the cake with quite a sweet icing. I even used a slightly salted butter for the icing to help stop the cake from being sickly sweet. This is seriously one of the easiest and best chocolate cakes I've ever made.
mint_choc_chip_cake-6
Originally I was going to arrange the scoops of icing around the edge of the cake, but I realised I didn't have quite enough icing to do that so I ended up just doing a few of them in the middle. I can't quite figure out if it looks a bit awkward but I'm happy with the way the icing itself looks. It really reminds me of mint chocolate chip ice cream, one of my favourite flavours. This cake is great for anyone who loves mint and chocolate together, and is easy to whip up and impress your friends with.
mint_choc_chip_cake-4
Mint Chocolate Chip Cake
(makes one 9-inch cake, cake adapted from David Lebovitz's Devil's Food Cake recipe)
9 tbsp unsweetened cocoa powder
1 1/2 cups cake flour (not self-raising, I just used plain flour and replaced 3 tbsp with cornflour/cornstarch)
1 1/2 tsp salt
1 tsp bicarb soda
1/4 tsp baking powder
115g (1 stick) unsalted butter, at room temperature
1 1/2 cups caster sugar
2 large eggs, at room temperature
1/2 cup strong coffee (or water, I used a weak coffee as I didn't want it overpower the mint)
1/2 cup whole or low-fat milk

For the icing:
280g (2.5 sticks) unsalted (or slightly salted) butter
500g icing sugar (about 4 cups), sifted
2-3 tsp peppermint essence, adjust to taste
150g dark chocolate, very finely chopped or pulsed through a food processor
green food colouring
Optional: waffle ice cream cones to decorate

Butter and line the base of a two 9-inch cake tins (I only had a 22cm springform tin which I used for both cakes) and preheat oven to 180°C (350°F). Sift together the cocoa powder, flour, salt, bicarb soda, and baking powder in a bowl. Using an electric mixer with a large mixing bowl, beat together the butter and sugar about 5 minutes until smooth and creamy. Add the eggs one at a time and beat until fully incorporated.

Mix together the coffee and milk. Stir half of the dry ingredients into the butter mixture, the add the coffee and milk. Finally stir in the other half of the dry ingredients until smooth. Split batter mixture between the two prepared tins (or in my case, I used half for the first cake, baked it and then reused the tin for the other half of the batter). Bake for about 25 minutes, or until a skewer inserted into the centre of the cake comes out clean. Remove from the oven and cool in tin about 5 mins, then place on a wire rack and cool completely before icing.
mint_choc_chip_cake-14
Prepare the mint icing; remove butter from fridge about half an hour before starting. Cut up butter into smaller pieces and place in a large mixing bowl. Beat with an electric mixer on high until fluffy and smooth. Add sifted icing sugar one cup at a time, beating until combined. Add peppermint essence to taste and green food colouring. Gradually add chocolate chip pieces until you have a good distribution of chocolate bits.

Use about 1/4 of the icing on top of one of the cakes and smooth over with a spatula. Place second cake top side down on top of the iced cake. Cover entire cake with more icing, smoothing with a spatula. I used an offset spatula, running it under hot water every now and then to help keep the surface smoother. Use the leftover icing to form scoops of icing to place on top of the cake, arranged however you like. Use mini ice cream cones or chop the ends of normal-sized cones and place on top of icing scoops. Alternatively you could cover the top with extra dark chocolate chips. Can be served immediately or stored in an airtight container overnight. Serve at room temperature.
mint_choc_chip_cake-7
Happy Birthday Regex Man!
Print Friendly and PDF

Monday, July 6, 2009

Chocolate Peppermint Creams


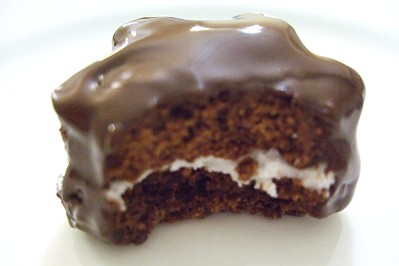
I've wanted to try this recipe for ages, being a HUGE fan of the mint & chocolate combination. I was obsessed with after dinner mints as a kid and would eat a whole pack of After Eights in one go. I can eat a whole pack of Mint Slices no problems, it's quite disgusting.

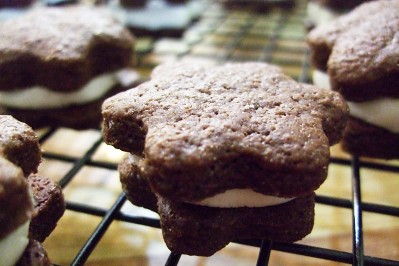
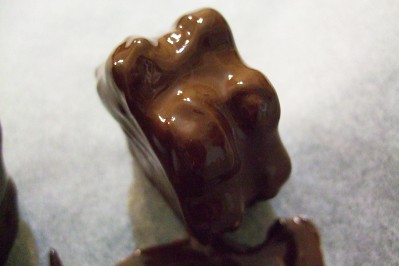
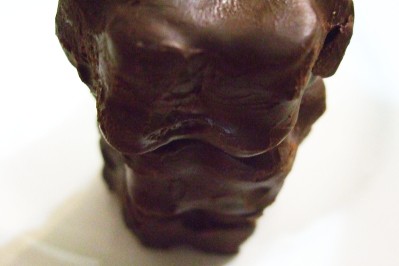
I took some really terrible photos of these biscuits because I thought they looked so damn ugly after I made them that I wasn't sure if I was going to post about it. In fact, I was calling them star-shaped poos for the rest of the day.

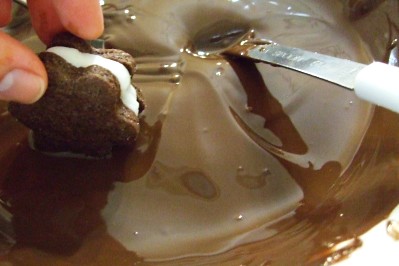
So I got really lazy because I spent ages making dinner the other night but I really wanted to make these biscuits too, so I pressed on. Of course by the end when I had to dip my mint cream filled biscuits in melted chocolate I was lazy and rushed and didn't drip them off for long enough so the chocolate was an ugly mess. But when I brought them to work the next day the reaction was unexpected. Re said they were the best things I had ever made. Someone even said they were better than sex HAHA! They disappeared fast and I was lucky to save one for Asian Gaga who was so in love with them that she made me promise to make an entire batch for her Christmas present. I would have made more but the chocolate biscuits on their own were so cute and yummy that I kept snacking on them while I was waiting for them to cool!

Chocolate Peppermint Creams
(from the Essential Baking Cookbook)

65g unsalted butter, softened
1/4 cup (60g) caster sugar
1/2 cup (60g) plain flour
1/3 cup (40g) self-raising flour
2 tbsp cocoa powder
2 tbsp milk
300g dark chocolate

Preheat the oven to 180 degrees C. Line two baking trays with baking paper. Cream the butter and sugar in a small bowl with electric beaters until light and fluffy. Add the sifted flours and cocoa alternatively with the milk. Mix with a knife until the mixture forms a soft dough. Turn out onto a floured surface and gather together into a rough ball. Cut the dough in half.

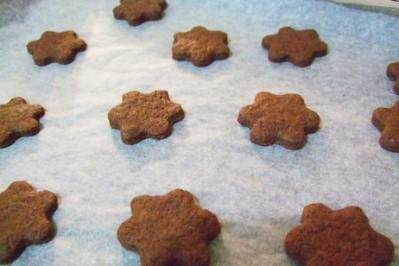
Roll each half between two sheets of baking paper to 2mm thick. Slide onto a tray and refrigerate for 15 minutes, or until firm. Cut the dough into rounds using a 4cm round cutter (obviously I used a flower shaped cutter), re-rolling the dough scraps and cutting more rounds. Place on the trays, allowing room for spreading. Bake for 10 minutes or until firm. Transfer to a wire rack to cool completely.

For the peppermint cream:
1 egg white
1 3/4 cup (215g) icing sugar, sifted
2-3 drops peppermint essense or oil, to taste

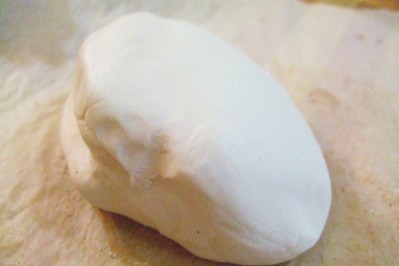
Put the egg white in a small, clean, dry bowl. Beat in the icing sugar 2 tablespoons at a time, using electric beaters on low speed. Add more icing sugar, if necessary, until a soft dough forms. Turn the dough onto a surface dusted with icing sugar and knead in enough icing sugar so that the dough is not sticky. Knead in the peppermint essence.

Roll a teaspoon of peppermint cream into a ball, and flatten slightly. Sandwich between 2 chocolate biscuits, pressing together to spead the peppermint to the edges. Repeat with the remaining filling and chocolate biscuits, keepping the filling covered as you work.

For the topping, put the chopped chocolate in a heatproof bowl and melt over a double boiler. Take off the heat but keep the bowl over the hot water while you work. Use a fork to dip the biscuits into the chocolate and allow any ecess to drain away. Place on a baking paper lined tray to set.


DO NOT DO WHAT I DID AND REST THEM ON THEIR SIDES. At first I thought this was a neat solution, but they ended up all wonky because I had so much excess chocolate on the biscuits and thats why I think they looked like little poos. If you lie them flat they'll be much prettier.

Hopefully the next time I make these (which will probably be sooner than Christmas) I will have the energy to make them look prettier :) I think the mint icing and the chocolate biscuits in this recipe make it 10 times better than a regular Mint Slice.

Print Friendly and PDF