Showing posts with label Chilled. Show all posts

Tuesday, November 18, 2014

Raspberry Swirl Pavlova with Summer Fruits

Raspberry Swirl Pavlova with Summer Fruits
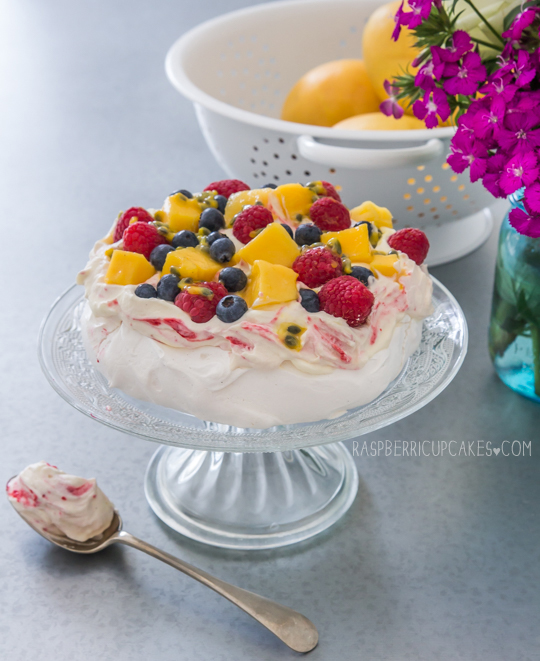
You know what's strange? I love eating pavlova, it is one of my favourite summer treats but somehow I have never made it before. In all the years of baking, all the cakes and macarons and cupcakes, I have yet to make my own pavlova. So when I was asked to make one for an upcoming BBQ, I actually got nervous. What fruits should I choose? What if I completely stuffed up the meringue? Should I do anything to mix it up a bit or should I not mess with a classic?
Raspberry Swirl Pavlova with Summer Fruits
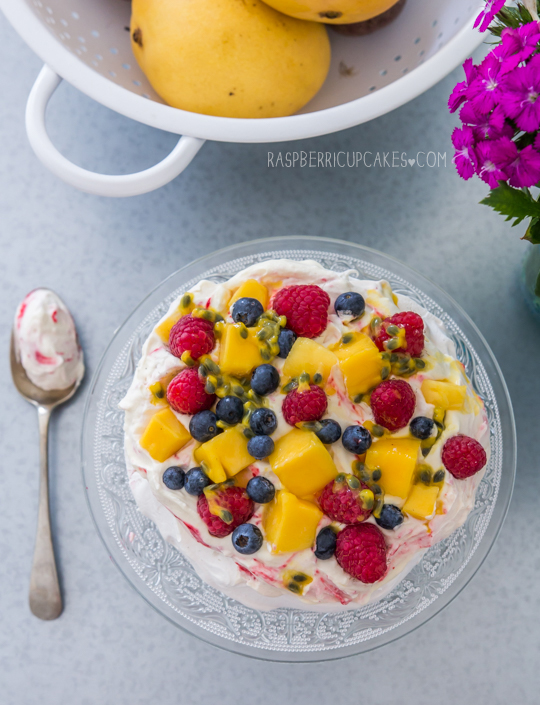
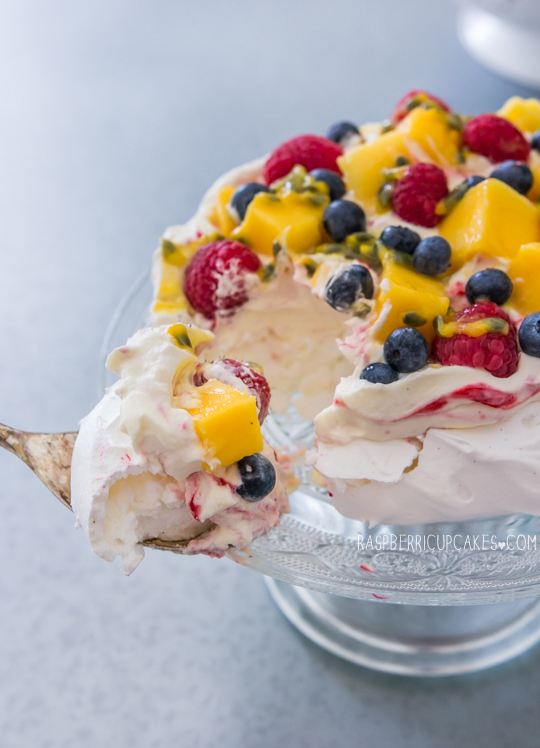
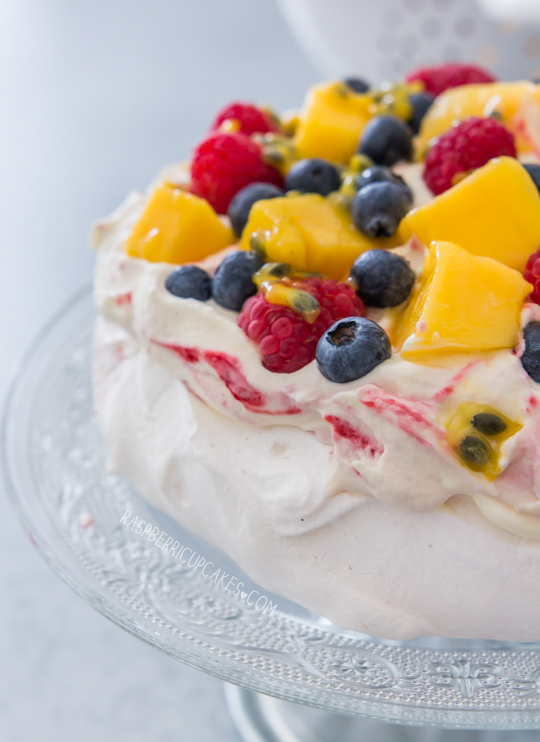
In the end I didn't add too much to it, I swirled a delicious raspberry sauce into the cream, which was a whipped mix of regular cream and mascarpone. Berries and mangoes are super cheap and in season here in Australia, so I went a little nuts with those. I know its not summer just yet but this just feels so summery. By the way, the pav shown in the photos is a mini version, the recipe below actually makes a full size pavlova. Obviously I couldn't prepare and photograph the pavlova the day before the BBQ so I made an extra mini one to practice. The full-sized one that I served up actually looked even better because it was piled super high with so much fruit and the raspberry sauce was swirled better. I wish I could have photographed it! Oh well, it went down really well and everyone was a big fan of the raspberry swirled cream. I think it added something a little special.
Raspberry Swirl Pavlova with Summer Fruits
Sooo, this is probably what you're all waiting for! Thanks so much to everyone who entered the cookbook giveaway last week, it was really lovely to see so many entries and read all about your dream cakes! It was incredibly difficult to choose just one entry, if I could give out a book to every one of you I would! So the winner is *drumroll*......
winner
Congratulations E. Danieletto! Check your inbox and get back to me quick and you will have a copy of  Lomelino's Cakes : 27 Pretty Cakes to Make Any Day Special by Linda Lomelino thanks to Roost Books coming your way!
Raspberry Swirl Pavlova with Summer Fruits
(meringue recipe from Gourmet Traveller, serves 8)
For the meringue:
4 eggwhites, at room temperature (even better if aged i.e. separated and stored in the fridge overnight, or even frozen and defrosted)
A pinch of salt
240g (about 1 & 1/3 cups) caster (superfine) sugar
1 tbsp cornflour
1 tsp white vinegar
1 vanilla bean, scraped seeds only
For dusting: melted butter or vegetable oil + extra cornflour
  1. Preheat oven to 100°C. Line a large baking tray with baking paper, brush with butter/oil and dust with cornflour.
  2. Whisk eggwhites and a pinch of salt in the bowl of an electric mixer until soft peaks form. With motor running, add sugar, a tablespoon at a time, whisking until sugar dissolves (5-10 minutes, you can check it by pinching a small amount of mixture between your fingers). 
  3. Fold in cornflour, vinegar and vanilla seeds, then pile mixture into a 20cm-diameter circle on oven tray, gently smoothing top and making a slight indentation. 
  4. Bake in centre of oven until crisp but not coloured (1-1¼ hours). Turn off oven and leave to cool completely with door ajar. Meringue will keep in an airtight container for up to 4 days.
For the raspberry sauce:
150g (125oz) raspberries, fresh or frozen
1/4 cup sugar
2 tsp lemon juice
1 tbsp cornflour (cornstarch) + 2 tsp cold water
  1. Place raspberries, sugar, and lemon juice in a medium saucepan and place on medium heat. Stir over heat until sugar dissolves. 
  2. Mix cornflour and water together in a separate small bowl then add to the saucepan and stir over medium heat until mixture thickens, about 3-4 minutes. Strain to remove seeds and then set aside to cool.
To assemble:
2.5 cups cream (thickened/heavy cream will do, but I used 1 cup thickened, 1 cup double cream and 250g mascapone to give it a slightly richer texture)
1/4 cup icing/confectioner's sugar, sifted
1 vanilla bean, scraped seeds only
Selection of summer fruits; I used fresh raspberries, blueberries and diced strawberries (1 punnet each) and mango (2 mangoes) and a bit of passionfruit (1)
  1. Whip cream first; place creams in a large mixing bowl with icing sugar and vanilla seeds and beat on high with an electric mixer until it reaches soft peaks. Take care not to overmix (especially if you add the double cream, its very easy to overwhip). Cream can be whipped a couple of hours ahead of time and stored in an airtight container in the fridge.
  2. Only assemble your pavlova when you are ready to serve it or it will go soggy.  Place meringue on serving plate or stand. 
  3. Add raspberry sauce to your cream and use a spatula to give it a couple of quick folds. Spread cream mixture of the top of your meringue (sauce will swirl throughout the cream as it spreads on).
  4. Top with fresh fruit and serve immediately.
Print Friendly and PDF

Saturday, June 7, 2014

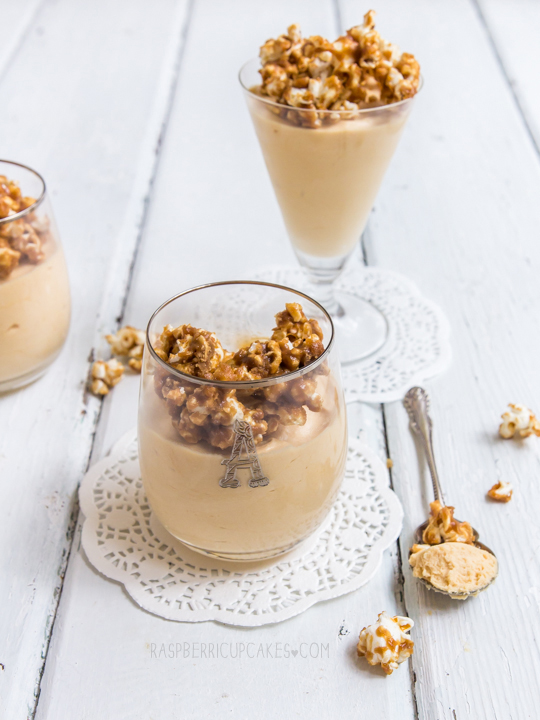
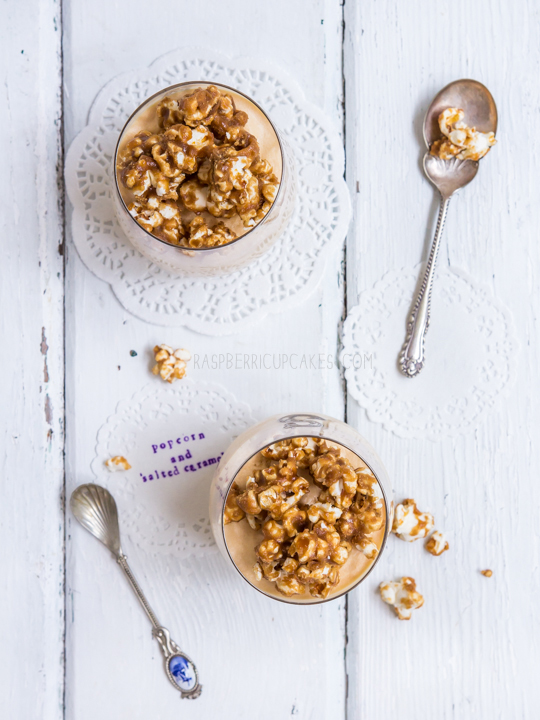
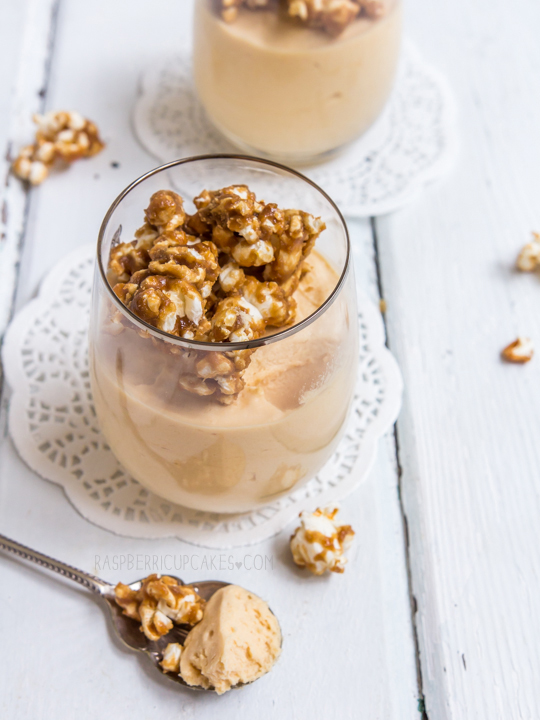
Salted Caramel Mousse with Caramel Popcorn on DesignSponge

Salted Caramel Mousse with Caramel Popcorn
Hi! I know it's been quieter than usual around here, sorry about that. I'm working on a new recipe for you right now! But I have something a little different to share with you today. I was asked to collaborate with DesignSponge on a fun & easy recipe and there was no way I could say no.
Salted Caramel Mousse with Caramel Popcorn
I came up with a fairly simple recipe for a wonderfully indulgent dessert; Salted Caramel Mousse with Caramel Popcorn. Yes, I'm still stuck on my salted caramel obsession. You're welcome.
Salted Caramel Mousse with Caramel Popcorn
Make sure you click through to Kristina's In The Kitchen With column for more photos and the full recipe. Hopefully we will be returning to regularly scheduled programming soon. I know I promised that last time but I mean it this time!
Salted Caramel Mousse with Caramel Popcorn
Print Friendly and PDF

Tuesday, May 13, 2014

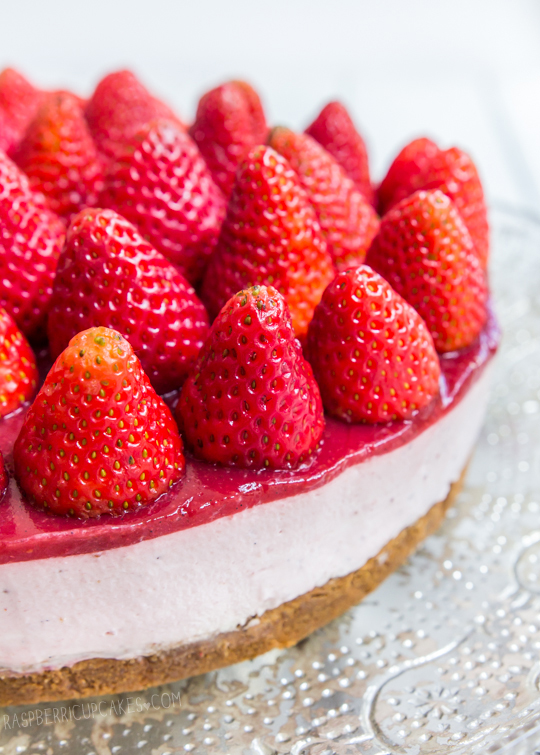
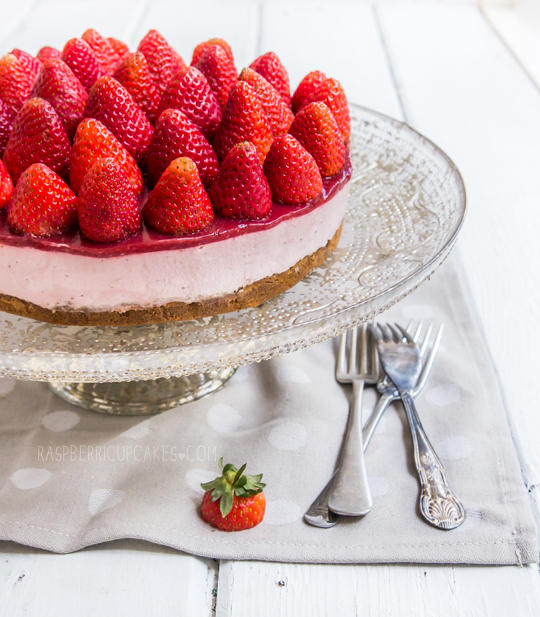
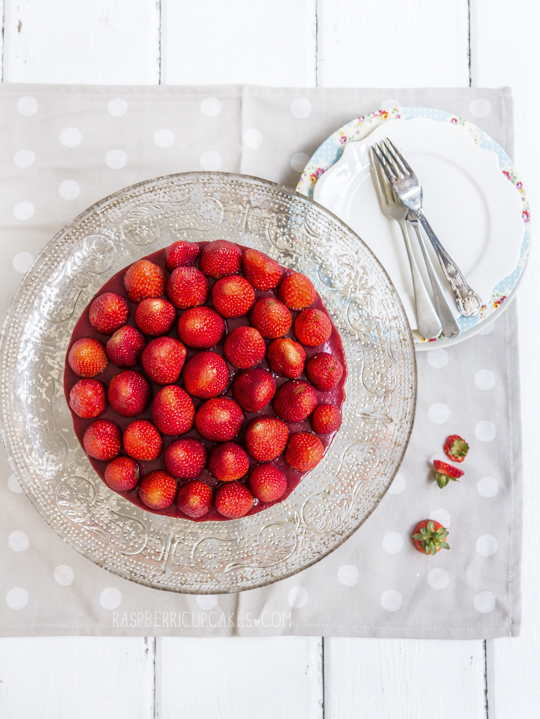
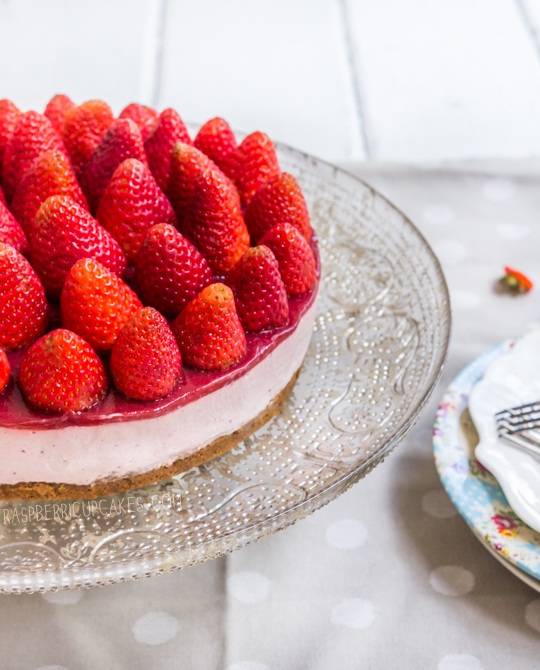
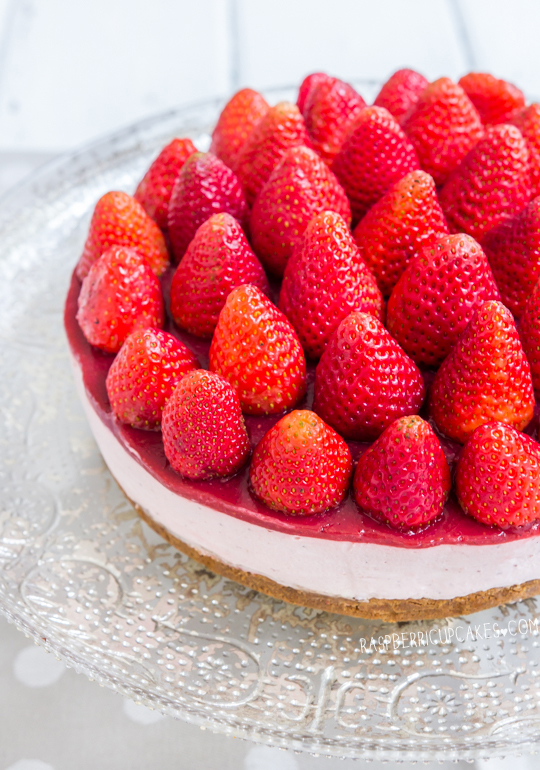
Strawberry Cheesecake (with Speculoos Crust)

Strawberry Cheesecake (with Speculoos Crust)
Don't let this cheesecake fool you with its prettiness. It's EVIL I tell you! This will forever be known to me and Asian Gaga as the Cheesecake Disaster of 2014. It was close (but not quite) as devastating as the Trifle Disaster of 2012. I've decided that my birthday dessert attempts for Asian Gaga must be cursed. They've resulted in some of the biggest fails in my recent baking history.
Strawberry Cheesecake (with Speculoos Crust)
So why was this such a fail? It looks fairly good in the photos, doesn't it? Well it was all fine while I was taking these photos, and then slowly I started to realise that it hadn't set properly and the whole thing was starting to melt into a puddle in front of me. In a panic I rushed to try and get it back onto a plate, but the stupid (but gorgeous) cake stand I was taking the photos with doesn't have a flat base, so the crust had split into four or five pieces which made it impossible to lift up, and there was a bloody super high lip on the edge of the stand so I couldn't just slide the damn thing off! ARGH! By this point there were smears of cheesecake everywherrrreee and the strawberries had started sliding off the edges and I was starting to freak out. I eventually got it on to a flat plate (with a lot of swearing). And then I realised that because it was totally not set, the sides were probably going to collapse even if I put it back the fridge. So I had to move it again into a cake tin to hold the sides up. This was a MESS. The cake was threatening to completely fall apart. Strawberries were rolling on to the ground. I was getting hysterical. AND THE TIN WAS TOO BIG. So I had to move it AGAIN. 

By the end of it there was cheesecake all over me and the kitchen and about 3 different tins because I couldnt match up my springform tins with their matching bases (I have a lot of them). It was awful. My husband actually fled the house to go shopping in the middle of my meltdown, because he knows better than to be anywhere near the vicinity of one of these disasters. I felt so bad because the cheesecake actually tasted really great, and I had this feeling while I was making it (I was sorta loosely making it up as I went along) that I hadn't added enough gelatine but I was on the cold and flu meds and kinda out of it so I just kept going (I also exploded a ton of melted butter all over the inside of my microwave, I'm just that good). I knew better, but I still managed to completely stuff it up.
Strawberry Cheesecake (with Speculoos Crust)
The cheesecake somehow still tasted great, even though it was a little melty as it came back to room temp. If I had the time I would have just started from scratch again, but Asian Gaga was already in her car and on the way when this was all happening. Of course she was a dutiful best friend and ate it all anyway, told me it was great and ignored the smears of cheesecake on the floor. The cheesecake itself is a chilled Strawberry Cheesecake with Strawberry Jelly on top and Fresh Strawberries. The crust is made with speculoos (aka Biscoff cookies for those of you in the US). I was so excited to find the Lotus brand in Coles (on special!) and bought about 10 packets, I'm not kidding. These lovely spiced biscuits make an excellent cheesecake crust that match so well with the strawberry and I really recommend you try it if you can find the biscuits. But if you can't get your hands on them, ginger nut biscuits/ginger snaps will work well with this flavour combo too. Anyway, since I'm still completely happy with the flavour of the actual cheesecake, I'm going to share the recipe with you with some modifications so that you can avoid any of my pain (I've more than doubled the gelatine amount so it should be nicely set - if you make this recipe please let me know if it is too firm or not firm enough!).
Strawberry Cheesecake (with Speculoos Crust)
Strawberry Cheesecake (with Speculoos/Biscoff Crust)
(makes one 7 or 8 inch cheesecake)
For the crust:
250g (about 9oz) speculoos (aka Biscoff cookies), I used Lotus brand (you can substitute with ginger nuts/snaps or any other biscuit of your choice)
75g (about 5 tbsp) butter, melted
  1. Preheat oven to 180°C (350°F) and grease and line the base of an 18cm (7inch) or 20cm (8 inch) springform cake tin with baking paper (I used 18cm). 
  2. Place biscuits in a food processor and blend until crushed to small crumbs, then add melted butter and blend until just combined.
  3. Press mixture in an even layer on the base of the prepared tin.
  4. Bake in oven for about 7-10 mins, make sure it does not burn.

For the strawberry mixture:
400g (about 1.5 punnets/14oz) fresh or frozen strawberries, hulled
1/3 cup (about 65g) sugar
3 tsp lemon juice + grated zest of 1/2 lemon
1 vanilla bean pod, split and seeds scraped (or 1 tsp vanilla extract/vanilla bean paste)
4 tsp powdered gelatine
  1. Place gelatine in a small bowl with 3 tsp of cold water and set aside to soften.
  2. Place strawberries, sugar, lemon juice and zest and vanilla bean pod and seeds into a medium saucepan on medium heat.
  3. Simmer until sugar is completely dissolved and fruit softens, about 10 minutes.
  4. Add gelatine and whisk mixture over heat until gelatine is completely dissolved. 
  5. Set aside to cool for 5 minutes. Place 1 cup of mixture aside to use for topping later, the remaining amount will be added to the cheesecake.

For the cheesecake:
3/4 cup thickened/heavy cream
400g (14oz) cream cheese, softened
1/2 cup (100g) sugar (preferably caster/superfine)
Remaining strawberry mixture from above, should be just over 1 cup
Optional: Extra fresh strawberries to decorate, about 2 punnets
  1. Place cream in a large mixing bowl and beat with an electric mixer on high until it reaches stiff peaks (take care not to overwhip). Place cream in fridge until ready to use.
  2. Place cream cheese and sugar in another large mixing bowl and beat with an electric mixer on high until smooth and fluffy. 
  3. With the mixer on low, gradually add the remaining strawberry mixture from above (making sure you leave 1 cup behind for topping) to the cream cheese mixture. Beat until completely combined.
  4. Gently fold in in whipped cream until smooth. 
  5. Pour mixture over prepared crust and chill in the fridge until just set, about 2 hours (or about half an hour in the freezer).
  6. Reheat remaining 1 cup of strawberry mixture in saucepan until it is pourable, then pour over top of chilled cheesecake. Return to the fridge to set overnight.
  7. Run a sharp knife under hot water to warm it up, then carefully run knife around the inside edge of the cake tin. Carefully remove from springform tin. Top with extra fresh hulled strawberries. Keep chilled until ready to serve.
Strawberry Cheesecake (with Speculoos Crust)
Print Friendly and PDF

Monday, March 17, 2014

Irish Cream Cheesecake

Irish Cream Cheesecake
Happy St. Patrick's Day! I made a dessert at the last minute for today, so apologies that this recipe is probably going up a little too late for anyone else to actually make this year. Unless you're a big fan of Baileys and you just want to make it any time of the year. I'm not actually too keen on the stuff, but I thought it would be nice to make this for my workmates who are celebrating today. A cheesecake for Irish Cream lovers, it has a strong kick to it that might not be to everyone's tastes.
Irish Cream Cheesecake
Sorry for the radio silence over the last couple of weeks, it's been a hard slog. Unfortunately things are going to be pretty nuts for the next few months, so weekly posts are becoming harder and harder. It's starting to drive me a little batty, I love baking up a storm and making a big mess in the kitchen and I start to get antsy if I haven't baked in a while.
Irish Cream Cheesecake
So this weekend I made this cheesecake! It's the chilled kind, so it was really quick to make. Well it would have been really quick to make if I had made it correctly the first time. I swear everything I've made in the last month I've had to redo at least once because of a dumb mistake I've made. It's not a good precedent, especially when I'm making my first wedding cake at the end of this month. Eek! I also got a little tipsy from tasting the mixture a lot, it definitely has a kick to it. I reduced the amount of Bailey's on my second attempt, and you could reduce it even more if you want a milder flavour.
Irish Cream Cheesecake
I went the an Oreo crust this time. I do love an Oreo crust. Any old biscuit crust would work great with this cheesecake, but I think the dark crumbs look nice with the fluffy, pale cheesecake mixture in.
Irish Cream Cheesecake
A word of warning; do NOT put green M&Ms on this cheesecake and then put it in the fridge overnight. It will turn into a lumpy green puddle of mess. It's not pretty. If you do want to decorate it as its seen in the photos, pop the M&Ms on at the last minute. Trust me.
Irish Cream Cheesecake
Baileys (Irish Cream) Cheesecake
(adapted from my Milo Cheesecake recipe)
For the crust:
1 packet (200g) Oreos (or other biscuit of your choice), including centres
50g (3.5 tbsp) butter, melted
  1. Grease and line the base of an 18cm (7inch) or 20cm (8 inch) springform cake tin with baking paper (I used 18, you may want to use an extra half packet of Oreos if using 20cm to ensure a good crust thickness). 
  2. Place biscuits in a food processor and blend until crushed to small crumbs, then add melted butter and blend until just combined.
  3. Press mixture in an even layer on the base of the prepared tin.

For the filling:
300ml (about 1 1/4 cups) thickened (heavy) cream
340g (12oz) cream cheese, softened
1/2 cup (100g) sugar (I used caster/superfine)
150ml Baileys or any other Irish Cream
3 & 1/2 tsp powdered gelatine
Optional: Green M&Ms to decorate right before serving (I needed two large bags to get enough green ones)
  1. Whip cream in a mixing bowl until it reaches soft peaks (take care not to overmix). Chill until ready to use.
  2. Place cream cheese in a separate large mixing bowl and beat with an electric mixer on high until smooth. Add sugar and beat until combined. 
  3. Place gelatine in a small separate bowl with 3 tbsp cold water to soften it.
  4. Place Baileys in a small saucepan on medium heat, add softened gelatin and whisk to combine. Continue whisking over heat until dissolved. Ensure there are no lumps.
  5. Add warm gelatine mixture to cream cheese and beat until smooth. 
  6. Fold in whipped cream until smooth and then pour mixture over crumb layer. 
  7. Chill for at least 3 hours or overnight. 
  8. To serve, run a thin-bladed knife under hot water and then carefully run around the edge of the pan to loosen it. Carefully remove from pan and serve, or store in an airtight container in the fridge until ready to serve. 
  9. Optional: When ready to serve, decorate with green M&Ms (don't do this too early as M&Ms colour will bleed into cheesecake after a while)
Irish Cream Cheesecake
Print Friendly and PDF

Monday, February 3, 2014

Rhubarb & Ginger Cordial with Mint & Raspberry Ice

Rhubarb & Ginger Cordial with Mint & Raspberry Ice
I had a pretty awful week last week and it was bloody hot over the weekend, so the last thing I wanted to do was turn on my oven and bake something. I was dreaming about popsicles and icy, cool refreshments. So you'll have to excuse me for not having a dessert recipe for you this week, but instead a lovely homemade cordial that will not only make a great cold drink, but is also a fantastic cocktail mixer and will make some pretty delicious popsicles too.
Rhubarb & Ginger Cordial with Mint & Raspberry Ice
A few months ago I saw David Lebovitz's fresh ginger syrup recipe and knew that I needed to make it. Anything ginger is up my alley. I've made the original recipe many times and it is fantastic as is, I totally recommend you try it. There was obviously no point reposting his version here, but this week I had a fresh bunch of rhubarb to play around with as well, so I decided to try a version with a bit of a twist.
Rhubarb & Ginger Cordial with Mint & Raspberry Ice
While dreaming about my wonderfully cold drinks, I kept imagining cups mixed with fresh raspberries. It might seem a little excessive when you consider the price of fresh raspberries, but it looks so pretty and is so perfect for summer. So I made up a batch of ice cubes with fresh raspberries and bits of fresh mint leaves frozen into them. SO PRETTY. I included instructions below but it seems a bit silly to be writing instructions on how to make ice.
Mint and Raspberry Ice
Yep, I couldn't resist pulling out my heart-shaped ice cube tray for this. And then I realised Valentines Day is coming up shortly, so I guess this would be a great idea for that...even though I usually tend to avoid anything heart-shaped for the day because it's so overdone and cheesy. We don't really celebrate it in my house since my husband hates the day, but feel free to use this idea for your Valentine.
Mint and Raspberry Ice
Once the ice melts you have the mint which makes a great extra flavouring for the drink and you can eat the raspberries. Pretty AND helpful. I didn't have any booze in the house so I couldn't test it out as a cocktail but I imagine it would be fantastic. Rhubarb and ginger always work great together, however this is definitely a drink for people who are already a big fan of ginger (as it's rather spicy).
Rhubarb & Ginger Cordial with Mint & Raspberry Ice
I love the light pink hue the rhubarb gives the drinks when you mix it up (it's quite a bright pink in its concentrated form, which is also great). I definitely think it's worth making this up with the fancy ice cubes, and it looks so pretty in my shiny new blue-green jug and glass set! This set is actually the very first thing I bought for my new house. Not something useful like a washing machine or a bed; I bought a jug with matching glasses. I was standing there staring at the pretty blue-green glass and imagining how great they would be for serving cold drinks on my sunny new porch, so I had to get them. Of course I need to get some tables and chairs for my porch and to get rid of my ridiculous mosquito situation before I can actual realise this dream, but at least I have the pretty glasses.
Rhubarb & Ginger Cordial with Mint & Raspberry Ice
Homemade Rhubarb & Ginger Cordial
(adapted from David Lebovitz's Fresh Ginger Syrup recipe, makes about 2 cups/0.5L)
200g fresh ginger, unpeeled (you can peel it if you prefer, but my ginger was very young so it didn't need to be removed)
200g chopped rhubarb pieces (about 2cm thick pieces)
4 cups (1L) water
450g (2 1/4 cups) sugar
Pinch of salt
  1. Chop ginger into thin slices, then run knife over the slices to roughly chop it into smaller pieces.
  2. Place chopped ginger, rhubarb,  water, sugar and salt in a large saucepan. Heat to a boil, then reduce the heat to a steady simmer, and cook for 45 minutes to one hour.
  3. Let cool, then strain the cordial through a fine-mesh strainer. Store the strained cordial in the refrigerator, covered, until ready to use. (I kept mine in an airtight bottle) It should keep for about 2 weeks in the fridge.
  4. To serve; Mix cordial with water or soda/sparkling water and a squeeze of fresh lemon or lime juice. Add some mint and raspberry ice cubes (directions below) if you want to pretty it up. Adjust amount of cordial to taste, I think a good ratio of cordial to water is about 1:3 depending on how sweet you want it. Will also make a great cocktail mixer or can be mixed with water to make some fantastic popsicles.
Mint and Raspberry Ice
Fresh Mint & Raspberry Ice Cubes
1 punnet fresh raspberries
A small bunch of fresh mint leaves
  1. In your ice cube trays (heart-shaped ones are great for this), place one raspberry per ice cube space, or a rip up a few small pieces of mint leaf. 
  2. Fill trays carefully with water, you may need to gently press the raspberries down with a fork to remove any big air bubbles.
  3. Freeze until ready to serve, at least 4 hours.
Rhubarb & Ginger Cordial with Mint & Raspberry Ice
Print Friendly and PDF

Monday, January 13, 2014

Chocolate Buttermilk Waffles with Fresh Mint Ice Cream

Chocolate Buttermilk Waffles with Fresh Mint Ice Cream
It was about time I got more use out of our waffle maker! I had leftover buttermilk and cream from last week's epic baking efforts, so the only thing I bought was a bunch of fresh mint and I had all the making of waffles with homemade, no-churn ice cream. I shared Lisa's awesome no-churn ice cream recipe with you not too long ago. It really is a time-saver, so long as you're not averse to the slight tint of flavour from the sweetened condensed milk.
Chocolate Buttermilk Waffles with Fresh Mint Ice Cream
I based the waffle recipe on a plain buttermilk recipe, replacing some of the flour with cocoa powder. However I did find them a little too salty and not quite sweet enough because of the addition of cocoa so I've adjusted the amounts in the recipe below to fix that. You definitely still need to serve it with something sweet and light like the mint ice cream. The buttermilk does it's job of keeping the waffles wonderfully fluffy and soft while still crisp on the outside thanks to the wonders of wafflemakers.
No-Churn Fresh Mint Ice Cream
I know a lot of people commented on the last no-churn ice cream recipe about the strong condensed milk flavour in the ice cream. Unfortunately that's the cost of using a no-churn recipe that still stays as smooth as a normal ice cream, but I did try to tone down the strength of the condensed milk flavour by infusing the condensed milk with fresh mint leaves in this recipe. I've always wanted to try making fresh mint ice cream. As much as I love mint flavouring, I really did enjoy the subtle flavour of fresh mint in this ice cream. Of course there's nothing stopping you from using peppermint extract/essence instead, or creme de menthe if you want to get some green colour into the ice cream as well.
Chocolate Buttermilk Waffles with Fresh Mint Ice Cream
I made the ice cream so quickly on Friday evening after work that I totally forgot to take any progress shots and didn't even save a single leaf of fresh mint for the photos. So you'll just have to take my word for it that the ice cream is well-infused with the flavour. I was a little worried that the condensed milk would overpower the light flavour of the mint leaves especially while tasting the warm mixture, but after freezing it overnight I found the flavour was just the right amount of mint for me. You don't want it to be too strong as it's quite herby, if you know what I mean. If you like it strong you could always blend up the leaves into the mixture rather than straining them out.
Chocolate Buttermilk Waffles with Fresh Mint Ice Cream
I served my waffles with a drizzled of warm melted chocolate mixed with a tiny bit of cream, you could also make chocolate awesomesauce or plain melted chocolate. I was tempted to mix chocolate through the ice cream itself to make my favourite mint chocolate chip flavour, but instead I topped the whole thing off with some cocoa nibs instead. It added a nice bite with a bit of nuttiness to the whole thing. I don't know why I'm tagging this under the breakfast tag as this is strictly a dessert kinda waffle, but out of habit I feel the need to categorise anything waffle-related under breakfast. Okay I'm rambling now, see ya next week!
Chocolate Buttermilk Waffles with Fresh Mint Ice Cream
Chocolate Buttermilk Waffles with No-Churn Fresh Mint Ice Cream
(waffle recipe adapted from Brown Eyed Baker, ice cream recipe adapted from spicyicecream)
For the ice cream:
1 large bunch of mint, about 70g, chopped
1 can (395g) sweetened condensed milk
2 cups cream (pure/pouring cream (or heavy cream in the US, min 35% fat unthickened))

Place chopped mint and sweetened condensed milk in a small saucepan on low heat and stir regularly. Do not allow to come to the boil. Stir over heat to allow mint to infuse, about 10 minutes. Set aside to cool completely and then chill for about an hour.

Place cream in a large mixing bowl and beat with electric mixer on high until it reaches soft peaks (take care not to overmix). Gently fold in condensed milk mixture until combined and then pour mixture into a large loaf tin (about 1.5L capacity). I find it easier to use a whisk to combine them, to avoid pockets of condensed milk mixture remaining unmixed. Freeze overnight. Best eaten within 1 week.
No-Churn Fresh Mint Ice Cream
For the waffles:
(makes about 8 regular waffles or 5 large Belgian style waffles)
1 & 1/4 cups (about 175g) plain/all-purpose flour
1/2 cup cocoa powder, sifted
4 tbsp sugar
2 tsp baking powder
1 tsp baking (bicarb) soda
1/4  teaspoon salt
1 & 3/4 cups buttermilk at room temperature
115g (½ cup) butter, melted and cooled to room tempeature
2 eggs, at room temperature
1 tsp pure vanilla extract
Optional: chocolate sauce and cocoa nibs or chocolate chips to serve

In a large bowl, whisk together the flour, cocoa powder, sugar, baking powder, baking soda and salt; set aside.In a medium bowl, whisk together the buttermilk, butter, eggs and vanilla extract. Add the wet ingredients to the dry ingredients and gently whisk to combine. Do not overmix.

Spray a waffle iron with non-stick cooking spray or brush with melted butter, then preheat. Once the waffle maker is ready, add the batter according to the manufacturer's instructions and cook for 2 to 3 minutes, or until the waffle maker indicates they are ready. Serve immediately, or place in oven to keep warm. Leftover waffles can be wrapped in plastic wrap, placed in a ziploc bag and stored in the refrigerator for 2 days or in the freezer for up to 1 month. Serve warm with a scoop of ice cream and drizzled with chocolate sauce and nibs.
Chocolate Buttermilk Waffles with Fresh Mint Ice Cream
Print Friendly and PDF

Wednesday, January 1, 2014

Mango Curd Tart with Toasted Coconut Crust

Mango Curd Tart with Toasted Coconut Crust
Happy New Year! What a crazy few weeks it's been. I'm finally getting settled into my new home, and testing out my brand new oven. It's all very exciting. I spent NYE with my family, and my Mum originally requested a lemon curd tart for dessert with some fresh blueberries that she bought on special. I decided to be difficult and I changed it from a lemon curd tart to a mango curd tart at the last minute. Mango curd is my current new baking love. I made it a few weeks ago for my brother's birthday and it was a revelation. The wonderful rich flavour of ripe, sweet mangoes is offset by the tang of lime juice.
Mango Curd Tart with Toasted Coconut Crust
My only concern about making this curd as the filling of my tart was that it was rather runny the last time I made it and I didn't want to cut into my tart and have the filling pooling out all over the plate. To be safe I added a tiny bit of gelatine to the mixture and it did the trick. The curd stayed juuust firm enough to hold itself while it was cut into slices, but not enough to stop the creamy filling from melting in your mouth. Of course, if you don't eat gelatine you can always skip this and maybe add a little extra butter to ensure it sets.
Mango Curd Tart with Toasted Coconut Crust
Instead of a plain old shortcrust pastry for the tart shell, I wanted to add toasted coconut to the crust. I found the perfect recipe with a quick google search, it was really easy to mix up in my food processor (though you could probably just mix the ingredients together with an electric mixer too), and made this perfect, super thin, crisp and golden crust, fragrant with toasted coconut. It was the such a great pastry to match with the mango filling.
Mango Curd Tart with Toasted Coconut Crust
The blueberries were a little unnecessary, but like I said in my last post I'm making sure to make the most of the cheap, super sweet fresh summer berries in Australia at the moment. I've got a very busy week coming up with my niece's 1st birthday so I will hopefully have lots of new recipes and photos to share with you. Hope you all have a fantastic New Year!
Mango Curd Tart with Toasted Coconut Crust
(Curd recipe adapted from Smitten Kitchen, pastry recipe from epicurious)
For the toasted coconut crust:
1/2 cup (50g/1 3/4 oz) dessicated coconut
3/4 cup (about 105g) plain/all-purpose flour
100g (7 tbsp) cold butter, cut into cubes
1/3 cup (about 40g) icing/confectioner's sugar
1/4 tsp salt

Preheat oven to 180°C (350°F) and grease a 23cm (9 inch) loose-bottomed tart tin. Spread coconut in an even layer on a baking tray and toast in the middle of the oven, stirring occasionally until golden brown, about 10 to 12 minutes. Remove from oven (leaving oven on), and allow to cool to room temperature. Place cooled coconut, flour, butter, icing sugar and salt in a food processor and pulse until dough just begins to form a ball. Using floured fingers, press dough in evenly on to bottom and sides of prepared tin (there is only enough to form a thin layer, so you must make sure it is as even as possible or it may crack at weaker spots). Place in freezer for 10 minutes, then bake in oven for 25 minutes or until golden. Cool completely in tin on a wire rack then carefully remove.

For the Mango Curd:
1 tsp powdered gelatine
1 ripe mango (about 450g/15oz), peeled, pitted, cut into 1/2-inch pieces
1/3 cup sugar
3 tbsp fresh lime juice
Pinch of salt
4 large egg yolks
60g (1/2 stick) butter, cut into small pieces
Optional: fresh berries to decorate

Mix gelatine in a small bowl with 1 tbsp cold water and set aside. Puree mango, sugar, lime juice and salt in processor, scraping down sides of work bowl occasionally. Add yolks; puree 15 seconds longer. Strain through sieve set over large metal bowl, pressing on solids with back of spatula to release as much puree as possible. Discard solids in sieve.

Set metal bowl over saucepan of simmering water (do not allow bottom of bowl to touch water); add gelatine mixture to bowl and whisk puree until gelatine dissolves, mixture is thickened and thermometer registers about 80°F( 170°F), about 10-15 minutes. Remove from over water. Whisk in butter 1 piece at a time. Cover and chill to room temperature, then pour into prepared crust and refrigerate overnight. Can also be decorated with fresh berries before chilling. Serve straight out of the fridge.
Mango Curd Tart with Toasted Coconut Crust
Print Friendly and PDF

Wednesday, December 25, 2013

Christmas Trifle with Layered Jelly

Christmas Trifle with Layered Jelly
It's Christmas! Okay, I'll make this fast. I just really, really wanted to get some shots of my enormous Christmas Trifle that I'm bringing along to the family lunch today! Isn't it glorious? And made in a very short amount of time and with no oven. I'm finally moved into my new house and only just got my oven installed a day or so ago, so I went with the store-bought jam rolls this year. I'm not ashamed, like I've mentioned before I think that trifles are one of the few places where store-bought sponge is totally acceptable!
Christmas Trifle with Layered Jelly
So what's in this trifle? I kept it quite simple except for the pretty, pretty jelly. I was inspired after seeing the Pioneer Woman's Christmas Finger Jello recipe, and decided that it would be the perfect decoration for the jelly layer of my trifle this year. It takes a bit of time and patience but it was totally worth the effort. I sped the process up by setting my jelly in my huge new freezer (YAY).
Christmas Trifle with Layered Jelly
Since we don't get the magic of a white Christmas here in Australia, I needed to at least celebrate the wonderful summer fruit that we have available at this time of year. So there are super sweet strawberries in the middle, and lovely fresh cherries on top. And of course lots of vanilla bean custard (definitely not store-bought) and freshly whipped and sweetened cream.
Christmas Trifle with Layered Jelly
All business from the top, and a party downstairs! So there's no real recipe for this post, but heres a guide for how to recreate this monster of a trifle:
For the jelly: As per Pioneer Woman's recipe

For the vanilla bean custard: As per this custard recipe (I made 1.5x the amount just in case)

To assemble: Cut jelly into cubes and arrange in a single layer, top with a layer of custard (about half of your custard). Cut store-bought mini jam rolls into thirds and arrange in a single layer. Top with a layer of fresh halved and hulled strawberries. Cover with another layer of custard and another layer of jelly. Chill overnight. Before serving, whip 2 cups of thickened cream with 1/4 cup icing/powdered sugar to soft peaks and spread over the top of the trifle. Decorate with fresh cherries.

Merry Christmas Everyone!
Christmas Trifle with Layered Jelly
Print Friendly and PDF

Monday, December 2, 2013

Christmas Mess with Christmas Tree Meringues

Christmas Mess with Christmas Tree Meringues
It's December! I don't know how that happened. This year has been a total whirlwind! Anyway, the start of December means that I can start posting Christmas recipes, YAY! In case you didn't know, Christmas is my favourite baking season and generally one of my favourite times of the year. I can't help getting caught up in the festivities. The only part I don't look forward to is the stressful Christmas present shopping because I'm a terrible procrastinator and always end up leaving it until the very last moment.
Christmas Mess with Christmas Tree Meringues
Over the last few months I've been making a lot of Eton Mess. It's one of my favourite desserts because it is so simple to make, absolutely delicious and not too heavy. I love strawberry desserts. I've made it numerous times over the last few months, either in individual cups or in one giant bowl served up to a group of people. It's the ideal dinner party dessert because it's so quick and easy to make and as the name implies, you don't have to concern yourself with the presentation because it's just meant to be a big mess of cream, meringue and strawberries.
Christmas Mess with Christmas Tree Meringues
But this time around, I decided to fancy it up a little bit so that I could take pictures that didn't look like a big ugly blob in a bowl. I remembered Jacq's pretty Christmas Tree-shaped meringues from the blogger picnic a few years ago, and I thought they would be a great twist on the plain meringue cookies that you usual crumble into the Eton mess mixture. Plus I added some of the usual Christmas spices to the strawberry sauce, and there you have it; Christmas Mess.
Christmas Mess with Christmas Tree Meringues
The Christmas Tree meringues definitely make this special. They're actually quite easy to make (if you're patient) and even if you don't want to make the whole dessert, just making these meringues is a great holiday treat. I actually used pandan paste to colour and flavour these little meringues, it worked perfectly! Of course you could just use green food colouring, and you could even add a little vanilla or peppermint flavouring if you like. I bet a peppermint meringue version with chocolate sauce would be great too!
Christmas Mess with Christmas Tree Meringues
Even when you put the effort into layering all the ingredients neatly, once you start digging your spoon into it, you'll still end up with one big mess in your bowl. It's a little bit sad to smash up those pretty trees with your spoon but you won't regret it once you start eating it. I've included two versions of the strawberry sauce, one using fresh and one using frozen berries because I know they won't be in season for a lot of people. For the record I used frozen berries for the dessert in the photos, but usually I prefer to use fresh berries if I can get them, because this type of dessert really celebrates the freshness of the berries.
Christmas Mess with Christmas Tree Meringues
(meringue recipe adapted from Penguin Says Feed Me, serves about 4-6 people)
For the Christmas Tree Meringues:
2 egg whites, at room temperature
125g (about 2/3 cup) caster/fine granulated sugar
Green food colouring (preferably gel colouring) or pandan paste
Optional: star-shaped sprinkles to decorate

Preheat the oven to 120ºC (250ºF) (if fan-forced, 100ºC (215ºF). Line two baking trays with baking paper. Place egg whites in a large mixing bowl and beat on high with an electric mixer until soft peaks form. Gradually add sugar, once the sugar has been incorporated, add the green food colouring until the desired colour is achieved (I used about 1/2 tsp). Continue to beat until until glossy, firm, very stiff peaks form (pinch a small amount of mixture between your fingertips to ensure that the sugar has completely dissolved into the mixture). Place mixture in a piping bag with a 1cm wide star tip. Pipe the meringue onto prepared trays in a tall-narrow spiral motion to create a tree shape. The base of the spiral should be about 2cm in diameter. Leave enough room between each tree to allow for the meringue to spread slightly. Top each tree with a star decoration.

Bake in the oven for about 45-60 minutes (actual baking time will depend on the size of your meringues), or until dry, cooked through and easily lifts off the baking paper. If your meringues start to brown in any way then your oven is too hot, reduce the temp and increase the baking time. When ready, turn off the oven and open the oven door slightly ajar and allow the meringues to cool completely in the oven. Once cool, store in an airtight container until ready to serve.
Christmas Mess with Christmas Tree Meringues
For the Christmas Mess:
250g (1 punnet/9oz) strawberries (fresh or frozen)
2 tbsp golden syrup (can substitute with molasses)
1/2 tsp ground cinnamon
1 tsp ground ginger
1 vanilla bean pod, split and seeds scraped
600ml thickened cream, cold
2 tbsp icing (powdered) sugar, sifted
Pinch of freshly grated nutmeg

If using fresh strawberries, hull and halve strawberries, then place in a bowl with golden syrup, cinnamon, ginger, and vanilla bean seeds and pod and allow to marinate in the fridge for at least an hour. If using frozen, place whole strawberries, golden syrup, cinnamon, ginger, and vanilla bean seeds and pod in a small saucepan and stir, simmering over medium heat until thickened. Remove vanilla bean pod from mixture and chill mixture until ready to serve. When ready to serve, whip cream with icing sugar and nutmeg until soft peaks form. Assemble right before serving or meringue will go soggy. Using 1/2 cup capacity serving glasses (the cups in the photos are actually 1 cup capacity and too large for a single person serve, so use about half the amounts pictured), layer strawberry sauce, cream and meringue. I crumbled one layer of meringue in the middle and then topped with whole Christmas tree meringues on top. (Alternatively you can layer all the ingredients in a large trifle bowl and spoon serves into smaller bowls.)
Print Friendly and PDF