Monday, November 4, 2013

Coconut Croissant Pudding with Kaya

Coconut Croissant Pudding with Kaya
I have a small confession to make; I've never really gotten excited about bread and butter pudding. There's something slightly unappealing about the idea of baked soggy bread to me. I know, you'd expect me to be a fan of anything sweet, but this is one of the ones that I haven't gotten my head around until now. (I'm also still on the fence about rice pudding.)
Coconut Croissant Pudding with Kaya
But a few weeks ago my friend Re asked me why I had never tried making bread and butter pudding. She suggested that I try and make it with an ingredient that I loved to make it my own; kaya (Malaysian coconut jam). I was suddenly intrigued. And then I recalled a super old episode of Nigella where instead of using stale bread, she used stale croissants to make a very indulgent version of bread and butter pudding with caramel. At the time I scoffed at the idea of ever having croissant sitting around my house long enough to go stale. I put off doing this for so long because the two most important ingredients (croissants and kaya) were things that I tend to eat quickly so I don't have enough of it leftover to make anything with! But now the idea of trying this dish was good an idea to pass up. I bought a bunch of croissants and hid them away to stop myself from eating them. I hoarded a few jars of kaya from the Asian grocers.
Coconut Croissant Pudding with Kaya
To keep going along with the whole coconut theme of this dish, I made a coconut custard mixture to soak the croissants in, as well as dolloping a generous amount of kaya throughout the pudding. To add a bit of crunch, I sprinkled some roasted coconut chips after baking. The result was kind of incredible. A puffed, golden brown pudding with flakey buttery layers, mixed with a lovely coconut flavoured custard and warm pockets of coconut jam and that last final crunch of the coconut flakes on top. It smelt SO GOOD. It tasted even better, especially when it was straight out of the oven and the pastry was still all flaky and a little crunchy on top.
Coconut Croissant Pudding with Kaya
This is definitely not a light dessert. But I didn't find it over-the-top heavy since I decided not to add any extra sugar to the egg mixture as I knew I was adding so much coconut jam. The mixture has enough moisture that you don't need to add any sauce or cream to enjoy it, though serving it with a some extra kaya will surely go down well.
Coconut Croissant Pudding with Kaya
Yeah don't ask my why I'm making seasonal berry cheesecakes one week and then a pudding the next week (after a couple of boiling hot days too). There's no method to my madness, I just really wanted to try making this. And I'm so glad I did. I think I may be a convert to this whole bread and butter pudding thing, but it might just be due to the buttery croissants and abundance of kaya. I'm so glad my friend pushed me to try something new, it's so easy for me to stay in my comfort zone of baking.
Coconut Croissant Pudding with Kaya
I don't expect everyone who reads this recipe to know what kaya is (though regular readers should be fairly familiar with it, since I'm so obsessed with the stuff), or to have easy access to it (you can make it yourself but it's quite time consuming) so I've included alternate ingredients if you still want to make a coconut croissant pudding. However a lot of Asian supermarkets these days (at least in Aus) stock kaya now, you can usually find it near the coconut milk and cream. If you're in Sydney I'd recommend the Nona brand, I've seen it at Castle Towers, Eastwood and Chatswood Chase. It's definitely worth tracking down for this dessert, it just adds a little something.
Coconut Croissant Pudding with Kaya
Coconut Croissant Pudding with Kaya (Coconut Jam)
(serves about 6, adapted from this Martha Stewart recipe)
About 3 croissants, torn into large pieces (you may need to adjust the amounts of this recipe to suit the size of your baking dish)
2 large eggs
1/2 cup coconut milk
1/2 cup coconut cream
1/4 tsp salt
2/3 cup kaya (you can make your own, or if unavailable add 1/2 packed cup brown sugar and 1/4 tsp vanilla extract to your egg mixture)
Roasted coconut flakes (or shredded/desiccated coconut)
Optional: a few drops of vanilla or pandan extract to add extra fragrance

Preheat oven to 150°C (300°F) and butter a shallow, heavy baking/gratin dish or iron skillet (mine was approx 21cm x 15cm). In a large mixing bowl, whisk together eggs, salt, coconut milk and coconut cream (and sugar and vanilla if you are not using kaya). Add croissant pieces and allow to soak in mixture for about 10 minutes. Pour contents into prepared dish, layering with large dollops of kaya throughout the dish. If using untoasted coconut, sprinkle over the top and place in the oven.
Coconut Croissant Pudding with Kaya
Bake for 40-50 minutes or until puffed and golden brown on top and a skewer inserted into the centre (a non-kaya part) comes out clean. At this point I sprinkled roasted coconut chips over the top, but you can skip this if you baked it with coconut flakes on top. Serve immediately, can be served with extra kaya.
Coconut Croissant Pudding with Kaya
Print Friendly and PDF

Monday, October 28, 2013

Triple Berry Japanese Cotton Soft Cheesecake

Triple Berry Japanese Cotton Soft Cheesecake
The best thing about the warmer months is the abundance of fresh berries. They are so colourful and delicious and I just want to put them on every single dessert I make. This week I happened to walk past a big batch of fresh mulberries and I had to get them. For me mulberries bring back incredibly strong childhood memories of picking them off my neighbour's mulberry bush in Perth, gathering them in a big white ice cream container and washing them off with the garden hose before eating the whole lot in one go with my brother. I love them.
Triple Berry Japanese Cotton Soft Cheesecake
To go with my haul of fresh berries I made this light and fluffy Japanese Cotton Soft Cheesecake. We've talked about this type of cheesecake before. We like this cheesecake. It's the perfect balance between a cheesecake and a spongecake. It's only downside is that it doesn't have a crust. I do like a good cheesecake crust...but it's still pretty great without it.
Triple Berries
I got a little fancier with it this time by making three separate layers, each flavoured with a different berry. I love how pretty it looks with the separate layers, almost like an ombre cheesecake. But to be honest when you're eating it with all the fresh berries you can't really taste the difference between the layers, so it's mostly just there for the visual effect.
Triple Berry Japanese Cotton Soft Cheesecake
I couldn't resist pulling out my heart-shaped tin for this one. The only time I get uneasy about baking heart-shaped things is around Valentines day. Any other time of the year it's all good! Because it was such a fluffy cheesecake it ended up rising a LOT higher than the edges of my tin, so it was a good thing I reinforced the sides higher with lots of baking paper. After topping off the cheesecake with fresh berries, I decided to add a lemon jelly glaze over the top to give it a bit of shine and an added bit of tang. I love how luscious it makes the berries look!
Triple Berry Japanese Cotton Soft Cheesecake
The important thing with this cake is to make sure you bake it for long enough and cool it down slowly so the middle doesn't collapse in on itself. You'll always get a tiny bit of shrinkage as it cools but if it's set enough and you are patient then you'll end up with a fairly smooth top. I was pretty pleased with myself this time, I usually tend to rush it and turn the middle into a pancake. This time it stayed tall and so pretty with those three distinct layers. The cheesecake on its own is not very sweet at all so it really benefitted from having all the berries on top. Ooh or you could try covering the top of it in lemon curd, that would be great!
Triple Berry Japanese Cotton Soft Cheesecake
Triple Berry Cotton Soft Cheesecake
(adapted from Diana's Desserts)
250g/9oz cream cheese
50g/1.75oz butter
100 ml (1/3 cup + 1 tbsp) fresh milk
60g/2 oz plain/all-purpose flour
40g/1.5 oz cornflour (cornstarch)
1/4 tsp salt 
1 tbsp lemon juice
6 egg yolks
6 egg whites 
140g/5oz fine granulated sugar (caster sugar)
1/4 tsp cream of tartar
3 cups (about 300g) berries, fresh or frozen (and thawed), I used 1 cup blueberries, 1 cup strawberries, 1 cup blackberries
Optional: Fresh berries to decorate 
 
Puree (and strain if you prefer not to have seeds) your berries, keeping each type of berry separate if you want different flavoured layers, otherwise blend them together. Preheat oven to 160°C (320°F). Grease base and sides, and line the base and sides of a 20cm (8inch) round (or heart) baking tin with baking paper (it's best to avoid springform tins as it will be placed in a water bath). Melt cream cheese, butter and milk in a heatproof mixing bowl over a pot of simmering water, whisking until smooth. Cool the mixture. Fold in the flour, the cornflour, egg yolks, lemon juice and mix well. In a separate mixing bowl, whisk egg whites with cream of tartar until foamy. Add in the sugar and whisk with an electric mixer until soft peaks form. Add cream cheese mixture to egg white mixture and stir until combined. If making separate layers, split mixture between three bowls. Fold in berry puree. 
Triple Berry Japanese Cotton Soft Cheesecake
Pour one layer of cheesecake into the prepared tin and bake in a water bath  for about 10-15 minutes until the surface is just set, then pour the next layer on top carefully and bake for another 10 minutes. Pour on the final layer of cheesecake and bake for a further 50-60 minutes, until the top is turning golden and the middle is set. Gently cool the cheesecake to prevent the centre from collapsing, I did this by turning the heat down by half 10 minutes before it was done, then turning off the heat for another 10 minutes, and leaving it to cool with the oven door crack open for another 10 minutes. If you are baking a single layer cheesecake, bake for about 1hour 10-15 minutes until done. 

If the top starts to brown too quickly, carefully cover with a sheet of foil. Make sure your cheesecake is set before removing from oven, don't worry about it drying out as the berries will stop this. Cool in tin and then carefully transfer to a cake plate to serve. Top with extra berries. (I also glazed the top of the cake and the berries with a lemon jelly by mixing 1 tbsp gelatine powder with 1 tbsp hot water to dissolve, plus 1 tbsp lemon juice and 1 tbsp icing/powdered sugar). Keep in fridge until ready to serve.
Triple Berry Japanese Cotton Soft Cheesecake
Print Friendly and PDF

Monday, October 21, 2013

Black Tea Cupcakes with Lemon Icing

Black Tea Cupcakes with Lemon Icing
I've been feeling uninspired lately. It just happens sometimes. When you bake as often as I do, you're bound to have phases where you can't come up with a recipe idea that sounds interesting or exciting. It's best not to force it. It's not the time for crazy rainbow cakes or salted caramel brownie oreo-stuffed peanut butter s'mores concoctions. When these moments occur I always go back to the basics. I think about what I enjoy baking and what I feel like eating.
Black Tea Cupcakes with Lemon Icing
For anyone who's read my blog for long enough, it should come as no surprise that I ended up using black tea in these cupcakes. I am a big tea fan. I come from a family of tea drinkers and I married into a family of tea drinkers. I've used Earl Grey and Jasmine tea in desserts before, but this time I just wanted to use some good ol' black tea. The milk for these cupcakes was infused with black tea leaves, and I mixed some of tea leaves straight into the cupcake batter to ensure that you get a strong hit of tea flavour when you bite into it. I topped them with a super tangy lemon icing on top, making these cupcakes taste a bit like ice lemon tea.
Black Tea Cupcakes with Lemon Icing
I baked half of these in my silicone tea cup cases, I couldn't resist the novelty of it. The rest I baked in plain paper cases but then presented them in my favourite china tea cups. They looked so adorable, I think they would make a great dessert or afternoon tea treat, served with little dessert spoons or forks to eat them straight out of the tea cups.
Black Tea Cupcakes with Lemon Icing
The important thing to remember is to make sure you don't over-bake the cakes. Because I based it on a muffin recipe the dry to wet ingredients ratio might be a little high for a cupcake, but I took them out as soon as a skewer inserted into the centre came out clean and they were super soft and fluffy. But if you find they are on the dry side then you might need to reduce the flour amounts a bit. I also added a tiny bit of honey to the batter to temper any bitterness that might come through from the tea leaves. You can't go wrong with honey, lemon and tea.
Black Tea Cupcakes with Lemon Icing
(adapted from this Earl Grey Muffin Recipe)
3 black tea bags (or about 3 tsp loose tea leaves)
250ml (1 cup) milk
155g (3/4 cup) caster (superfine) sugar
125g (1 stick plus about 1 tbsp) butter, softened
2 eggs, room temperature
1 tbsp honey
350g (about 2 1/2 cups) self-raising flour

Preheat oven to 180°C (350°F) and line a 12-hole cupcake tin with cupcake papers (or you can use these silicone tea cupcake moulds). Empty the tea leaves into a small saucepan with the milk and warm until it is nearly boiling, whisking reguarly. Remove from the heat and allow to cool. At this point you can strain out all the leaves, I kept about half the leaves in the mixture to ensure a strong tea flavour in the final cupcake. Place butter and sugar in a large mixing bowl and beat with an electric mixer on high until light and fluffy, at least 5 minutes. Add eggs one at a time, mixing until well combined. With the mixer on low, add honey, followed by 1/3 of the flour. Then add 1/2 the milk mixture, another 1/3 of the flour, then the remaining milk and flour and gently mix until just smooth. Spoon mixture into the cupcake liners, filling them about 2/3 full and bake for 15-20 minutes or until they start to turn golden and a skewer inserted into the centre of a cupcake comes out clean. Try your best not to over-bake them as it will dry them out. Cool in tin for 5 minutes then remove and cool on a wire rack completely
Black Tea Cupcakes with Lemon Icing
For the icing:
250g (about 2 1/4 sticks) butter, softened
500g (about 4 cups) icing/confectioner's sugar, sifted
3-4 tbsp lemon juice (about 1 lemon), adjusted to taste

Place butter in a large mixing bowl and beat with an electric mixer on high speed until light and fluffy. Gradually add icing sugar and lemon juice, then beat on high until smooth, fluffy and pale. Place in a piping bag with a star tip and pipe over cooled cupcakes. Serve as is or in tea cups with dessert spoons or forks. Can be stored in an airtight container in the fridge for several days, serve at room temperature.
Black Tea Cupcakes with Lemon Icing
Print Friendly and PDF

Monday, October 14, 2013

Carrot Cake with Lemon Ginger Mascarpone Icing

Carrot Cake with Lemon Ginger Mascarpone Icing
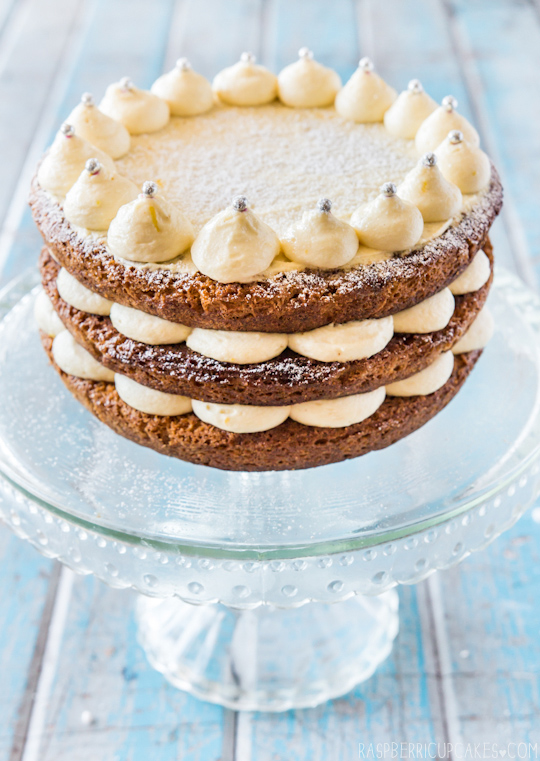
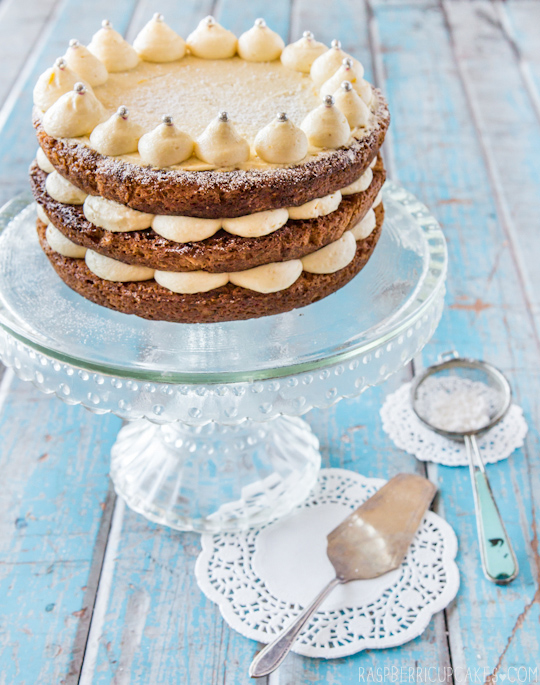
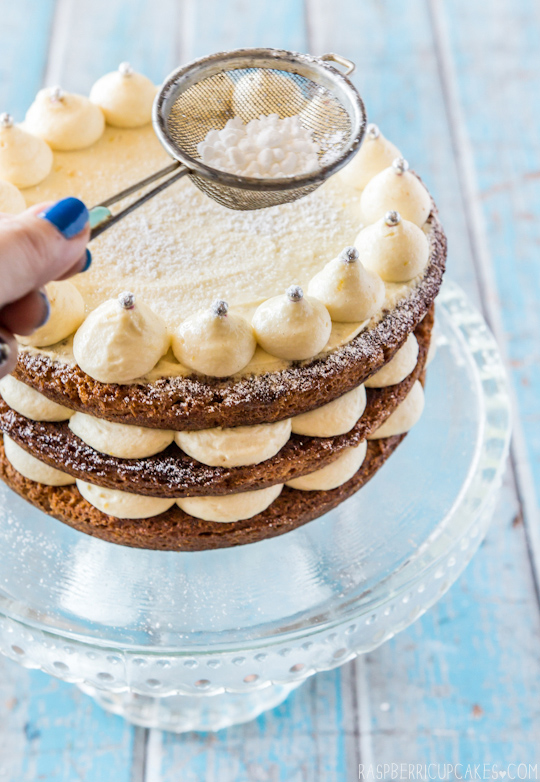
This cake. It pains me a little to look at the photos of this cake. At the same time it makes me a little glad that I took photos of this cake before it met its doom. If you follow me on instagram or facebook then you will already know that about 2 hours after I took these photos this cake was lying upside down IN THE MIDDLE OF THE ROAD. It was quickly followed by my high pitched shriek of horror while having flashbacks to the time I dropped a 7-layer trifle on my carpet. I don't even know how it happened. I'm never trusting cake carrier containers ever again.
Carrot Cake with Lemon Ginger Mascarpone Icing
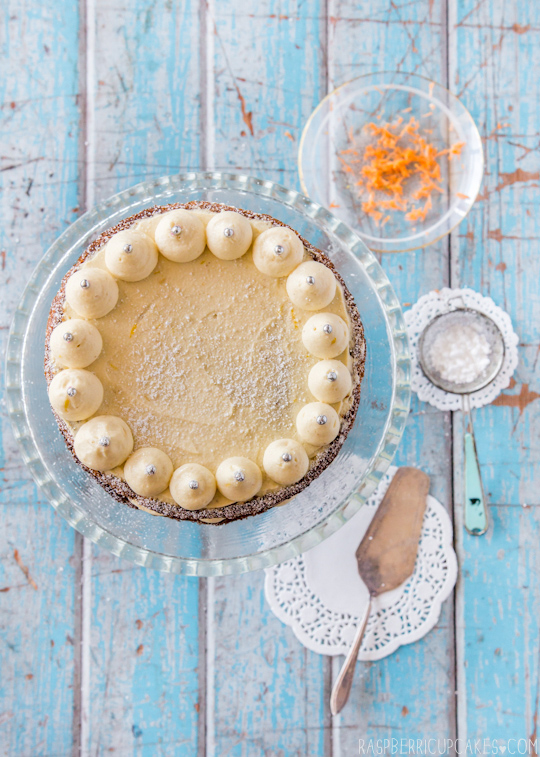
The funny thing was, I wasn't completely happy with how I decorated the top of the cake anyway. I changed my mind several times while making it and the final result wasn't exactly what I had hoped for. But it was good enough. I guess it just wasn't meant to be? Anyway, with a car rushing towards the doomed cake, we scooped it up (surprisingly intact except for the completely smushed top layer) and dumped it back on the cake carrier and ran. Oh and did I mention this cake was for my Mum's birthday?
Carrot Cake with Lemon Ginger Mascarpone Icing
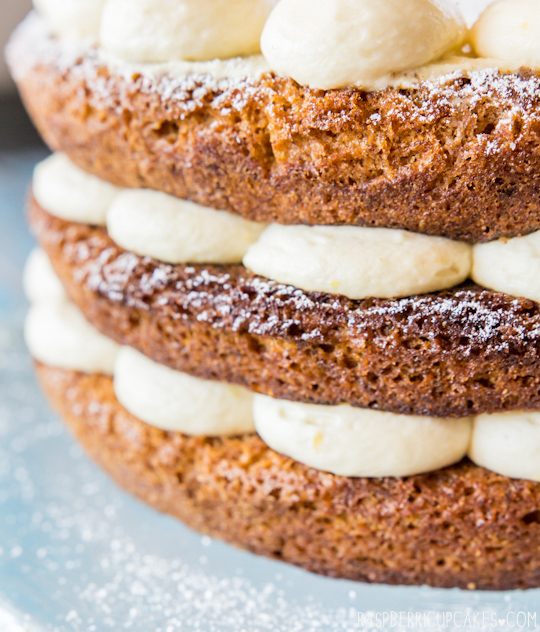
My family were highly amused when they saw the roadkill cake. Luckily for me the cake seemed to fall straight on its face without touching anywhere else so I was able to do a quick salvage operation and chop off the top, flip the cake over and dust it with loads of icing sugar. It still wasn't the same, I think the fall made the whole cake deflate a little so it was a lot shorter than it looks in these photos.
Carrot Cake with Lemon Ginger Mascarpone Icing
But in the end it tasted pretty amazing (and not at all gravelly as far as I could tell). This is actually the first time I've baked a carrot cake, I usually avoid it since the recipe always contains walnuts and I'm allergic to them. I skipped the walnuts this time but I think the crunch of nuts was definitely missed. Next time I might try using pumpkin seeds or pine nuts to add that extra texture. The cake recipe was adapted from Bourke St Bakery's recipe, it's a really interesting recipe that is almost like a sponge cake. Instead of making one tall cake I split the mixture between my three cake tins (I'm so glad I did that, if I had dropped a 1 layer cake it wouldn't have been salvagable). It meant that there was a nice amount of icing with each mouthful of cake. And since I know my Mum doesn't like her cakes too sweet, I replaced the normal cream cheese icing with a very light and fluffy mascarpone and cream icing flavoured with ginger and lemon. It was zesty and light and definitely not too sweet. I couldn't get a shot of a cake slide since it was a birthday cake but there is a dodgy iphone shot of the innards below. The most important thing is that Mum enjoyed it, though she is making a case for a second birthday cake since her first one ended up on the ground. Happy Birthday Mum!!!
Carrot Cake with Lemon Ginger Mascarpone Icing
Carrot Layer Cake with Lemon Ginger Mascarpone Icing
(carrot cake adapted from Lisa's version of the Bourke St Bakery Carrot Cake, icing adapted from Martha Stewart)
For the carrot cake:
70g walnuts (I'm allergic so I skipped this, you could substitute with pine nuts or pumpkin seeds if you still want the crunch)
150g (about 1 cup plus 2 tbsp) self-raising flour
1/4 tsp baking powder
1/4 tsp baking (bi-carb) soda
1 tsp ground cinnamon
1/4 tsp ground cloves
1/4 tsp ground nutmeg
1/4 tsp salt
2 egg whites
60g (about 1/4 cup) caster (superfine) sugar (for eggwhites)
1 egg
1 egg yolk
160g (about 2/3 cup) caster (superfine) sugar (for egg yolks)
170ml (about 3/4 cup) extra light olive oil
125g (4.4 oz, about 2-3 carrots) of peeled and grated carrots

Grease well and line the base and sides of three 18cm (7inch) round cake tins, or two 20cm (8inch) tins.  Preheat oven to 200°C (390°F) (or 180°C (350°F) fan-forced). Place the walnuts on a baking tray and cook for 4-5 minutes or until lightly roasted. Cool and cut into thirds. Sift the flour, baking powder, baking soda, cinnamon, cloves, nutmeg and salt into a bowl. Repeat to ensure they are evenly mixed. Put the egg whites in a large clean bowl. Whisk egg whites on high speed with an electric mixer until soft peaks start to form. Slowly add 60g of sugar while whisking and continue mixing until soft peaks form. Transfer the meringue to another bowl and set aside until needed.

Placethe egg and egg yolk in the large mixing bowl and add the sugar for egg yolks. Mix on high speed with an electric mixer for 3-4 minutes or until the mixture doubles in volume and is quite airy. With the mixer still on, slowly pour the oil in a thin stream being careful that it doesn’t split or deflate too much. Remove the bowl from the mixer and with a spatula, gently fold in the flour mixture until combined. Fold in the carrots and walnuts. Working quickly, lightly fold in the meringue, but do not fold in completely. You should still be able to see some white streaks through the mixture. Pour equal amounts of the mixture into the prepared tins and bake for 25-30 mins, or until a skewer inserted into the centre of the cake comes out clean and the surface of the cake springs back when lightly pressed. If using two or one tin instead of three you should increase your baking time accordingly. Cool in tin for 5 minutes then carefully remove and cool completely on a wire rack.
Carrot Cake with Lemon Ginger Mascarpone Icing
For the icing:
340g (12oz) mascarpone cheese, room temperature
3/4 cup (about 100g) icing (confectioners') sugar, sifted
1 tbsp powdered ginger, can be adjusted to taste
Zest of 1 lemon + 2 tsp lemon juice
1 1/2 cups (about 360ml) thickened (heavy) cream

Place mascarpone, icing sugar, powdered ginger and lemon zest and juice in a large mixing bowl and whisk together with a hand whisk until smooth. In a separate clean mixing bowl, whisk cream until soft peaks form. Take care not to overwhip. Fold cream into mascarpone mixture until smooth then place in a piping bag with a 1cm round tip. 

To assemble; place one layer of cake on your cake stand or plate. Pipe rounds of icing just inside the edge of the top of the cake if you want to create the scalloped effect, then fill in the rest of the top of the cake. Cover with another layer of cake and repeat. For the top of the cake I spread a thin layer of icing using a spatula and then repeated the piped rounds around the edge of the cake and topped with soft silver cachous and a dusting of icing sugar. Alternatively you can just dust with icing sugar or top with a smooth layer of icing and more toasted walnuts. Keep chilled in the fridge until ready to serve.
Carrot Cake with Lemon Ginger Mascarpone Icing
Print Friendly and PDF

Tuesday, October 8, 2013

Salted Honey Rice Krispies Treats

Salted Honey Rice Krispies Treats
I'm so grateful for long weekends. I've been acutely aware of the fact that this time last year I was on my honeymoon in Europe and that I haven't been out of Sydney since then. I am long overdue for a holiday! Unfortunately life is getting in the way of holidaying, so I just have to be glad that I got an extra free day yesterday.
Salted Honey Rice Krispies Treats
For some reason I really, really wanted to eat Rice Krispies Treats. I needed any excuse to make them so I could chow down on them. Whatever you call them, Rice Krispies/Bubbles Treats/Squares/LCMs, these things are so easy to make and so darn addictive. It's such an easy thing to make that it almost doesn't qualify as a recipe (unless you want to make your own marshmallows, but this is the one occasion where I think that store bought marshmallows are okay to use).
Salted Honey Rice Krispies Treats
After seeing Y's GORGEOUS green tea & brown butter version, I have wanted to do some sort of rice krispie treat with an interesting flavour addition. And not too long ago my friend mentioned the curious idea of salted honey desserts. I was immediately intrigued because it was something so simple that I hadn't really heard of, but totally made sense. It's like salted caramel but without having to go through the trouble of caramelising sugar. I had to try it for myself. And it totally works.
Salted Honey Rice Krispies Treats
The salt in these offsets the super sweetness of the honey and marshmallows, and the honey adds a great flavour to these squares that makes them even more addictive than the plain version. Imagine a cross between a regular rice krispie treat and a honey joy. Nothing revolutionary but a definite crowd pleaser. Feel free to play around with the amounts of honey and salt to your liking. I made mine quite lightly flavoured but with lots of marshmallow to ensure they were extra gooey.
cosmo
To my pleasant surprise I am one of the top 3 finalists in the blogger category for Cosmo Australia's Fun Fearless Female Awards! Thanks to everyone who's voted for me so far, and please feel free to keep voting for me for the rest of the month :) You can vote here: http://www.cosmopolitan.com.au/celebrity/fun-fearless-female-2013/finalist-voting/ (up to three times per person per day if you feel like it).
Salted Honey Rice Krispies Treats
(makes 16 squares)
40g (3 tbsp) butter
1/3 cup honey (or more adjusted to taste)
1 tsp salt (adjust amounts ot taste if you wish)
275g (about 9oz) marshmallows (or about 4 cups miniature marshmallows)
6 cups (about 180g/6.4oz) Rice Bubbles/Krispies cereal
Melted butter/vegetable oil for greasing

Grease and line a square 20cm (8 inch) cake tin with baking paper. Grease paper. Melt butter over low heat in a large saucepan. Add honey, salt and marshmallows and stir continuously over low heat until marshmallows are completely melted (at this point you can taste the mixture to adjust the salt/honey amounts if you wish). Add cereal and remove from heat, stirring until mixture is evenly combined. Using a greased spatula, spread mixture into prepared tin. Use a piece of well greased baking paper to press down on the surface to ensure it is evenly spread. Set aside to cool completely, then remove from tin on to a greased piece of baking paper and cut with a greased, long sharp knife into 16 squares (or 25 if you prefer them smaller).
Salted Honey Rice Krispies Treats-5
Can be stored for up to 2 days in an airtight container at room temperature. You can also freeze them for up to 6 weeks and defrost them before serving.
Salted Honey Rice Krispies Treat
Print Friendly and PDF

Monday, September 30, 2013

Scones with Spiced Pineapple and Apples

Scones with Spiced Pineapple & Apples
Bleurgh. I woke up this morning with a serious case of the bleurghs. If this post stops making sense blame the cold and flu drugs! Right now I wish I still had a batch of these fluffy, warm scones with pineapple and apple pieces stewed in star anise, cinnamon and cloves. They would definitely make me feel less crappy!
Scones with Spiced Pineapple & Apples
I made these scones last week for my Mum. Every time she's in town she always requests a batch of fresh scones, which I am more than willing to do for her. My love of scones is well-documented, I must have gotten it from her. However she does not have my sweet tooth, and complains whenever anything is too sweet. So instead of serving these scones with the usual jam and cream I thought I would try cooking some fruit myself so I could control the sweetness.
Scones with Spiced Pineapple & Apples
The pineapples were looking super sweet at the store so I decided to pair them with some apples and cook them in spices so it would be similar in flavour to my favourite pineapple jam that you get on pineapple tarts, but without all the extra effort of grating the fruit. It worked out great, the star anise, cinnamon and cloves work so well with the sweet and sour flavours. I added a bit of palm sugar as well, just to give it a bit of colour and a touch more sweetness. To counter that I served it with some creme fraiche, which also saved me from having to whip up extra cream for serving. The only thing I'd change for next time is to cut the fruit up a little smaller to make it easier to pile on top of the scones and quicker to cook.
Scones with Spiced Pineapple & Apples
(scone recipe previously posted here)
For the stewed pineapple and apples:
1/2 a pineapple (cut weight about 350g), skin and core removed and chopped into small cubes (feel free to double the amounts if you have a whole pineapple, the amount I've specified is a nice amount to go with one batch of scones, you can also used canned pineapple if necessary)
2 cooking apples, peeled, cored and cubed (slightly bigger than the pineapple cubes, I used Granny Smiths)
1 star anise
5 cloves
1 cinnamon stick
20g palm sugar (replace with brown sugar if unavailable)

Place all the ingredients in a medium saucepan on medium heat and stir until the palm sugar melts and forms a syrup with the juices of the fruit. Continue cooking mixture until fruit is tender and syrup thickens slightly. Set aside to cool. Can be stored in a sterilised jar in the fridge.
Scones with Spiced Pineapple & Apples
For the scones:
2 cups self-raising flour
1/4 tsp salt
150ml (about 2/3 cup) pure/pouring cream (min 35% fat, heavy cream in the US)
150ml (about 2/3 cup) milk

Preheat oven to 230°C (445°F), 220 °C (430°F) fan-forced, line or grease a heavy based baking dish that has sides (or a 20cm square cake tin, scones baked close together will rise higher and thus be lighter). Sift flour and salt together in a large mixing bowl and make a well in the centre. Pour cream into the well and begin to cut cream into dry ingredients with a flat bladed knife, then gradually add milk using the same cutting motion, until there is enough to form a soft dough. 

Working quickly and gently, gather dough together on a floured bench (I usually place a big sheet of baking paper over a chopping board to make cleaning up easier). Try to handle the dough as little as possible, using lightly floured hands to stop dough sticking to you, and pat the dough into a rectangle about 3-3.5cm thick. You can lightly knead the dough with your hands for a smoother appearance but overknead it and your scones will be tough and hard. Cut out round using a 5-6cm scone cutter (push the cutter into the dough, don't twist) and place next to each other in your prepared tin.I usually manage to cut about 5-6 scones, then I pat the scraps together and cut out another 2-3 and finally pat the scraps from that together into a ball to form the final scone. Lightly brush the tops of the scones with some extra cream using a pastry brush. 

Bake for 10-15 mins, until scones are cooked through and tops are lightly browned (will take longer in a heavier baking dish). Serve immediately with stewed fruit and cream. I used creme fraiche instead of cream to add a touch of sourness to the mix. (I like to cover my waiting scones with a clean tea towel to keep them from going hard) Scones can be stored in the freezer for up to 3 months.
Scones with Spiced Pineapple & Apples
Print Friendly and PDF

Monday, September 23, 2013

Rainbow Cake with Jelly Beans

Rainbow Cake with Jelly Beans
My first rainbow cake. It was bound to happen eventually. But surprisingly, this is the first time after four and a half years of baking for this blog. Friends would look at me funny and say, "Are you sure you've never made a rainbow cake before?!". I've done rainbow sprinkle ombre cakes and rainbow-shaped cakes but for some reason I never went for the full rainbow cake experience.
Rainbow Cake with Jelly Beans
I remember the first time I laid eyes on a rainbow cake. It was on Kaitlin's amazing Whisk Kid blog and it blew my mind. Back then I had never seen anything like it and I was completely smitten. I remember thinking to myself that I would probably never have the talent and precision to make anything that perfect. And since then so many others have made equally impressive versions of the rainbow layer cake. It had been done. I remember wishing I could have it as my wedding cake but I wasn't able to get it. Sad face!
Rainbow Cake with Jelly Beans
But then a couple of weeks ago I had the challenge of coming up with a crazy birthday cake for my friend Regex Man. It's been getting pretty hard to beat my previous efforts for his birthday, most of them have turned out to be some of the most popular cakes on this site including the mint chocolate chip cake. I finally decided that this would be the perfect time to try my first rainbow cake. Sure it was nothing original but it was SO MUCH FUN. I've learnt so much about assembling layer cakes over the years and surprisingly this cake came together without much stress or mishaps. The important thing to remember; be patient! I baked three layers of this cake one night, three layers the next night and then iced it the morning after. Trying to do everything on the same day would have been exhausting.
Rainbow Cake with Jelly Beans
I did have a bit of a disaster when it came to decorating the outside of the cake. Originally I wanted to create this big complicated cake bunting thing by threading jelly beans together but I am so not a crafty person and it turned into a huge ugly mess of wasted jelly beans and string. So I went to plan B and just topped the cake with rainbow jelly beans. You can't really go wrong with that, especially when there is so much going on inside of the cake. I made sure that the colours really popped in the cake layers, I wasn't looking for a half-arsed pale/pastel rainbow, I wanted it to be really intense (It's so intense!) in colour. I used gel colouring because I know you get a really bold colour without having to use huge amounts. If you have a problem with using food colouring then this obviously isn't the cake for you. There's always natural food colouring options but I wanted the full-blown crazy rainbow effect and you can't get that with natural food colouring.
Rainbow Cake with Jelly Beans
I get a lot of questions about how I get my layers neat and even and icing smooth. I learnt from some great tutorials from other great baking blogs (here, here and here) and it's taken a bit of practice to get better at it. As I said, patience is the key. You need to give your cakes time to chill, they are so much easier to cut neatly if you chill them first. I always turn my cake layers upside down (at the very least the top layer) as it tends to help keep them level when you stack them. An offset spatula will make your life so much easier when you are smoothing your icing. Crumb coating. All these little things make a big difference. I still can't get the edges perfectly straight and even but I've always been a messy baker.
Rainbow Cake with Jelly Beans
Doesn't it make you happy just looking at it? I was expecting it to be nothing special to eat but I was actually really pleased with the taste. I used my trusty yellow cake recipe, the same as I've used for most of my vanilla layer cakes. The icing is just regular salted butter icing but with lots of lemon juice to help cut through all that sugar. I took extra care this time to make sure I didn't overbake my cakes at all, I took them out as soon as the skewer came out clean. The result was 6 layers of soft vanilla cake that wasn't the least bit tough or dry, even after all the mixing and chilling in the fridge. It was a little tricky to serve the cake as full-sized six-layer slices, so we ended up cutting it up into two layer slices. Obviously I went for a purple-blue piece.
Rainbow Cake with Jelly Beans
Rainbow Layer Cake with Jelly Bellys
(makes a six-layer 18-20cm cake, serves approx 40)
For the six layers of cake: (divide by 6 if you want to bake each layer individually)
530g (about 4 cups) plain (all-purpose) flour
6 tsp baking powder
3/4 tsp salt
340ml (about 1 1/3 cups) milk
4 tsp pure vanilla extract (if using essence reduce to 3 tsp)
600g (about 2 1/2 cups) sugar (I use caster/superfine but white/granulated is fine too)
340g (3 sticks) butter, softened
6 eggs, at room temperature
Food colouring (I used Wilton gel icing colouring, about 1/4-1/2 tsp per layer)

Preheat oven to 180°C (350°F) and grease whatever 18cm (or if you prefer, 20cm) round cake tins you have (I have 3 so I split the amounts listed above in half and did three cakes at a time. If you only have 1-2 tins you can prepare all the batter ahead of time and bake them one after another but the last cakes might not rise as much. You can also mix and bake one layer at a time, but this is very time consuming.). Line the base of tins with baking paper and grease paper. Combine flour, baking powder and salt in a medium bowl and set aside. Mix milk and vanilla together in a measuring jug or bowl.

Using an electric mixer on low speed, beat sugar and butter in a large bowl until blended. Increase speed to high and beat until pale and creamy, at least 5 minutes. Reduce speed to medium low, add eggs 1 at a time, beating well after each addition. Alternately add flour mix and milk mixture, beginning and ending with flour mixture (I did it by adding 1/4 of of the dry mixture followed by 1/3 of the wet mixture at a time). Beat until smooth, occasionaly scraping bowl with a spatula. Divide mixture evenly into 6 medium bowls (I did this by weighing the batter on kitchen scales to ensure consistency). Gradually mix in colouring until you are satisfied with the colour (gel colours will be more vibrant after baking). Try to avoid over mixing the batter, but it is quite forgiving. Pour batter into prepared tins and bake each layer for about 20-22 minutes or until a skewer into the centre comes out clean and the outside is golden, take care not to overbake or cakes will be tough. Cool in tin for 5 mins and then turn out onto wire racks to cool completely. Wrap in clingfilm and chill overnight.
Rainbow Cake with Jelly Beans
For the lemon icing:
(Note: I am only guessing at the right amounts here as I had to make extra icing to cover this cake. You may need to adjust the amounts/ratio to get the right icing consistency and volume)
800g (about 6 1/2 cups) icing (powdered) sugar, sifted (or blitzed in the food processor)
400g (about 3.5 sticks) butter (I use salted, add about 1 tsp of salt if you use unsalted)
1-4 tbsp lemon juice (or milk mixed with vanilla extract if you want vanilla icing), adjusted to taste/consistency

Prepare the icing; remove butter from fridge 30 mins before starting and chop into small cubes. In a large mixing bowl, beat butter on high with an electric mixer until smooth and fluffy. Reduce speed to medium-low and gradually add icing sugar until combined, then increase speed to high and beat until very pale and fluffy. Gradually add lemon juice to taste, you may need to add more icing sugar if your mixture is too runny, or more lemon juice or milk if you mixture is too stiff. The icing should be smooth and easily spreadable, but stiff enough to hold its shape.

To assemble cake; remove cake layers from the fridge and use a long shape knife (preferably serrated) to carefully trim the tops of the cake to ensure they are level. Flip your cake layers upside down before assembling. Place the purple layer on your cake plate/stand, spread a thin layer of icing over the top with an offset spatula (I used an ice cream scoop to ensure equal amounts between each layer, about 1 generous scoop for each layer). Repeat with the blue, green, yellow, orange and red layers. Crumb coat the cake and chill for about 15 minutes, then cover the cake with more icing and smooth out surface with an offset spatula. For a smoother finish, run your offset spatula under hot water and dry with a paper towel regularly.

Optional: To decorate; cover the top with rainbow jelly beans, or m&ms or skittles. Or you can cover the entire cake in rainbow sprinkles like this.
Rainbow Cake with Jelly Beans
Print Friendly and PDF