Monday, June 17, 2013

Giant Fairy Bread Cake

Giant Fairy Bread Cake
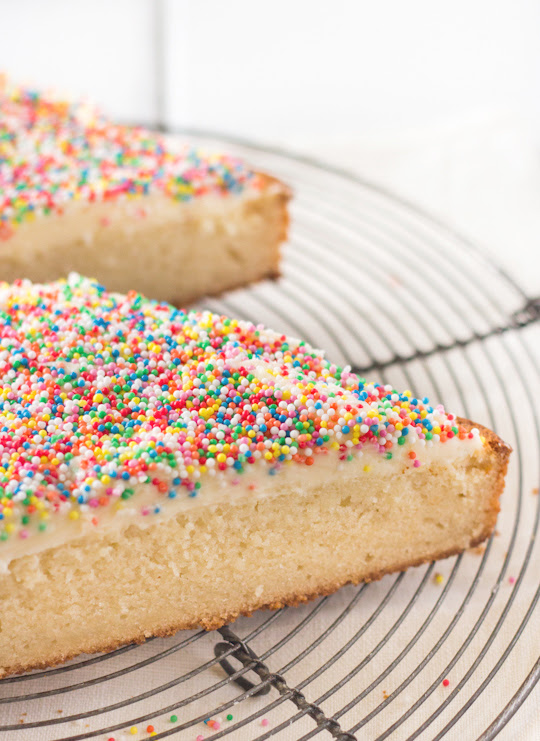
Your eyes do not deceive you. It's cake that looks like a giant piece of Fairy Bread. Fairy bread is such a funny thing, so many of us grew up with it as children in Australia but I've seen it receive mixed reactions from other people around the world. I guess it's just something you have to grow up with. I think it's pretty awesome. But I would, I love ANYTHING with sprinkles. Especially rainbow sprinkles.
Giant Fairy Bread Cake
I'm so in love with this cake because it combines so many of my favourite things. Sprinkles. Cake. Desserts that look like giant versions of other desserts (you might have seen my Giant Tim Tam Cake). This is the kinda thing that makes me happy. I truly believe that most desserts can be improved with the addition of rainbow sprinkles. Sure it's just sugar and food colouring (which is the root of evil in the eyes of many people these days), but there's something about 100s and 1000s that's so whimsical and fun.
Giant Fairy Bread Cake
I especially love this cake because it's such a simple idea. A plain vanilla pound cake, which I managed to bake into the shape of a perfect slice of bread (thanks to Lisa who let me borrow her cakewich pan), slathered with a salted butter icing and topped with lots and lots of happiness. Of course it wouldn't be fairy bread unless it was cut into triangles, right? Since I'm not usually a fan of spending money on single-use kitchen appliances, I would suggest trying this recipe in a square pan instead of the cakewich pan. It won't be quite as cute, but once it's cut into triangles you'll get pretty much the same effect.
Giant Fairy Bread Cake
Since the recipe is for a vanilla pound cake, it is quite dense and moist so you need to ensure you don't overbake the cake as this will make it dry and hard. I took my cake out as soon as a skewer inserted into the centre cake out just clean. Alternatively you could use your favourite vanilla butter cake, sponge cake or chiffon recipe. I think it's a great treat for kids and for the kids at heart, and even people who don't like fairy bread will enjoy it. Everyone needs more sprinkles in their life.
Giant Fairy Bread Cake
(adapted from the pound cake recipe on the Cakewich pan box)
For the cake:
250g (about 2 cups) plain flour
1 ½ tsp baking powder
¼ tsp salt
175g butter, softened
330g (about 1 ½ cups) caster sugar
1 tsp pure vanilla extract
6 large egg whites
¾ cup milk

For the icing:
125g salted butter, softened (or add 1/4 tsp of salt for unsalted butter)
250g (about 2 cups) icing sugar, sifted
1 tbsp milk
100s & 1000s (rainbow sprinkles) to decorate
For the cake, set the rack in the middle of the oven and preheat to 160°C (315°F). Grease the inner bottom surface of your Cakewich pan, alternatively you could try using a 20cm square cake tin that is greased and lined with baking paper. Combine the flour, baking powder and salt in a bowl, mixing well with a whisk. Whisk together egg whites and milk in a medium mixing bowl until just combined.

In large mixing bowl with an electric mixer, cream butter and sugar for about 5 minutes, until light and fluffy. Add vanilla and beat vigorously. Reduce the speed to low and add one quarter of the flour, then one third of the milk mixture, mixing until just combined and scraping down the bowl after each addition. Repeat until all ingredients are just combined. Scrape down the bowl with a rubber spatula. Pour the batter into the prepared pan and smooth the top. Bake for 50-65 minutes, or until a skewer inserted into the center comes out clean. Cool the cake in the pan on a cooling rack for 1 hour, then unmold it to finish cooling right side up.
Giant Fairy Bread Cake
Prepare the icing; place butter in a mixing bowl and beat on high with an electric mixer until smooth and fluffy. Gradually mix in icing sugar, add milk and then beat until light and fluffy. To assemble the cake, use a serrated bread knife to slice off the “dome” of the cake. Use a spatula to spread your prepared icing over the top. Cover the icing with 100s and 1000s/rainbow sprinkles (I placed my cake on a wire rack which was sitting over a baking tray to catch any sprinkles that overflowed). Can be served immediately or stored in an airtight container at room temperature for a couple of days.
Giant Fairy Bread Cake
Print Friendly and PDF

Friday, June 14, 2013

Milo Macarons


Milo Macarons
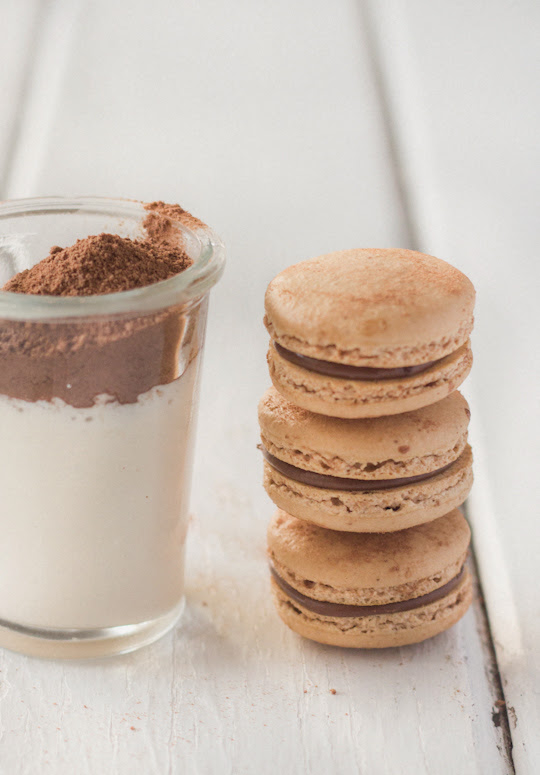
Macarons.They've garnered a bit of a reputation haven't they? You know that there's a macaron craze going on when they start selling them at Maccas. Some people might turn their noses up at this trend, but I believe I'll still be making these little cookies even after the madness passes. I like to call them cookies because it takes some of the pressure off them, the expectation that they'll somehow taste so good they'll change your life and the terror that comes with the thought of trying to making them at home. In the end they're just another cookie. Like most store-bought baked goods, there's plenty of mediocre macarons that are sold in stores. They can be dry and crunchy, weird-flavoured, tasteless or just way too sweet. I totally believe it's worth the time and effort to make them yourself, there is something really rewarding about getting them right. There aren't many baked goods that I'd prefer to buy from a store than make in my own oven.
Milo Macarons
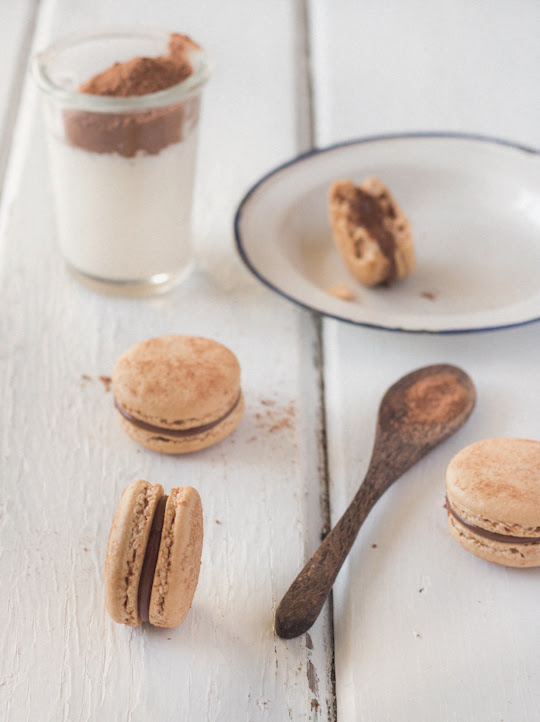
I've been making macarons for several years now. Every time I pop a tray of macarons into the oven I go through the same ritual; I wait patiently for a few minutes and then eagerly peer through the oven door glass to check if they have developed 'feet', that unmistakable crinkly edge on the bottom of each macaron shell. It's one of the signs of a successful macaron and always makes me break out in a little celebratory "YAY there's feet!" dance in the middle of my kitchen. It never gets old, the small satisfaction that comes with making good batch of macarons.This particular batch incorporates one of my favourite baking flavours - Milo. They're full of chocolatey, malty goodness.
Milo Macarons
Many people tell me that they're too scared to try making macarons but I am always trying to convey the idea that there is nothing too intimidating about these little sweets. I've made them in all kinds of flavours and I have a particular love for animal-themed macarons; chicks, koalas, cats, pigs, bunnies. There's so much fun to be had with them. It really comes down to a few important points: be prepared, practice and know your oven. Read up on all the great macaron tutorials that are available online (I'm a fan of BraveTart's). Weigh out all your ingredients (preferably with some good kitchen scales) before you start mixing anything and ensure that they're at room temperature. Make sure your meringue is whipped until it's very dry and stiff, and that you really deflate all the air out of the meringue when you mix it into your icing sugar and almond meal mixture. Always let your piped macarons sit out to dry for at least an hour, it ensures that they form feet. If you fail, don't give up! It may just need some tweaking. Every oven is so different, you have to adjust your baking temperature to suit the way your oven runs. For example, the oven in my last apartment was super old and had no fan. It tended to run really cool and I would usually set it to about 150°C. My current oven is fan-forced and seems to be way hotter than the temperature it is set to, so I usually set it to around 120°C for macarons. An oven thermometer will help you figure out how accurate your oven is, or if you're like me you'll get a feel for it the more you use your oven. But my main point for all of this is that you should never be too afraid to try making macarons, it's just a cookie! Once you get a hang of plain macaron shells you can experiment with other flavours like these Milo Macarons.
Milo Macarons
Milo Macarons
(makes 12-15 macarons)
Note:  (if you are a beginner with macarons, read up and practice plain macarons first. BraveTart has lots of useful advice and info on the subject)
For the shells:
100g egg white, at room temperature
1/2 tsp salt
110g almond meal, at room temperature and well sifted
185g icing sugar
15g Milo powder plus extra for dusting (replace with equal amounts of icing sugar if you want to try baking plain, unflavoured shells)
50g caster sugar
Optional: 1 tsp powdered egg whites (available from The Essential Ingredient), helps to stabilise egg whites but is not necessary

Line two baking trays with good quality baking paper. Place icing sugar in food processor and pulse for a minute to remove any lumps. Stir in almond meal and pulse for about 30 seconds to combine. (If you don't have a processor just sift together with a fine sieve.) Sift into a large mixing bowl and set aside. Using an electric mixer, beat egg whites and salt (and egg white powder) in a medium mixing bowl until it reaches soft peaks.

With the mixer on high speed, gradually add sugar and beat until it reaches stiff peaks. Add meringue to your dry mixture and mix together with a spatula, quickly at first to break down the bubbles in the egg white (you really want to beat all the large bubbles out of the mixture, which is easily done by smearing the mixture on the bottom and side of the bowl with your spatula), then mix carefully as the dry mixture becomes incorporated and it starts to become shiny again. Take care not to overmix, the mixture should flow like lava and a streak of mixture spread over the surface of the rest of the mixture should disappear after about 30 seconds.

Place mixture in a piping bag with a 1cm round piping tip. Pipe rounds about 3cm diameter on your prepared trays, leaving at least 2cm space around each one. Tap baking sheets carefully and firmly on the benchtop a couple times to remove any large bubbles. Leave to dry for about an hour, so that when you press the surface of one gently it does not break/stick to your finger. This will help prevent any cracking and help the feet to form on the macs. Preheat your oven to 130-150°C, depending on your oven. You can place the sheet of piped shells on top of an upside-down roasting tray or another baking tray, for better heat distribution. Bake for 20-25 minutes, depending on the size of your shells. Carefully test if the base of the shell is ready by gently lifting one and if it's still soft and sticking to the baking paper, then it needs to bake for a few minutes longer. Remove from the oven and cool on the tray for a few minutes, then gently remove from the sheet, dip in extra Milo powder to dust the shells and place on a wire rack to cool completely.
Milo Macarons
For the Milo Ganache:
100g good quality milk chocolate, finely chopped
100ml pure (heavy) cream
50g (about 1/2 cup) Milo powder

Place chopped chocolate and Milo powder in a mixing bowl and set aside. Heat cream in a small saucepan on medium heat until it just comes to the boil. Remove from the heat and pour over the chocolate and Milo. Leave for 5 minutes to allow the chocolate to melt, then use a whisk to combine all the ingredients until smooth. Chill in fridge until mixture thickens but is still pipable, whisking it every 10 minutes or so. Spoon or pipe between macaron shells. Refrigerate overnight in an airtight container to allow them to mature. Remove from the fridge about half an hour before serving so they come closer to room temperature.
Milo Macarons
Print Friendly and PDF

Wednesday, June 5, 2013

Single-Serve Chocolate Self-Saucing Pudding with Butterscotch Sauce

Single Serve Chocolate Self-Saucing Pudding & Butterscotch Sauce
I'm a stress eater. I'm not proud of it, but it's true. I'm well aware of the fact that when I'm having a bad day my first instinct is to seek out some comfort food. Thanks to my insatiable sweet tooth it's usually in the form of dessert (which should be pretty obvious by the majority of the recipes on my blog). The main problem with this habit is that my husband has absolutely no interest in anything sweet. People usually tell him that he's lucky to be the main taste-tester of my baking experiments. The truth is, when I ask him to taste a dessert the look on his face is very similar to a child who is asked to swallow the last piece of their least favourite vegetable on their dinner plate. (To be fair; he always gives very useful and encouraging feedback after that.)
Single Serve Chocolate Self-Saucing Pudding & Butterscotch Sauce
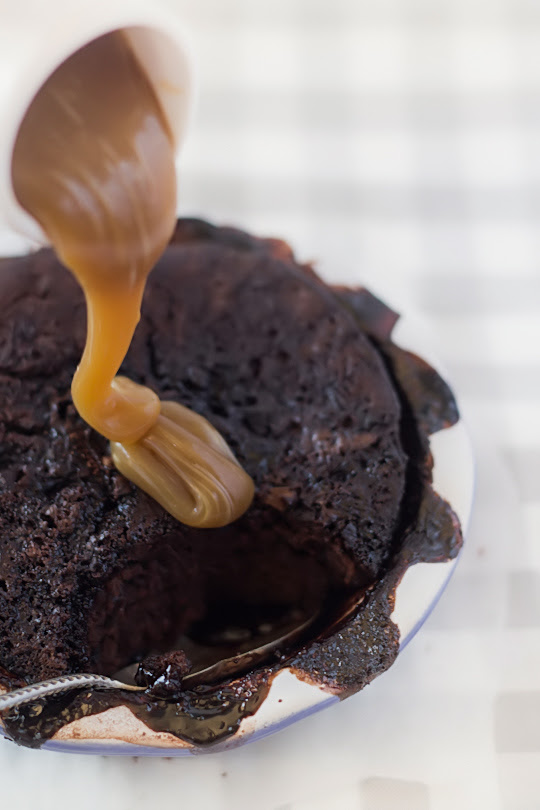
So here's where the idea of single-serve desserts becomes extremely handy. One of my favourite winter desserts is chocolate self-saucing pudding - a pudding that comes with its own sauce straight out of the oven? Magical. This particular recipe is cut down so that it's enough for just one person, which is perfect for stress eaters like me. And because I always like to go a little bit overboard, I'm also including the option of whipping up a really quick and easy extra topping; salted butterscotch sauce. Pour this over the top of the single-serve chocolate pudding and it's like child of a chocolate cake and a sticky toffee pudding. It's a hug in dessert form.
Single Serve Chocolate Self-Saucing Pudding & Butterscotch Sauce
Of course there's absolutely no need to make the extra butterscotch sauce, the pudding tastes great on its own. I had a bit of cream leftover in my fridge, and the butterscotch sauce recipe is so easy that it just happened to be good option for me. (Though really, butterscotch sauce is never a bad option.) The full-sized version of the pudding is one that I've been using for years and years, I blogged about it way back in the early days of my blog if you really want the recipe (link below - the photos are horrendously bad, please don't judge me too harshly). It's definitely not one of the prettiest desserts around, but it really hits the spot when you're snuggled up on the couch on a chilly winter's night. P.S. It's even better with a scoop of vanilla ice cream.
Single Serve Chocolate Self-Saucing Pudding & Butterscotch Sauce
Single Serve Self-Saucing Chocolate Pudding with Butterscotch Sauce
(pudding recipe adapted from an old recipe on my blog)
For the pudding:
1/3 cup (50g) self-raising flour (or 1/3 plain flour plus 1/2 tsp baking powder)
1 tbsp cocoa powder (preferably Dutch-processed)
A pinch of salt
1 tsp sugar
1 egg
10g butter, melted
2 tbsp milk
A few drops of pure vanilla extract if you are not making the butterscotch sauce
Optional: 3 tbsp chopped walnuts
To sprinkle on top: 1/4 cup (50g) tightly-packed brown sugar, 1 tbsp cocoa powder, 1/4 cup of boiling water

Preheat oven to 180°C and butter a 1 & 1/2 cup capacity (375ml) ramekin/pie dish/oven-safe bowl. Whisk together flour, cocoa powder, salt and sugar in a medium bowl. Add milk, melted butter, egg (and vanilla and/or nuts) to the bowl and whisk to combine. Don't worry if there's a few small lumps in the mixture, that's okay. Pour mixture into your prepared dish. Whisky brown sugar and cocoa powder together and sprinkle over pudding batter. Pour boiling water carefully over all the ingredients. You may wish to place your dish on a lined baking tray in case the sauce bubbles over the side of the dish like mine did (but mine overflowed because my pie dish was only 1 cup capacity). Bake for 10-15 minutes, or until the pudding has puffed and is firm to the touch in the centre. The sauce should be bubbling around the edges. Carefully remove from the oven and serve immediately on its own or with butterscotch sauce (recipe below) and/or a scoop of vanilla ice cream.
Single Serve Chocolate Self-Saucing Pudding & Butterscotch Sauce
For the quick butterscotch sauce:
30g butter, melted
1/4 cup (50g) tightly-packed brown sugar
1/4 cup pure (heavy) cream
1/4 tsp sea salt, or more to taste
1/4 tsp pure vanilla extract

You can prepare this sauce ahead of time (keep chilled in the fridge and reheat in the microwave), or make it while you are waiting for your pudding to bake. Place all ingredients in a small saucepan and heat on medium-low, stirring until the butter melts. Increase heat slightly to bring mixture to a very gentle boil, stirring regularly. Simmer for about 5 minutes and then remove from the heat. Taste test and add extra salt if needed. Pour over the top of your pudding.
Print Friendly and PDF

Monday, May 27, 2013

Vanilla Bean Sponge Cake with Salted Caramel Apples

Vanilla Bean Sponge with Salted Caramel Apples
Salted Caramel. It's one of the current food trends that I hope never goes away. I love it a little bit too much. The weird thing is, when I think of regular old plain caramel I immediately think it's too rich for me, too sweet, too heavy. But when it's salted caramel, I think BLISS. Just the simple addition of some sea salt flakes and I could have it with nearly every dessert and it would be happier for it, and I will eat it straight from the jar with a spoon.
Vanilla Bean Sponge with Salted Caramel Apples
This time around it was drizzled, no, drenched on top of a simple but lovely vanilla bean sponge cake. I was making a dessert to finish off a family afternoon tea but I didn't feel like making an ordinary Victoria sponge (as much as I love them). This particular vanilla bean sponge was filled with whipped cream and creme fraiche (I had enough people ask me what the heck it was last week that I feel obligated to google it for you) and more vanilla beans. Then I cooked some apple chunks until they were tender and golden and stirred them into some salted caramel sauce and piled it all on top of the cake. There's nothing quite like a river of oozing salted caramel down the side of a cake to get you drooling.
Vanilla Bean Sponge with Salted Caramel Apples
It may not be as pretty as a cake topped with berries or icing, but I assure you it's worth it for the flavours. I didn't expect to love this cake as much as I did. Especially after tasting all the separate components all day while I was making it, followed by a very filling meal of sandwiches, cheese, vol au vents, sausage rolls and quiche. But even after all that this cake was well received, with some people even going back for seconds. The richness of the caramel was easily offset by the light sponge, tart apples and slightly sour flavour of the creme fraiche.
Vanilla Bean Sponge with Salted Caramel Apples
Of course, the important part of this dessert is getting the sponge right. I have to admit I was a little nervous since this was my first time making sponge in my new place, but I didn't need to worry. If you're not too comfortable with making sponge I suppose you can play it safe and get storebought. But there's nothing quite like a homemade sponge cake. Make sure you read up on tips for making a successful sponge. My main ones are; make sure your eggs are at room temperature, go nuts when whipping your egg mixture (easily done with a stand mixer or with a bit of elbow grease and a hand mixer) to ensure that your cake batter is as stable as possible while baking. And make sure your butter is melted but not hot when you add it to the batter at the end.

Edit: Ooh and in other news, last week I found out that I'm lucky enough to be part of the Top 5 Food & Wellbeing  Voices of 2013. Yay! It's very exciting to be chosen along side some seriously talented bloggers. As part of it I will be guest posting on Kidspot throughout the month of June, and I'll make sure to link to all my posts here so that you guys can check them out!
Vanilla Bean Sponge with Salted Caramel Apples
Vanilla Bean Sponge Cake with Salted Caramel Apples
(sponge cake from Gourmet Traveller, salted caramel sauce adapted from Brown Eyed Baker)
Note: If you are new to sponge cakes make sure you click through to the Gourmet Traveller link above for extra tips. This sponge cake relies solely on the whipped eggs for leavening and it is important you follow all the steps carefully.
For the sponge cake:
40g (about 3 tbsp) butter, melted and cooled plus extra for greasing tins
120g (about 1 cup) plain/all-purpose flour, plus extra for dusting
4 eggs, at room temperature
110g (about 1/2 cup) caster/superfine sugar
1 vanilla bean, scraped seeds only

Preheat oven to 180°C (350° F) (you may need to adjust to 170°C (340° F) for fan-forced) . Brush an 18-20cm round cake tin with melted butter, line base and sides with baking paper, grease paper with a little extra butter and then dust lightly with flour. Triple-sift flour and set aside. Whisk eggs, sugar and vanilla seeds in an electric mixer until thick, pale and tripled in volume (about 7-8 minutes). Sift over flour in two batches, folding each batch in with a large metal spoon or spatula. Fold in melted butter. Carefully pour into prepared tin and bake until light golden and centre springs back when pressed lightly with your fingertip (20-25 minutes). Pull cake gently away from sides of tin with your fingers or carefully loosen with a knife. Turn onto a wire rack, remove baking paper, turn back over swiftly and cool completely. Best eaten on the day of baking, but you can store it in an airtight container overnight and assemble the rest of the cake the next day.
Vanilla Bean Sponge with Salted Caramel Apples
For the salted caramel apples:
1/2 cup sugar
40g (about 3 tbsp) butter, at room temperature, cut into pieces
1/4 cup pure or thickened (heavy) cream, at room temperature
1 tsp flaky sea salted, adjusted to taste
3 baking apples (I used Granny Smiths), peeled cored and chopped into chunks

Place sugar in an even layer on the bottom of a small (preferably heavy-based) saucepan on medium heat, whisking as it begins to melt. It may start to clump, but this is fine. Continue to whisk until the sugar is all melted and then stop whisking, swirling the pan occasionally while the sugar cooks. If you have a sugar thermometer, place it in the sugar at this point and cook it until the mixture is a deep amber colour and reaches 180°C (350° F) and absolutely no higher or it will likely burn. I like to take mine off the heat as it approaches the temperature. Quickly and carefully add all the butter at once, whisking as it bubbles up, melts and combines. Keeping the pan off the heat, add the cream and whisk until the mixture is smooth. Add sea salt to taste (careful not to burn yourself!) and set aside to cool and thicken. Place chopped apples in a medium to large frying pan with a bit of melted butter and cook, tossing regularly, until apples are golden and tender. Stir apples into salted caramel sauce.

To assemble cake:
200g creme fraiche (if unavailable you can replace this with another 1/2 cup of thickened cream)
120ml (about 1/2 cup) thickened (heavy) cream
1/2 cup icing/powdered sugar, sifted
1 vanilla bean, scraped seeds only

Place ingredients in a large mixing bowl and beat with an electric mixer until it reaches soft peaks. Take care not to overmix. Carefully cut your sponge cake in half using a long serrated knife. Place bottom half on cake stand and spread whipped cream over the top with a spatula. Top with the other half of the cake and then carefully top with apples and caramel sauce. Make sure the sauce has cooled enough to be thicken enough not to run straight off the cake but is still pourable.
Vanilla Bean Sponge with Salted Caramel Apples
Print Friendly and PDF

Monday, May 20, 2013

Caramelised White Chocolate Cheesecake with Blueberries

Caramelised White Chocolate Cheesecake with Blueberries
I'm pretty cranky today. I had a full-on weekend, but in a mostly good way. Yesterday I was happily baking in the kitchen and everything was going great. I had made some awesome caramelised white chocolate, the cheesecake I was preparing for my sister-in-law's birthday looked great going into the oven and baking in the oven. Then somehow things just went completely downhill. I got impatient waiting for the damn cheesecake to cool, and not only managed to deflate it quite badly, it was still soft while I was taking it out of it's tin and I managed to crack it into two ugly pieces. DISASTER. It was only barely saved by covering the whole thing with a crapload of blueberries. Sad face.
Caramelised White Chocolate Cheesecake with Blueberries
Anyway, that's the reason there's not many pictures of anything but a lot of blueberries. But I still wanted to share this recipe with you because I'm pretty certain it is great. It tasted great the last time I made it (even after dropping it on the floor), and I really wanted to make it pretty this time so I could share it with you guys. Sigh. I haven't tasted or cut into this one yet because it's her birthday today, fingers crossed it tastes as good as the mixture did before it went into the oven. I'm so irritated with myself for being impatient with the cooling process, I just really wanted to take some photos and have a nap yesterday. I never learn!
Caramelised White Chocolate Cheesecake with Blueberries
So, about the caramelised white chocolate. I posted the picture on my instagram and facebook yesterday and there was a giant chorus of "HOW?!". For the record, google is your friend. But I've been hearing great things about caramelised white chocolate from all of my favourite blogs, in particular David Lebovitz and Poires au Chocolat. It looked so good, I knew I was going to love it. I made some for my husband's birthday cake and it was fab. I made it again for this cheesecake and it was even better. It was almost a shame to mix it into the cheesecake, I just wanted to sit there and eat it with a spoon. But the cheesecake mixture tasted so great that I knew it was worth it. Anyway, if you have yet to try caramelised white chocolate, YOU MUST DO IT NOW. Just make sure you find the best quality white chocolate you can and stay far far away from anything compound.
Caramelised White Chocolate Cheesecake with Blueberries
(serves 10, adapted from this Lifestyle Food recipe)
For the crust:
2 cups Digestive biscuit crumbs (about 1 packet) (or graham crackers, or your favourite biscuit. It works great with ginger nuts)
1 tbsp sugar
100g (7 tbsp) butter, melted

Preheat oven to 150°C (320°F), grease and line the base of a 20cm springform tin. Crush biscuits and mix in sugar and butter until combined. Press mixture into the base of the prepared tin in an even layer. Bake for 10-15 minutes, or until the edges turn golden brown. Set aside to cool.

Optional blueberry sauce mixture:
1 punnet (125g) fresh or frozen blueberries
1 tsp lemon juice
2 tsp sugar
2 tsp cornflour/cornstach
1/2 cup water

Place ingredients in a small saucepan and stir to combined. Bring to the boil and then simmer for about 3-5 minutes stirring regularly, until blueberries have broken down and mixture starts to thicken. Set aside to cool, strain and chill until needed, after it reaches room temp.
Caramelised White Chocolate Cheesecake with Blueberries
For the caramelised white chocolate (from David Lebovitz):
250g (about 9oz) good quality white chocolate, chopped into small pieces (highest cocoa butter content you can get, preferably more than 30%, minimum 24%)
A pinch of sea salt

Preheat oven to 120°C (250°F). Place white chocolate pieces in a large baking dish/sheet and heat for 10 minutes. Remove from oven and spread with a dry, clean spatula. Return to the oven and continue to cook for 30-60 minutes, stirring it every 10 minutes until the mixture is a deep-golden brown. Don't freak out if the mixture starts to get dry and chalky, it is more likely to do that the lower cocoa solids are in it. Just be patient and stir the mixture and it should smooth out. (It doesn't matter if it doesn't as it will be blended with cream later) Remove from the oven and stir in sea salt. See David's recipe for extra tips and troubleshooting.

For the cheesecake mixture:
250g (about 9oz) cream cheese, softened
1 vanilla bean pod
250g caramelised white chocolate prepared above
250g sour cream
250g crème friache
3 large eggs
1 punnet (125g) fresh blueberries, to serve

Preheat oven to 150°C (320°F). Place cream cheese and scraped seeds of the vanilla bean pod in a large mixing bowl and beat with an electric mixer on high until smooth. Mix the melted and slightly cooled caramelised white chocolate with the crème friache. (Blend together if there are any lumps) Add white chocolate mixture and sour cream to the cream cheese mixture and beat to combine, scraping bowl wit ha spatula every now and then. With the mixer on low, add eggs one at a time and beat until smooth. Pour mixture over prepared crust. If you are using the blueberry sauce, drizzle it over the top of the cheesecake mixture and use a butter knife to swirl it into the surface. Bake in oven until the middle is just wobbly and the edges are set, about 50-60 minutes. Turn off oven and cool inside for 15 minutes, then cool completely in tin on a wire rack. Can be stored in fridge overnight before serving. Top with extra blueberries.
Print Friendly and PDF

Monday, May 13, 2013

Chocolate & Passionfruit Brulee Tart

Chocolate & Passionfruit Brulee Tart
It's funny that there are so many passionfruit recipes on a blog owned by someone who has never really enjoyed passionfruit. I would blame my best friend Asian Gaga, who loves passionfruit-flavoured desserts and I made this tart for her birthday, but this time around she specifically told me I didn't have to do anymore passionfruit desserts. But I was still drawn to it, for some unknown reason. Asian Gaga mentioned how much she loves the brûlée tarts at Bourke St Bakery (who doesn't?) and so I toyed with the idea of trying it with a chocolate shell instead, similar to the lovely lime version that Karen does. And I really do love the combination of chocolate with passionfruit. Two very strong flavours that can still stand up well when placed together.
Chocolate & Passionfruit Brulee Tart
For the pastry I adapted a recipe from BraveTart, it's a really fantastic recipe. Since I was making one large tart shell I erred on the side of caution and added an extra egg yolk to the mixture to make sure it did fall apart of me when I rolled out the pastry. I am really clumsy with pastry, which is probably why you don't see a huge amount of pastry recipes on this blog. I'm a messy baker. But feel free to use Stella's awesome original recipe, especially if you're making smaller individual tarts instead. It's so good, even the raw pastry dough tastes amazing. That is always a good sign.
Chocolate & Passionfruit Brulee Tart
Unfortunately for you guys I didn't have the heart to cut into this particular birthday present. I thought it would be just a little too harsh to hand over a broken tart to my best friend, especially when the best part about a brulee is that first crack through that thin layer of toffee on top. But I can show you some flamey action shots of me torching the sugar. Yeah! Don't try this at home kids; holding a blowtorch in one hand and trying to focus with a camera is not fun. I really need to get myself a tripod.
Chocolate & Passionfruit Brulee Tart 
I love my blowtorch! Since I left Asian Gaga with her birthday tart I didn't get to try a piece myself but I can definitely tell you that all the separate elements tasted great, so fingers crossed the tart as a whole tasted good too.
wf
Ooh random change of subject; thanks to Women's Fitness Magazine for the mini-mention in their June issue (sorry about the crappy phone photo).  Pretty sure my gummy bear cake is the exact opposite of women's fitness heehee but it was super nice of them to give a shoutout!
Chocolate & Passionfruit Brulee Tart-5
The filling recipe is adapted from the original brulee tart recipe from Bourke St Bakery. It's a little time consuming with all the whisking and chilling but totally worth the effort. I actually ended up with just a little less filling than I wanted, so I have increased the amounts for you. I will definitely want to try this recipe again as smaller individual tarts. If you do plan to try that out I would use BraveTart's original tart shell recipe and then double the amount of filling described.
Chocolate & Passionfruit Brulee Tart
Chocolate & Passionfruit Brûlée Tart
(chocolate tart shell adapted from BraveTart, filling adapted from Bourke St Bakery)
For the tart dough:
105g (3.75 ounces/about 1/2 cup) sugar
35g (1.25 ounces) brown sugar
Scrapings from half a vanilla bean
1/2 tsp instant coffee powder
1/4 tsp salt
125g (4.5 ounces) butter, room temperature
3 egg yolks
255g (9 ounces) plain/all purpose flour, sifted
50g (1.75 ounces) cocoa powder, sifted
For rolling: 30g (1oz) cocoa powder + 30g (1oz) icing/powdered sugar sifted together

With a hand or stand mixer, combine sugars, vanilla bean seeds, coffee powder, salt and butter on medium speed. Mix only until ingredients are thoroughly combined, but by no means light and fluffy. Add in the yolks, one at a time then reduce speed to low. Add in the flour and cocoa powder all at once and mix until homogenous. If you’re comfortable with dough and a pin, you can roll it right away. Otherwise, form the dough into a disk, wrap in plastic, and refrigerate about 15 minutes to make the it easier to handle.
You can refrigerate the dough for up to a week or freeze for several months. Before rolling, set the dough out and let it slowly come to room temperature over a few hours.

Preheat the oven to 180°C (350° F) and lightly grease a 22cm loose bottomed tart tin. Dust the counter with the prepared cocoa/powdered sugar mixture. Don’t use flour, it will toughen the dough and dull the richness of the chocolate color. Roll to 0.75cm (1/3") thickness.Carefully set dough over the tart shell and use your thumbs to press the dough into the corners of the pan. Press the overhanging dough against the edges of the tart pan to trim off the excess and leave the dough flush with the edges. Dock tart lightly with a fork. The dough is extremely forgiving and can be rerolled two or three times, you should be able to press any cracks together to mend them.

Bake for 20-25 minutes. After 10 minutes or so, check on the tart. If it has formed an air bubble; use a skewer to gently poke a small hole in the bubble to deflate it. Continue baking until the tart is firm and dry to the touch. Cool in tin for about 10 minutes, then carefully remove from tin and cool completely on a wire rack. Shell can be stored in an airtight container overnight.
Chocolate & Passionfruit Brulee Tart
For the passionfruit brûlée filling:
430ml (about 1 3/4 cups) pure/pouring (whipping) cream (35% fat)
Remaining 1/2 vanilla bean (leftover from the pastry), split lengthways
6 egg yolks
50g g (about 1/4 cup) caster/superfine sugar, plus plenty for burning
Fresh pulp of one passionfruit

Place cream, passionfruit pulp, scraped vanilla bean seeds and vanilla pod in a small saucepan and bring just to the boil. Remove from the heat and set aside. Place the egg yolks in a stainless steel/heatproof bowl and use a whisk to combine. Add the sugar and continue whisking for about 30 seconds, or until the sugar has dissolved. Pour the slightly cooled cream mixture through a fine sieve, discarding the vanilla bean, then pour the cream into the egg yolk mixture, stirring well to combine. Place bowl over a saucepan of simmering water, making sure the base of the bowl does not touch the water, and continue stirring with a whisk for about 10-15 minutes, or until the mixture is smooth and thick, scraping down the sides of the bowl regularly with a rubber spatula. It is important to keep stirring at all times or the mixture will curdle. Remove the bowl from the heat and whisk briskly for about 2 minutes to cool it quickly. Over the next 1 hour, whisk the mixture every 10 minutes until cooled. Use a rubber spatula to clean the sides of the bowl thoroughly and place plastic wrap directly on top of the mixture; refrigerate overnight to set. Pour mixture into baked tart shell, using a palette knife or offset spatula to smooth the top so that it is flush with top of the tart shell. If you wish you can decorate the surface of the filling with a few extra passionfruit seeds. Chill in the fridge for a further 4 hours. When ready to serve, sprinkle an even layer of sugar over the top of the filling and burn with a blowtorch. Try to do this as close to serving time as possibly, sugar will eventually melt over the course of a day and will lose the crisp layer of toffee.
Chocolate & Passionfruit Brulee Tart
Print Friendly and PDF

Monday, May 6, 2013

Grape Tea Cake with Vanilla Bean Glaze

Grape Tea Cake with Vanilla Bean Glaze
I had a pretty good weekend. I had friends over for a BBQ where we put on a ridiculous spread of food, I finally won the battle against my recent bout of the flu and I managed to squeeze in family time. After all of that it didn't leave me with a huge amount of time for baking. That's why this cake recipe was perfect; it was quick to throw together, it was a perfect afternoon tea snack and it used up some of the leftover grapes from the BBQ. Nothing too crazy or over the top, just a bit of comfort baking.
Grape Tea Cake with Vanilla Bean Glaze
I was curious to see how this recipe would turn out. I've never tried baking with grapes before, but they worked surprisingly well. Sure they do add a fair bit of moisture to the cake but it works well in this particular cake, which is wonderfully soft and buttery. I also got to use up some of the last bottle of dessert wine that I brought back from my last Hunter Valley trip. It gives the cake a great depth of flavour without actually making it taste boozy.
Grape Tea Cake with Vanilla Bean Glaze
Since the cake itself isn't very sweet (made even less sweet since I substituted unsalted butter for my regular slightly salted butter as always), I decided to top it with a simple vanilla bean glaze. I really think this adds something special to the cake. The original French recipe uses a butter & sugar topping but I love this thin, crisp layer of icing with little pops of vanilla bean. I was actually a little bit stingy with the icing for the photos; I was worried I would be drowning the cake in it if I added much more, but to be honest after tasting it I added all the leftover glaze to the top of the cake because it was so amazing together. Anyway, it would be a shame to waste any vanilla bean!
Grape Tea Cake with Vanilla Bean Glaze
It may not be much to look at, but these kind of cakes rarely are. It's something that you want to throw together in an hour so that you can enjoy it on the same day (still slightly warm) a with a cup of tea of coffee. This cake disappeared so fast yesterday afternoon, especially since it was a particular chilly day.
Grape Tea Cake with Vanilla Bean Glaze
My only regrets about the cake; I did wrap a damp tea towel around my cake tin again to achieve that super flat cake surface, but to be honest this kind of cake doesn't need to look that neat on top and it means I missed out on having a lovely golden brown crust around the edge of the cake. I definitely won't be using the tea towel next time. I also pushed some of my grapes a little too far into the batter and they sunk to the bottom, which wasn't as nice as the grapes that stayed up the top. Learn from my mistakes people!
Grape Tea Cake with Vanilla Bean Glaze
(adapted from this Bon Apppétit recipe, serves 8-10)
1 1/2 cups (about 190g) plain/all-purpose flour
1 tsp baking powder
1 tsp salt
1/4 tsp bicarb (baking) soda
3/4 cup (170g) caster (superfine) sugar
85g (6 tbsp) butter, room temperature
3 tbsp extra-virgin olive oil
2 large eggs
1 tsp grated lemon zest
1 tsp grated orange zest
1 tsp pure vanilla extract
1 cup Muscat wine
1 1/2 cups red seedless grapes

Preheat oven to 200°C (400°F) (180°C (350°F) fan-forced) and grease and line the base of a 20cm springform tin with baking paper. Sift flour, baking powder, salt and bicarb soda into a bowl and set aside. Place butter, sugar and olive oil in a large mixing bowl and beat with an electric mixer on high until smooth. Beat in eggs, zest, and vanilla extract until combined. Add flour mixture alternately with wine in 3 additions each, whisking just until smooth after each addition. Spread mixture evenly in prepared tin and sprinkle grapes on top. Bake for 30-40 minutes, until a skewer inserted into the centre of the cake comes out clean.Cool cake in tin for 15 minutes, then carefully remove from tin and cool completely on a wire rack.
Grape Tea Cake with Vanilla Bean Glaze
For the vanilla bean glaze:
1 cup icing sugar, sifted
1/2 vanilla bean pod, seeds scraped (or 1/2 tsp vanilla bean paste)
2-3 tbsp milk
Optional: extra fresh red grapes to serve
 
Place icing sugar in a bowl and add vanilla beans. Gradually mix in enough milk to form a smooth, thick paste.Once cake has cooled, drizzle glaze over the top of mixture. (Feel free to use more glaze than what is shown in the photographs, I actually poured on double the amount of glaze after the photos were done!) You can also sprinkle a few leftover fresh grapes on top of the cake before you glaze it, but it doesn't really need it.
Grape Tea Cake with Vanilla Bean Glaze
Print Friendly and PDF