Sunday, July 17, 2011

Homemade Apple Pie Pop Tarts

apple_pie_poptarts-2
It's been ridiculously cold recently. I kind of love it. People tend to look at me funny when I say that I love winter, but as I've mentioned before on this blog I get super cranky in the heat and humidity of summer. I like how the air smells on those crazy cold nights. This kind of cold weather makes me crave apple pie.
apple_pie_poptarts
There are just some desserts that I will only eat in the middle of winter. Piping hot apple pies full of delicious chunks of juicy apple goodness along with a big scoop of vanilla ice cream is one of them. It has to be flavoured with plenty of spices and wrapped up in a very short, buttery pastry.
apple_pie_poptarts-10
When Lisa made us these amazing cherry pop tarts with vanilla bean glaze, I immediately put them on my must-try list of recipes and every now and then I would wistfully dream about the thin flaky pastry and that amazing glaze. This weekend I finally found the time to try out the recipe and satisfy my apple pie cravings by making these Apple Pie Pop Tarts with a Cinnamon Glaze.
apple_pie_poptarts-9
I just had one for breakfast today and they are amazing. The pastry recipe is perfection, the dough is super easy to work with and handle, plus it stayed flaky and short even though I had to re-roll the scraps several times. I loved how thin I could roll the pastry so that the pop tarts were wonderfully delicate to bite into.
apple_pie_poptarts-3
I went through a phase where I was having strawberry pop tarts every morning for breakfast. If it wasn't pop tarts, it was cocoa pops. It seems that I used to like starting the day off with an insane amount of sugar (I'm more of a bacon and egg type of girl these days). Pop tarts aren't as readily available in Australia, so it's great to have a recipe for a homemade version. Plus as Lisa mentioned, it's all made with real butter and no corn syrup. And it's wayyyy tastier.
apple_pie_poptarts-8
The apple pie filling is quite simple. I freaked out a bit when I cooked up the apples as they released so much juice, so I added a bit of gelatin powder to the mixture but I don't think it really needed it. The mixture seems to dry out quite well in the oven thanks to the flour that is added. I tried not to add too much sugar to the filling so it is quite tangy, since the pop tart is covered with that beautiful cinnamon glaze. The apples are mixed up with a bit of cinnamon and real vanilla bean, and when you get a mouthful of the mixture, with that light pastry, the spiced glaze and a little crunch from the sugar crystal you will cry. Then you can come thank me :)
apple_pie_poptarts-6
The glaze is a bit tricky to get right. If it's too runny it won't hold it's shape on the top of the mixture and will just go everywhere. I found the best way to get it right was to keep whisking in small amounts of icing sugar and then spooning it on to a tart to see how long it would take to settle, using the spoon to scoop up the stray drips. It's definitely worth investing the time to get the glaze just right, so that it has that thin layer that almost shatters as you bite into it. Just heavenly.
apple_pie_poptarts-4
Apple Pie Pop Tarts with Cinnamon Glaze
(makes 8, adapted from spicy icecream's recipe)
3-4 apples, peeled and finely chopped (about 3 cups worth), I used a mixture of Granny Smith and Royal Gala but you can use any good baking apples
Juice from half a lemon
1 vanilla bean pod
1 tbsp (14g) butter
1 tbsp brown sugar
1 tbsp glucose syrup (optional, can be replaced with another tbsp of brown sugar)
1 tbsp flour

For the pastry:
2 cups plain flour
2 tbsp sugar
1 tsp salt
225g unsalted butter, cold, cut into cubes
1 large egg
2 tbsp milk
1 large egg, for brushing the dough

For the glaze:
1 cup icing sugar, sifted
1 1/2 tbsp milk
1/2 tsp ground cinnamon
Optional: granulated or raw sugar crystals

Prepare the filling first. Place butter in a medium saucepan on medium-low heat until it goes golden brown, then add chopped apple, lemon juice, brown sugar, glucose and vanilla bean (split and seeds scraped) and return to the heat. Stir regularly until apples are slightly more tender and liquid has reduced slightly, about 5-10 minutes. Remove from the heat and cool completely. Add flour and stir to combine, then chill while preparing the pastry.

In the bowl of a food processor, combine flour, sugar and salt. Add the cold butter and pulse until only pea sized lumps remain in your mixture. In a small bowl, beat the egg with the milk. Add the mixture all at once to the dry ingredients and pulse until moisture is introduced to all of the flour mixture. Lightly dust a clean surface with flour and knead the dough until it starts to hold together. Divide the dough in two, wrap in plastic wrap and refrigerate for about 30 minutes.
apple_pie_poptarts-18
Remove one piece of dough from the refrigerator. On a well floured surface, roll the dough out to 3mm thick. Trim the dough into rectangles 14 x 8cm (this is why my stainless steel ruler is one of my most used kitchen utensils). Place the dough rectangles onto 2 baking trays lined with baking paper and refrigerate while you prepare the second piece of dough in the same way. Brush one set of 8 squares with a beaten egg. This will act as the glue for the top layer of dough. Spoon 1 1/2-2 tbsp of apple filling into the center of each brushed dough square (you may want to drain some of the excess liquid from the filling first). Top with a second piece of dough and use a floured fork to crimp the sides closed. Use the tines of the fork to create vent holes in each tart.

Preheat the oven to 180°C (350°F). Let the tarts rest in the fridge while the oven preheats. Bake for 25-30 minutes or until golden brown on top. While the tarts bake, whisk together the icing sugar, cinnamon and milk for the glaze and set aside. Let baked tarts rest on a cooling rack to cool completely before glazing. If glaze is too runny, gradually sift more icing sugar into the mixture until it reaches the correct viscosity. Sprinkle a small amount of sugar crystals over each tart. When glaze has set, serve immediately or store in an airtight container. Best served within 2 days, warmed up for 20-30 seconds in the microwave.
apple_pie_poptarts-7
Print Friendly and PDF

Sunday, July 10, 2011

Pandan Lamingtons

pandan_lamingtons-18
Lamingtons. They are so quintessentially Aussie. We all have our preferences, some of us swear by the classic version, some like the cream/jam filled ones. And then there's pandan. It's leaves are so widely used in Malaysian dishes that it was a total shock to my system when I came back to live in Sydney 11 years ago and found that hardly anyone had heard of it. I've been over the moon with the gradual increase in Malaysian cuisine in Australia, and the eventual appearance of pandan in desserts, like Dan Hong's pandan chiffon cake on Masterchef (my only gripe is that they kept pronouncing it on the show like 'pang-dang' which made me cringe so friggin much. It's meant to be pronounced more like 'pahn-dahn').
pandan_lamingtons-14
I've put these elements together, one totally Australian and the other bringing me straight back to Malaysia, to create these Pandan Lamingtons. Lamington purists will probably be totally offended by this bright green monstrosity but if there was ever a dessert which I would use to describe myself, this would be it. It brings together my two loves, my happy childhood memories in Australia and my love of Malaysian food (including my Mum's awesome cooking). They may not be the prettiest cakes ever but they are wonderful to eat. I'd been planning them for ages and I'm quite pleased with the way they turned out.
pandan_lamingtons-20
I adapted a recipe for plain lamingtons by adding some pandan essence paste to the sponge cake. It was quite convenient that the recipe used a chocolate ganache rather than a cocoa icing for the coating, as I was able to switch it to white chocolate ganache which was a much better match for that lovely soft & fluffy green pandan cake. Coconut and pandan are always perfect together, plus the shredded coconut on the outside is exactly the type of coconut that they use in Malaysian desserts and kuih. The finished lamingtons even remind of Malaysian kuih with that hint of green hiding underneath the layer of coconut (which was a total accident, the white chocolate ganache ended up being a lot more transparent than I had expected).
pandan_lamingtons-19
Pandan Lamingtons
(makes about 32, adapted from this Gourmet Traveller recipe)
8 eggs
250g caster sugar
3/4 tsp pandan paste (more if you use the more watery pandan essence)
250g plain flour
30g unsalted butter, melted
400g shredded coconut

For the white chocolate ganache coating:
600g white chocolate
300ml pouring cream (min. 35% milk fat pure cream)

Preheat oven to 190°C (375°F). Grease and line the base with baking paper in a 24x32cm lamington tray, or two 20cm square cake tins. Whisk eggs, pandan paste and sugar in a heatproof bowl (it will be freakishly green at this point but don't worry, it will lighten after you whip it) over a saucepan of gently simmering water for 5-10 minutes or until warm (about 40°C/105°F), lighter and frothy. Transfer to an electric mixer and whisk on high speed in a large mixing bowl for 10 minutes or until mixture has tripled in volume. Sift over plain flour in batches and, using a metal spoon, fold gently to combine between additions. Just before adding the last of the flour, fold through melted butter. Pour into prepared tin(s) and bake in centre of oven for 20 minutes or until a skewer withdraws clean. Stand in pans on wire racks for 10 minutes, then turn out onto racks and cool completely.
pandan_lamingtons-12
For the white chocolate ganache coating, combine chocolate and cream in a heatproof bowl over a saucepan of gently simmering water. When chocolate begins to melt, stir gently until combined and smooth and set aside in a warm place.

Scatter shredded coconut over a tray. Cut sponge into 4-5cm squares. Using 2 forks, dip each square into the ganache and shake to remove excess. (If ganache starts to thicken, place bowl over gently simmering water to thin.) Roll each square in coconut, shake off excess and place on a wire rack (sitting over a tray). Stand for at least 1 hour or until chocolate sets. Store in an airtight container in a cool dry place for up to 3 days.
pandan_lamingtons-21
Print Friendly and PDF

Sunday, July 3, 2011

Red Velvet Melting Moments

red_velvet_melting_moments-2
Time has been flying along way too fast for me. I often wonder how people manage to keep up with all the crazy amounts of things they need to balance in their lives, since I find it pretty much impossible. Inevitably one aspect of my life gets messy and neglected at some point (it usually ends up being the housework since I am a total slob). It boggles my mind that it's July already.
red_velvet_melting_moments-4
Luckily my blog has never been the thing to be completely neglected in the last few years. It's probably because it's my hobby, with no obligations and nothing that makes it feel like work. It'll be sad if that ever changes. Unfortunately my baking ideas can't keep up with how fast time flies seeing as I came up with a lovely, simple idea for a Valentine's Day baking project months too late. Check out these Red Velvet Melting Moment Biscuits, melt-in-your-mouth shortbread biscuits (also known as yoyos) sandwiched with fluffy cream cheese icing. I couldn't resist making them heart-shaped, even though it does remind me of the red velvet whoopie pies that I saw around Valentine's day. I have issues with whoopie pies. These are much better.
red_velvet_melting_moments-3
I adapted these from the same recipe I used for my Neopolitan Melting Moments, cos they were so full of awesome. These ones have a bit of cocoa and a ton of red food colouring and taste so great with the smooth cream cheese icing. I was originally planning to try this icing for the filling but I had leftover cream cheese and couldn't let it go to waste. It worked out great since the biscuits are so delightfully light that they needed that bit of richness and tang from the cream cheese.
red_velvet_melting_moments-6
This recipe is incredibly easy and quick to whip up, the only fiddly part is pressing the dough into the little heart shapes. Of course there's no need for the heart shapes, you can just roll and press regular rounds of dough for normal melting moments, but I love the hearts. I also love that A came home the other day with a chopped up chunk of an old, worn blue wooden door from his work because he remembered that I saw it once and ranted about how perfect it would be for photos. We love him.
red_velvet_melting_moments-5
Red Velvet Melting Moments
(adapted from this Gourmet Traveller recipe, makes about 24 biscuits)
250g soft, good quality unsalted butter
80g icing sugar, sifted
1 tsp pure vanilla extract
About 1 tbsp liquid red food colour, adjust as you like (I used gel colouring, which only needed about 2 tsp)
75g (1/2 cup) cornflour (cornstarch)
225g (1 1/2 cups) plain flour
1 tbsp cocoa powder (preferably Dutch-processed)
1/2 tsp salt

For the cream cheese icing:
113g cream cheese
1 tbsp (14g) butter
1 cup (150g) icing sugar, sifted

Preheat oven to 180°C (350°F) and line two baking sheets with baking paper. Using an electric mixer, beat butter and sugar until light and fluffy. Add red food colouring and vanilla and beat until just combined. Sift flours, cocoa powder and salt over butter mixture and, using a wooden spoon, stir to form a soft dough. If you are making heart shapes you may want to chill your dough for about 10 mins before you start to shape them, to stop the butter in the dough melting from the heat of your hands.
red_velvet_melting_moments-11
Keeping your fingertips lightly floured, press heaped teaspoons of dough into heart shapes that are about 0.5cm thick and 3.5cm wide and place on baking sheets (do not knead your dough, work it as little as possible). I could fit about 24 biscuits on each sheet. Bake for 12 minutes or until lightly coloured. Stand biscuits on trays for 5 minutes, before transferring to wire racks to cool completely.

To prepare the icing, remove the cream cheese and butter 30 mins before starting. Beat cream cheese and butter in a large mixing bowl with an electric mixer on high until smooth and fluffy. Add sifted icing sugar and beat until smooth. Spoon on to cooled biscuits and sandwich together. Can be served immediately or stored in the fridge in an airtight container.
red_velvet_melting_moments
Print Friendly and PDF

Sunday, June 26, 2011

Kitty Cat Carrot Macarons

kitty_cat_macarons-11
There have been a lot of animal-themed baked goods on this blog. Pupcakes. Piggy Macs. Bunny Macs. Sweets with little smiley faces on them are just too cute aren't they? This weekend is A's little sister's birthday and I wanted to make her something special. The newest member of their household is an adorable ginger kitty named Puss Puss and these kitty cat macarons are inspired by him.
kitty_cat_macarons-2
I've been wanting to do another animal macaron for some time now. A while back I REALLY wanted to make Hello Kitty macarons for Asian Gaga's birthday, but then I found a few blogs who had already done them so well and AG ended up requesting the mint slice cake anyway. But I think I like these ginger kitten macarons even more than Hello Kitty, they're so fat and happy! And look as those little tails :D
kitty_cat_macarons-5
One thing we need to talk about is the filling. I decided to make a Carrot Cake-Flavoured Icing to match the orange shells. I was a little unsure if this would work but it turned out SO GOOD. It tastes just like carrot cake with cream cheese icing. I'm quite chuffed with it to be honest. I did manage to dump an entire container of ground cinnamon on myself in the process, which was very messy and I kept smelling myself and getting hungry for the rest of the day.
kitty_cat_macarons-8
Hopefully A's sister will like these as much as I do. Happy Birthday Miss K!
kitty_cat_macarons-4
Just like with my bunny macs, I might have gotten a little bit carried away with the photos/scenarios...
kitty_cat_macarons-9
Kitties playing
kitty_cat_macarons-10
Kitties chatting over morning tea
kitty_cat_macarons-6
I ended up with two extra tail shells, which is super creepy and makes me think of that Halloween episode of the Simpsons which parodies The Fly and their cat and dog get spliced together...someone please tell me I'm not the only one who knows what I'm talking about.

Kitty Cat Macarons with Carrot Cake Icing
(makes about 10 macarons)
100g aged egg whites (you can use fresh eggs too, just make sure they are room temperature. I always use fresh these days, and zap it in the microwave on defrost for 10 seconds)
110g almond meal, dried in a cool (100 degrees C or less) oven for 5 minutes and sifted
200g icing sugar
50g caster sugar
Optional: 1 tsp powdered egg whites (available from The Essential Ingredient), helps to stabilise egg whites but is not necessary
orange powdered food colouring

For the carrot cake icing:
1 medium carrot, peeled & finely grated
100g cream cheese
1 1/2 cups icing sugar, sifted
1/4 tsp cinnamon

To decorate: liquid black food colouring (available from the supermarket) or edible ink pens, sugar balls/cachous

Line two baking sheets with baking paper. Place icing sugar in food processor and pulse for a minute to remove any lumps. Stir in almond meal and pulse for about 30 seconds to combine. Place in a large mixing bowl and set aside. Using an electric mixer, beat egg whites and egg white powder in a medium mixing bowl until the egg white powder dissolves and it reaches soft peaks. With the mixer on high speed, gradually add sugar and beat until it reaches stiff peaks.

Add meringue to your dry mixture and mix, quickly at first to break down the bubbles in the egg white (you really want to beat all the large bubbles out of the mixture, be rough!), then mix carefully as the dry mixture becomes incorporated and it starts to become shiny again. IMPORTANT: Just as the mixture has started to combine, place about 1/4 of the mixture in a separate bowl and set aside (to be used for the white part of the faces). Add orange food colouring to the remaining mixture and mix until the correct consistency. Take care not to overmix, the mixture should flow like lava and a streak of mixture spread over the surface of the rest of the mixture should disappear after about 30 seconds. Place in a piping bag and pipe rounds of about 3-4cm diameter on baking sheets, about 10 on each sheet or silicon baking mats. Make sure you leave enough space above each round so you can pipe the two ears for each kitty face. Using a narrow piping tip, piped triangular ears on half of your piped rounds. Tap baking sheets carefully and firmly on the benchtop a couple times to remove any large bubbles.
kitty_cat_macarons-16
Leave to dry for about half an hour. Mix the leftover white macaron mixture to the same consistency as the orange mixture and place in a piping bag. Pipe small circles over the top of the rounds with ears. Place a pink sugar ball/cachous in the middle of the white circle for the kitty's nose. If you still have some mixture leftover of either colour you can pipe small tails on the non-face shells. Leave this to dry again for at least half an hour, so that when you press the surface of one gently it does not break. This will help prevent any cracking and help the feet to form on the macs. Preheat your oven to 140-150 degrees C. Place on top of an overturned roasting tray or another baking sheet if your sheets are not professional grade, for better heat distribution. Bake for 15-18 minutes, depending on the size of your shells. Remove from the oven and cool on the tray for a few minutes, then gently remove from the sheet and place on a wire rack to cool completely. Use a skewer dipped in black food colouring or edible ink pens to draw on eyes (and whiskers if you choose).

To prepare the carrot cake icing, heat a small non-stick frying pan on low and coat the surface with a small amount of unsalted butter. Place grated carrot in pan and sweat carrots until all excess moisture is remove and carrot is tender and cooked through (about 15 mins). Set aside to cool completely. Place cream cheese in a mixer (you may need to take it out of the fridge ahead of time to soften if you don't have a strong electric mixer), and beat until fluffy. Add sifted icing sugar, cinnamon and carrot and beat until smooth. Spoon/pipe onto shells and sandwich.
kitty_cat_macarons-7
Kitty sniggering into his ball of yarn because he thinks the other kitty walks with a funny bum wiggle
Print Friendly and PDF

Thursday, June 23, 2011

Sponge Roll with Dulce De Leche Cream, Strawberries & Cocoa Nibs

dulce_strawberry_sponge-6_filtered
Oh look it's another sponge cake. I'm a lost cause! I don't want to make anything but sponge/chiffon cakes at the moment. You're just lucky that I stopped myself from adding malt to it, or I'd have to rename my blog Malty Spongecakes. Which somehow sounds kinda dirty even though it isn't.
dulce_strawberry_sponge_filtered
So I made another sponge cake. But this is the first time I've ever made a sponge roll! Plus I had all these lovely fresh small strawberries and lots of cream. And then I added cocoa nibs to the sponge. And dulce de leche to the cream. Ohhhh so good. There was a total harmony between all the different textures and flavours in this cake.
dulce_strawberry_sponge-4_filtered
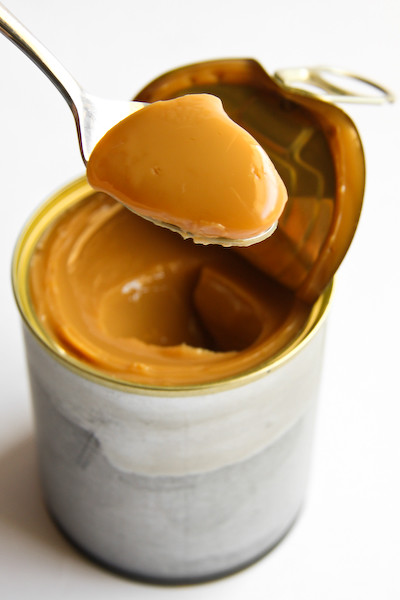
The small chunks of fresh tart strawberries are mixed in with this beautiful caramel cream to make the most delicious filling. I love dulce de leche. I've never had an exploding can of condensed milk in all the times I've made it, so I am a firm believer in making it by boiling the whole can. Those of you who might have looked in my archives would know that I've already tried dulce de leche and cocoa nibs together with huge success (and now I really want to make these cookies again, they are ridiculously good). But who knew that mixing dulce de leche with some whipped cream would help mellow out the intense sweetness of the caramel, making you wish you could slurp it all up with a giant straw.
dulce_strawberry_sponge-2_filtered
I made a simple vanilla sponge by adapting this tried and tested chocolate sponge roll recipe, the same one I used for my Tim Tam & Mint Slice cakes. I didn't have a proper Swiss roll pan, but I used a cookie sheet lined with baking paper and it worked perfectly. I did have some issues rolling up the thing, my caramel cream was super runny and I way overfilled my sponge roll, so it started oozing out everywhere (I've adjusted the recipe below with tips so hopefully it won't happen to you). But I'm so used to disasterous messes in my kitchen these days, so I just wrapped the whole thing up and stuck it in the freezer over night, scraped the excess filling into a bowl and ate it with a spoon for dessert ;) I highly recommend it.
dulce_strawberry_sponge-5_filtered
Sponge Roll with Dulce De Leche Cream, Strawberries & Cocoa Nibs
(adapted from this Gourmet Traveller recipe, serves 6)
4 eggs
110g (1/2 cup) caster sugar
1 tbsp pure vanilla extract
65g cornflour
45 gm (1/4 cup) plain flour
1 tsp cream of tartar
1/2 tsp bicarbonate of soda
50g unsalted butter, melted and cooled
1 tsbp cocoa nibs
250ml (1 cup)thickened cream
250ml (1 cup) dulce de leche (See here for a method to make it)
1 punnet fresh strawberries

Prepare the dulce de leche ahead of time (see above for method), cool can under tap water and then measure 1 cup of dulce de leche into a medium bowl and whisk until smooth. Set aside to cool completely.

Preheat oven to 180°C (350°F). Whisk eggs and sugar in an electric mixer until thick and pale (5-6 minutes). Add vanilla and sift over cornflour, flour, cream of tartar and bicarb soda, fold in with spatula. Fold in butter, spoon into a baking paper-lined 30cm x 42cm swiss roll tin (I used a medium cookie sheet), smoothing top. Sprinkle cocoa nibs over the surface of the batter. Bake in centre of oven until light golden and cake springs back when lightly pressed (10-12 minutes). Turn onto a tea towel lined with baking paper. Peel paper from sponge and, with short side facing you, roll in tea towel to form a log. Stand until just cool (8-10 minutes).
sponge_dulce_strawberries
Hull strawberries and dice. Whisk cream until soft peaks form, then (if you want to make dulce de leche cream) take one large dollop of the cream and fold into the cooled dulce de leche. Then take this dulce mixture and fold it into the rest of the whipped cream. If you prefer to keep the dulce de leche and cream as two separate fillings (this will stop it from going runny), skip this step. Refrigerate until required. Unroll sponge, spread over fillings. Reroll, dust with icing sugar and serve immediately. (If your mixture was too runny like mine, wrap in baking paper and freeze overnight. Then slice and defrost before serving)
dulce_strawberry_sponge-3_filtered
Print Friendly and PDF

Sunday, June 19, 2011

Earl Grey Cake with Rhubarb Cream Cheese Glaze

earl_grey_rhubarb_cake-6_filtered
I'm alliiiiveee! Well sort of. It's been a very icky, snotty, exhausting week in bed. I managed to catch myself one nasty b*tch of a bug, one that was so bad that even A (who proudly boasts that he only gets sick once every 5 years) caught it too. So that meant that when I finally started feeling a bit better I forced myself out of bed to make him honey lemon drinks and huge pots of chicken soup. Other than that most of last week was spent in bed, watching Buffy and eating lots of comfort food. I may or may not have eaten an entire tray of Sara Lee chocolate cake (I know who to blame for my rekindled love of their frozen cakey goodness).
earl_grey_rhubarb_cake
But finally, after many Sudafed-induced sleeps I was better enough to get back into the kitchen to bake something. It's always a very obvious sign that I'm very sick if I don't even have the energy to bake, usually when I'm feeling a little under the weather I still manage to whip up some scones. So today I kept things pretty simple, I don't quite have the energy for one of my crazy baking experiments just yet. I just wanted a lovely sweet tea cake to nibble on.
earl_grey_rhubarb_cake-3_filtered
I love tea so effing much. Every kind of tea. Chinese teas, Japanese green tea, a milky English Breakfast, give it to me by the bucketload. But other than matcha flavoured desserts I haven't tried too many tea-flavoured desserts. Earl Grey seemed like the obvious choice to try out, with its distinctive bergamot aroma and flavour. I had a bunch of rhubarb waiting to stewed and I always love the combination of rhubarb with any kind of citrusy flavour, so I decided to try an Earl Grey Tea Cake with a Rhubarb & Cream Cheese Icing. At first I was imagining swirls of lusciously thick cream cheese icing, but as I started making it I realised that a glaze would work much better. The icing was quite sweet so I didn't want too much of it on the cake, plus I had to use quite a high ratio of rhubarb puree so that it wouldn't be overpowered by the flavour of the cream cheese. I love the light pink colour that the rhubarb gave the glaze, it just looks so inviting and fresh drizzled over the cake.
earl_grey_rhubarb_cake-2_filtered
The exterior look and feel of the cake itself is quite deceptive. It looks appears slightly dense and heavy, but when you cut yourself a slice you find a beautiful fluffy centre with just the right amount of flavour from the Earl Grey. It's not too strong but you can definitely notice its presence. I actually quite like the mottled banana-bread-like appearance that the loose tea leaves give the cake. The first thing you taste is the sweet rhubarb mixed up with smooth cream cheese and just a hint of lemon zest, then you're left with the light aftertaste of the bergamot. It's one of those lovely girly cakes that you just want to sit down and share with your girlfriends over a cup of tea.
earl_grey_rhubarb_cake-5_filtered
Earl Grey Cake with Rhubarb Cream Cheese Glaze
(Adapted from this Earl Grey Tea Cakes recipe from Good Taste)
2 Earl Grey tea bags (about 3 tsp leaves)
60ml (1/4 cup) boiling water
80ml (1/3 cup) milk
100g butter, at room temperature
2 eggs
160g (2/3 cup) caster sugar
190g (1 1/4 cups) self-raising flour

For the glaze: (this made quite a lot of glaze for me, you could halve it if you like)
150g rhubarb, diced
Zest of 1 lemon
2 tbsp caster sugar and 1 tbsp water
125g cream cheese, softened
1 cup (150g) icing sugar, sifted

Preheat oven to 180°C (350°F). Grease and line a 20cm round cake tin. Empty the tea leaves from the tea bags into a cup and add the boiling water. Set aside for 3 minutes then add milk to cup.

Place butter and sugar in a large mixing bowl and beat with an electric mixer on high speed until light and fluffy. Reduce speed to medium and add eggs one at a time, beating until smooth. With the mixer on low, gradually add flour and tea mixture, alternating between wet and dry ingredients. Beat until just combined.
earl_grey_rhubarb_cake-12
Pour mixture into prepared tin and bake for 25-30 minutes or until golden and a skewer inserted in the cake comes out clean. Remove from the oven and set aside for 2-3 minutes before turning onto a wire rack to cool completely.

While the cake is baking and cooling, place rhubarb in a small saucepan on low heat with lemon zest, sugar and water. Stirring occasionally, simmer rhubarb until soft and cooked through, about 10 minutes. Remove from the heat and set aside to cool. Puree mixture in a food processor or blender. Place cream cheese in a large mixing bowl and beat until smooth. Add sifted icing sugar and rhubarb puree and beat until smooth. Pour over the top of cooled cake and serve immediately. Can be refrigerated overnight.
earl_grey_rhubarb_cake-4_filtered
Print Friendly and PDF

Tuesday, June 7, 2011

Coconut Chiffon Cupcakes & Lime Curd

coconut_lime_cupcakes-15
Remember how I said I was suffering baker's block? One thing I tend to do when I'm lacking inspiration is look at what's left in my fridge and then browse my favourite recipe websites for ideas. And I have to say, it worked like a charm this time. I may be completely short of ideas, but somehow I managed to whip up some amazing little coconut chiffon cakes with lime curd and coconut buttercream.
coconut_lime_cupcakes-13
Now that I've finally gotten over my fear of baking sponge and chiffon cakes, there's no turning back. I love how light, moist and versatile it is. I've had this coconut chiffon cake recipe bookmarked for some time and I had all these limes waiting to be used (they were on special!). However instead of making a giant cake, I decided to make some petite cupcakes, filled in the centre with a dollop of that rich, creamy lime curd. I then whipped up a lovely coconut Swiss meringue buttercream, a little different from the original recipe but it was just what the cupcakes needed.
coconut_lime_cupcakes-4
I was a little apprehensive at first as the recipe used a lot of coconut essence, which I tend to find has a very artificial, unpleasant aftertaste. But it turns out that there's just the right amount of it used in this recipe to give you the heady aroma of coconut as you bite into the cake. I love how reliable all the GT recipes are. Lime and coconut are two things that are just meant to be together forever, and the lime curd is so rich and thick that you only need a tiny amount with these fluffy, super soft cakes to make them perfect.
coconut_lime_cupcakes-14
The only thing I wasn't sure about was whether or not to toast the flakes of coconut that went on top. In the end I went with untoasted because I love its snowflake-like appearance, but I can imagine the toasted coconut would have tasted great. Please make these, they will make you (and the people you feed them to) extra happy.
coconut_lime_cupcakes-5
Coconut Chiffon Cupcakes, Lime Curd & Coconut Buttercream
(makes 12-15 cupcakes, adapted from this Gourmet Traveller recipe)
170g (about 1 heaped cup) plain flour, sieved
125g (about 1/2 cup) sugar
1/4 tsp salt
1 3/4 tsp baking powder
115ml water
65ml (about 1/4 cup) vegetable oil
4 eggs, separated
1 1/4 tsp coconut essence
Pinch of cream of tartar
30ml (1 1/2 tbsp) Malibu (optional)

For the lime curd:
60g butter
40g caster sugar
40 ml lime juice (about 2 limes), plus rind of ½ lime, finely grated
3 egg yolks
½ titanium-strength gelatine leaf, softened in cold water for 5 minutes

For the coconut buttercream:
130 g (about 1/2 cup) caster sugar
3 eggwhites
150g unsalted butter, softened
1 tsp coconut essence
To serve: shredded coconut (can be toasted)
(If you're new to making Swiss meringue buttercream, these wonderful tutorials from two of my favourite bloggers will help)

Prepare the lime curd first; whisk butter, sugar, lime juice and egg yolks in a heatproof bowl over a saucepan of simmering water until combined and smooth, then stir occasionally until thick (3-6 minutes), make sure to keep an eye on it so it doesn't get lumpy. Stir in lime rind and remove from heat. Squeeze excess water from gelatine, add to curd, stir to dissolve. Cover closely with plastic wrap, set aside to cool, refrigerate until set.

Preheat oven to 165°C (330°F). Combine flour, sugar, baking powder and salt in a bowl. Whisk in water, vegetable oil, egg yolks and coconut essence until smooth. Whisk eggwhites and cream of tartar in a separate bowl until stiff peaks form, fold one-third through flour mixture, then fold remaining eggwhites into flour mixture. Pour equal amounts into a 12 hole (I ended up making 15 as my papers were small) cupcake or muffin tin lined with baking papers, then bake until cakes are golden and a skewer withdraws clean (18-20 minutes; don’t be concerned if cakes crack a little). Cool cakes gradually by first turning off the oven a couple of minutes before they are done, then remove them from the oven and cool in tin for 10 minutes, then remove and cool on a wire rack completely. Brush with Malibu (I didn't have Malibu so I skipped this step and added an extra 1/2 tsp of coconut essence to the cake batter) and use a spoon or a knife to scoop a small amount of cake from the centre of each. Fill each hole with lime curd, about 2 tsp each.
coconut_lime_cupcakes

Prepare the buttercream; place egg whites and sugar in a medium heatproof bowl and whisk together. Place over a small saucepan of simmering water, attach a sugar thermometer and continue to whisk until the mixture reaches 160 degrees F (70 degrees C). Remove from heat and transfer to a large mixing bowl and whisk with an electric mixer on high until cooled and thick, about 3 minutes. Continue whisking on high, adding a tablespoon of butter at a time until it is combined. Add coconut essence and whisk until combined. If the mixture is runny at this point, chill for about 5 minutes and then beat until stiff. (The mixture may look like it has split, but keep whisking and it will come together eventually) Spread or pipe over cupcakes and sprinkle a pinch of coconut over the top of each. Can be stored in an airtight container for about 2 days.
coconut_lime_cupcakes-7
P.S. Thanks to Meaghan from Cupcake House who sent me these gorgeous cupcake wrapper samples something like two years ago! I've been saving them for just the right cupcake :)
Print Friendly and PDF