Tuesday, August 25, 2009

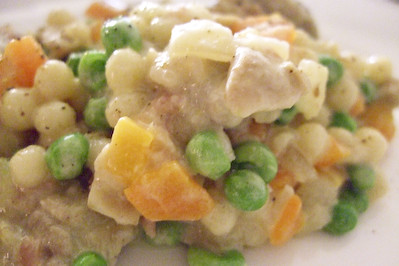
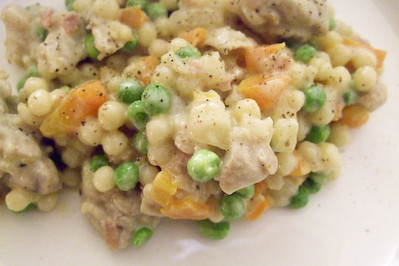
Chicken & Moghrabieh with a Greek Yoghurt Sauce

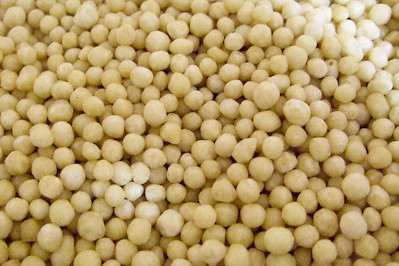
I recently went on a bit of a shopping spree at The Essential Ingredient. And by spree, I mean that I got a raised eyebrow from the shop assistant. It's a very dangerous place for me to be left alone in...yeah I went a little bit nuts! One of the things that I picked up was a huge bag of moghrabieh, a large couscous made from semolina. After trying it for the first time at Fouad's secret dinner, I was instantly enamoured with the texture of these little pearls. I had no idea what I was going to do with it, but I couldn't resist buying some for myself.

Uncooked moghrabieh
I originally wanted to just do some sort of creamy sauce with smoked chicken, but I had a bit of a failure with the grocery shopping that day and had to throw together whatever random bits I could get my hands on. I am probably mixing random foods from random cuisines that don't really go together, hopefully it's not insulting to anyone! ...But it tasted good, so that was enough to make me and the boy happy! A bit of Greek yoghurt added the creamy texture and tang that I was looking for, without being too heavy or rich. I also wanted to add broadbeans but had to substitute it with frozen peas since I couldn't find any at the time. The sauce may have been random, but was happily gobbled up, and would be good with any sort of pasta if you're not able to get your hands on some moghrabieh.

Moghrabieh with a Greek Yoghurt, Chicken & Pancetta Sauce
6 chicken thighs, sliced into chunks (I originally wanted to serve this with 200g smoked chicken)
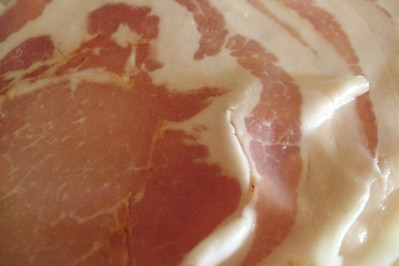
100g pancetta
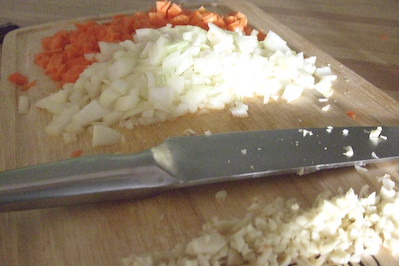
1 onion, diced
2 carrots, peeled & diced
2 cloves garlic, finely diced
6 sage leaves, or whatever fresh herbs you prefer
1 cup Greek yoghurt
1 cup chicken stock
1 cup white wine (I used a sweet sparkling one)
1 cup baby peas (or broadbeans)
1/2 cup shaved parmesan
1 cup moghrabieh (or a serve of any other pasta of your choice)
freshly ground pepper & salt

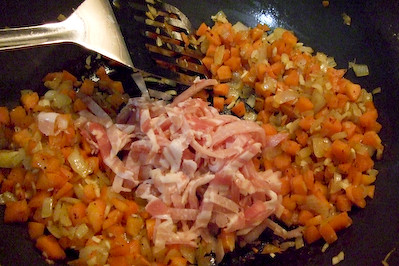
Heat some olive oil in a large frying pan or pot over medium heat. Fry your onions and carrot first, allowing them to sweat and soften without burning. If you want to get your onions a bit caramelised, turn up the heat and add a teaspoon of sugar but make sure to stir it regularly to stop it from burning completely.

Put another large pot filled with water on the stove to boil for the pasta. Once the onions and carrot are very tender, add the garlic and fry for a few more minutes. Add the chicken and pancetta and cook for 3 minutes or so, until the chicken is sealed.


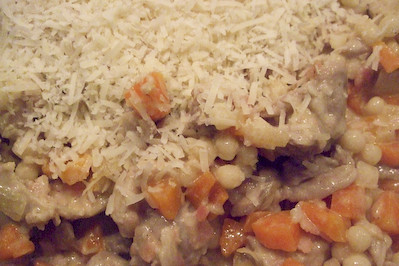
Add some salt then the moghrabieh to the boiling pot of water. Cook in boiling water for 20-25 minutes until tender. Add the sage and the chicken stock and simmer for a few minutes, then add the wine and allow the sauce to reduce by about half (arouns 10-15 minutes). Reduce the heat to low and stir in the peas and yoghurt. When the mograbieh is ready, drain water well and then stir into the sauce along with the parmesan cheese. Season to taste with salt and pepper.

The sauce itself is quite light but the moghrabieh was surprisingly filling. I'm still in love with their texture, pop in your mouth morsels with a smooth, soft exterior which yields to a firm middle with a bit of bite to it. I couldn't only manage the smallest serving for dinner, so this meal lasted us for ages! I have a feeling that my 1 kilo bag of moghrabieh will take me a very long time to finish, which makes it seem like good value :)
Print Friendly and PDF

Saturday, August 22, 2009

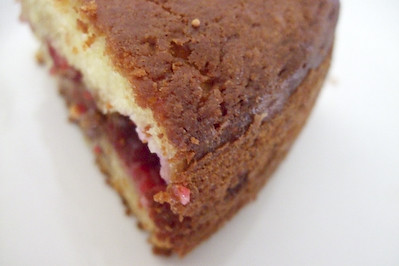
Fig & Raspberry Teacake


Sometimes it's better to keep things simple. I can get in strange moods and come up with the most ridiculous baking experiments, which more often that not leave me with a messy kitchen and a Fail cake of some sort. Now and then I get fed up of doing the weird stuff and just want to whip together something easy but equally delicious.

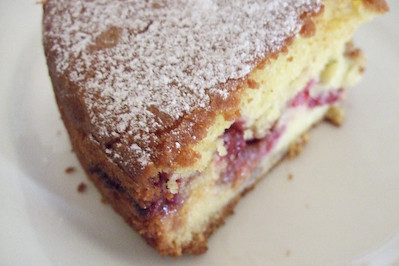
This teacake is nothing special but was a good way to use up some of the random non-fresh fruit and leftover buttermilk I had sitting around in my larder. I had frozen raspberries and dried figs, which work really well together.

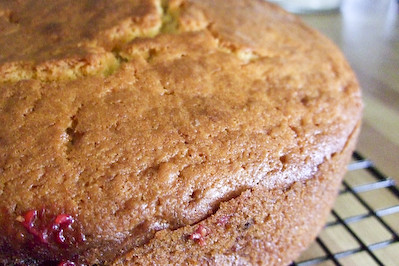
Obviously it would be even better if I had fresh raspberries and figs, but that wasn't possible at the time. You could replace these with any fruit of your choice, it's a basic but lovely light and buttery cake that's perfect for afternoon tea.

Fig & Raspberry Teacake
150g sugar
200g butter
225g plain flour
75g self-raising flour
1 tsp bicarbonate soda
2 eggs
300ml buttermilk (You can substitute this with regular milk and 1 tsp lemon juice if you can't get buttermilk)
2 tbsp brown sugar
1 tsp cinnamon
100g raspberries (fresh or frozen)
150g figs (dried or fresh, roughly chopped)

Preheat oven to 180 degrees C. Sift flours together in a medium bowl. Cream butter and sugar in a large mixing bowl with an electric mixer until it is light and fluffy. Add eggs one at a time, beating after each one until well combined. Mix buttermilk in and then fold flours into the mixture carefully.

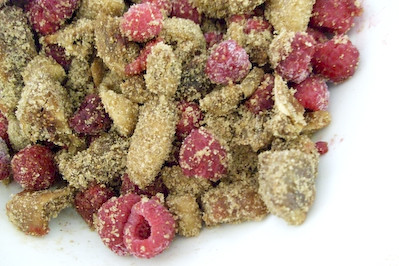
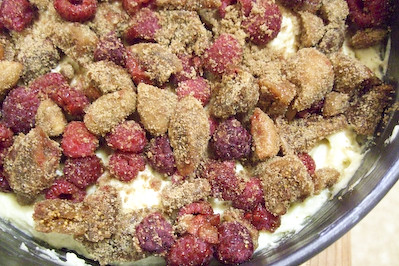
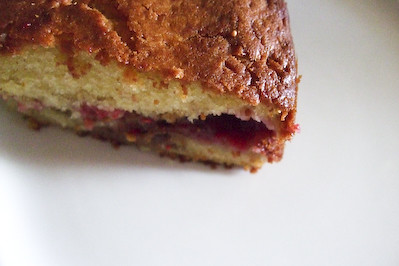
In a small bowl, stir fruit, brown sugar and cinnamon together. Pour half the cake batter into a medium, round springform tin and then sprinkle the fruit mixture over the top. Cover with the rest of the batter. Bake for 45-50 minutes or until a skewer inserted into the centre of the cake comes out clean. Some of the fruit mixture may ooze out the sides depending on how close you placed it near the edge of the pan.

Stand for 5 minutes and then remove from tin and stand on a wire rack to cool further. When cooled, dust the top with icing sugar. Can be served on it's own or with cream.

PSSST! You can still vote for my pupcakes in the Creative Cupcake Competition on the RSPCA website! You can vote multiple times as long as you are in a new session on your browser ;) Click here to register your vote! Thanks so much to everyone who voted, I know I won't win but it's still fun heehee!
Print Friendly and PDF

Friday, August 21, 2009

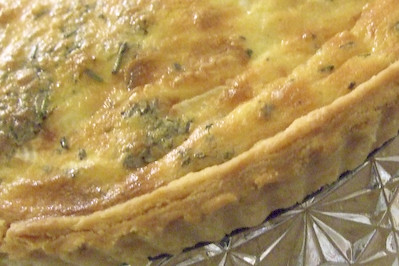
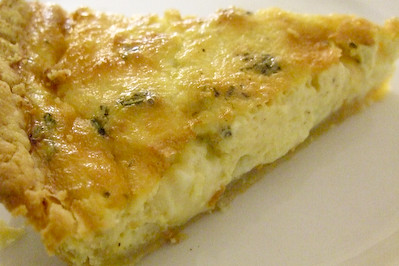
Two Cheese & Rosemary Tart


Dear Stephanie Alexander, I ♥ you. The Cook's Companion has never failed me. Okay there is the date scone recipe which I swear has a typo in it because the dry to wet ratio never seems to work for me no matter how many times I retry it, but ignoring that it's my old faithful. The orange teacake recipe is the basis of my cupcake recipe and am always pulling out the chocolate self-saucing pudding, sticky date pudding and banana cake recipes when I am in need of comfort desserts. Much love, from another Stephanie :)

Originally I bought some cheese with wild fantasies of whipping together a fabulous two cheese souffle, after being challenged to bake one by Peter Pad Thai, my Iron Chef judge. But that particular night I was was getting bad vibes from my kitchen (does that sound insane?) and was feeling a little tired. So I lost my nerve and went with a slightly safer but equally yummy option. Stephanie's gruyere tart caught my eye. Shortcrust pastry and melty cheesy innards, you can't go wrong with that. Obviously I replaced the gruyere with the cheeses I had in my fridge which happened to be a wheel of double cream brie and my most favourite cheddar, a Tasmanian cheese mixed with fresh wild wasabi.

Two Cheese Tart with Rosemary
(Adapted from Stephanie Alexander's recipe from A Cook's Companion)
1 sheet shortcrust pastry (I used Stephanie's recipe, will post it up soon)
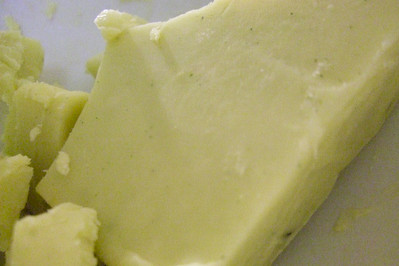
250g of cheese of your choice (I used 100g wild wasabi cheddar and 150g brie)
1 cup cream
salt
freshly ground pepper
freshly grated nutmeg
2 eggs + 1 egg yolk
2 tsp fresh rosemary finely chopped

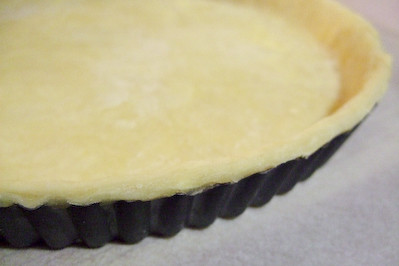
Line a 22cm loose-bottomed flat tin with pastry and blind bake at 200 degrees C for 15 minutes and then bake uncovered for 5 minutes. Allow to cool

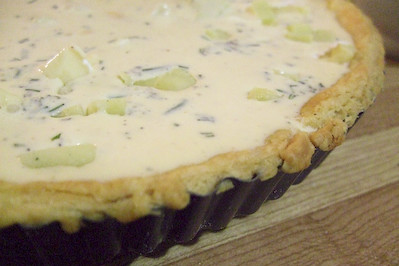
After blind baking

Cut cheese into tiny dice and scatter over pastry.

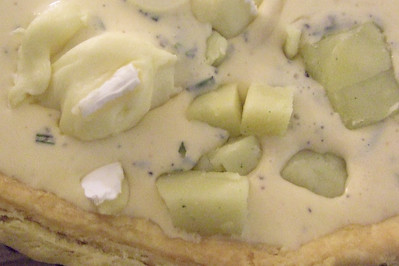
Warm cream in a pan over low heat and season it with salt, pepper, rosemary and nutmeg. Mix eggs and egg yolk into cream and pour gently into pastry case.

Okay so my pastry was a tiny bit wonky
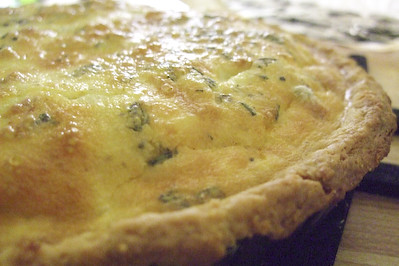
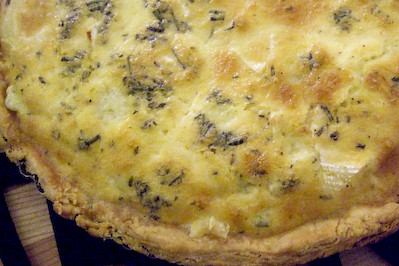
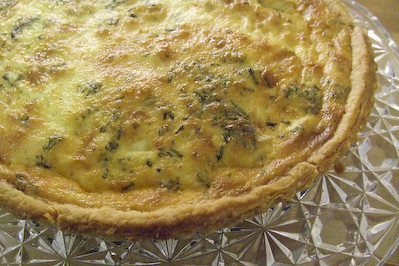
Bake at 200 degrees C for 20 minutes or until the top is golden and the middle is just set. Allow to cool for a few minutes before cutting.


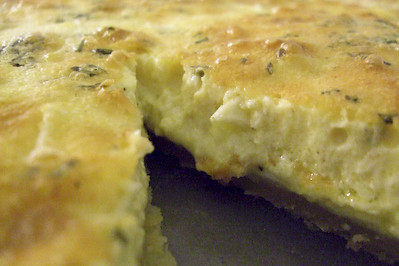
Mmm melty...
The tart puffed up a tiny bit and was light, airy and full of small pockets of gooey cheese. The shortcrust pastry recipe I used was so buttery and short and so easy to make that I instantly fell in love with in. I even had enough leftover pastry to make a sweet dessert, but I'll save that for another post ;)

I would definitely recommend buying some of the wasabi cheese for this tart, it was a lovely surprise of flavour to find in the tart and the rosemary matched it quite well, which was unexpected (I only added the rosemary because I have too much of it and needed to use some up).

My only complaint was that it was still a little too eggy for a tart filling, I think next time I might increase the amount of cheese and not use that extra egg yolk, so feel free to try doing that if you use the recipe above.

Print Friendly and PDF

Sunday, August 16, 2009

Cupcake Day for the RSPCA - Pupcakes!


As mentioned previously, Monday 17th August 2009 is Cupcake Day for the RSPCA. I decided to participate thanks to a bit of gentle persuasion from a certain person. I love the idea of it, it's such a cute and fun way to raise money and everyone can get involved. So I quickly registered to be a cupcake cook on their website, and received a Cupcake Kit in the mail a couple days later with posters and balloooons!

Since this was my first year participating, I had to go with the obvious cliche, animal cupcakes. Someone jokingly mentioned "You should do pupcakes!", and being the big cheesy person that I am, I just had to do it!

Many ideas were explored, but I decided to keep it simple. Lemon cupcakes adapted from my foolproof cupcake recipe, with maple cream cheese icing (a huge hit on top of my sweet potato cake recently).

The only extra bit of flair came from some persian fairy floss to make them a bit furry looking, an idea that came to me while enjoying dessert at the Gazebo Wine Garden, which included a fairy floss topped brownie. It was a bit fiddly, but each pupcake got its own unique hairstyle.

This one looks like a bit of an Einstein don't you think?
The thing that pleased me most was that these are really yummy, as well as looking super cute. A light, moist, crumbly cake with the heady scent of lemons and a smooth, rich icing with a hint of maple syrup. Hopefully everyone will think these make it worth forking out the money for a good cause!

Mmm marshmallowy...

Pupcakes!
(Adapted from my foolproof cupcake recipe)
2 eggs
125g unsalted butter, softened
3/4 cup caster sugar
225g self-raising flour (I usually make this by mixing plain flour and baking powder using the instructions on the baking powder pack if I don't have self-raising flour)
1 large lemon
1 mandarin
Cupcake papers

For the icing:
125g cream cheese, softened
200g icing sugar, sifted
1 tbsp maple syrup

For the decorations:
Brown m&ms (1 per cupcake)
Dark chocolate chips (2 per cupcake)
Strawberry Starburst Fruit Chews (about 1 for 3 cupcakes)
Optional: Persian fairy floss

Preheat oven to 180C and line a cupcake tray with paper cases. Zest lemon and set aside the zest. Juice lemon and top up with mandarin juice (if necessary) to obtain 1/3 cup juice. Cream butter and sugar together using an electric beater until light and smooth. Add eggs at a time and beat in well. Add the juice, lemon zest and flour and quickly mix until combined, avoid overmixing the flour.

Pour cake mixture in paper cases, filling them about half to two-thirds full. It's usually easiest to use a table spoon to scoop the batter and then drop it into your paper cases. Bake for about 20 minutes, or until the tops are dark golden brown and cakes are thoroughly cooked through. Cool for a couple minutes in the tray then remove carefully and cool completely on a wire rack.

When cakes are completely cooled (I baked them the night before), cut marshmallows in half for the noses of the pupcakes. Place half a marshmallow on close to the centre of each cupcake.

Beat the softened cream cheese in a large mixing bowl until smooth. Add the sifted icing sugar and beat until well combined. Add maple syrup and beat until combined. Use a small spatular or the back of a spoon to smooth the icing over the top of the cakes and over the marshmallow snouts.

Place a brown m&m on the top of the centre of each icing-covered marshmallow to finish off the puppy nose. Use two chocolate chips for the eyes.

Place a strawberry fruit chew between two sheets of baking paper and carefully flatten with a rolling pin to about a millimetre or so thick. Cut into the shape of a tongue and place underneath their marshmallow snouts.

Grab a tuft of persian fairy floss (can be bought from Persian grocery stores and the Essential Ingredient) and arrange above the eyes for the puppies hairdo. If you can't get this, you could also place half oreo cookies (to make ears) on the top of the cakes at the same time as the marshmallow and cover with icing.

Voila! You have puppie cakes! Some may have some dodgy haircuts, but oh well...they're pretty cute aren't they?

Pupcakes waiting for their eyes and hair...a bit creepy, no?
I'm a bit buggered since this took a lot longer than I thought it would. Me & my kitchen are covered in icing sugar and fairy floss but I think it was worth the effort!

So tomorrow I will be hauling these little pups into work, in an attempt to sell them to my poor workmates who have become quite used to getting my baked good for free! The only thing I can't decide is how much to charge for them. What do you reckon?

P.S If you like my pupcakes, click HERE to vote for it for the Creative Cupcake competition on the RSPCA website!
Print Friendly and PDF