Showing posts sorted by relevance for query ice cream macarons. Sort by date Show all posts

Monday, July 9, 2012

Ice Cream Cone Macarons

Ice Cream Cone Macarons
How's everyones week been? I managed to tire myself out so much that I caught a cold by the end of the week, so my weekend was mostly spent sleeping with a little bit of baking mixed in. I always want to bake when I'm feeling under the weather, I guess it's a comfort thing. It's been a while since I baked up some macarons, and this weekend I decided to make Ice Cream Cone-Shaped Macarons filled with Vanilla Ice Cream & Waffle Cone Icing. I think we've firmly established the fact that I am shamelessly willing to make macarons in any wacky shape I feel like. I was inspired after seeing a recipe for an icing that actually used melted ice cream in it from Cookies & Cups. I thought it would be the perfect filling for a cute macaron shaped into an ice cream covered with rainbow sprinkles. Pretty freakin' cute.
Ice Cream Cone Macarons
Shaping the macarons shells into ice cream cones was pretty tricky. It is not an easy shape to get right because it's so irregular, and this makes the shell surface more prone to cracking. About half my batch of shells cracked in various places (sad face), mostly because I forgot that weirdly-shaped macarons need a LOT more drying time before they go into the oven. And the ones that didn't crack were still a little lumpy and funny looking, far from perfect but still cute! Sprinkles always help. I even found these nifty mini rainbow chocolate chips in my cupboard (my cupboard full of sprinkles is getting pretty huge), and used the red ones as the 'cherry' on top of each ice cream cone.
Ice Cream Cone Macarons
As mentioned in the original ice cream frosting recipe, the melted ice cream doesn't make a noticeable difference to the flavour of the icing, but it's just fun to have it in there. I used a strong flavoured French vanilla ice cream so the vanilla came through quite well. You could use any flavour you like really. I bet mint chocolate chip flavour with green shells rather than pink shells would be fantastic. I also decided to stir in some tiny pieces of crushed up waffle cone into the icing, so give it the whole flavour of an ice cream cone, not just the ice cream. I think it adds an interesting flavour and texture to the filling.
Ice Cream Cone Macarons
I probably wouldn't recommend this recipe for beginner macaron bakers, getting the triangle shapes right for the cone portion of the macaron shell is a pain in the butt. But if you're keen to do someone along the same lines, an easier alternative is to bake regular round macarons covered in sprinkles to look like the 'scoops' of ice cream, skewer 2 or 3 of them on a lollipop stick and place it in a mini ice cream cone. It would still look super cute and work well with the icing recipe.
Ice Cream Cone Macarons
Between all the sleeping and baking I did this weekend, I finally started to plan our honeymoon in Europe! We'll be there for about 3 weeks in Autumn, and we're planning to visit London, Paris, Barcelona and Amsterdam. I. Cannot. Wait. So feel free to drop me an email or a comment with any suggestions you might like the share for must-sees, must-dos or must-eats! I would appreciate any help :)
Ice Cream Cone Macarons
(makes about 15 macarons, ice cream frosting recipe adapted from Cookies & Cups)
For the macarons: (if you are a beginner with macarons, read up and practice plain macarons first. BraveTart has lots of useful advice and info on the subject)
100g aged egg whites (you can use fresh eggs too, just make sure they are room temperature. I always use fresh these days, and zap it in the microwave on defrost for 10 seconds)
110g almond meal, at room temperature and well sifted
200g icing sugar
50g caster sugar
Optional: 1 tsp powdered egg whites (available from The Essential Ingredient), helps to stabilise egg whites but is not necessary
To decorate: pink food colouring (powdered or gel), 1/2 tsp cocoa powder sifted, rainbow sprinkles (I used mini rainbow chocolate sprinkles for the 'cherry' on top)

For the ice cream & waffle cone icing:
100g unsalted butter
2 cups (about 250g) icing sugar, sifted
1/4 cup completely melted ice cream (any flavour you like, I used French vanilla and left the right amount to melt in the fridge overnight)
1 medium waffle cone, crushed into small pieces

Prepare the macarons first; line two baking sheets with baking paper. Place icing sugar in food processor and pulse for a minute to remove any lumps. Stir in almond meal and pulse for about 30 seconds to combine. Place in a large mixing bowl and set aside. Using an electric mixer, beat egg whites and egg white powder in a medium mixing bowl until the egg white powder dissolves and it reaches soft peaks. With the mixer on high speed, gradually add sugar and beat until it reaches stiff peaks.

Add meringue to your dry mixture and mix, quickly at first to break down the bubbles in the egg white (you really want to beat all the large bubbles out of the mixture, be rough!), then mix carefully as the dry mixture becomes incorporated and it starts to become shiny again. As it just starts to mix together, place about a third of the mixture in a separate bowl. This smaller amount will be used to pipe the 'cones'. Add 1/2 tsp of sifted cocoa powder to this and then mix to the correct consistency. Take care not to overmix, the mixture should flow like lava and a streak of mixture spread over the surface of the rest of the mixture should disappear after about 30 seconds. Place mixture in a piping bag with a narrow tip, about 3mm wide. Add pink food colouring to the remaining 2/3rd of mixture and mix to the same consistency. Place mixture in a separate piping bag with a 1cm round piping tip.
Ice Cream Cone Macarons
Using the cocoa powder tinted mixture, pipe tall, skinny 'V' shapes to create the triangle shapes for the 'cones' on the prepared sheets. I piped them about 3cm long and 1 cm wide at the widest part. If you want to neaten up the edges of the shapes, use the blunt tip of a wooden skewer dipped in a small amount of hot water to fix up the edges. Pipe 2cm circles of pink mixture for the 'scoop' part of the ice cream cone macarons. Tap baking sheets carefully and firmly on the benchtop a couple times to remove any large bubbles. Decorate with rainbow sprinkles. Leave to dry for AT LEAST an hour, so that when you press the surface of one gently it does not break. This will help prevent any cracking and help the feet to form on the macs. These macarons seem to need a longer drying time than regular round ones as they are prone to cracking. Preheat your oven to 140-150°C (285-300°F), depending on your oven. Place on top of an overturned roasting tray or another baking sheet if your sheets are not professional grade, for better heat distribution. Bake for 20-25 minutes, depending on the size of your shells. Carefully test if the base of the shell is ready by gently lifting one and if it's still soft and sticking to the baking paper, then it needs to bake for a few minutes longer. Remove from the oven and cool on the tray for a few minutes, then gently remove from the sheet and place on a wire rack to cool completely.

Prepare the icing; remove the butter from the fridge about 30 mins before starting. Place butter in a large mixing bowl and beat on high with an electric mixer until smooth and fluffy. Reduce speed to low and gradually add icing sugar. Add melted ice cream and increase speed to high. Beat until smooth and combined. Fold crushed waffle cone pieces into the mixture, then place in a piping bag. Pipe and sandwich macarons with the icing. Place in an airtight container in the fridge overnight. Remove from the fridge and allow to come back to room temperature before serving. Can be stored in the fridge for several days.
Ice Cream Cone Macarons
Print Friendly and PDF

Sunday, April 17, 2011

Hot Cross Bun Ice Cream Sandwiches

hcb_icecream_sandwiches-14
I have a big thing for ice cream sandwiches. They always remind me of the 5 years I spent growing up in Qatar; back then there wasn't a MacDonald's to be found in Doha but they eventually opened up a Dairy Queen. For me that meant kiddy meals with little pots of pink silly putty as the prize and yummy, sugar-coma inducing ice cream sandwiches. Ahh the memories. But as much as I love them there's a very good reason why I've never made them at home before. It's a long, slow process with many steps and lots of waiting. I just don't have the patience for that. (And of course disaster struck during the ice cream sandwiching process - I accidently left the freezer door open for a few hours which is why all my photos are full of ugly melty ice cream *sad face*) But I've been planning this one a while, nearly as long as my Easter Bunny Macarons. I really, really wanted to make some ice cream sandwiches that tasted just like hot cross buns.
hcb_icecream_sandwiches-3
I was psyching myself up to start making them yesterday when I decided to do a quick Google search to see if it had already been done (I usually do this for all my ideas). My heart sank a little when the search reminded me that Y had made these amazing hot cross bun cookie sandwiches a couple years back and I knew I could never reach that level of perfection. But I decided to press on with my attempt, since I had a lot of egg yolks to get rid of. My interpretation is slightly different to Y's, with the cookie adding to the flavours that made this ice cream sandwich very much like a hot cross bun in taste. I decided to use my Orange Buttermilk Choc Chip Cookies as they were lovely and light so they wouldn' be too hard after freezing. I made them slightly bigger than the original recipe and added some cinnamon, using a cookie cutter right after baking to give them nice, clean edges. The orange zest in the cookies seemed like a great substitute for the candied orange peel you find in some hot cross buns. (I've never been a fan of the candied orange peel in the buns) Also the chocolate chips reminded me of the choc chip hot cross buns that I happen to love.
hcb_icecream_sandwiches-5
Lisa, my trusted advisor for all things ice cream and doughnut related, suggested that I adapt her lovely Christmas pudding ice cream, replacing the fruit and nuts with sultanas and currants. It worked perfectly, such a beautifully creamy and smooth ice cream that really tasted just like a hot cross bun, especially thanks to the sultanas and currants. I would be quite happy to eat the ice cream on its own to be honest. And before anyone starts complaining about the amount of wastage you get from the leftover scraps after using the cookie cutters to get your pretty round sandwiches, just remember you can re-freeze the leftover ice cream and crush up the cookie bits and have yourself an awesome snack with the leftovers. It's a great alternative sweet treat for Easter if you feel like doing something besides the usual hot cross buns. Just dont be like me, remember to close the freezer door or your sandwiches will go FLOP :(
hcb_icecream_sandwiches
Hot Cross Bun Ice Cream Sandwiches
(makes 12 ice cream sandwiches, adapted from Lisa's recipe)
3 eggs
2 egg yolks
2 tsp vanilla extract
1/2 tsp allspice
1 cup caster sugar
2 cups pouring cream (min. 35% milk fat pure cream)
3/4 cup sultanas
2/3 cup currants

For the cookies:
Ingredients for Orange Choc Chip Buttermilk Cookies
plus
1/2 tsp ground cinnamon
100g melted white chocolate

Place the eggs, extra yolks, vanilla, spice and sugar in a heatproof bowl. Place over a saucepan of simmering water and whisk until thick and pale. Remove from the heat and beat for a further 5 minutes or until cool. Whisk the cream until stiff peaks form. Gently fold through the egg mixture until just combined. Refrigerate until cold, preferably overnight. Freeze in an ice cream maker, according to manufacturer's instructions. Fold through sultana and currants, pour into a baking paper lined casserole dish or large baking sheet with high sides and freeze until hard (at least 6 hours or overnight).
hcb_icecream_sandwiches-13
Prepare the cookie dough as per the recipe, adding the extra cinnamon to the dry ingredients when you whisk them together. Spoon slightly larger portions of dough for each cookie, about 2 tbsp and flatten it out slightly using a spatula, leaving at least an inch of space around each cookie. You should be able to make 24 cookies. Bake, 1 sheet at a time, until cookies are puffed and golden at 180°C (350°F). Remove from the oven, while still hot and soft, place a sheet of baking paper over the top of cookies and use a flat surface (like another baking tray) to gently press the tops of the cookies flatter. (Optional step:) Use a round cookie cutter to cut the edges off of each cookie so they are nice and neat. (I used a 7.5cm cutter) Place on a wire rack to cool completely.

When ready to assemble, use the same sized cookie cutter (or one size smaller) to cut rounds of ice cream out of the tray it was frozen in and sandwich between cookies. You have to this in several rounds to stop the ice cream from melting. Refreeze ice cream sandwiches until hard. Place melted white chocolate in a piping bag with a round tip and pipe white crosses on the tops of each ice cream sandwich. Freeze until set and then serve.
hcb_icecream_sandwiches-4
P.S. Special thanks to Justine who was sweet enough to lend me some of her ceramics to use for my posts!
Print Friendly and PDF

Tuesday, April 27, 2010

Beetroot Desserts

beetroot-3
Beetroot lollipop with fizzy sherbert powder, beetroot chocolate brownie with beetroot ice cream, beetroot & chocolate macaron
Sorry guys, no Daring Baker's challenge from me this month. One reason is because I've been super busy experimenting in the kitchen in preparation for The Food Blogger's Battle Royale Cook off! Which was as much fun as it sounds, believe me. My challenge was to come up with some sort of crazy dessert that incorporated some form of vegetable in the dish. So I was basically shitting myself, knowing what amazing cooks and bakers the other bloggers are, I knew they would come up with something mind-blowing. My main aim was to make something that wasn't inedible. And it had to be fun!
beetroot-30
So what did I come up with? After a week of experimenting, burning, hair-pulling, screaming, breaking and spilling I ended up with this: a trio of beetroot. Basically a beetroot tasting plate, which included: a beetroot & chocolate macaron; beetroot chocolate brownie with beetroot ice cream; and a beetroot lollipop with fizzy sherbert powder. I immediately prayed that no one at the party had an intense hatred of beetroot.
beetroot-5
I decided nearly straight away that I wanted to do a hard candy lollipop, no matter what vegetable I was using. I've been obsessed with making hard candy recently, and was excited to try it after getting my hands on a bottle of light corn syrup. Yeah yeah, I know corn syrup is terribly unhealthy, but I've never used it before and it's not the same without it in a lollipop. And I had to do the fizzy sherbert powder with it, because I've always loved how fun it is to dip a lollipop into that tingly, fizzy powder that will lead to a HUGE sugar high.
beetroot-18
The main reason I ended up choosing beetroot was because of Hugh Fearnley-Whittingstall. I've always been intrigued by the idea of using beetroot in a dessert ever since I saw an episode of River Cottage where he used it in about 5 different desserts. And though I wasn't convinced the flavour of beetroot necessarily belonged in a sweet dish, I was in love with the gorgeous colour it would make everything. In particular, the colour of my beetroot ice cream made me clap my hands with glee.
beetroot-16
Yes the ice cream was unmistakably beetroot. There was the intense colour and an equally intense flavour from the pureed beetroot. I roasted my beetroot until it was super tender in the hopes that it would lessen the strong, earthy flavour and help sweeten it, but even then I found the flavour in the ice cream a little bit much for me. But in small amounts, I think it worked well with the fudgy, crisp-topped brownie. The brownie only had a very subtle flavour from the beetroot but it did give it a nice red tinge, almost like a red velvet cake, and it stayed nice, moist and crumbly. I did have some disasters with the ice cream, since I don't have a machine, so it was frozen in a container and taken out to be churned though my food processor many times. Somehow it turned out surprisingly smooth (I think mostly thanks to the cream and glucose) and freakishly held its shape after being spooned on top of the brownie, which was unsettling...but great for photos!
beetroot-9
But I think my favourite part, and the most fun element of the dish was definitely the lollipop with the sherbert powder. The lollipop itself didn't taste much of beetroot (which may have been a good thing), so I added a little sploge of beetroot puree underneath. It took about three attempts to get the lollipops right, since I had a lot of issues with the candy caramelising and tasting of burnt toffee. But miraculously, my final batch worked well, and my favourite $2 IKEA heart shaped silicon ice cube trays worked perfectly as candy moulds! The fizzy sherbert powder was surprisingly easy to make and brought back many childhood memories :)
beetroot-14
I had my usual dramas with the macarons. It was my first time trying out chocolate shells, which inevitably led to a batch of failed macarons with no feet (which I then forgot about and set fire to, which set off the smoke alarm late at night, oops). The ones I ended up with were a little undercooked but had okay feet. I had trouble figuring out how to make the ganache beetrooty, but ended up going with a white chocolate ganache and added some beetroot puree. Unfortunately the white chocolate was a little overpowering so you couldn't tell it was beetroot except for the colour, and I think the mixture may have split in the fridge, but hopefully it wasn't too obvious in the finished macarons. So does beetroot work well in a dessert? Wellll, I guess in the context of our cook-off challenge it was okay but I don't think I would eat the ice cream on its own. Perhaps the ice cream might work well in some sort of savoury dish? But the brownie was pretty tasty, if I didn't see the beetroot go into the mixture I might not have guessed it and I can't stop eating the lollipops! UGHH anyway, I'm sorry this post is SOO long, I don't blame you if you have a tl;dr moment. But for anyone who is curious about the recipes, here you go:
beetroot-24
Cooking the beetroot: In all the recipes below, I prepared by beetroot by chopping the stalks about 1 cm from the base and then washing, drying and wrapping them in foil. I then placed them in a 180 degrees C oven for two hours, roasting them until they were tender and sweet. The easiest way to peel them is to take them straight out of the oven, carefully unwrap and then peel the skin off under cold running water. This is usually my favourite, easy way to cook beetroot for any salads or to serve with other roasted veges :) For anything that required puree I pulsed it for AGES in my food processor, stirring it with a spatula every now and then so it was super smooth. I figured a chunky beetroot puree might freak people just a little too much in a dessert.
beetroot-12
Part 1: Beetroot Lollipops with Fizzy Sherbert Powder
(makes approximately 24 lollipops)
1 medium beetroot, roasted, peeled and grated
2 cups caster sugar
2/3 cup light corn syrup
2 cups bottled apple juice
1/2 tsp cream of tartar
Hard candy moulds or silicone ice cube trays + lollipop sticks

Icing sugar
Citric acid
Bicarb soda

(Note: if you are keen to try other flavoured lollipops, simply replace beetroot and apple juice with 1 cup water and whatever flavour you want, oil based flavours work better I've heard)

Place grated beetroot in a small saucepan and boil on medium heat with apple juice until it reduces and is heavily coloured with beetroot juice, about half an hour. Strain liquid, you need enough to make 1 cup of liquid. If not, top up with cold water to make 1 cup. Place beetroot juice, caster sugar, corn syrup and cream of tartar in a medium saucepan with a candy thermometer. Stir with a silicon spatula, on high heat until the sugar dissolves. After this, try not to stir it anymore as this can cause sugar crystals to form. Allow it to bubble, until it reaches the hard crack stage at 300 degrees F (150 degrees C).
beetroot-26
I found mine started to burn before it reached 300 degrees F so as it got close to that temp I was stirring up the sugar at the bottom of the saucepan with my spatula. You will know it is at the right stage as a small amount of syrup dropped into a cold glass of water will harden immediately. As soon as it reaches the right temperature, remove from the heat and pour straight into your candy molds. Allow to cool for a minute and then place the lollipop sticks into the middle (if you are using ice cube trays).
beetroot-31
To make the fizzy sherbert powder, ensure all your surfaces and hands are dry, as any moisture will ruin the powder. Sift icing sugar and stir in citric acid and bicarb soda. It is hard for me to give exact measurements as I did it to taste, but I would say it was about 1 cup icing sugar, 1 tsp citrus acid and 1.5 tsp bicarb soda.
beetroot-17
Part 2: Beetroot Chocolate Brownies with Beetroot Ice Cream
(adapted from River Cottage recipes, serves approx 24 people)
For the brownies:
250g beetroot, roasted until tender, peeled and pureed
250g caster sugar
250g unsalted butter
250g good quality dark chocolate
150g self raising flour
3 large eggs

Preheat oven to 180 degrees C and grease and line a 17cm x 27cm brownie tin. Melt chocolate and butter together in a bowl (the bowl of sin!), either in a warming oven or over a double boiler, or the lazy way in a microwave at 1 minute at a time. Stir until combined and set aside to cool. Whisk eggs and sugar together until smooth, then gradually whisk in chocolate mixture, until smooth. Gently fold in flour, followed by the beetroot puree. Take care not to overmix or brownie will be tough. Pour into tin and bake for approximately 20 minutes, or until a skewer comes out with some moist crumbs attached. Remove from oven and cool inside the tin on a wire rack and then cut into squares. It is better to undercook them as they will cook slightly more while cooling in the tin.
beetroot-23
For the ice cream:
6 large egg yolks
250ml milk
250ml double cream
2-3 medium beetroots, roasted until tender, peeled and pureed
75g caster sugar
1 tbsp glucose syrup

Beat egg yolks and sugar together until smooth. Heat milk in a pan until nearly boiling then remove from the heat, leave to cool slightly and then gradually whisk in the egg yolk mixture.

Pour mixture into a pan and heat gently, constantly stirring until the mixture thickens and coats the back of a wooden spoon. Do not let it get too hot or it will split. Remove from the heat, dissolve the glucose syrup into the warm custard and strain through a sieve, then allow to cool. Chill in the fridge, covered with a piece of greaseproof paper to prevent a skin from forming.
beetroot-27
When cold, stir in beetroot puree and cream. Pass through a fine sieve. Churn in an ice cream maker, or if you dont have one, freeze in a freezer safe container and take out every few hours and churn in your food processor. I did this about three times on the day and then once the day before serving.
beetroot-13
Part 3: Chocolate Macarons with Beetroot & White Chocolate Ganache
(adapted from Tartelette's macaron recipe, makes about 22 regular sized macarons)
110g almond meal, dried in a cool oven for 10 minutes and sifted
1 tsp egg white powder (optional)
100g aged egg whites (you can use fresh eggs too, just make sure they are room temperature. I always use fresh these days, and zap it in the microwave on defrost for 10 seconds)
50g sugar
200g icing sugar (minus 5 tsp icing sugar)
5 tsp cocoa powder, sifted + extra for dusting

110g white chocolate
1 tbsp beetroot puree
50 ml pouring cream

Place icing sugar in your food processor and process to remove any lumps. Add almond meal and pulse a few times, stirring every now and then with a spatula until the mixture is combined. Take care to not over process. Place in a large mixing bowl and set aside.

Beat eggwhites and egg white powder in a medium mixing bowl to soft peaks, then beat on high speed while gradually adding sugar, and beat until stiff peaks form. Do not overmix or macarons will be dry. Add meringue to the dry mixture, and mix in, quickly at first to beat out the air bubbles from the meringue. Take care not to over mix, the mixture should flow like lava and a small streak of mixture on the surface should disappear after a minute. Place in a piping bag with a plain tip and pipe 3cm rounds on two lined baking trays. Bang trays lightly on benchtop to remove any bubbles from mixture. Dust tops of shells with cocoa powder.
beetroot-28
Preheat your oven to 140 degrees C and leave trays to dry out for about an hour, so the surface of the macarons does not break when you lightly touch it with a fingertip. Bake for about 15-18 minutes, placing tray on an overturned roasting tray if they are not professional grade. Remove from the oven and allow to cool on tray for 5 minutes. Carefully peel shells from baking paper and cool completely on a wire rack.
beetroot-29
beetroot-20
To make the ganache, heat cream in a small saucepan until it just boils and remove from the heat and cool for 5 minutes. Add chopped white chocolate and set aside for 5 minutes to melt. Mix mixture until smooth using a whisk and cool completely. Fold in beetroot puree, you can adjust the amount of puree to your taste.
beetroot-21
If it is not thick enough to be spooned onto shells, chill for 10 minutes in the fridge. Spoon or pipe about 1 tsp of mixture onto a shell and sandwich with another shell. Refrigerate macarons overnight and then serve at room temperature.
beetroot-10
So my kitchen ended up covered in splattered beetroot stains, my hands were a very beety pink colour for the last couple of days, and I don't think me & A can look at another beetroot for a long time. But it was so much fun, and I ended up learning some new techniques (first time making ice cream and hard candy, yeah!), and hopefully I didn't gross anyone out too much. Thanks to Billy, Ellie and Linda for organising such a fun, exciting night and to Ellie for being such a lovely, gracious host. It was pretty inspiring seeing what everyone came up with, and I thoroughly enjoyed it. Dear Linda, your onion pannacotta is still blowing my mind! It definitely proved to me I would SUCK on Masterchef, I was stressing out even though all my things were pretty much ready to be plated when I showed up that night! If you are interested in reading more about the cook-off you can check it out here, here, here, here, here and here.
Print Friendly and PDF

Monday, March 18, 2013

Mint Chocolate Chip Macarons

Mint Chocolate Chip Macarons
The fun thing about working with an unfamiliar oven is having an excuse to go back to basics. I was super scared to try macarons in the oven in my new place since it took me many, many failed batches to get used to my last oven. But I decided bite the bullet and try a pretty uncomplicated recipe. It's essentially the macaron version of my Mint Chocolate Chip Cake, which included the icing version of the ice cream flavour. It's like dessert inception!
Mint Chocolate Chip Macarons
I used the same mint chocolate chip icing from the cake recipe, with a slightly stronger peppermint flavour since you're not going to be eating a whole slice worth of icing. I made some plain macaron shells tinted with a bit of green and blue colouring and sprinkled with cocoa nibs. I love using cocoa nibs and they are perfect for this macaron flavour. I know they're not that easy to get a hold of so you can always substitute it with a dusting of cocoa powder instead.
Mint Chocolate Chip Macarons
Thankfully the my first batch of macaron shells turned out pretty good. A little bumpy, but the shells had good feet and weren't hollow inside. But I have learnt that my oven is much hotter than the previous oven, so I pretty much have to lower the temperature about 20 degrees from what is stated in most recipes. It's an important thing to learn; every oven is totally different and you need to get to know how hot or cool your oven operates and adjust the oven temperature accordingly. It's handy to get an oven thermometer but I tend to get a feel for it over time.
Mint Chocolate Chip Macarons
You might end up with some extra icing after filling your macarons. You could throw it out, or ice some cupcakes, or go totally nuts and bake some Salted & Malted Chocolate Chip Cookies and sandwich it with a bucketload of icing. Oh yeahhhh.
Mint Chocolate Chip Macarons
I know this macaron flavour has totally been done before, but it was fun to try out anyway. I knew that the macaron would probably look a lot more elegant with a simple mint flavoured chocolate ganache, but I wanted to get the full mint chocolate chip experience by using the fabulous icing that looks just like the ice cream flavour. Of course I couldn't resist picking up some mini ice cream cones to play with too!
Mint Chocolate Chip Macarons
(makes about 15-16 macarons)
For the macarons: (if you are a beginner with macarons, read up and practice plain macarons first. BraveTart has lots of useful advice and info on the subject)
100g aged egg whites (you can use fresh eggs too, just make sure they are room temperature. I always use fresh these days, and zap it in the microwave on defrost for 10 seconds)
110g almond meal, at room temperature and well sifted
200g icing sugar
50g caster sugar
Optional: 1 tsp powdered egg whites (available from The Essential Ingredient), helps to stabilise egg whites but is not necessary
Blue/green food colouring (powdered or gel)
To decorate: cocoa nibs (also available from The Essential Ingredient)

Line two baking sheets with baking paper. Place icing sugar in food processor and pulse for a minute to remove any lumps. Stir in almond meal and pulse for about 30 seconds to combine. Sift into a large mixing bowl and set aside. Using an electric mixer, beat egg whites and egg white powder in a medium mixing bowl until the egg white powder dissolves and it reaches soft peaks. With the mixer on high speed, gradually add sugar and beat until it reaches stiff peaks. (You can add the food colouring to the meringue as you are beating it to stiff peaks, it makes it easier to adjust how much colouring to add. Otherwise add it in the next step. I used a green gel colouring with a hint of aqua gel as well.)

Add meringue to your dry mixture and mix, quickly at first to break down the bubbles in the egg white (you really want to beat all the large bubbles out of the mixture, be rough!), then mix carefully as the dry mixture becomes incorporated and it starts to become shiny again. Take care not to overmix, the mixture should flow like lava and a streak of mixture spread over the surface of the rest of the mixture should disappear after about 30 seconds. Place mixture in a piping bag with a 1cm round piping tip. Pipe rounds about 3cm diameter, leaving at least 2cm space around each one. Tap baking sheets carefully and firmly on the benchtop a couple times to remove any large bubbles. If you wish, you can decorate the shells with cocoa nibs or a dusting of cocoa powder.

Leave to dry for about an hour, so that when you press the surface of one gently it does not break. This will help prevent any cracking and help the feet to form on the macs. Preheat your oven to 130-150°C (265-300°F), depending on your oven. You can place the sheet of piped shells on top of an overturned roasting tray or another baking sheet if your sheets are not professional grade, for better heat distribution. Bake for 20-25 minutes, depending on the size of your shells. Carefully test if the base of the shell is ready by gently lifting one and if it's still soft and sticking to the baking paper, then it needs to bake for a few minutes longer. Remove from the oven and cool on the tray for a few minutes, then gently remove from the sheet and place on a wire rack to cool completely.
Mint Chocolate Chip Macarons
For the mint chocolate chip icing:
125g salted butter, softened (or use unsalted and add 1/2 tsp salt)
1 1/2 cups icing sugar (about 190g)
3 tsp peppermint essence
75g semi-sweet dark chocolate, either very, very finely chopped (I pulsed mine down in a food processor, sifting away the finer powder) or mini chocolate chips
Optional: green/blue food colouring

Place butter in a large mixing bowl and beat on high using an electric mixer until the butter is smooth and fluffy. Gradually beat in icing sugar until smooth. Add peppermint essence and food colouring, try to match the colour of the shells. Stir in chocolate bits gradually, you want to make sure you don't add too much and that your chocolate isn't too fine or it will turn the icing brown. Spoon or pipe into the macaron shells, sandwiching them together. Store in an airtight container overnight to allow them to mature. Serve at room temperature.
Mint Chocolate Chip Macarons
Print Friendly and PDF

Monday, July 14, 2014

Lemon Syrup Sponge Cake with Whipped Cream Cheese Icing and Berries

Lemon Syrup Sponge Cake with Whipped Cream Cheese Icing and Berries
It's been a crazy couple of weeks. I lost my tiny, ancient budgie who has been with me since I moved to Sydney and who I thought was going to live forever. I finally, FINALLY got my Ps, so have a newfound sense of freedom (don't judge, I lived right next to a train station for over 10 years so there wasn't much motivation to drive until recently). We bought a couch. So yeah...life. Anyway. This past weekend we had my cousin from Singapore visiting for her birthday, and I demanded to make her birthday cake.
Lemon Syrup Sponge Cake with Whipped Cream Cheese Icing and Berries
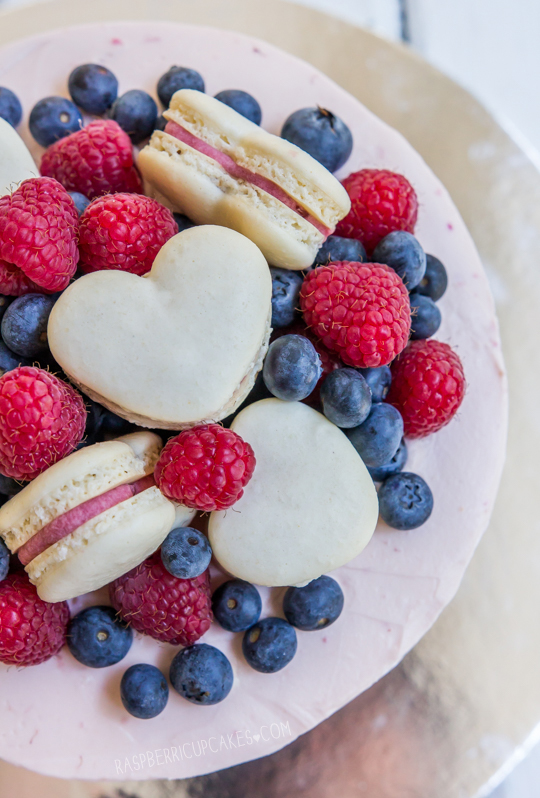
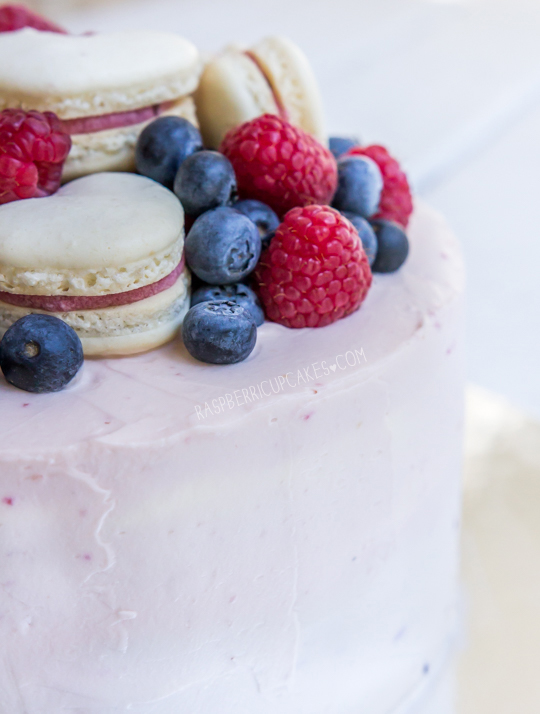
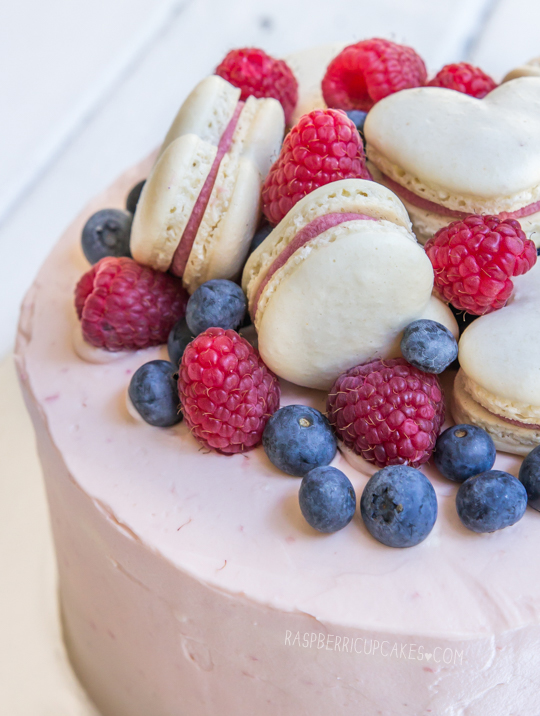
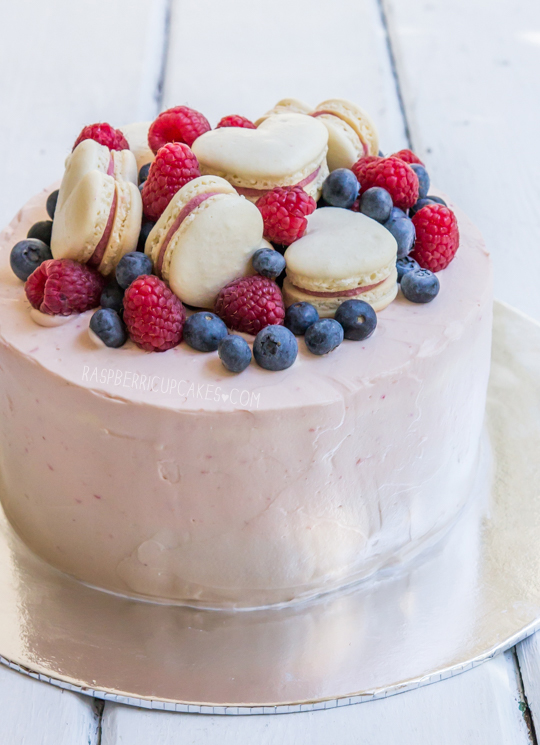
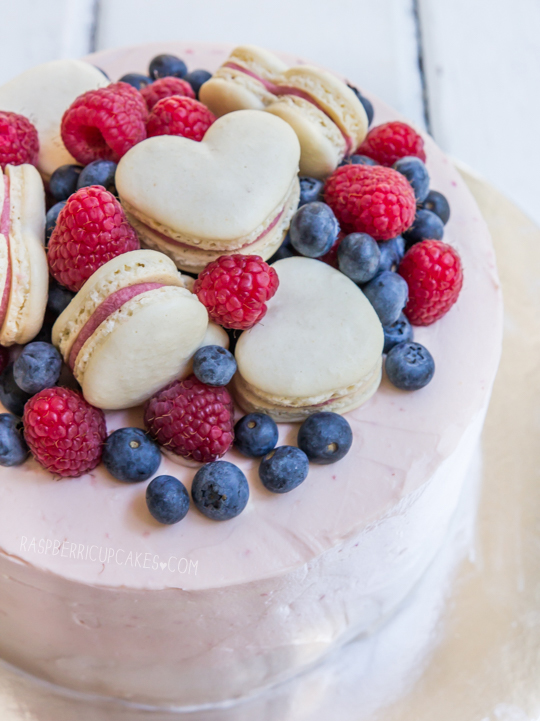
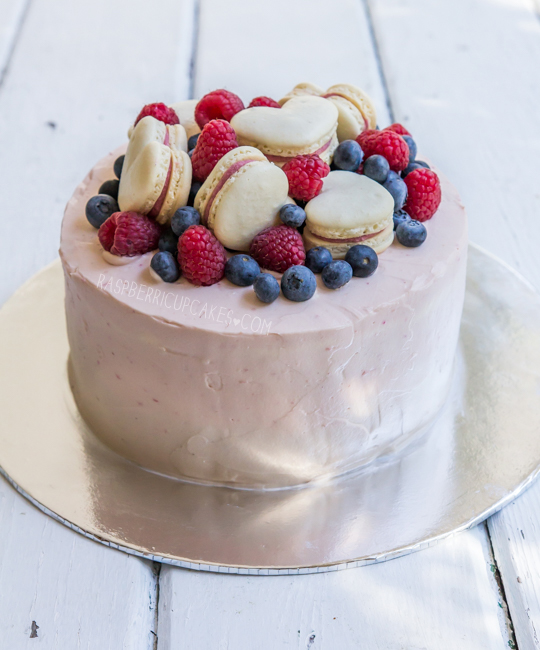
She requested anything with berries, preferably with sponge and cream cheese. So I made a simple vanilla sponge cake and soaked the sponge in a sticky lemon syrup, sandwiched it with one layer of raspberry filling and another layer of blueberry filling, and covered it in a fluffy whipped cream cheese icing, fresh berries and raspberry heart macarons. My original idea was to tint half the icing with blueberries to make it purple, and the other half with raspberries to make it pink and to ice the cake with an ombré effect. I did it, but the tinting was so faint that you can barely see it so it probably wasn't worth it.
Lemon Syrup Sponge Cake with Whipped Cream Cheese Icing and Berries
I'm still having issues with hollow macarons in my new oven, I'm going to have to keep experimenting to get the right temperature. It's driving me nuts. Anyway, it was one of the several things that I wasn't 100% happy about with this cake, but whatever it tasted great! Everyone was saying that they loved that the sponge wasn't too dry, the filling was super tasty and the icing tasted almost like ice cream! (Sneaky shot of the innards from my cousin) Surprisingly the whipped cream and cream cheese holds up fairly well at room temperature, the cake didn't melt at all (though it probably helps that it was friggin freezing). I think the icing worked particularly well with the sponge since both were quite delicate in texture and flavour, but the icing is so great that I want to try it out with some white cake next time. Happy Birthday P!
Lemon Syrup Sponge Cake with Whipped Cream Cheese Icing and Berries
(makes a 3 layer 18cm (7") round cake, sponge recipe from Gourmet Traveller)
For the Lemon Syrup Sponge Cake:
Note: If you are new to sponge cakes make sure you click through to the Gourmet Traveller link above for extra tips. This sponge cake relies solely on the whipped eggs for leavening and it is important you follow all the steps carefully.
Sponge cake:
60g (about 4.5 tbsp) butter, melted and cooled plus extra for greasing tins
180g (about 1 &1/3 cups) plain/all-purpose flour, plus extra for dusting
6 eggs, at room temperature
165g (about 3/4 cup) caster/superfine sugar
1 tsp pure vanilla extract
  1. Make sure your eggs are at room temp and preheat oven to 180°C (350° F) (you may need to adjust to 160-170°C (340° F) for fan-forced). 
  2. Brush three 18cm (7 inch) round cake tins with melted butter, line base and sides with baking paper, grease paper with a little extra butter and then dust lightly with flour. 
  3. Triple-sift flour and set aside. 
  4. Whisk eggs, sugar and vanilla in an electric mixer until thick, pale and tripled in volume (about 7-8 minutes). Sift over flour in two batches, folding each batch in with a large metal spoon or spatula.
  5. Fold in melted butter. 
  6. Carefully pour equal amounts into prepared tins and bake until light golden and centre springs back when pressed lightly with your fingertip (about 20 minutes). 
  7. Pull cake gently away from sides of tin with your fingers or carefully loosen with a knife. Turn onto a wire rack, remove baking paper, turn back over swiftly and cool completely. 
Lemon Syrup:
Zest of 1 lemon
Juice of 2 lemons, about 1/2 cup
1 cup (about 200g) sugar
1/2 cup water
  1. Place all ingredients in a medium saucepan over medium heat and stir until sugar dissolves. 
  2. Increase heat slightly and allow mixture to come to the boil, then simmer for about 3-5 minutes to allow syrup to thicken slightly. 
  3. Set aside to cool for 10 minutes.
  4. Use a fork or skewer to poke holes over the surface of your cooled sponge cakes. Use a brush or a small spoon to carefully drizzle lemon syrup over the surface of all three cakes (you don't need to use all of it, just enough to generously cover the surface of all three). 
  5. Cakes can be wrapped in clingfilm and stored in the fridge overnight, until ready to assemble.
Lemon Syrup Sponge Cake with Whipped Cream Cheese Icing and Berries
For the berry filling:
300g (5oz) berries, fresh or frozen (I used 1 punnet raspberries to fill between one layer, and blueberries for the other layer)
1/3 cup sugar
4 tsp lemon juice
1/2 tsp pure vanilla extract or vanilla bean paste
2 tbsp cornflour (cornstarch) + 4 tsp cold water
  1. Place berries, sugar, lemon juice and vanilla in a medium saucepan and place on medium heat. Stir over heat until sugar dissolves. 
  2. Mix cornflour and water together in a separate small bowl then add to the saucepan and stir over medium heat until mixture thickens, about 3-4 minutes. Set aside to cool.
For the whipped cream cheese icing:
250g (about 9oz) cream cheese, softened
1/2 cup (about 100g) sugar
300ml (about 1 & 1/3 cups) thickened (heavy) cream
Optional: 1/4 tsp vanilla extract or 2-3 tbsp of berry filling from above to flavour icing
  1. Place cream cheese and sugar in a large mixing bowl and beat with an electric mixer on high until smooth.
  2. With the mixer still running on medium speed, gradually add cream to mixture.
  3. Beat on high until mixture reaches stiff peaks, take care not to over mix or cream will split.
  4. Fold in vanilla or berry filling to flavour mixture.
To assemble cake:
  1. Place first cake layer on your serving plate or stand. 
  2. Spread a layer of berry filling over the top of the cake (I started with blueberry for the bottom layer and raspberry on top).
  3. Sandwich with another cake layer and repeat. 
  4. Crumb coat cake with cream cheese icing and chill cake for 15 minutes.
  5. Cover cake with remaining icing, smoothing with an offset spatula.
  6. Decorate with additional fresh berries and/or macarons (recipe here).
Lemon Syrup Sponge Cake with Whipped Cream Cheese Icing and Berries
Print Friendly and PDF

Sunday, September 11, 2011

Mint Chocolate Chip Cake

mint_choc_chip_cake-2
Chocolate cake and I have had a very interesting romance. I started off with quite an intense dislike of chocolate cake. I KNOW. But try not to judge me too harshly, I had many bad experiences with store-bought dry, dense mudcakes covered in grainy baking chocolate icing. So every year when I asked Regex Man what cake he would like for his birthday and every year he replied me with "Chocolate.", it usually filled me with dread. But I took on the challenge and made him a chocolate cake with salted caramel filling and the epic triple-triple chocolate cake covered in macarons. There have been many chocolate cakes since. And somewhere along the way I started to have a grudging respect for chocolate cake, which blossomed into love. Now I can't seem to stop thinking about them, baking them and eating them.
mint_choc_chip_cake-3
So this year for Regex Man's birthday I offered to do a chocolate cake even though he said it didn't have to be chocolate this year. I had this sudden urge to cover an entire chocolate cake with mint chocolate chip butter icing that looked exactly like the mint chocolate chip ice cream you get from Baskin Robbins. I was also incredibly inspired when I saw this cake idea not too long ago and while I was too lazy to do the chocolate ganache even though it looks awesome, I thought it would be cute to use some of the leftover icing to make 'scoops' with mini ice cream cones.
mint_choc_chip_cake-5
I used David Lebovitz's devil's food cake recipe again, my new favourite chocolate cake since making it for my raspberry cupcakes when I launched the new site. While making up the cake batter I misread the recipe and managed to add triple the amount of salt than I was meant to but it tasted so good that I just went with it and have included it in the recipe. It's only a small increase but it works well since I'm pairing the cake with quite a sweet icing. I even used a slightly salted butter for the icing to help stop the cake from being sickly sweet. This is seriously one of the easiest and best chocolate cakes I've ever made.
mint_choc_chip_cake-6
Originally I was going to arrange the scoops of icing around the edge of the cake, but I realised I didn't have quite enough icing to do that so I ended up just doing a few of them in the middle. I can't quite figure out if it looks a bit awkward but I'm happy with the way the icing itself looks. It really reminds me of mint chocolate chip ice cream, one of my favourite flavours. This cake is great for anyone who loves mint and chocolate together, and is easy to whip up and impress your friends with.
mint_choc_chip_cake-4
Mint Chocolate Chip Cake
(makes one 9-inch cake, cake adapted from David Lebovitz's Devil's Food Cake recipe)
9 tbsp unsweetened cocoa powder
1 1/2 cups cake flour (not self-raising, I just used plain flour and replaced 3 tbsp with cornflour/cornstarch)
1 1/2 tsp salt
1 tsp bicarb soda
1/4 tsp baking powder
115g (1 stick) unsalted butter, at room temperature
1 1/2 cups caster sugar
2 large eggs, at room temperature
1/2 cup strong coffee (or water, I used a weak coffee as I didn't want it overpower the mint)
1/2 cup whole or low-fat milk

For the icing:
280g (2.5 sticks) unsalted (or slightly salted) butter
500g icing sugar (about 4 cups), sifted
2-3 tsp peppermint essence, adjust to taste
150g dark chocolate, very finely chopped or pulsed through a food processor
green food colouring
Optional: waffle ice cream cones to decorate

Butter and line the base of a two 9-inch cake tins (I only had a 22cm springform tin which I used for both cakes) and preheat oven to 180°C (350°F). Sift together the cocoa powder, flour, salt, bicarb soda, and baking powder in a bowl. Using an electric mixer with a large mixing bowl, beat together the butter and sugar about 5 minutes until smooth and creamy. Add the eggs one at a time and beat until fully incorporated.

Mix together the coffee and milk. Stir half of the dry ingredients into the butter mixture, the add the coffee and milk. Finally stir in the other half of the dry ingredients until smooth. Split batter mixture between the two prepared tins (or in my case, I used half for the first cake, baked it and then reused the tin for the other half of the batter). Bake for about 25 minutes, or until a skewer inserted into the centre of the cake comes out clean. Remove from the oven and cool in tin about 5 mins, then place on a wire rack and cool completely before icing.
mint_choc_chip_cake-14
Prepare the mint icing; remove butter from fridge about half an hour before starting. Cut up butter into smaller pieces and place in a large mixing bowl. Beat with an electric mixer on high until fluffy and smooth. Add sifted icing sugar one cup at a time, beating until combined. Add peppermint essence to taste and green food colouring. Gradually add chocolate chip pieces until you have a good distribution of chocolate bits.

Use about 1/4 of the icing on top of one of the cakes and smooth over with a spatula. Place second cake top side down on top of the iced cake. Cover entire cake with more icing, smoothing with a spatula. I used an offset spatula, running it under hot water every now and then to help keep the surface smoother. Use the leftover icing to form scoops of icing to place on top of the cake, arranged however you like. Use mini ice cream cones or chop the ends of normal-sized cones and place on top of icing scoops. Alternatively you could cover the top with extra dark chocolate chips. Can be served immediately or stored in an airtight container overnight. Serve at room temperature.
mint_choc_chip_cake-7
Happy Birthday Regex Man!
Print Friendly and PDF