Tuesday, March 26, 2013

raspberri cupcakes on facebook

Hi! Just a quick note to let you know that by popular demand, I have FINALLY set up a Facebook page for raspberri cupcakes! Yay! Yeah I know, it's about 3 years too late but I honestly thought I would never do it since I am a bit wary of Facebook. I know a lot of you had asked me to make the page for a while now and I finally caved because I wanted to make sure there's plenty of options for everyone to get updated when I post a new recipe. Of course you can still subscribe via e-mail or rss to get my new posts, but now you can also LIKE my facebook page too! So please go and like away! I will try my best to keep it updated regularly with plenty of good shizz.
facebook
Print Friendly and PDF

Monday, March 25, 2013

Easter Trifles (with Chick Macarons)

Easter Trifles (with Chick Macarons)
Let's not beat around the bush; I've had a spectacularly shit week. Oh hell, I've had a spectacularly shit month. Excuse the language but I need to get it out there. My blog is my favourite place to get ranty. The one good thing that came out of this week was these Easter-themed trifles. Aren't they adorbs?! They are individual serve chocolate & orange trifles topped with a white chocolate nest, speckled eggs and orange white chocolate chick macarons. A bit of a mouthful and certainly much more complicated than last years super popular 
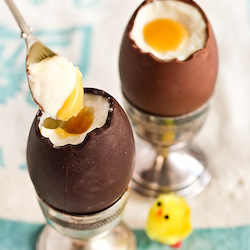
Cheesecake-Filled Chocolate Easter Eggs, but so worth the effort.
Easter Trifles (with Chick Macarons)
I love a good trifle any time of the year. I was inspired to put these together after my brother bought me the cutest, tiniest pastel coloured speckled eggs from Aldi (love Aldi!). I really wanted to do some sort of nest-like dessert and trifle was the first thing that came to mind. It was hard to think of the best flavours to use at Easter, but since I was using chocolate eggs I settled for the classic combination of orange and chocolate (a family favourite).
Easter Trifles (with Chick Macarons)
It's taken me a while to work up the energy to make a trifle again. I'm still emotionally scarred from my epic 7-layer passionfruit trifle that I made for Asian Gaga's birthday last year, which I managed to upend on the floor right after I finished the first attempt. I can still picture the smashed ruins of jelly, cream, sponge and macarons all over the white carpet. I thought that individual serves would be cuter for this themed trifle, especially topped with grated white chocolate to make it look almost like a nest. And then the sweetest chicklet macarons!
Easter Trifles (with Chick Macarons)
For the record, I know that chick macarons have been done for Easter by other blogs. Everyone seems to be into making animal-shaped macarons these days! But since these were just one component of a dessert I figured it would be fun to try. Plus I get to add them to my growing animal macaron zoo on this blog (which now includes koalas, cats, pigs, and another Easter favourite; bunnies). I had so much fun making them, but I did manage to nearly forget to add the salt until the last minute, which led to bumpier than usual shells since the salt grains didn't dissolve. 
Easter Trifles (with Chick Macarons)
The macarons are filled with a simple white chocolate orange ganache. They are so good to eat once you get over the fact that you are chomping into their cute little faces. I made a simple chocolate sponge, which I brushed with Grand Marnier and then layered with a homemade orange jelly and whipped cream dotted with vanilla beans. I also added a dash of Grand Marnier to the cream which gave it wonderful richness and got me just a leeeeeetle bit tipsy after eating one of the trifles.
Easter Trifles (with Chick Macarons)
I KNOW, you're probably thinking this is all way too complicated to attempt. But if you prep all the components the day before it isn't that bad, and you can even use store-bought sponge and packet orange jelly (this is one of the few times I will condone store-bought cake) or fruit to save time. You can skip the macarons or make sugar cookies instead. Or you could just make the macarons on their own. The possibilities are endless! Make sure you check out all my other Easter recipes from previous years. It's one of my all-time favourite holidays to bake for.
Easter Trifles (with Chick Macarons)
Chocolate & Orange Trifles with Chick Macarons
(serves approx 6-8 people, makes about 15 macarons)
For the macarons: (if you are a beginner with macarons, read up and practice plain macarons first. BraveTart has lots of useful advice and info on the subject)
100g aged egg whites (you can use fresh eggs too, just make sure they are room temperature. I always use fresh these days, and zap it in the microwave on defrost for 10 seconds)
1/2 tsp salt
110g almond meal, at room temperature and well sifted
200g icing sugar
50g caster sugar
Yellow food colouring (powdered or gel)
Optional: 1 tsp powdered egg whites (available from The Essential Ingredient), helps to stabilise egg whites but is not necessary
To decorate: Orange heart sprinkles/orange candy coated fennel seeds, black food colouring,

Line two baking sheets with baking paper. Place icing sugar in food processor and pulse for a minute to remove any lumps. Stir in almond meal and pulse for about 30 seconds to combine. Sift into a large mixing bowl and set aside. Using an electric mixer, beat egg whitesm salt and egg white powder in a medium mixing bowl until the egg white powder dissolves and it reaches soft peaks. With the mixer on high speed, gradually add sugar and beat until it reaches stiff peaks. (You can add the food colouring to the meringue as you are beating it to stiff peaks, it makes it easier to adjust how much colouring to add. Otherwise add it in the next step.)
Add meringue to your dry mixture and mix, quickly at first to break down the bubbles in the egg white (you really want to beat all the large bubbles out of the mixture, be rough!), then mix carefully as the dry mixture becomes incorporated and it starts to become shiny again. Take care not to overmix, the mixture should flow like lava and a streak of mixture spread over the surface of the rest of the mixture should disappear after about 30 seconds. Place mixture in a piping bag with a 1cm round piping tip. Pipe rounds about 3cm diameter, leaving at least 2cm space around each one. Tap baking sheets carefully and firmly on the benchtop a couple times to remove any large bubbles. I carefully topped half the macarons with two heart-shaped orange sprinkles for the feet and a candy coated fennel seed for the beak, then piped the wings on using a narrow star tip. (This does make the shells more susceptible to cracking, as an alternative you can bake the shells plain and pipe on decorations later with royal icing.)
Leave to dry for about an hour, so that when you press the surface of one gently it does not break. This will help prevent any cracking and help the feet to form on the macs. Preheat your oven to 130-150°C (265-300°F), depending on your oven. You can place the sheet of piped shells on top of an upside-down roasting tray or another baking sheet if your sheets are not professional grade, for better heat distribution. Bake for 20-25 minutes, depending on the size of your shells. Carefully test if the base of the shell is ready by gently lifting one and if it's still soft and sticking to the baking paper, then it needs to bake for a few minutes longer. Remove from the oven and cool on the tray for a few minutes, then gently remove from the sheet and place on a wire rack to cool completely. I used a wooden skewer dipped in black food colouring to draw on the eyes.

For the orange ganache:
200g (7oz) white chocolate, finely chopped
100ml (just over 1/3 cup) thickened (heavy) cream
Zest of one orange + 1 tbsp orange juice

Place white chocolate and orange juice in a medium mixing bowl. Heat cream and orange zest in a small saucepan over low heat until it just comes to the boil, stirring regularly. If you want a smoother ganache, strain the zest out at this point. Pour hot cream over white chocolate and leave to sit for about 3-5 minutes, then gently whisk until the chocolate melts and the mixture is smooth. (If it does not completely melt, place bowl over a small pot of boiling water and whisk until smooth.) Chill until mixture thickens but is still pipable, then sandwich in between macaron shells.
Easter Trifles (with Chick Macarons)
For the orange jelly (feel free to replace with packet orange jelly or segmented fresh orange slices):
1/2 cup water
Peeled rind and juice from 3-4 oranges
1-2 tbsp sugar, adjust to taste
2 tbsp powdered gelatine + 1/2 cup water
Optional: 1 tbsp Grand Marnier

Grease a 20cm square cake tin with vegetable oil or line with baking paper. Place powdered gelatine in 1/2 cup water and set aside to soften. Heat 1/2 cup water plus the peeled rind and juice in a small saucepan and simmer for about 5 minutes. Strain out the rind and add sugar to taste. Gently whisk in softened gelatine and Grand Marnier and pour into prepared tin. Chill for at least 3-4 hours until set or overnight. 

For the chocolate sponge:
Use this recipe from Gourmet Traveller, which I always use for my Tim Tam Cake. You can also use store-bought sponge.

To assemble:
475ml (about 2 cups) thickened cream
1 tsp vanilla bean paste (or scraped seeds of 1 vanilla bean pod)
White chocolate (about 100g), grated
Optional: 1 tbsp Grand Marnier plus extra for brushing sponge, easter eggs to decorate

Chop orange jelly into 1 cm cubes. Whip cream with vanilla beans to soft peaks and then fold in Grand Marnier. Cut rounds of chocolate sponge about 2 cm thick to fit into about 6 serving glasses (I found my sponge baked quite high so I could actually cut each round into two layers). Place one layer of sponge, brush with Grand Marnier, top with a layer of jelly cubes followed by a layer of cream. Repeat. Top with a layer of grated white chocolate, a chick macaron and easter eggs to decorate. Chill in the fridge for an hour and then serve. If you are not serving immediately do not assemble and do not whip the cream. Keep other components in fridge and then whip cream and assemble when ready to serve.
Print Friendly and PDF

Monday, March 18, 2013

Mint Chocolate Chip Macarons

Mint Chocolate Chip Macarons
The fun thing about working with an unfamiliar oven is having an excuse to go back to basics. I was super scared to try macarons in the oven in my new place since it took me many, many failed batches to get used to my last oven. But I decided bite the bullet and try a pretty uncomplicated recipe. It's essentially the macaron version of my Mint Chocolate Chip Cake, which included the icing version of the ice cream flavour. It's like dessert inception!
Mint Chocolate Chip Macarons
I used the same mint chocolate chip icing from the cake recipe, with a slightly stronger peppermint flavour since you're not going to be eating a whole slice worth of icing. I made some plain macaron shells tinted with a bit of green and blue colouring and sprinkled with cocoa nibs. I love using cocoa nibs and they are perfect for this macaron flavour. I know they're not that easy to get a hold of so you can always substitute it with a dusting of cocoa powder instead.
Mint Chocolate Chip Macarons
Thankfully the my first batch of macaron shells turned out pretty good. A little bumpy, but the shells had good feet and weren't hollow inside. But I have learnt that my oven is much hotter than the previous oven, so I pretty much have to lower the temperature about 20 degrees from what is stated in most recipes. It's an important thing to learn; every oven is totally different and you need to get to know how hot or cool your oven operates and adjust the oven temperature accordingly. It's handy to get an oven thermometer but I tend to get a feel for it over time.
Mint Chocolate Chip Macarons
You might end up with some extra icing after filling your macarons. You could throw it out, or ice some cupcakes, or go totally nuts and bake some Salted & Malted Chocolate Chip Cookies and sandwich it with a bucketload of icing. Oh yeahhhh.
Mint Chocolate Chip Macarons
I know this macaron flavour has totally been done before, but it was fun to try out anyway. I knew that the macaron would probably look a lot more elegant with a simple mint flavoured chocolate ganache, but I wanted to get the full mint chocolate chip experience by using the fabulous icing that looks just like the ice cream flavour. Of course I couldn't resist picking up some mini ice cream cones to play with too!
Mint Chocolate Chip Macarons
(makes about 15-16 macarons)
For the macarons: (if you are a beginner with macarons, read up and practice plain macarons first. BraveTart has lots of useful advice and info on the subject)
100g aged egg whites (you can use fresh eggs too, just make sure they are room temperature. I always use fresh these days, and zap it in the microwave on defrost for 10 seconds)
110g almond meal, at room temperature and well sifted
200g icing sugar
50g caster sugar
Optional: 1 tsp powdered egg whites (available from The Essential Ingredient), helps to stabilise egg whites but is not necessary
Blue/green food colouring (powdered or gel)
To decorate: cocoa nibs (also available from The Essential Ingredient)

Line two baking sheets with baking paper. Place icing sugar in food processor and pulse for a minute to remove any lumps. Stir in almond meal and pulse for about 30 seconds to combine. Sift into a large mixing bowl and set aside. Using an electric mixer, beat egg whites and egg white powder in a medium mixing bowl until the egg white powder dissolves and it reaches soft peaks. With the mixer on high speed, gradually add sugar and beat until it reaches stiff peaks. (You can add the food colouring to the meringue as you are beating it to stiff peaks, it makes it easier to adjust how much colouring to add. Otherwise add it in the next step. I used a green gel colouring with a hint of aqua gel as well.)

Add meringue to your dry mixture and mix, quickly at first to break down the bubbles in the egg white (you really want to beat all the large bubbles out of the mixture, be rough!), then mix carefully as the dry mixture becomes incorporated and it starts to become shiny again. Take care not to overmix, the mixture should flow like lava and a streak of mixture spread over the surface of the rest of the mixture should disappear after about 30 seconds. Place mixture in a piping bag with a 1cm round piping tip. Pipe rounds about 3cm diameter, leaving at least 2cm space around each one. Tap baking sheets carefully and firmly on the benchtop a couple times to remove any large bubbles. If you wish, you can decorate the shells with cocoa nibs or a dusting of cocoa powder.

Leave to dry for about an hour, so that when you press the surface of one gently it does not break. This will help prevent any cracking and help the feet to form on the macs. Preheat your oven to 130-150°C (265-300°F), depending on your oven. You can place the sheet of piped shells on top of an overturned roasting tray or another baking sheet if your sheets are not professional grade, for better heat distribution. Bake for 20-25 minutes, depending on the size of your shells. Carefully test if the base of the shell is ready by gently lifting one and if it's still soft and sticking to the baking paper, then it needs to bake for a few minutes longer. Remove from the oven and cool on the tray for a few minutes, then gently remove from the sheet and place on a wire rack to cool completely.
Mint Chocolate Chip Macarons
For the mint chocolate chip icing:
125g salted butter, softened (or use unsalted and add 1/2 tsp salt)
1 1/2 cups icing sugar (about 190g)
3 tsp peppermint essence
75g semi-sweet dark chocolate, either very, very finely chopped (I pulsed mine down in a food processor, sifting away the finer powder) or mini chocolate chips
Optional: green/blue food colouring

Place butter in a large mixing bowl and beat on high using an electric mixer until the butter is smooth and fluffy. Gradually beat in icing sugar until smooth. Add peppermint essence and food colouring, try to match the colour of the shells. Stir in chocolate bits gradually, you want to make sure you don't add too much and that your chocolate isn't too fine or it will turn the icing brown. Spoon or pipe into the macaron shells, sandwiching them together. Store in an airtight container overnight to allow them to mature. Serve at room temperature.
Mint Chocolate Chip Macarons
Print Friendly and PDF

Monday, March 11, 2013

Maple Syrup Glazed Scones

Maple Syrup Glazed Scones
I am generally resistant to a lot of change. I like my comfort zones. You could probably tell from the large amount of whinging that I've done over the last few weeks how much I hated the whole moving process. But now that I'm finally settled in my new place I think I am kind of loving it. We managed to throw a metric shitload of stuff away while packing, which means that our new place is so much less cluttered. I can actually see all my props now! I've also realised that I've inherited some of my Mum's hoarding habits, because I was holding on to so much ridiculous stuff that I was never going to conceivably use or need or want to see any time in the future.
Maple Syrup Glazed Scones
So this was my first proper weekend in my new place. A newer oven, hopefully better than the old clunker that I've grown accustomed to working with in my old place. I decided the best way to test it out was to make a good ol' batch of scones. (I am too scared to try macarons in it yet) As part of the whole nostalgic experience of leaving my old place got me looking into my very early blog posts and I came across these golden syrup scones from way back when. I couldn't believe I hadn't made them more since then. I remember this recipe was ridiculously good.
Maple Syrup Glazed Scones
I decided to try it out with a bit of a change, switching the sticky super sweet golden syrup for the slightly runnier, darker maple syrup. As much as I love golden syrup I know it can be hard to get hold of good quality stuff in a lot of places. And I had a bottle of maple syrup sitting in the cupboard begging to be used. I was interested to see which version would be better.
Maple Syrup Glazed Scones
To be honest they were pretty similar but they are both amazing so you can't go wrong with either version. You end up with the soft, fluffy pillows of scone goodness thanks to the cream scone base, and the sticky sweetness from the syrup. It's only just a hint of sweetness, so you can still eat it with jam and cream. But I would definitely recommend trying it with a slightly less sweet jam like a cherry jam. I also served it with crème fraîche, which worked really well because it had a slight tartness to offset the sweetness of the scones. I always love a classic plain scone but I think the sweet tooth in me secretly likes these ones better. Anyway you might have to bear with me as I get used to working with a new oven and figuring out the light and the best places to take photos in my new place, I'm definitely looking forward to finding my new comfort zones.
Maple Syrup Glazed Scones
(makes 8-9 scones, adapted from these Golden Syrup Scones)
2 cups self-raising flour
2 tbsp sugar (I used caster (superfine) but regular granulated white sugar is fine too)
2 tbsp pure maple syrup + about 1/4 cup extra for glazing after baking
1/2 cup (125ml) milk
1/2 cup (125ml) pure/pouring cream (or heavy cream in the US, min 35% fat unthickened)
Recommended to serve: crème fraîche or clotted cream, and a not too sweet jam (I used a black cherry jam)

Preheat oven to 200°C (390°F) (fan-forced 180°C (350°F)) and line a heavy based baking dish with sides (or a 20cm square cake tin) with baking paper. Sift flour and sugar together in a large mixing bowl. Make a well in the centre, place the maple syrup in and then pour cream on top. While gradually adding the milk, start to mix lightly and quickly with your butter knife using a cutting motion until just combined. You may want to slow down adding the milk just as you get to the last 1-2 tbsp of liquid as you may not need to add all of it. the mixture should be sticky but you should be able to gently handle it with floured hands.

Working quickly and gently, gather dough together on a floured bench. Try to handle the dough as little as possible, using lightly floured hands to stop dough sticking to you, and pat the dough into a rectangle about 3-3.5cm thick. You can lightly knead the dough with your hands for a smoother appearance but overknead it and your scones will be tough and hard.
Maple Syrup Glazed Scones
Cut out round using a 5-6cm scone cutter (push the cutter into the dough, don't twist) and place next to each other in prepared tray (scones baked close together will rise higher and thus be lighter). I usually manage to cut about 5-6 scones, then I pat the scraps together and cut out another 2 and finally pat the scraps from that together into a ball to form the final scone.

Bake for 15-20 mins, until scones are cooked through and tops are lightly browned. You can test in the insides to check if they are done by inserting a skewer in between two if the scones. If it comes out with any raw dough attached it needs to bake for longer. As soon as you remove the scones from the oven, brush the tops with maple syrup. Make sure to only brush a thin, even layer while the scones are still piping hot or the tops will go soggy. Serve immediately with crème fraîche and jam. If you have leftover scones let them cool completely then store in an air-tight container in the fridge and warm up in the microwave for 20-30 seconds before serving again later.
Maple Syrup Glazed Scones
Print Friendly and PDF