Saturday, September 12, 2009

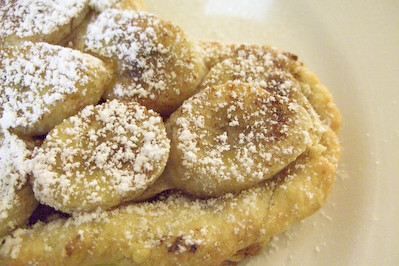
Banana Maple Tartlets


A quick post for the weekend...This banana maple tart is not a complex, beautiful creation. In fact this post isn't really much of a recipe. It's just one of those random things that you throw together with all the leftover sweet things you have in your fridge and pleasantly surprises you by how good it tastes. Nothing fancy, kinda ugly, but it's a fantastic mix of flavours and a great shortcrust pastry that are the key to this yummy treat.

I had a bit of leftover shortcrust pastry after making my two cheese and rosemary tart and had a real urge for something sweet after all that cheese. So the leftover pastry was hastily moulded into a (fairly ugly) tart shell and filled with whatever I could find. Imagine my surprise when I took it out of the oven, bit into it and was rewarded a mouthful of yum. A buttery, super short pastry, warm bananas glazed with pure maple syrup and cinnamon and topped with some cold whipped cream. This is all about the pastry, so this time I've included the pastry that I used, because it turned out fantastic and was so buttery and flaky it was almost like puff pastry.

Banana Maple Tartlets
(Includes Stephanie Alexander's shortcrust pastry recipe)
180g unsalted butter
240g plain flour
3 tbsp water
Pinch of salt
Bananas (approx 1 per 1-2 tartlets)
Ground cinnamon
Pure maple syrup
Optional: Whipped cream for serving

(This quantity of pastry will line a 26cm loose bottomed tart tin and will make about 6 medium sized tartlets) Remove the butter from the refrigerator approximately 30 mins before making your pastry. Sieve flour and salt onto a clean, smooth work surface. Chop butter into smallish pieces and toss lightly in the flour. Lightly rub to combine partly. Make a well in the centre and pour in water. Using a pastry scraper, (and being mindful of the technique you have observed of mixing cement), work paste into a very rough heap of butter lumps of dough. (I don't have a pastry scraper, so I just sort of combined this using my hands and it worked out fine)

Using the heel of your hand quickly smear pastry away from you across the workbench. It will combine lightly. Gather together, then press quickly into a flat cake and dust with a little flour. Wrap in cling film and refrigerate for 20-30 mins. When required, roll out pastry dusting generously with flour. If you are using a big tart tin or smaller tartlet tins, roll out the pastry, then wrap it around the rolling pin and let it unroll over the tin. Press it into the edges of the tin wel and trim the pastry a tiny bit higher than the edges of the tin and fold the extra bit over the edge (this will help prevent shrinkage). If you're not using a tin, cut your pastry into equal portions (say 6 or so), roll out and use a sharp knife to cut out your tart bases and roll the leftover scraps into a thin long strip to use as the borders of your tart which you can press onto the tops of your tart bases after lightly brushing the edges of the base with some water. Chill or freeze your tart cases for at least 20 minutes before baking.

Line your pastry with foil or baking paper and then fill this with pastry weights, beans, rice, or my personal favourite, 5 cent coins. Take care if you are using the coins as they are dirty, and get really hot. So don't touch them with your hands and don't let them touch the pastry! Bake the pastry at 200 degrees C for 15 minutes, then remove the foil and weights and bake for another 5 minutes. Slice bananas thinly and arrange on top of your pastry, drizzle with a generous amount of maple syrup and lightly dust the tops with cinnamon. Return to the oven for another 5 minutes.

Remove from the oven, allow to cool for a few minutes and then dust with icing sugar. If you wish, this can also be served with some cold whipped cream, which makes it very banoffee like :)

Print Friendly and PDF

Sunday, September 6, 2009

'Hot' Chocolate Mousse with Pine Nut Praline


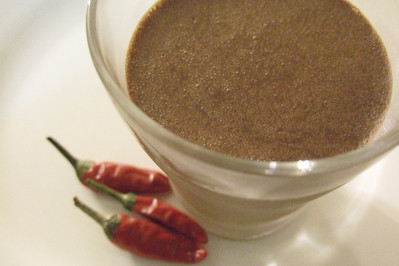
I've had to take a step back from the kitchen in the last few weeks. Work is very busy and rather draining, so the precious moments I have to myself have usually been spent being a couch potato (I am so lazy!!). The warmer weather has stopped me craving winter puddings and pies, and numerous eating out opportunities have meant that lots of sweets and baked yummies sitting around the house is not the best idea. But certain circumstances can arise where I'm willing to break this baking/desserts drought. The other day, Mr. Rabbit (of the free lemon fame) came up to my desk with a lovely little bag of red chillis from his chilli plant at home and I immediately started to ponder what I would use them for.

It would have been easy to throw them into whatever I cooked for dinner, I can put chilli in almost anything (I even put chilli flakes in my spag bol). This time I decided to try this great recipe that I saw in Gourmet Traveller. I know chilli chocolate is a bit of an overdone thing, but I think it's great fun in small doses. Obviously the original recipe uses a nut praline which I can't have, so I adapted it to use pine nuts instead, inspired by the lovely pine nut praline that Lili used in her secret dinner dessert.

I wasn't quite sure about replacing the chilli powder with fresh chilli, I dried it under the grill (and forgot about it so it went a bit black, oops), chopped it up very finely and ground it up a bit in my mortar and pestle. It seemed to work fine, the chillis were super spicy so the mousse had a fantastic kick to it.

Hot (chilli) Chocolate Mousse with Pine Nut Praline
(adapted from this Gourmet Traveller recipe)
For the mousse:
180g dark chocolate (54% cocoa solids), coarsely chopped
3 eggs, at room temperature, separated
¼ tsp ground cinnamon
¼ tsp ground allspice
¼ tsp chilli powder
225 ml thickened cream, lightly whipped (I used light and it still worked very well)
For the praline:
100g pine nuts, toasted
150 g caster sugar

Melt chocolate in a heatproof bowl over a saucepan of gently simmering water, turn off heat and cool, add yolks and stir to combine, then add spices. Add cream and fold through to combine.

In a separate bowl, beat eggwhites until soft peaks form, then add to chocolate mixture and fold to combine. The mousse should be smooth and even in colour. Spoon into six ½ cup-capacity moulds and refrigerate for 3 hours or until set.

For the pine nut praline, place pine nuts on a baking paper-lined oven tray. Combine sugar and 3 tbsp water in a small saucepan and bring to the boil over medium heat for 5-10 minutes or until light caramel, then pour over pine nuts and cool completely. Coarsely chop. When you are ready to serve, sprinkle praline over the top of your mousse.

I poured half the mixture into plastic cups and brought it (along with a zip lock bag full of praline) into work for Mr. Rabbit to try and take home. I think he was surprised and pleased to see what had happened to his chillis :)
Print Friendly and PDF

Friday, September 4, 2009

Almost Bourdain's Malaysian & Dutch Feast


"Just bring your empty stomach and enjoy". That was the invitation extended to us lucky people, by Ellie of Almost Bourdain, to come and sample some Malaysian and Dutch treats whipped up by herself & her husband. I felt so spoilt! It was a fantastic opportunity to meet Ellie and her lovely family, after being an avid follower of her blog for quite some time. Her Malaysian recipes always look so delicious and make me miss the food over there, so I had a feeling that the lunch would be full of moments that would help cure some of the homesickness I get for Malaysia. Along for the ride was Helen, Lorraine, Richard, Shez, Simon, Suze and Yas.


Sure enough, there's already a load of food and drink ready for us that are guaranteed to put a big beaming smile on my face. On the table is rojak, a Malaysian fruit and vegetable salad dish with a thick, sweet and nutty sauce (which I couldn't have, but was happy to pick pieces of pineapple and fried dough off the plate), cute mini biscuits that looked like curry puffs which tasted just like the little spicy shrimp rolls I always buy in Malaysia, and spiced gouda. I particularly enjoy the gouda, which is peppered with caraway (or was it cumin?) and just delicious dipped in the accompanying mustard.

Spiced gouda

Smoked sausage

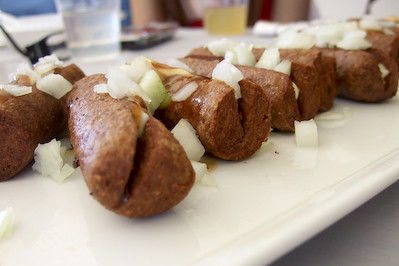
It was the first time I really got to try Dutch food, and I really enjoyed it all. The sausages were lovely and smoky and were also great with mustard, the friekendel speciale were tasty little sausage-like pieces of ground meat topped with diced onion, Dutch mayonnaise and curry sauce. The curry sauce was intriguing, not particularly spicy but with a strong scent of curry powder. My favourite of the Dutch goodies on offer was definitely the bitterballen, deep fried and crumbed balls which are very much like croquettes with a smooth, spiced, meaty filling. I was so busy enjoying one of these that I totally forgot to take any photos of them, silly me!

Friekendel Speciale
On to the mains! I was already feeling a bit sloshy and full from downing many glasses of barley water (oh childhood memories!) and Michael Jackson drinks, but I was so ready for the food because it looked and smelt so amazing!

Michael Jackson drink
(recipe)

So much food!! (Front: Gado Gado)


G
ehaktbal (recipe)
The gehaktbal are huge Dutch meatballs which have been sliced up and skewed with big hunks of onion. The Dutch must like their meat, and I don't blame them when it's this yummy.

Nasi kunyit
(recipe)
I can only clap my hands with glee at the sight of the bright yellow nasi kunyit (tumeric glutinous rice) and I am bouncing up and down in my seat when the huge dish gets placed right in front of me. A bowl full of happiness, that's what I called it! I ate far too many portions of this and had to resist the urge to loosen my belt and this wonderfully fragrant sticky rice, dotted with whole black peppercorns, expanded in my stomach. Oh so good.

Beef rendang (recipe)
I'm usually quite picky about my beef rendang, and this was a good one. It was definitely all that toasted coconut in the recipe that added that extra texture and aroma that you would expect in a good redang and this went perfectly with the nasi kunyit. I ate so much AND I took some of the rice and rendang home with me for A, who gobbled it all up on his own.

Malaysian chicken curry
Ellie cooked two chicken curries, one with a Malaysian brand curry pack and another that was Singaporean. It was interesting to try both of the side by side, because I sometimes use the Singaporean one (Prima) at home because I'm too lazy to do it completely from scratch, but it tasted different to how I remember and I found myself enjoying the Malaysian version more. They were both very moreish though, and I went back for seconds (possibly thirds, I'm not sure, me and Shez hogged the curries, rendang and rice at our end of the table).

Singaporean chicken curry

Cooking roti for the curries

While Ellie was getting the previous dishes ready in the kitchen, her husband was preparing this amazing fish on the barbeque for us. Whole snapper was placed on banana leaf and then smothered in sambal belacan. My mouth was watering at the sight of that huge bowl of super spicy and incredibly aromatic sambal belacan.

Snapper on banana leaves ready to be barbequed


Spreading on the sambal *drool*


Sambal ikan (
recipe)

The fish was as good as it looked, gorgeously moist and tender flesh with that fantastic spicy flavour punch from the sambal.

Butter prawns (
recipe)

Last but definitely not least were the Malaysian butter prawns. This is one of my favourite dishes to have at seafood restaurants in Malaysia, that combination of the butter, egg, chillis and curry leaves is so good, I can just eat it on its own. Unfortunately this dish came to the table after I had already gone a little bit nuts on all the curries and nasi kunyit so I was really full already, but of course I had to try these, and they tasted just like how I remembered.

Cheesecake brownies (
recipe)

Even though I had totally pigged out on the dishes before, I always have room for dessert! And lucky I did, because we had so many awesome sweets on offer. Cheesecake brownies, a hybrid of two of my favourite indulgent dessert and bright green kuih bakar. I was keen to try the kuih bakar because it had previously been described as 'kaya in a slice form' which was so up my alley!

Slicing the Kuih Bakar

Shez insisted on cutting the kuih in the diamond shape that is typical of kuih sold in Malaysia, it's just not the same if it's not cut this way I swear! The only thing that would have bettered it would be to cut it with a crinkly knife to get that crickle-cut edge :D The kuih was just as I expected it, rich with the flavour of pandan and really nice with the sprinkling of sesame seeds on top.

Kuih Bakar (
recipe)

Rockmelon sago
(recipe)
Two things that were guaranteed to get me on a sugar high - rockmelon sago and a selection of different dulce de leches that Simon had brought for us to try and compare. The rockmelon sago was soooo good, I want the recipe Ellie! The four different dulce de leches we had to try were made from 1) A no-name brand, 2) Nestle brand 3) Skim milk 4) A squeezy tube version of condensed milk.

Dulce de leche taste testing

It was very interesting to see the differences between them all, unfortunately the squeezy tube one had crystallised a bit since it was smaller and probably needed less boiling, so although the taste was nice, the texture was off. The skim milk one still tasted good but wasn't as smooth and creamy as the full fat ones, but would probably be alright after some whipping with an electric beater. My favourite was the no-name brand one, which seemed lighter and less dense than the Nestle brand version. Wheee sugar!

Pasteis de nata from Sweet Belem, Petersham

Finally, even though I was going to explode, I managed to share half of one of these portuguese custard tarts that Yas brought from Sweet Belem. I can't believe I didn't know about Sweet Belem before, everyone else seemed to, but I must go visit now! These were so amazing, the pastry was insanely flaky and made an extremely sexy (yep there's no other way to describe it) crunchy noise as you bit into it and was followed by a lovely light and creamy custard, topped with a load of cinnamon which I totally loved. I was wishing I had just eaten a whole one! Thanks Yas!

Custard tart food porn

At this point I was so well fed, I couldn't believe I was going to have to leave from this lunch and go straight to a birthday dinner where I would have to consume more food. Ughhh. But Ellie's lunch was definitely getting priority stomach space and it was so worth it. Thank you so much to Ellie and her lovely family for hosting such a wonderful and tasty lunch, it was fantastic spending time chatting and enjoying food with you and all the other bloggers!

Print Friendly and PDF

Monday, August 31, 2009

Pandan Madeleines (and Happy Merdeka Day!)


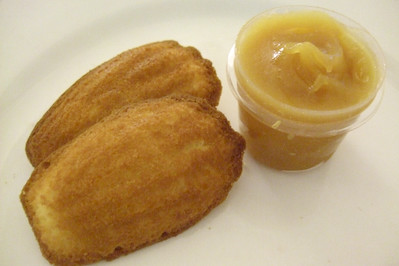
Happy Merdeka Day everyone! Today is Malaysia's national day, so it only seemed right to include a post on my blog which is tinged with the flavours of the country. I lived in Malaysia for 5 years and my parents still live there, and although I was a fussy eater while growing up there, I now miss and crave the amazing food there. One of the things that I miss the most is the abundance of pandan flavoured goodies there, including my favourite spread; kaya, made with coconut, eggs and pandan extract. So the other day I decided to whip up a batch of madeleines, these sweet little sponge cakes, which were flavoured with pandan essence that I picked up at the Asian supermarket and I served them with some kaya. Unfortunately I haven't had the time to make my kaya from scratch yet, I swear I will soon though!

You can find a lot of pandan flavoured sponge cakes in Asian supermarkets here in Sydney, easily spotted due to their neon green appearance, but good kaya is a little hard to come by. There is one quite common brand called Nonya brand which is sold in a glass jar which my brother swears he has seen them using in Mamak for their roti kaya (I'm not sure how much I believe this), but my favourite one so far is a canned version I found in Cabramatta which is Yeo's brand and is by far the smoothest, eggiest, coconutiest(?!) version I've found off the shelf. I was a little disappointed with the pandan flavouring I bought, it was very weak and watery and not green enough! Definitely getting a much stronger paste version next time.

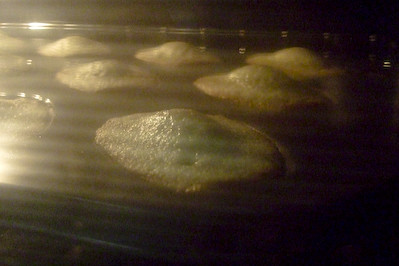
I believe the madeleine recipe is one that my brother found which is very old and works a charm. We fell in love with these little sponge cakes after coming across this recipe while having cake cravings and at the time we just threw the batter into a patty cake tin and it still tasted amazing. It's by far the most reliable madeleine recipe I've come across, other ones I have tried can be too dry and dense. In fact I'd tried so many bad madeleine recipes that I gave up for a while and my almost new madeleine tin gathered dust at the back of my cupboard until I decided to switch back to this great recipe. I was delighted that this mixture did develop a small bump on the tops, something which I have never managed to get with other recipes. It may have been small but there was definitely a bump!

The only thing you have to take care of with this recipe is to not heat up the mixture too much, or you will cook the egg in the batter enough to make the whole mixture taste and smell very eggy. But done right, these madeleines are super light, fluffy and moist with a lovely golden layer on the outside that is fantastic to sink your teeth into. And serving it with kaya enhances the great pandan flavours and had me very pleased with the combination.

Pandan Madeleines
(makes about 24 madeleines)
2 eggs
3/4 cup caster sugar
1 cup plain flour, sifted
150g butter melted
Pandan flavouring (essence or paste)

Preheat oven to 180 degrees C. Grease madeleine tin very well, then dust lightly with flour. This will make it easier to remove the madeleines later (I think I can thank Rick Stein for that tip).

Fill a wide, low tin with hot water, large enough that you can place your mixing bowl inside it and the water level goes up the sides of the mixing bowl by 2cm. Combine eggs and sugar in the mixing bowl and beat with an electric mixer until the mixture is very light and fluffy and has tripled in volume. (If the water starts to get cool, you can top it up with a bit more hot water, just take care that its not hot enough to scramble the eggs, you'll know if this starts to happen because the mixture will start to smell very eggy)

Add pandan flavouring to taste. Since mine was the weak watery kind, I used almost a tablespoon and it was still quite subtle. If you are using the paste you will need a lot less. Add sifted flour and carefully fold into mixture. Finally, stir in the melted butter until just combined.

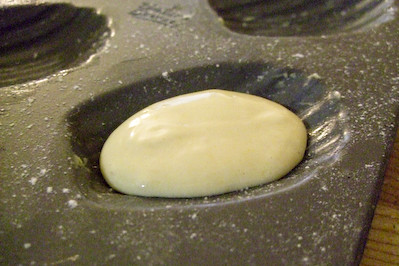
Carefully spoon mixture into the moulds filling them about 3/4 full (a bit less than a tablespoon). Bake for 10 minutes or until the tops of the cakes are just turning golden. Immediately and carefully remove the madeleines from the tin and cool on a wire rack.

Peering into the oven: I see bumps!
Can be served on their own dusted lightly with icing sugar or with kaya. I swear I will do a recipe for homemade kaya soon! Best eaten straight out of the oven, but if you really want you can cool them completely and then place in a very airtight container for the next day.

The only thing I wish I could have improved was the colour of the madeleines, they really should be much greener from the pandan flavouring, so don't be alarmed if yours turn out greener if you use a better pandan flavouring than I did. The flavour was lovely though, pandan always works well in a light sponge cake (I was originally going to do a typical pandan chiffon cake but didn't have time to find a good recipe since my mum had lost hers :( ), so it was just perfect for the madeleines. I'm not sure why but the heat from the hot water really helps create the perfect texture and flavour in the cakes.

Happy Merdeka Day!

Print Friendly and PDF