Sunday, May 30, 2010

Milo Cupcakes with Condensed Milk Icing

milocupcakes-5
I am in LOVE with these cupcakes. How could I not be? They are full of milo-ey goodness and dripping with condensed milk. They are AWESOME. And if you are like me, and like Milo (and cupcakes), you have to make these. I grew up with Milo, as most Malaysians do. Did you know that in Malaysia, Milo supposedly has a 90% brand share of their market? That is a lot of Malaysians drinking Milo every day. Though over there you tend to hear it pronounced as 'Mee-low' rather than 'My-low', which I think is a much cuter name :)
milocupcakes-7
So it's been a while since I last made cupcakes. I've had the idea for this flavour sitting in my head for a little bit, and as soon as I ordered these adorable silicon tea cupcake moulds online I knew that I had to make these Milo cupcakes in them. (EDIT: For those wondering, I got my teacupcake moulds from Urban Outfitters, here) I wanted them to be chock full of malty chocolate flavour, with a sticky sweetened condensed milk buttercream on top. If you have not had the pleasure of enjoying a Milo with sweetened condensed milk, you haven't LIVED yet. I was a little nervous since I was just sort of making up the recipe as I went. But luckily, they turned out even better than I had hoped.
milocupcakes-4
The batter has quite a bit of sour cream which stops it from being dry. Because of the sour cream, I had the confidence to leave my cupcakes in the oven until they had a nice golden crust on top, so they had a little bit of crunch on the outside while still being fluffy and soft in the middle. And they smelt incredible. SO GOOD!!! And then I used some lightly salted butter for my buttercream, rather than just plain unsalted butter, which stopped it from being too toothachingly sweet from the sweetened condensed milk. And then on top of these cupcakes I drizzled a little bit of extra condensed milk and Milo. Even though I had only made a small batch and was supposed to save them so I could photograph them, I immediately scoffed one within minutes of icing them. And then I did a little dance around my kitchen.
milocupcakes-6
Milo Cupcakes with Condensed Milk Icing
(makes 10-12 cupcakes)
200g plain flour
200g caster sugar
1.5 tsp baking powder
1/2 tsp bicarb soda
150-200g Milo (adjust to taste, I take it by the bucketful)
1 tsp vanilla extract
180g sour cream
170g unsalted butter, softened
2 large eggs

150g slightly salted butter (or unsalted + a pinch of salt)
300g icing sugar, sifted
5 tbsp sweetened condensed milk
milocupcake-2
Preheat oven to 180 degrees C. Fill cupcake tray with liners. If using a food processor, place flour, sugar, baking powder, bicarb, Milo, vanilla, sour cream, butter, sour cream and eggs in the food processor and pulse until the mixture is combined and smooth.
milocupcake-3
If not using a food processor, sift flour, bicarb and baking powder in a bowl and set aside. Cream butter and sugar with an electric mixer in a large mixing bowl and then beat in eggs one at a time until combine. Add sour cream, vanilla and milo and beat until just combined. Add flour mixture and beat on low until just combined. Fill cupcake liners until 3/4 full and bake for approx 15-20 mins or a skewer inserted into the centre of a cupcake comes out clean. For the best texture, the cakes should be dark golden brown on top and firm to the touch and after cooling for 1 minute out of the oven. Cool on a wire rack.
milocupcake-4
To make the icing, remove butter from the fridge 30 mins ahead of time. Beat butter until light and fluffy and then beat in icing sugar until combined. Add sweetened condensed milk and beat until combined.
milocupcake-5
Pipe or spoon over the top of cupcakes when they are cooled and drizzle some extra condensed milk over the top. Finish with a sprinkle of Milo. Can be stored in an airtight container in the fridge overnight.
milocupcakes-2
Print Friendly and PDF

Thursday, May 27, 2010

Cupcake Croquembouche - Daring Bakers May 2010

croqcupcake-11
"What is THAT?!" You ask? That's what I have been asking myself while staring at this photo. It was supposed to be a chocolate and raspberry croquembouche, stacked into the shape of a cupcake. But things didn't quite go to plan, so it turned out a little messy. All I think when I look at the photo is PAIN. Burning. Mess. Ouch. Those of you in Australia who watched Masterchef last year will be more than familiar with the croquembouche, and the struggles the contestants had with it - flat choux pastry, sugar burns, collapsing cones. Let me just say, I have a renewed respect for those Masterchef contestants.
cupcakebouche
The May 2010 Daring Bakers’ challenge was hosted by Cat of Little Miss Cupcake. Cat challenged everyone to make a piece montée, or croquembouche, based on recipes from Peter Kump’s Baking School in Manhattan and Nick Malgieri.

Life has gotten in the way of my participation in Daring Baker's challenges recently, but it was impossible to pass up this challenge. I've made choux pastry in the past with my eclair notdogs, but I've never assembled an entire croquembouche. And I always love to try something new. Even though...*whispers* I don't like them. Don't hate me! I've just always found choux pastry a little too close to cardboard in texture and flavour, and the combination of it with the hard , crunchy toffee doesn't appeal to me. Perhaps it's just because I experienced too many bad croquembouches at birthday parties, when I all I wanted was a big piece of cake.
croqcupcake-12
But I had to give it a shot. I was curious to see how difficult it would be to create one, without a mould like the metal cone they used in Masterchef. And I wanted to make one that looked like a raspberry cupcake (Get it?? Like me, Raspberri Cupcakes! *snort* yes I'm a total dork :P). So I set about giving it a go. Slow and steady, stress free. I spent one day making the pate a choux; I did one batch with added cocoa powder so they were chocolate, and another batch with pink food colouring. Then I whipped up two batches of pastry cream - one was a gorgeous chocolate crème patissiere and the other was flavoured with raspberry puree. I followed the recipe exactly, though I piped my choux a little smaller than normal as I figured that would make it easier to stack into a weird shape like a cupcake. The little choux puffed up perfectly, hollow and round. It is REALLY fun to bake choux pastry. I love the way they transform from lumps of gluey looking batter into these cute, crisp little puff balls.
croqcupcake-13
Then the next day rolled around. I was cool, calm and collected, filling my choux with pastry creme and dissolving sugar for my first pot of hard caramel glaze. Then it all went a bit pear-shaped. It didn't take long to get my first painful sugar burn while dipping those little choux into the caramel. After that I was wayyy too frazzled to care about how the damn thing looked. It started looking wonky, and the caramel was messily distributed over the choux, but I didn't care! I just wanted to get the thing finished so I could nurse my blisters. So I crankily rushed and finished it, practically threw some silver cachous on top, couldn't be bothered doing any spun sugar and flung a ribbon on it. Not made with love. But it tasted good. And it kind of looks like a cupcakebouche...I guess? Just not quite as pretty as I'd originally envisaged. And in the end, it was worth the 5 or so blisters I got, because it was a real challenge, it was new and it was fun. Next time, (not that I really think there will be a next time), I will remember to dip all my choux with the same amount of toffee so they look more uniform.
cupcakebouche-3
Raspberry & Chocolate Cupcake Croquembouche
(based on recipes from Peter Kump’s Baking School in Manhattan and Nick Malgieri)
For the pâte à choux (Yield: About 28, or 40 smaller ones)
¾ cup (175 ml.) water
6 Tbsp. (85 g.) unsalted butter
¼ Tsp. salt
1 Tbsp. sugar
1 cup (125 g.) all-purpose flour
4 large eggs
For Egg Wash: 1 egg and pinch of salt

Pre-heat oven to 425◦F/220◦C degrees. Line two baking sheets with parchment paper. Combine water, butter, salt and sugar in a saucepan over medium heat. Bring to a boil and stir occasionally. At boil, remove from heat and sift in the flour, stirring to combine completely.
croqcupcake
Return to heat and cook, stirring constantly until the batter dries slightly and begins to pull away from the sides of the pan. Transfer to a bowl and stir with a wooden spoon 1 minute to cool slightly. Add 1 egg. The batter will appear loose and shiny. As you stir, the batter will become dry-looking like lightly buttered mashed potatoes.It is at this point that you will add in the next egg. Repeat until you have incorporated all the eggs. As I added the last egg, I added about 3 tsp cocoa powder to one batch of batter, and made another batch with pink food colouring added (for the ones that would later be filled with raspberry pastry creams).
croqcupcake-2
Transfer batter to a pastry bag fitted with a large open tip (I piped directly from the bag opening without a tip). Pipe choux about 1 inch-part in the baking sheets (mine were closer to 3/4 inch). Choux should be about 1 inch high about 1 inch wide.
Using a clean finger dipped in hot water, gently press down on any tips that have formed on the top of choux when piping. You want them to retain their ball shape, but be smoothly curved on top. Brush tops with egg wash (1 egg lightly beaten with pinch of salt).
croqcupcake-3
Bake the choux at 425◦F/220◦C degrees until well-puffed and turning lightly golden in color, about 10 minutes. Lower the temperature to 350◦F/180◦C degrees and continue baking until well-colored and dry, about 20 minutes more. Remove to a rack and cool. Can be stored in a airtight box overnight.
croqcupcake-5
For the crème patissiere (Half Batch)
1 cup (225 ml.) whole milk
2 Tbsp. cornstarch
6 Tbsp. (100 g.) sugar
1 large egg
2 large egg yolks
2 Tbsp. (30 g.) unsalted butter
1 Tsp. Vanilla
For the chocolate pastry cream: 1/4 cup milk + 80g semisweet chocolate
For the raspberry pastry cream: 1 cup fresh or frozen raspberries - pureed and strained

If doing chocolate pastry cream: bring milk to the boil in a small pan, remove from the heat and stir in chocolate until completely melted and combined. Set aside to cool.

Dissolve cornstarch in 1/4 cup of milk. Combine the remaining milk with the sugar in a saucepan; bring to boil; remove from heat. Beat the whole egg, then the yolks into the cornstarch mixture. Pour 1/3 of boiling milk into the egg mixture, whisking constantly so that the eggs do not begin to cook. Return the remaining milk to boil. Pour in the hot egg mixture in a stream, continuing whisking.

Continue whisking (this is important – you do not want the eggs to solidify/cook) until the cream thickens and comes to a boil. Remove from heat and beat in the butter, vanilla, and chocolate mixture (if making chocolate pastry cream) or raspberry puree (if making raspberry pastry cream). Pour cream into a stainless steel/ceramic bowl. Press plastic wrap firmly against the surface. Chill immediately and until ready to use.
croqcupcake-6
When you are ready to assemble your piece montée, using a plain pastry tip, pierce the bottom of each choux. Fill the choux with pastry cream using either the same tip or a star tip, and place on a paper-lined sheet. Choux can be refrigerated briefly at this point while you make your glaze.
croqcupcake-16
For the hard caramel glaze:
1 cup (225 g.) sugar
½ teaspoon lemon juice
croqcupcake-15
Combine sugar and lemon juice in a saucepan with a metal kitchen spoon stirring until the sugar resembles wet sand. Place on medium heat; heat without stirring until sugar starts to melt around the sides of the pan and the center begins to smoke. Begin to stir sugar. Continue heating, stirring occasionally until the sugar is a clear, amber color. Remove from heat immediately; place bottom of pan in ice water to stop the cooking. Use immediately. Use the chocolate choux for the base of your 'cupcake' and the raspberry choux for the top. Decorate with sprinkles, cachous and ribbons. (Hopefully a little neater than I did) Thanks to Cat for this extremely fun challenge!
cupcakebouche-2
Print Friendly and PDF

Thursday, May 20, 2010

Matcha Mousse with Honeycomb

matchamousse-9
I have a lot of pet peeves. Most of them are the typical ones that I think a lot of people have - I can't stand people who can't figure out the difference to between you're and your (this seems to be a disease spreading rapidly through the pointless fan pages of Facebook). I cringe at people who drag their feet across the ground rather than picking them up and taking proper steps. I contemplate bloody murder when someone attempts to blast their awful music from the tinny speakers on their mobile phone, subjecting the rest of the train/bus/waiting room to their bad taste. I'm sure there any many others but then this post would get reeeeeally long.
matchamousse-8
One of my pet peeves in the kitchen is watching leftover baking ingredients go bad. I somehow always end up with a little bit of cream, or a couple of egg yolks sitting sadly in my fridge, begging me not to waste them. And it happens SO often, because there are just days where I will have complete mind blanks when it comes to thinking of a good, quick recipe to use them up. Luckily for me, a good recipe came to mind the other day.
matchamousse-5
Of course, as soon as I thought of what I wanted to make, I realised I was missing a key ingredient and had to run down to the petrol station in the rain to grab it, but it was totally worth it. Half an hour later I had whipped up these dreamy green tea & white chocolate mousses, using up the extra cream and egg whites I had sitting in my fridge (after using up more of the cream and egg yolks to make carbonara for dinner that night, YUM).
matchamousse-30
I decided to make some homemade honeycomb to go with it, which had the perfect crunchy texture to go with this light, fluffy mousse. Crunchy bubbles versus soft bubbles. Plus the sweetness from the honeycomb was just what was needed to balance out the slight bitterness from the matcha. In case you haven't noticed, I've had a little bit of an obsession with candy recently, making marshmallows and lollipops. I've always wanted to make honeycomb, and this recipe worked out pretty well. The honeycomb was golden, bubbly and super crunchy, though like any honeycomb after you eat it for a little while it sticks to your teeth like crazy! Even so, I ate SO much of it. Anyway, this dessert had my sugar cravings satisfied and had the added bonus of using up my extra cream :)
matchamousse-6
Matcha White Chocolate Mousse with Homemade Honeycomb
(adapted this white choc mousse recipe from bill's food and this honeycomb recipe from Best Recipes, serves approx 6)
For the green tea mousse:
250g white chocolate
80ml milk
1 tsp pure vanilla extract
3 large eggs, separated
375ml pouring cream
1-2 tsp matcha (green tea) powder, adjusted to taste

For the honeycomb:
1 1/2 cups sugar
2/3 cup golden syrup
1/3 cup water
2 tsp bicarb soda, sifted
matchamousse-2
Line a medium cake tin with baking paper, I used a 28 x 18 slice tin but a 20cm square tin would work as well. Place white chocolate, milk and vanilla in a heatproof bowl over a saucepan of boiling water, making sure the bowl does not touch the water. Heat until the chocolate is just melted, stirring regularly. Cool for 5 minutes, then beat in egg yolks one at a time until well combined. When beating in the last egg, add matcha powder. (Adjust amount of matcha depending on how strong you want it to be, I like mine strong)

Whip cream to soft peaks in a separate bowl, and then gently fold into warm mixture until just combined. In a separate clean large mixing bowl, beat egg whites to soft peaks. Gently fold in the rest of the mixture into the egg whites until just combined, and then pour into serving glasses. Chill for 3-4 hours or overnight in the fridge.
matchamousse
For the honeycomb, place golden syrup, sugar and water in a heavy based pan with high sides with a sugar thermometer, and place on low heat. Stir continuously until the sugar dissolves completely and the mixture boils. Increase the heat until the mixture reaches 132 degrees C, and then maintain this temperature for 15 minutes. Remove from the heat and allow to cool, until most of the larger bubbles have disappeared.

Quickly beat in bicarb soda into mixture with a wooden spoon, the mixture should froth up quickly. Pour mixture into prepared tin and leave to cool completely on a wire rack. When completely cool, remove from tin and line all sides with extra baking paper, wrap in a kitchen towel and gently break up into smaller pieces using a rolling pin. Serve over the top of matcha mousse, with extra pieces on the side.
matchamousse-3
Mousse can be stored for a couple of days in the fridge, the honeycomb in an airtight container.
matchamousse-10
Print Friendly and PDF

Sunday, May 16, 2010

Quince Sherbert Marshmallows

marshmallow-4
It's funny how my appetite is nearly completely ruled by the weather. But in weird ways. For some reason I want to eat more ice cream when it gets colder. And salads! On the flip slide, I'm craving all those lovely fuzzy, warm things like soup and hot chocolate that you would expect to crave in winter. This is part of the reason why I had to make some marshmallows at home. I've never made them before, but have always wanted to. The leftover syrup from my slow baked quinces was the perfect flavouring for these marshmallows, as well as the leftover fizzy sherbert powder from my beetroot lollipops. So if you happen to try either of those recipes, here's a great way to use up your leftover stuff.
marshmallow-5
Consider this post the second part of my magical quince rant. I had a few pieces of leftover quince, enough to puree and add to my marshmallows for a punchier flavour. When I whipped them up in my food processor they turned into a very light, frothy paste, which was kind of perfect for adding to the marshmallows without affecting their texture. You need to take care with the moisture coming out of the marshmallows, as you can guess-any moisture will screw up the fizzy sherbert powder. It's best to only add the sherbert right before you serve it, just in case.
marshmallow-2
I was surprised by how easy and fun it was to make marshmallows, and they turned out so fluffy and delicious! I adapted the recipe from a Gourmet Traveller recipe, adding the quince puree and the spiced quinced sugar syrup instead of making new sugar syrup. The taste of quince was unmistakable, making these so moreish! The flavour of all the spices gave the marshmallows a lovely fragrance and the sherbert added a great zing. Marshmallows are just so fun!
marshmallow-3
My one regret is that I was in such a rush to cut these up that I ended up cutting them as cubes and not using a fun cookie cutter to make them even cuter. But I'll just have to save that idea for my next batch ;) Yep I'll definitely be doing more marshmallows from now on...

Quince Sherbert Marshmallows
(adapted from this Gourmet Traveller recipe)
25g gelatine powder
1/2 cup quince puree
200ml spiced quince sugar syrup (substitute with 200ml water, 500g caster sugar + 1 cinnamon stick, 4 star anise, 2 black pepper corns, 1 vanilla bean split and scraped)
1 tbsp liquid glucose
2 large egg whites
Snow sugar or 1/2 cup icing sugar + 2 tbsp corn starch for dusting

For the sherbert powder:
75 g citric acid
95 g pure icing sugar
1 tbsp bicarb soda

Line a 20cm square baking tin. Combine quince puree and gelatine in a small saucepan on low heat and stir until the gelatine dissolves. Set aside. Place sugar syrup and liquid glucose in a medium saucepan and gently heat with a sugar thermometer inserted. Heat until it reaches 125 degrees C.
marshmallow-7
In the meantime, beat eggwhites in a large mixing bowl to stiff peaks. While continuing to beat, add gelatine mixture and sugar syrup mixture to the eggwhites at the same time, in a steady, thin stream. Place thermometer in bowl, and continue to beat until the mixture cools to 37 degrees C. Pour into lined baking tin and leave to set overnight at room temperature. Remove from tin, cut up and toss snow or icing sugar mixture. To make the sherbert powder, mix all three ingredients together and dust over marshmallows. Serve immediately with lots of extra sherbert. Both marshmallows and sherbert can be stored in separate airtight containers.
marshmallow
Print Friendly and PDF

Thursday, May 13, 2010

Slow Baked Quince & Honey Panna Cotta

quincepanna-3
Time to take a step back from the 'scary' cray-cray that was the Lady Gaga Cake, with something slightly more elegant. Quinces, in my humble opinion, are a magical fruit. They start off all yellow, wrinkly and funny looking, smelling like an under ripe apple or pear. But then you cook it for a ridiculously long time and it turns this beautiful rich, rosy red, tender while holding it's shape nicely. Magical! It makes me sad that I only started using them a couple of years ago.
quincepanna-2
As a home baker, constantly learning and (hopefully) improving, I find it difficult to look past the flaws in the things I bake. For instance, this dish was pretty much going to plan until I decided to plate it up and realised that the pashmak (persian fairy floss) that I wanted to put on top of the quince had turned into a rock hard ball of sugar. ARgh@!!! Much swearing and crankiness ensued. So when I look at this dish, all I can see is the missing fairy floss. Which is a shame because it tasted delicious, perhaps a little too sweet when I drowned it in syrup, but perfect with just a drizzle of the syrup on top. I had to substitute the gelatine leaves for powdered gelatine, but the pannacotta still had a good wobble to it. You can add gelatine to the syrup to set the syrup as the original recipe does, but I was happy to leave it as a liquid.
quincepanna
The quinces were baked for about 4-5 hours in a beautifully aromatic spiced sugar syrup mixture. My whole house was filled with the scent of cinnamon, vanilla and star anise. I wouldn't recommend starting this recipe too late in the evening, as you will find yourself impatiently checking the oven to see if your quince have turned red yet so you can take them out and go to bed. But definitely start it the day before you plan to serve it, to give it a chance to chill overnight. I adapted it from a Gourmet Traveller recipe I've had my eye on, in the hopes that I would change it up a bit with the presentation and the pashmak. But things didn't quite go to plan so it's very similar to the original. To be honest it doesn't really need any of the extra bits, just the panna cotta, with it's intense honey flavour, and the lovely spiced quince are all you need for a great dessert. Even if you don't make the pannacotta, this is my favourite way to cook quince. And the leftover sugar syrup is so nice that it would be a shame to throw it away, hopefully I'll be able to use it for another sweet treat :) (EDIT: Check out what I used it for here)
quincepanna-4
Slow Baked Spiced Quince & Honey Panna Cotta
(adapted from this Gourmet Traveller recipe)
500g caster sugar
500ml water
2 quince, peeled cored and quartered, reserve trimmings
2 cinnamon quills
1 vanilla bean, split and seeds scraped
2 black peppercorns
4-5 star anise
img-3
1 1/4 tsp powdered gelatine
400ml pouring cream
100ml milk
80ml honey
30g caster sugar
quince-2
Preheat oven to 120 degrees C. Bring water and 500g sugar to a gentle boil in a casserole pot, stirring until the sugar dissolve. Simmer until a light syrup forms (about 10 mins) and then add quinces, trimmings and all the spices. Cover pot and bake in oven until quince are tender and have turned a rosy red, about 4 hours. Cool, then refrigerate until chilled, 2-3 hours or overnight.
img
Place cream, milk, honey and sugar in a medium saucepan and gently bring to the boil over medium heat. Remove from heat and carefully stir in gelatine until it dissolve. Strain mixture and pour into 4-5 glasses or pannacotta mould. Refrigerate until set, about 4-5 hours or overnight.
img-4
When ready to serve, cut quince into wedges and place over panna cotta. Strain quince syrup and drizzle some over the top of the quince. Don't throw away the left over syrup! It can be used for other recipes - Check out these Quince Sherbert Marshmallows ;) Optional: top off with some vanilla pashmak.
Print Friendly and PDF

Wednesday, May 5, 2010

Apple and Rhubarb Crumble Pie


I made this pie for two people. The first was A, who turned to me while I was stewing rhubarb for my rhubarb and vanilla crème brûlées and said, "You know what I really like with rhubarb? Apple. In a crumble." I could only answer this comment with a wide-eyed stare, since it's so incredibly rare for him to request a dessert. It had to be made!
rhucrumblepie-8
The second person I made this for is my Mum. Crumbles always make me think of my Mum, like her Apple Crumble Cake, or when I made a 
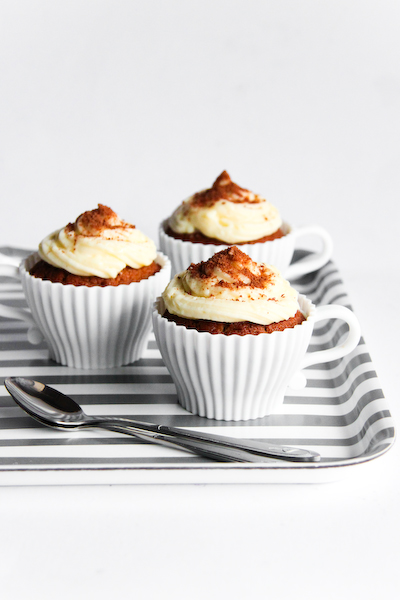
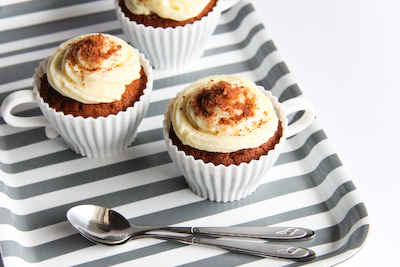
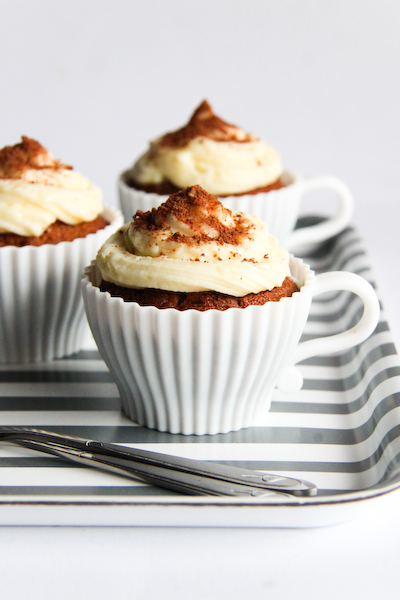
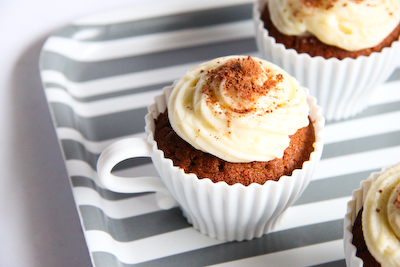
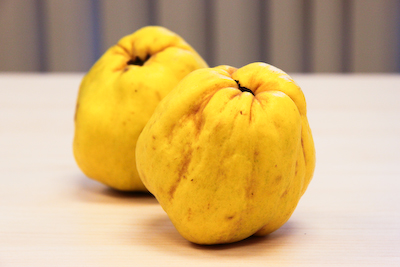
Quince & Craisin Crumble for her. And it seemed like a perfect time to make something with her in mind, since it is Mother's Day this Sunday. Happy Mother's Day! I personally think this pie is the perfect thing to bake for Mother's Day, especially after I fancied it up with Bourke Street Bakery sweet shortcrust pastry and golden syrup & vanilla bean custard.

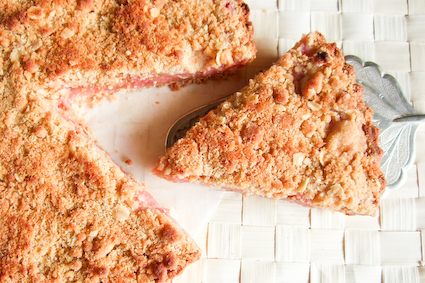
As I mentioned not long ago, I've been eager to try out the Bourke Street Bakery sweet shortcrust pastry recipe for a while. It did not disappoint, it baked into a beautiful dark, golden brown and was perfectly crisp, flaky and buttery. 
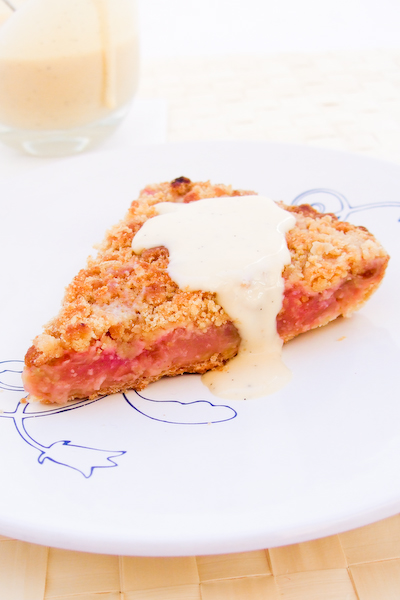
A loved it so much, he said it was the best shortcrust pastry I'd ever made. In fact, he said it was the best he'd ever had. And he loved the whole thing so much he didn't want me to share it with anyone else, saying "NO! It's too good, keep it for me!". The filling was just a little bit tart from the stewed rhubarb and apples, but just enough to go with the smooth, sweet golden syrup custard and the cinnamon-y, oat-y, thin layer of crumble on top.
rhucrumblepie-9
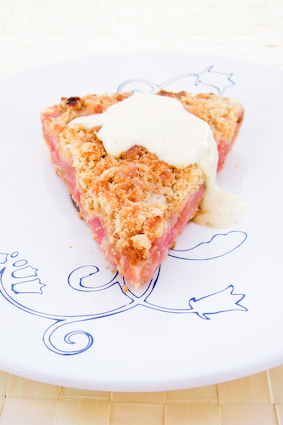
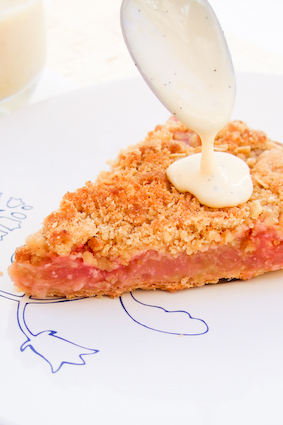
I was worried at first there would be too much going on to have a tart base AND a layer of crumble on top, but it wasn't at all. The pastry was just thick enough and the light layer of crumble on top was less heavy than a traditional pie top, and extra tasty thanks to all the cinnamon, brown sugar and oats. But oh my, the golden syrup custard. It was so delicious, particular because I was lucky enough to have a can of my favourite Lyle's golden syrup in the pantry. I think the vanilla bean made the flavour of the custard particularly rich in flavour, but it would taste just as nice without a whole vanilla bean in it. I made sure not to cook it down too much so it wouldn't be super thick and claggy. There's something about the combination of rhubarb and custard that makes me feel very happy. Though rhubarb seems to go well with so many things; apples, strawberries, lemon...Ugh I'm obsessed with rhubarb!
rhucrumblepie-11
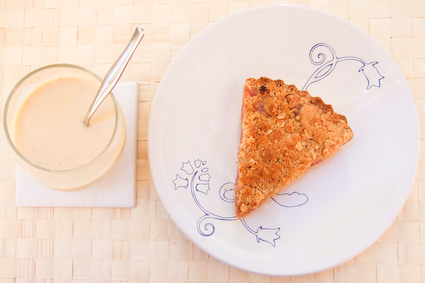
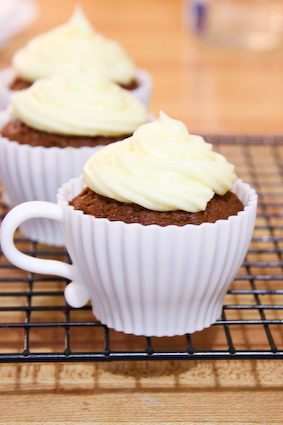
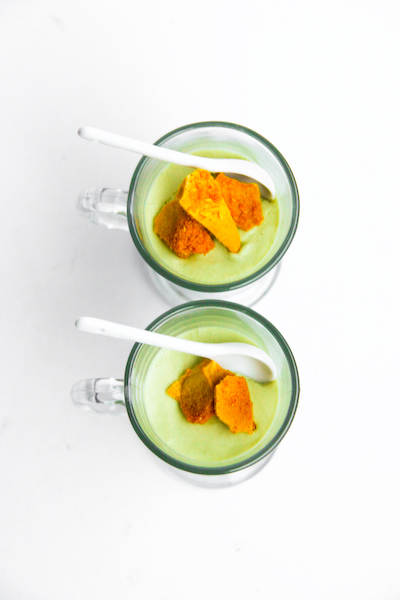
So back to my original point. This is a great dessert to make for your Mum. Or your boyfriend. And if you are going to use any shortcrust pastry recipe, you should definitely give the Bourke St Bakery recipe a try. And if you are going to make this pie, please make the custard! It is such a perfect match for the filling. I had made extra filling and crumble so that we could eat them without the pastry, in little ramekins and they were really nice straight out of the oven with a dollop of custard on top. So if you don't have the time to make the pastry, I'm sure your Mum would like the crumble on it's own anyway ;)
rhucrumblepie-13
Apple and Rhubarb Crumble Pie with Golden Syrup Custard
(shortcrust pastry adapted from Bourke St Bakery, makes one 22cm pie or approximately 5 x 8cm tarts)
For the pastry:
100 grams unsalted butter, chilled, cut into 1.5 cm cubes
5 ml white vinegar, chilled
25 grams caster sugar
43 ml cold water
165 grams plain flour, chilled
1/4 teaspoon salt

For the filling:
300g peeled, cored and sliced Granny Smith apples, or other cooking apple (about 4 medium apples)
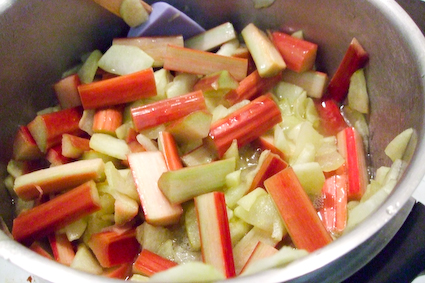
200g rhubarb, sliced 4cm long, about 1cm thick
1 cup (250ml) caster sugar
1/2 tsp ground cinnamon

For the crumble:
1/2 cup plain flour
1/4 cup firmly packed brown sugar
1.5 tbsp cooking oats
1/2 tsp baking powder
50g grams unsalted butter, chilled and cubed

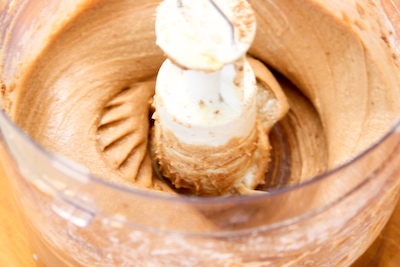
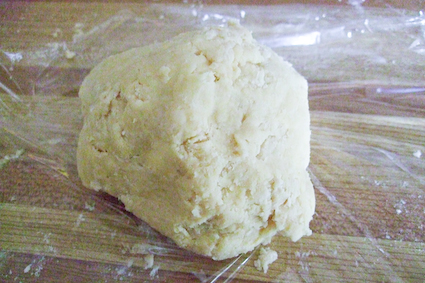
Remove butter from the fridge 20 minutes before you start mixing. Place vinegar and sugar in a small bowl, add the water and stir well, set aside. Place flour, salt and butter in a food processor and pulse in 2 second bursts three or four times to partly combine (use fingertips to rub but in if you don't have a processor). Turn mixture out onto a clean surface, it should be floury with bits of squashed butter.

Sprinkle over the sugar mixture and use the palm of your hand to smear the mixture away from you across the work surface. Gather together and repeat smearing process a few times, until it starts to come together. You should still be able to see streaks of butter marbling the mixture, giving it a flaky texture when baked. Shape into a ball and wrap in cling film. Refrigerate for at least two hours or overnight.
rhucrumblepie-14
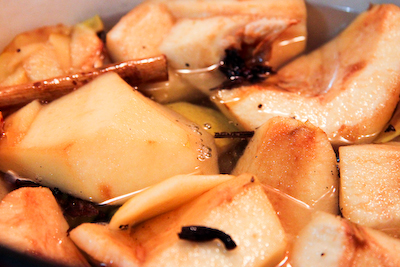
Prepare the filling, place sliced apples and sugar in a medium saucepan and heat until apples are tender and liquid as cooked down. Add rhubarb and cinnamon and cook until tender but not completely disintegrating. If there is still a lot of liquid, drain this off and cook it down until it is nice, thick and pink. Set filling aside to cool down.
rhucrumblepie-15
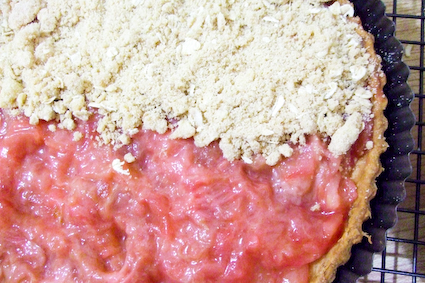
Grease a 22cm loose bottomed tart tin and preheat an oven to 200 degrees C. Remove pastry from fridge 20 minutes before rolling. Sprinkle a little flour over the bench top and rolling pin. Working from the centre, gently roll dough away from you, rotate by 30 degrees and roll out again. Repeat until you have a flat, round disc, 3mm thick. Carefully line tart tin with pastry and freeze for 20 minutes. Prepare the crumble in the meantime: place all the crumble ingredients in a bowl and use your finger tips to rub the butter into the other ingredients and it clumps together as a nice crumble. Refrigerate until ready to use.
rhucrumblepie-16
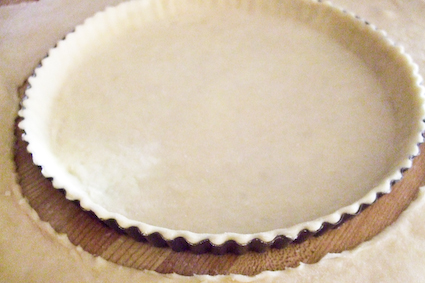
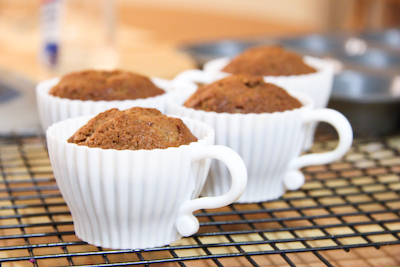
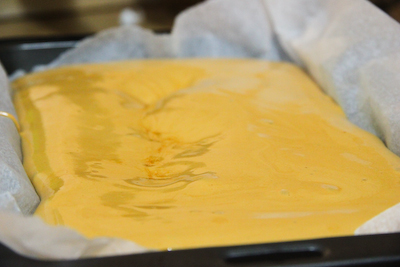
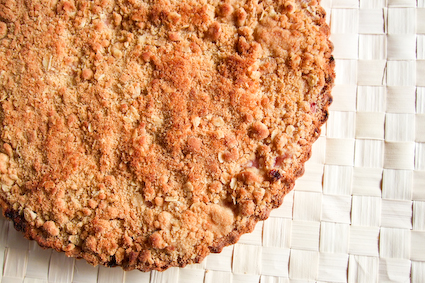
Blind bake pastry for 20-25 minutes until golden brown. My pastry was still a little light on the base after this so I removed the weights and baked it for another 5 minutes, but it depends on your oven. Remove from the oven and cool on a wire rack in the tray until cool. When cooled, fill with rhubarb apple filling and top with a very thin layer of crumble, just enough to cover the filling. Place in the oven for about 20 minutes, or until the crumble on top is golden brown. Remove from the oven and cool on a wire rack, then remove carefully from tin. Pie can be eaten cold or warm, served with LOTS of golden syrup custard. See below for custard recipe.
rhucrumblepie-18
For the custard:
3 large egg yolks
75g golden syrup (if unavailable replace with 75g caster sugar)
300ml pouring cream
150ml milk
1 vanilla bean pod or 2 tsp pure vanilla extract

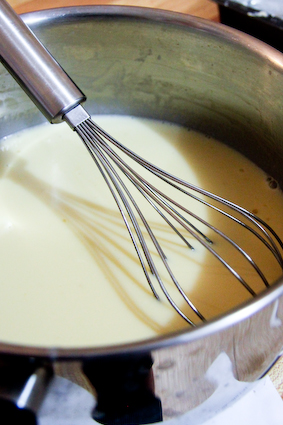
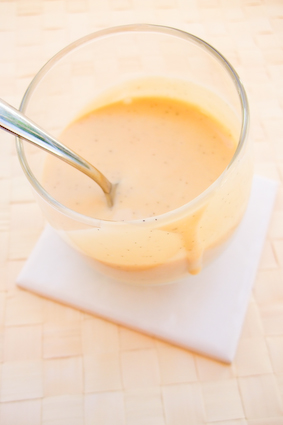
Place milk and cream in a small saucepan. Split vanilla bean pod with a knife and scrape insides into saucepan. Add the scraped pod to the pan and bring the mixture just to the boil. Set aside to cool for 10 minutes.

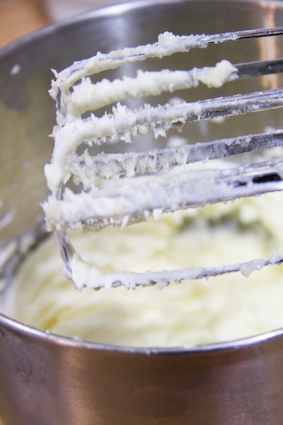
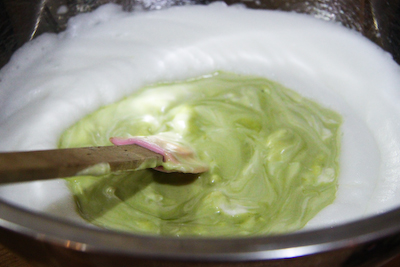
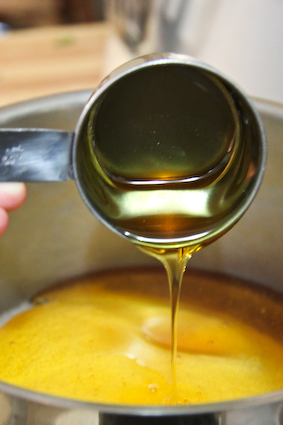
Place egg yolks in a mixing bowl with golden syrup and whisp until the syrup dissolve and the mixture becomes light and pale. Continue to whisk while gradually pouring the hot cream mixture into the mixing bowl and whisk until combined. Return to a saucepan on low heat and stir continuously (and I mean, continuously) with a rubber spatula until the mixture thickens and coats the back of a wooden spoon. Remove from the heat and place saucepan in an ice bath, to stop cooking process, it with thicken slightly further. Cover surface with a circle of baking paper to prevent a skin from forming. Mixture can be stored for a few days in the fridge, with the surface covered with cling film.
rhucrumblepie-6
Hope everyone has a lovely Mother's Day with their Mums, I wish I could be serving this pie up for my Mum who is so far away at the moment :( Happy Mother's Day for Sunday, Mum!
rhucrumblepie-10
Print Friendly and PDF